Table of Contents
Advertisement
Quick Links
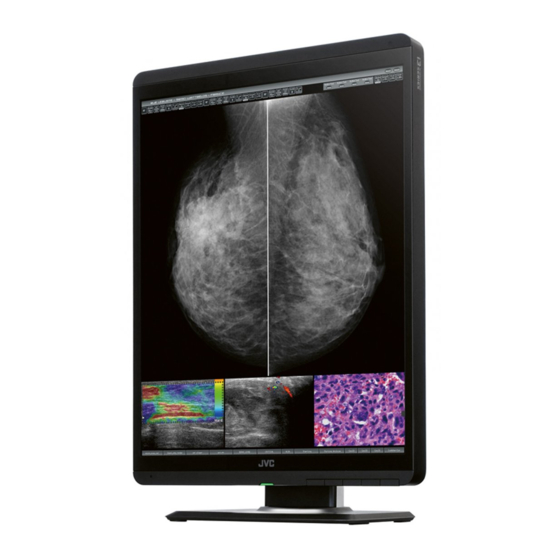
21.3-inch (54 cm) Color LCD Monitor
Installation Manual
for system administrators
Model: CL-S500BG0UA
CL-S500BG0EA
CL-S500BG2UA
CL-S500BG2EA
Important
Please read this installation manual carefully before use.
Please make sure to read the safety precautions first and keep this manual in a safe and
easily accessible place for future reference.
B5E-0205-20
Advertisement
Table of Contents

Related Manuals for JVC CL-S500 Series


Summary of Contents for JVC CL-S500 Series
- Page 1 21.3-inch (54 cm) Color LCD Monitor Installation Manual for system administrators Model: CL-S500BG0UA CL-S500BG0EA CL-S500BG2UA CL-S500BG2EA Important Please read this installation manual carefully before use. Please make sure to read the safety precautions first and keep this manual in a safe and easily accessible place for future reference.
-
Page 2: Table Of Contents
Contents Product security ..................3 Package contents ................... 4 Connecting the cables ................. 5 Switching monitor orientation ............7 Adjusting the monitor angle ............. 9 Monitor information ................9 1. Operation Button Guide ............9 2. Information ..................10 3. Current State .................11 4. -
Page 3: Product Security
Product security This product is operated by the dedicated microcomputer system. To delete or alter the program could lead to abnormal display. When this product is controlled by a computer, do not unplug the USB cable connected to this product. Connection to IT-Network ・... -
Page 4: Package Contents
Package contents Please check if the following items are included in this product package. If any item is missing, contact your dealer for replacement. Don’t use the power cord packaged with this product for other electronics. Note Monitor Power cord (2.0 m) (Either one of the followings) □... -
Page 5: Connecting The Cables
Connecting the cables Turn off the computer. DVI-D connection : Connect the supplied DVI cable between the monitor’s DVI-D and the computer’s DVI output connector. DisplayPort connection : Connect the DisplayPort cable between the monitor’s DisplayPort_IN and the computer’s DisplayPort connector. Supplied cable use is recommended. - Page 6 How to setup multiple monitors in daisy-chain Please connect multiple monitors together using DisplayPort as below. In relation to monitors and graphics cards supporting daisy-chain, please see our website for more details. To the DisplayPort output of the computer DisplayPort cable DisplayPort cable DisplayPort cable - 6 -...
-
Page 7: Switching Monitor Orientation
Switching monitor orientation CL-S500 can be used in both landscape and portrait orientation by changing the resolution setting in Monitor Properties. Follow the instructions below on how to switch monitor orientation. To use the monitor in portrait orientation, a graphics card that supports vertical Note timing is required. -
Page 8: Adjusting The Monitor Angle
Adjusting the monitor angle The monitor turns 45 degrees sideways, 5 degrees downward, and 20 degrees upward. Hold the monitor with both hands and adjust the angle slowly. 20 degrees 45 degrees 45 degrees 5 degrees Caution Be careful not to pinch your fingers when adjusting the panel angle. - 8 -... -
Page 9: Monitor Information
Monitor information 1. Operation Button Guide “Operation Button Guide” is not displayed on the screen in the default setting. When pressing any one of operation buttons (A–C), “Operation Button Guide ① ” appears. When no operation is done, it will disappear after 10 seconds. When pressing the Menu button, OSD menu and “Operation Button Guide ②... -
Page 10: Information
2. Information 1) Activate “Operation Button Guide ①” by pressing any one of operation buttons (A–C). 2) Press the “MENU” button. 3) Select “INFORMATION” on MENU 1/2 and press the “OK” button. And then, the following OSD “INFORMATION 1/2” appears as below. The OSD page switches between “INFORMATION 1/2”... -
Page 11: Current State
3. Current State 1) Activate “Operation Button Guide ①” by pressing any one of operation buttons (A–C). 2) Press the “MENU” button. 3) Select “CURRENT STATE” on MENU 1/2 and press the “OK” button. And then, OSD “CURRENT STATE” appears. Current luminance CURRENT STATE Current ambient Light... -
Page 12: Osd Menu Hierarchy
5. OSD menu hierarchy The OSD structure and a brief explanation for each menu item as follows. MENU - INFORMATION ............ Shows monitor information - CURRENT STATE ..........Shows monitor current state - DICOM CONFORMANCE TEST ....DICOM conformance test -... - Page 13 - USB POWER - Auto * ............ON only when USB UP is connected - Off ..............OFF - READING LIGHT - Low ............... Low illuminance - Middle ............Medium illuminance - High ............. High illuminance - Auto ............Automatic adjustment -...
-
Page 14: Performing The Dicom Conformance Test
Performing the DICOM conformance test Note This function is available only when the monitor has been calibrated to DICOM GSDF. Performing the DICOM conformance test ensures DICOM conformance of the monitor by measuring and checking the monitor properties. The DICOM conformance test is recommended to be performed after 60 minutes of continuous lighting time of the backlight of the LCD panel. - Page 15 DICOM CONFORMANCE TEST 5 M P D I C O M C O N F O R M A N C E T E S T R E S U L T - - - M A X D E V I A T I O N - - - L U M I N A N C E S t a b l e...
-
Page 16: Switching Configuration Data
Switching configuration data CL-S500 can save up to three settings of luminance-Gamma-color as configuration data within the monitor and they can be switched by selecting a configuration number appeared on the current operating state OSD screen. The following three configuration settings are saved prior to shipping as factory default. - Page 17 CURRENT STATE 5 M P C U R R E N T S T A T E L U M I N A N C E 4 0 9 A M B L I G H T 1 0 0 . 0 lx C O L O R 7 5 0 0 K ( x = 0 .
-
Page 18: Dynamic Gamma Function
Dynamic gamma function CL-S500 comes with our original function, dynamic gamma adjustment. By enabling this function, the images on the screen are automatically identified to distinguish between monochrome and color, and the respective images are displayed with the most suitable grayscale. - Page 19 INFORMATION 1/2 5 M P I N F O R M A T I O N 1 / 2 M O D E L C L - S 5 0 0 S E R I A L * * * * * * * * * * * * V S P U R e v .
-
Page 20: Switching Input Source
Switching input source Please operate input source change following the procedure mentioned below. Setting method 1 You can change input source by OSD. 1) Activate “Operation Button Guide ① ” by pressing any one of operation buttons (A–C) 2) Press the “MENU” button. 3) Select “INPUT SOURCE”... -
Page 21: Auto Text Mode Function
Auto text mode function CL-S500 comes with the function called “AUTO TEXT MODE”, which automatically detects a text window (white window) used for showing information such as report and patient list, and reduces its luminance depending on the size of the display area of the window. - Page 22 Setting method 2 You can make function buttons (F1 or F2) available. By doing so, you can easily turning on and off this function by using a button. The following steps tell you how to functionalize the “F2” button. 1) Activate “Operation Button Guide ① ” by pressing any one of operation buttons (A–C) 2) Press the “MENU”...
-
Page 23: Human Presence Sensor Function
Human presence sensor function Human presence sensor is mounted on this product, and it can detect human motion. When leaving your seat, “Standby” mode is automatically activated. It helps to reduce power consumption. The default is “Disable”, but OSD operation can change it to “Enable”. -
Page 24: To Fix The Monitor Orientation
To fix the monitor orientation CL-S500 can be used both Portrait and Landscape orientation rotating the panel. If the user would like to use with proper screen even if changes the panel orientation, need to change EDID data which is operated in the OSD (EDID). It is set to “Auto Selection”... -
Page 25: How To Display The Test Pattern
How to display the Test pattern To display the Test pattern to check the image quality prior to the use of the monitor, press the button located in the front of the monitor as follows. Select test pattern 1) Activate “Operation Button Guide ① ” by pressing any one of operation buttons (A–C) 2) Press the “MENU”... - Page 26 Display method 1) Activate “Operation Button Guide ① ” by pressing any one of operation buttons (A–C) 2) Display a test pattern by pressing the “F1” button. The test pattern disappears automatically in 10 seconds. You can also turn it off by pressing the “F1”...
-
Page 27: Displayport Setting
DisplayPort setting You can reduce power consumption by selecting “Disable” for DISPLAYPORT on MENU 2/2 when using only DVI (DisplayPort isn’t used at all). With this setup, DisplayPort OUT connector doesn’t work. Setting method 1) Activate “Operation Button Guide ① ” by pressing any one of operation buttons (A–C) 2) Press the “MENU”... -
Page 28: When Using A Usb Hub
When using a USB hub... CL-S500 has a USB 2.0 compliant hub. Peripheral USB devices can be connected to this monitor directly by connecting the supplied USB cable to a computer supporting USB or other USB hubs. The default is “Auto”, but OSD operation can change it to “Off”. Setting method USB POWER can turn on and off by OSD. - Page 29 The supplied USB cable can also be used for the followings: • To calibrate the monitor (An optional calibration kit is required.) • To calibrate multiple monitors in succession To calibrate the monitor ● Connect the supplied USB cable between one of the monitor’s UP’s and the computer’s USB down port.
-
Page 30: Reading Light
Reading light This product is equipped with reading light for hand lighting. You can reduce the burden on your eyes in a dim room by illuminating documents or your keyboard in the environment (20 Lux or less), such as a reading room, where mammography diagnosis is performed. -
Page 31: Restore Factory Preset
Restore factory preset Please follow the steps as below when restoring your monitor to “Factory Preset”. Restore method 1) Activate “Operation Button Guide ① ” by pressing any one of operation buttons (A–C) 2) Press the “MENU” button. 3) Select “FACTORY PRESET” on MENU 2/2 by using the “▲” button or the “▼” button and long press the “OK”... -
Page 32: Standby Button Lock Function
Standby button Lock function CL-S500 has the function to lock the Standby button. You can make the Standby button unavailable in front of the monitor to avoid turning off the monitor accidentally. Standby button 1) How to lock Long press the Standby (Power) button for more than four seconds without any OSD on the screen. -
Page 33: Operation Button Lock Function
Operation button Lock function CL-S500 has the function to lock operation buttons . You can make the operation buttons unavailable in front of the monitor to avoid changing your setting accidentally. Operation button (4 pieces) 1) How to lock Long press the “▲” button or the “▼” button for more than four seconds without any OSD on the screen. -
Page 34: Attaching An Arm Stand
Attaching an arm stand The tilt stand is interchangeable with commercially available arms that: • Come with a mount plate with 4 slotted screw holes at 100 mm × 100 mm, and • Bear the total weight of the LCD panel (without the stand) and the cables connected to it. -
Page 35: Antitheft Security Slot
Antitheft security slot This monitor has a built-in Kensington Security Slot by ACCO Brands Corporation. Please purchase the MicroSaver lock at PC supply stores separately. * “Kensington” and “MicroSaver” are registered trademarks of ACCO Brands Corporation. - 35 -... -
Page 36: How To Change The Fuse
How to change the fuse Note for AC INLET with fuse AC Inlet has a built-in fuse. When replacing the fuse, be sure to use only a correctly rated approved type, re-fit the fuse cover. How to replace the fuse Open the fuse compartment with the blade screwdriver, and replace the fuse. -
Page 37: When A Failure Is Suspected
When a failure is suspected... Symptom Cause and Solution • Make sure the monitor is plugged ( P5 ). The monitor won’t turn on! (The power indicator is off.) • Check if the monitor is on. • Check if cables are connected correctly ( P5 ). - Page 38 This page is intentionally left blank. - 38 -...
- Page 39 CL-S500 Installation Manual December 2021 Edition PZZ11-2646B Notes for the Installation Manual • No part of this manual, whether partly or wholly, may be reproduced or copied without authorization. • The content of this manual is subject to change without notice. •...
- Page 40 3-12, Moriya-cho, Kanagawa-ku, Yokohama-shi, Kanagawa 221-0022, JAPAN Printed in Japan © 2019 JVC KENWOOD Corporation B5E-0205-20 211118...