Zeiss Axioscope 5 Instruction Manual
Upright microscope for routine and entry-level research
Hide thumbs
Also See for Axioscope 5:
- Operating manual (140 pages) ,
- Quick reference manual (134 pages)

Related Manuals for Zeiss Axioscope 5


Summary of Contents for Zeiss Axioscope 5
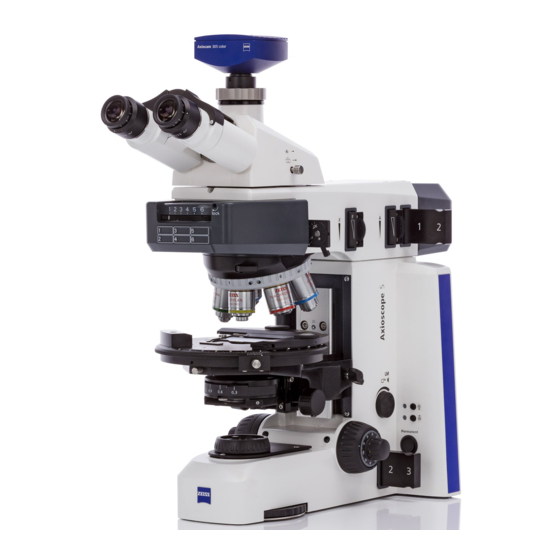
- Page 1 Instruction Manual ZEISS Axioscope 5, Axioscope 5/7 MAT Upright Microscope for Routine and Entry-level Research...
- Page 2 Effective from: 04/2022 © 2022 Without the prior written consent of ZEISS, this document or any part of it must neither be translated nor reproduced or transmitted in any form or by any means - including electronic or mechanic methods, by photocopying, recording or by any in- formation or filing system.
-
Page 3: Table Of Contents
Eyepieces ....................46 3.2.10 Nosepiece with Objectives ..............47 3.2.11 Condenser Carrier ................. 48 3.2.12 Condensers ................... 48 3.2.13 Stages....................50 3.2.14 Reflector Inserts ..................53 Instruction Manual ZEISS Axioscope 5, Axioscope 5/7 MAT | en-US | Rev. 13 | 430035-7344-001... - Page 4 Adjusting the Upper Stand Part Vertically ..........83 5.3.4 Adjusting the Height Stop on the Condenser Carrier ......84 5.3.5 Adjusting the Height Stop on the Focusing Drive........84 Instruction Manual ZEISS Axioscope 5, Axioscope 5/7 MAT | en-US | Rev. 13 | 430035-7344-001...
- Page 5 7 Troubleshooting ................1 30 Resetting the Microscope to the Factory Settings ..........134 8 Decommissioning and Disposal............1 35 Decommissioning....................135 Transport and Storage ..................135 Disposal ......................136 Decontamination ....................136 Instruction Manual ZEISS Axioscope 5, Axioscope 5/7 MAT | en-US | Rev. 13 | 430035-7344-001...
- Page 6 10.11.4 Polarizer, Rotatable, with Color Filter Carrier ......... 176 10.11.5 Circular Polarizer D................177 10.11.6 Color Filter Carrier 3x for Filter d=32mm ..........177 10.11.7 Low-power System for Objectives 2.5x/4x..........178 Instruction Manual ZEISS Axioscope 5, Axioscope 5/7 MAT | en-US | Rev. 13 | 430035-7344-001...
- Page 7 10.18 Assembling and Adjusting the Magnification Changer 4x........196 10.19 Replacing Filters in the Filter Wheel for Transmitted Light ........197 Revision History ................1 98 Glossary ..................1 99 Index....................2 01 Instruction Manual ZEISS Axioscope 5, Axioscope 5/7 MAT | en-US | Rev. 13 | 430035-7344-001...
-
Page 8: About This Instruction Manual
ZEISS 1 About this Instruction Manual This Instruction Manual (further called "document") is considered to be part of the Axioscope 5, Axioscope 5/7 MAT, herein after referred to as "microscope". This document contains basic steps and safety information that must be observed during opera- tion and maintenance. -
Page 9: Text Conventions And Link Types
See: Text Conventions and Link Types [ 9]. Link to further information for this topic. https://www.zeiss.com/corporate/int/ Link to a website on the internet. home.html Tab. 2: Link types Instruction Manual ZEISS Axioscope 5, Axioscope 5/7 MAT | en-US | Rev. 13 | 430035-7344-001... -
Page 10: Explanation Of Warning Messages And Additional Information
NOTICE indicates a potentially harmful situation which, if not avoided, may result in property damage. Info Provides additional information or explanations to help operator better understand the con- tents of this document. Instruction Manual ZEISS Axioscope 5, Axioscope 5/7 MAT | en-US | Rev. 13 | 430035-7344-001... -
Page 11: Explanation Of Symbols
Serial number Catalogue number WEEE label: Do not discard as unsorted waste. Send to separate collection facilities for recovery and recycling Tab. 3: Explanation of symbols Instruction Manual ZEISS Axioscope 5, Axioscope 5/7 MAT | en-US | Rev. 13 | 430035-7344-001... -
Page 12: Further Applicable Documents
Regulations Consult with your ZEISS Sales & Service Partner if these regulations are in conflict with the installa- tion requirements of the microscope. Safety Data Sheets Observe the enclosed safety data sheets. The instructions and guidelines given in the respective safety data sheets must be complied with. -
Page 13: Contact
ZEISS 1 About this Instruction Manual | 1.5 Contact 1.5 Contact If you have any questions or problems, contact your local ZEISS Sales & Service Partner or one of the following addresses: Headquarters Phone: +49 1803 33 63 34 Fax:... -
Page 14: Safety
ZEISS may not be used. 2.1.1 Intended Purpose Axioscope 5 is an instrument for general microscopic imaging for the in vitro-examination of vari- ous biological samples including samples collected from humans or animals. This imaging provides information to further assess physiological and pathological conditions. -
Page 15: Lifetime
Class A (only Axioscope 5 Vario) § Class B (all other Axioscope 5 and Axioscope 7 stands) If in doubt, contact a ZEISS service representative. Instruction Manual ZEISS Axioscope 5, Axioscope 5/7 MAT | en-US | Rev. 13 | 430035-7344-001... -
Page 16: General Safety Information
The training will be documented by ZEISS and its completion is to be confirmed by the operator. Special application training is offered for a fee. Current training dates, additional information and the registration form can be found at https://www.zeiss.com/microscopy/int/service-support/train-... -
Page 17: Electrical Hazards
Detachable mains supply cords must not be replaced with inadequately rated cords. Always use the power cords supplied by ZEISS. When an unsuitable power cord is used, ZEISS can no longer guarantee the electrical safety and functionality of the microscope. -
Page 18: Hazards Generated By Radiation
Incorrect handling of consumables and cleaning agents can lead to property damage or skin and Hazards eye injuries. Consumables that are not approved by ZEISS can lead to property damage. Consult your ZEISS Sales & Service Partner to learn what consumables you can order and how to handle them. Hazard of Skin The immersion fluid can cause skin irritation. -
Page 19: Labels And Lights
Check all warning labels for availability and legibility. § Immediately replace damaged or illegible warning labels. In case a label is missing please contact your ZEISS service representative for free of charge re- placement. 2.4.1 Labels on the Axioscope Fig. 1: Position of warning labels on microscopes with LED light source for transmitted light Fig. 2: Position of warning labels on microscopes with HAL 100 for transmitted light and... - Page 20 Fig. 5: Position of the warning label on the power supply for two HAL 100 lamps Fig. 6: Position of the warning labels on the power supply unit for HBO 100 Instruction Manual ZEISS Axioscope 5, Axioscope 5/7 MAT | en-US | Rev. 13 | 430035-7344-001...
- Page 21 EU Representative Carl Zeiss Microscopy GmbH Carl-Zeiss-Promenade 10 07745 Jena, Germany CAUTION LED Radiation Do not stare at operating lamp. May be harmful to the eyes. Instruction Manual ZEISS Axioscope 5, Axioscope 5/7 MAT | en-US | Rev. 13 | 430035-7344-001...
-
Page 22: Safety Devices And Interlocks
In case of defect or damage, the affected parts and the microscope must be taken out of operation immediately and must be secured against unintentional use. To verify the safety of the microscope, contact your ZEISS service representative and keep the ser- vice logs and logbooks. -
Page 23: Product And Functional Description
§ mineral exploration industry Info Additional information about the hardware configuration and optional enhancements can be obtained from your ZEISS Sales & Service Partner. Instruction Manual ZEISS Axioscope 5, Axioscope 5/7 MAT | en-US | Rev. 13 | 430035-7344-001... -
Page 24: Main Components
Eyepieces [ 46] Mechanical stage [ 50] Condenser [ 48] Upper part of the stand Lower part of the stand Transmitted light light source [ 148] Instruction Manual ZEISS Axioscope 5, Axioscope 5/7 MAT | en-US | Rev. 13 | 430035-7344-001... -
Page 25: Axioscope 5 Tl/Fl
Condenser [ 48] Upper part of the stand Reflected light light source for fluorescence Lower part of the stand Transmitted light light source [ 148] Instruction Manual ZEISS Axioscope 5, Axioscope 5/7 MAT | en-US | Rev. 13 | 430035-7344-001... -
Page 26: Axioscope 5 Tl/Rl Pol
Condenser [ 48] Upper part of the stand Reflected light light source [ 148] Lower part of the stand Transmitted light light source [ 148] Instruction Manual ZEISS Axioscope 5, Axioscope 5/7 MAT | en-US | Rev. 13 | 430035-7344-001... -
Page 27: Axioscope 5 Tl/Rl
Condenser [ 48] Upper part of the stand Reflected light light source [ 148] Lower part of the stand Transmitted light light source [ 148] Instruction Manual ZEISS Axioscope 5, Axioscope 5/7 MAT | en-US | Rev. 13 | 430035-7344-001... -
Page 28: Axioscope 7 Tl/Rl Mat
Upper part of the stand Condenser [ 48] Lower part of the stand Reflected light light source [ 148] Transmitted light light source [ 148] Instruction Manual ZEISS Axioscope 5, Axioscope 5/7 MAT | en-US | Rev. 13 | 430035-7344-001... -
Page 29: Axioscope 5 Vario
Stage carrier, H = 140 mm Upper stand for Axioscope (including focusing gear box) Reflected light light source [ 148] Focusing gear box for Axioscope 5 Vario, 15 mm focus lift Base plate Instruction Manual ZEISS Axioscope 5, Axioscope 5/7 MAT | en-US | Rev. 13 | 430035-7344-001... -
Page 30: Controls And Functional Elements On Components
3 Product and Functional Description | 3.2 Controls and Functional Elements on Components ZEISS 3.2 Controls and Functional Elements on Components 3.2.1 Axioscope 5 TL Stand Fig. 14: Controls and functional elements - Axioscope 5 TL Instruction Manual ZEISS Axioscope 5, Axioscope 5/7 MAT | en-US | Rev. 13 | 430035-7344-001... - Page 31 Luminous-field diaphragm 6-position filter wheel (operable from left and right) Stage carrier Condenser carrier Release lever for height stop on focusing drive Power switch On/Off Instruction Manual ZEISS Axioscope 5, Axioscope 5/7 MAT | en-US | Rev. 13 | 430035-7344-001...
-
Page 32: Axioscope 5 Tl/Fl Stand
3 Product and Functional Description | 3.2 Controls and Functional Elements on Components ZEISS 3.2.2 Axioscope 5 TL/FL Stand Fig. 15: Controls and functional elements - Axioscope 5 TL/FL Instruction Manual ZEISS Axioscope 5, Axioscope 5/7 MAT | en-US | Rev. 13 | 430035-7344-001... - Page 33 Aperture diaphragm or FL attenuator for reflected Filter slider for reflected light light Stage carrier Condenser carrier Release lever for height stop on focusing drive Power switch On/Off Instruction Manual ZEISS Axioscope 5, Axioscope 5/7 MAT | en-US | Rev. 13 | 430035-7344-001...
-
Page 34: Axioscope 5 Tl/Rl Pol Stand
3 Product and Functional Description | 3.2 Controls and Functional Elements on Components ZEISS 3.2.3 Axioscope 5 TL/RL Pol Stand Fig. 16: Controls and functional elements - Axioscope 5 TL/RL Pol Instruction Manual ZEISS Axioscope 5, Axioscope 5/7 MAT | en-US | Rev. 13 | 430035-7344-001... - Page 35 Aperture diaphragm for reflected light Filter slider for reflected light Stage carrier Polarizer Condenser carrier Release lever for height stop on focusing drive Power switch On/Off Instruction Manual ZEISS Axioscope 5, Axioscope 5/7 MAT | en-US | Rev. 13 | 430035-7344-001...
-
Page 36: Axioscope 5 Tl/Rl Stand
3 Product and Functional Description | 3.2 Controls and Functional Elements on Components ZEISS 3.2.4 Axioscope 5 TL/RL Stand Fig. 17: Controls and functional elements - Axioscope 5 TL/RL Instruction Manual ZEISS Axioscope 5, Axioscope 5/7 MAT | en-US | Rev. 13 | 430035-7344-001... - Page 37 Aperture diaphragm for reflected light Filter slider for reflected light Stage carrier Condenser carrier Release lever for height stop on focusing drive Power switch On/Off Instruction Manual ZEISS Axioscope 5, Axioscope 5/7 MAT | en-US | Rev. 13 | 430035-7344-001...
-
Page 38: Axioscope 7 Tl/Rl Mat Stand
3 Product and Functional Description | 3.2 Controls and Functional Elements on Components ZEISS 3.2.5 Axioscope 7 TL/RL MAT Stand Fig. 18: Controls and functional elements - Axioscope 7 TL/RL MAT Instruction Manual ZEISS Axioscope 5, Axioscope 5/7 MAT | en-US | Rev. 13 | 430035-7344-001... - Page 39 Luminous-field diaphragm for reflected light Aperture diaphragm for reflected light Filter slider for reflected light Stage carrier Condenser carrier Stage control button (on the right side) Power switch On/Off Instruction Manual ZEISS Axioscope 5, Axioscope 5/7 MAT | en-US | Rev. 13 | 430035-7344-001...
-
Page 40: Axioscope 5 Vario Stand
Reflector turret (for replaceable reflector modules) Release lever for vertical adjustment Hand wheel for vertical adjustment Permanent/ECO mode switch Snap button Indicator light for reflected light Instruction Manual ZEISS Axioscope 5, Axioscope 5/7 MAT | en-US | Rev. 13 | 430035-7344-001... -
Page 41: Functions Of Stand Keys And Display Elements
GREEN. Then release the knob. The indicator light turns to GREEN permanently if the system reset is done. After factory default reset, re-power the system. Instruction Manual ZEISS Axioscope 5, Axioscope 5/7 MAT | en-US | Rev. 13 | 430035-7344-001... - Page 42 + scope 7 multane- Stage ously control Press si- Load/unload button multane- ously again * Short press means: hold less than 1 second, then release. Instruction Manual ZEISS Axioscope 5, Axioscope 5/7 MAT | en-US | Rev. 13 | 430035-7344-001...
-
Page 43: Binocular Tubes
30° § field of view 23 mm Fig. 20: Binocular Photo Tube 30°/23 (50:50) Eyepiece socket Binocular section Angle scale Camera port (covered) Dovetail ring mount Instruction Manual ZEISS Axioscope 5, Axioscope 5/7 MAT | en-US | Rev. 13 | 430035-7344-001... - Page 44 Shift knob to front (eye symbol): 100% light to eyepieces § Shift knob to the rear (camera sym- bol): 100% light to camera Dovetail ring mount Instruction Manual ZEISS Axioscope 5, Axioscope 5/7 MAT | en-US | Rev. 13 | 430035-7344-001...
- Page 45 Slider for selecting the graduation Dovetail ring mount § Slider pushed in: 100% light to eye- pieces § Slider pulled out: 100% light to camera. 100% light to camera Instruction Manual ZEISS Axioscope 5, Axioscope 5/7 MAT | en-US | Rev. 13 | 430035-7344-001...
-
Page 46: Eyepieces
Red dot, corresponds to the zero White dot, corresponds to the zero diopter setting when a reticle is inserted diopter setting when no reticle is in- serted Instruction Manual ZEISS Axioscope 5, Axioscope 5/7 MAT | en-US | Rev. 13 | 430035-7344-001... -
Page 47: Nosepiece With Objectives
Accordingly, all objectives can be centered relative to the rotary stage. Fig. 25: Nosepiece with objectives Nosepiece Slot 6x20mm DIC slot Knurled ring for swivelling the nose- piece Objective Instruction Manual ZEISS Axioscope 5, Axioscope 5/7 MAT | en-US | Rev. 13 | 430035-7344-001... -
Page 48: Condenser Carrier
The condenser is mounted on the condenser carrier of the stand. Fig. 27: Condenser 0.9/1.25 BF Lever for setting the aperture di- Front lens aphragm Dovetail ring mount Instruction Manual ZEISS Axioscope 5, Axioscope 5/7 MAT | en-US | Rev. 13 | 430035-7344-001... - Page 49 Display field of the adjusted modulator Knurled ring for adjusting the position disk position of the modulator disk Modulator disk with 5 positions for condenser modules Instruction Manual ZEISS Axioscope 5, Axioscope 5/7 MAT | en-US | Rev. 13 | 430035-7344-001...
-
Page 50: Stages
X Coaxial knurled knob for Y adjustment Coaxial knurled knob for X adjustment Vernier scale for display of the adjust- ment range in Y Instruction Manual ZEISS Axioscope 5, Axioscope 5/7 MAT | en-US | Rev. 13 | 430035-7344-001... - Page 51 The sample is positioned in the beam path by means of the motorized adjustment drives in X and Y direction using the stage control button [ 41]. Fig. 30: Mechanical stage, 80x60, motorized Supporting surface for insert plates or Mechanical stage mounting frames Instruction Manual ZEISS Axioscope 5, Axioscope 5/7 MAT | en-US | Rev. 13 | 430035-7344-001...
- Page 52 Knurled knob for adjustment in Y direc- Mounting hole to get access to the tion clamping screw Knurled screw for locking the rotation, Angle scale 360° rotation possible Spring lever Instruction Manual ZEISS Axioscope 5, Axioscope 5/7 MAT | en-US | Rev. 13 | 430035-7344-001...
-
Page 53: Reflector Inserts
Instruction Manual ZEISS Axioscope 5, Axioscope 5/7 MAT | en-US | Rev. 13 | 430035-7344-001... -
Page 54: Light Manager Function
A fingerprint, dust or any dirt particle can have a negative effect, as they brighten the background and reduce the contrast of the object image. Instruction Manual ZEISS Axioscope 5, Axioscope 5/7 MAT | en-US | Rev. 13 | 430035-7344-001... -
Page 55: Transmitted Light Phase Contrast Microscopy
The interference colors may be of the first or of a higher order. Instruction Manual ZEISS Axioscope 5, Axioscope 5/7 MAT | en-US | Rev. 13 | 430035-7344-001... - Page 56 The gray-white color appearing first in the bright position in the above example corresponds to a path difference of 150 nm according to the Michel-Lévy color chart). Instruction Manual ZEISS Axioscope 5, Axioscope 5/7 MAT | en-US | Rev. 13 | 430035-7344-001...
- Page 57 (red: 550 nm). In this case, the interference color of the sample visibly changes from gray-white to orange (resulting path difference = 400 nm). Instruction Manual ZEISS Axioscope 5, Axioscope 5/7 MAT | en-US | Rev. 13 | 430035-7344-001...
- Page 58 This means that, while you are rotating the stage, the image will always look the same, as there are no bright and dark positions. With optical anisotropy all transparent samples show the interference colors that are characteristic to them. Instruction Manual ZEISS Axioscope 5, Axioscope 5/7 MAT | en-US | Rev. 13 | 430035-7344-001...
-
Page 59: Reflected Light Brightfield Microscopy Using The Köhler Method
This means that the stage does not need to be rotated while the relation- ship with the object is preserved. For the user, this means more information and an increase in sample throughput. Instruction Manual ZEISS Axioscope 5, Axioscope 5/7 MAT | en-US | Rev. 13 | 430035-7344-001... -
Page 60: Reflected Light Tic Microscopy
The following correction values must be considered depending on the objective used: Objective Correction factor k 5x/0.15 1.0057 10x/0.25 1.0161 10x/0.30 1.0236 20x/0.4 1.0436 20x/0.50 and 50x/0.75 1.0718 50x/0.60 1.1111 50x/0.75 and 100x/0.75 1.2038 50x/0.80 1.2500 Instruction Manual ZEISS Axioscope 5, Axioscope 5/7 MAT | en-US | Rev. 13 | 430035-7344-001... - Page 61 Aluminum 160.0° 160.5° Chrome 165.0° Coal 160.0° Graphite 165.0° Silicon 177.0° Glass 180.0° Tab. 5: Calculated phase jumps for compact material and vertical incidence of light Instruction Manual ZEISS Axioscope 5, Axioscope 5/7 MAT | en-US | Rev. 13 | 430035-7344-001...
-
Page 62: Reflected Light Polarization Microscopy
The spectra of the excitation and the emission filter must match very closely. They must be in- serted in a FL P&C reflector module together with the according Dichroic Beam splitter. Instruction Manual ZEISS Axioscope 5, Axioscope 5/7 MAT | en-US | Rev. 13 | 430035-7344-001... -
Page 63: Installation
It is recommended to keep the original packing and store it away for later use, e.g. for stowing the microscope during periods of non-use or for returning the microscope to the manufacturer for repair. Instruction Manual ZEISS Axioscope 5, Axioscope 5/7 MAT | en-US | Rev. 13 | 430035-7344-001... -
Page 64: Assembling The Upper Stand Part On The Stand Column
2. Position the upper stand part on the mounting plate of the stand column. 3. Tighten the upper stand part with six hex screws Instruction Manual ZEISS Axioscope 5, Axioscope 5/7 MAT | en-US | Rev. 13 | 430035-7344-001... -
Page 65: Asssembling The Binocular Tube
5. Rotate the tube into the desired observation position. 6. Re-tighten the clamping screw with the hex key. Proceed in the reverse order for removal. Instruction Manual ZEISS Axioscope 5, Axioscope 5/7 MAT | en-US | Rev. 13 | 430035-7344-001... -
Page 66: Assembling Components To The Binocular Tube
3. Instead of an eyepiece insert an auxiliary microscope or pinhole diaphragm one eyepiece socket. Proceed in the reverse order for removal. Instruction Manual ZEISS Axioscope 5, Axioscope 5/7 MAT | en-US | Rev. 13 | 430035-7344-001... -
Page 67: Assembling Objectives
If unused nosepiece openings remain uncovered, particles may enter the microscope and may damage its optics and mechanics permanently. Always close unused nosepiece openings with cover caps! Instruction Manual ZEISS Axioscope 5, Axioscope 5/7 MAT | en-US | Rev. 13 | 430035-7344-001... -
Page 68: Assembling The Reflector Turret
5. Hold the reflector turret and tighten the locking screw. Proceed in the reverse order for removal. Instruction Manual ZEISS Axioscope 5, Axioscope 5/7 MAT | en-US | Rev. 13 | 430035-7344-001... -
Page 69: Assembling The Stage
3. Turn the stage to orient it in an XY direction and tighten the fastening screws. 4. Place the sample holder on the stage and fasten the two clamping screws Proceed in the reverse order for removal. Instruction Manual ZEISS Axioscope 5, Axioscope 5/7 MAT | en-US | Rev. 13 | 430035-7344-001... -
Page 70: Assembling The Rotatable Mechanical Stage
Fig. 41: Installing the motorized mechanical stage Motorized mechanical stage Threaded holes in the bottom of the stage Holes in the stage carrier 3 mm hex key Stage carrier Mounting screw (4x) Instruction Manual ZEISS Axioscope 5, Axioscope 5/7 MAT | en-US | Rev. 13 | 430035-7344-001... -
Page 71: Assembling The Stage Carrier
Proceed in the reverse order for removal. 4.8 Assembling the Stage Carrier Fig. 42: Assembling the stage carrier Opening with mark Opening with mark Shoulder screw/opening with mark Stage carrier Wing screw Instruction Manual ZEISS Axioscope 5, Axioscope 5/7 MAT | en-US | Rev. 13 | 430035-7344-001... -
Page 72: Assembling The Condenser Carrier
3. Tighten the screws. 4. Slide the condenser carrier firmly and straight up to the upper stop of the stage carrier. Proceed in the reverse order for removal. Instruction Manual ZEISS Axioscope 5, Axioscope 5/7 MAT | en-US | Rev. 13 | 430035-7344-001... -
Page 73: Assembling The Dry Darkfield Condenser
Z sits horizontally on the condenser carrier. 7. Screw in the centering screws until they engage with the dovetail ring of the condenser holder Z. Instruction Manual ZEISS Axioscope 5, Axioscope 5/7 MAT | en-US | Rev. 13 | 430035-7344-001... -
Page 74: Assembling The Transmitted Light Light Source
3. Insert the light source's dovetail ring into the illumination mount 4. Ensure that the illumination cable is not being pinched or clamped. 5. Tighten the clamping screw Proceed in the reverse order for removal. Instruction Manual ZEISS Axioscope 5, Axioscope 5/7 MAT | en-US | Rev. 13 | 430035-7344-001... -
Page 75: Assembling The Hal 100 Light Source For Transmitted Light Illumination
The light source cannot be mounted onto the standard stand. When using the HAL or HBO light sources, a base plate for the Axioscope (000000-2202-526) is mandatory. Instruction Manual ZEISS Axioscope 5, Axioscope 5/7 MAT | en-US | Rev. 13 | 430035-7344-001... - Page 76 8. Connect the mains socket of the external power supply to a mains. Use the power ca- ble. Proceed in the reverse order for removal. Instruction Manual ZEISS Axioscope 5, Axioscope 5/7 MAT | en-US | Rev. 13 | 430035-7344-001...
-
Page 77: Assembling The Reflected Light Light Source
Make sure it locks. 5. Slide in the movable connecting piece of the adjustment tool. Proceed in the reverse order for removal. Instruction Manual ZEISS Axioscope 5, Axioscope 5/7 MAT | en-US | Rev. 13 | 430035-7344-001... -
Page 78: Assembling The Hbo 100 Light Source
1. Loosen the clamping screw on the illumi- nation mount 2. Insert the light source with the dovetail ring into the illumination mount. 3. Fasten the clamping screw. Instruction Manual ZEISS Axioscope 5, Axioscope 5/7 MAT | en-US | Rev. 13 | 430035-7344-001... -
Page 79: Assembling The Colibri 3 Led Light Source
Further information on installing the light source is available in the supplied instruction man- ual. Fig. 48: Assembling the Colibri 3 LED light source Clamping screw 3 mm hex key Colibri 3 LED light source LED light source plug Stand socket Instruction Manual ZEISS Axioscope 5, Axioscope 5/7 MAT | en-US | Rev. 13 | 430035-7344-001... -
Page 80: Assembling The Hxp 120 V Light Source
1. Connect the power cable to the power socket. 2. Connect the power cable to the mains. Proceed in the reverse order for disconnecting the microscope from the mains. Instruction Manual ZEISS Axioscope 5, Axioscope 5/7 MAT | en-US | Rev. 13 | 430035-7344-001... -
Page 81: Operation
3. If used, switch on the HXP 120 V light source. Consult the instruction manual supplied with the light source. Instruction Manual ZEISS Axioscope 5, Axioscope 5/7 MAT | en-US | Rev. 13 | 430035-7344-001... -
Page 82: Adjusting
2. Set the viewing height by swivelling the eye- pieces a full 180° upwards or downwards. Instruction Manual ZEISS Axioscope 5, Axioscope 5/7 MAT | en-US | Rev. 13 | 430035-7344-001... -
Page 83: Adjusting For Ametropia When Using Eyepiece Reticles
Stand column Procedure 1. On the stand column , loosen the release lever 2. Use the handwheel to adjust the height. 3. Tighten the release lever. Instruction Manual ZEISS Axioscope 5, Axioscope 5/7 MAT | en-US | Rev. 13 | 430035-7344-001... -
Page 84: Adjusting The Height Stop On The Condenser Carrier
3. By turning the clamping lever clockwise, clamp the stop again. Instruction Manual ZEISS Axioscope 5, Axioscope 5/7 MAT | en-US | Rev. 13 | 430035-7344-001... -
Page 85: Using The Light Manager Function
1. Press one of the Snap button and the Inten- sity/LM knob simultaneously for at least 1.5 seconds. à The indicator light blinks in the following sequence: GREEN / GREEN / GREEN Instruction Manual ZEISS Axioscope 5, Axioscope 5/7 MAT | en-US | Rev. 13 | 430035-7344-001... - Page 86 6. Repeat to set light intensity ratios for more objective/reflector combinations. After switching on the microscope, the previous setting of the Light Manager will be restored. See also Enabling the Light Manager Function [} 85] Instruction Manual ZEISS Axioscope 5, Axioscope 5/7 MAT | en-US | Rev. 13 | 430035-7344-001...
-
Page 87: Setting The Eco/Permanent Mode
The height stop of the condenser carrier is adjusted [ 84]. ü The height stop of the focusing drive is adjusted. [ 84] A suitable condenser for TL brightfield microscopy is installed. ü Instruction Manual ZEISS Axioscope 5, Axioscope 5/7 MAT | en-US | Rev. 13 | 430035-7344-001... - Page 88 5. Swivel the front lens into the beam path with ≥ 10x objectives, if condensers with a swiveling front lens are used. Instruction Manual ZEISS Axioscope 5, Axioscope 5/7 MAT | en-US | Rev. 13 | 430035-7344-001...
- Page 89 7. Swivel in the 10x objective on the nosepiece. 8. Focus the sample. 9. Close the luminous-field diaphragm until it is visible (even if not in focus) in the field of view Instruction Manual ZEISS Axioscope 5, Axioscope 5/7 MAT | en-US | Rev. 13 | 430035-7344-001...
- Page 90 16. Reinsert the eyepiece into the binocular tube. 17. Remove the high-contrast sample. Instruction Manual ZEISS Axioscope 5, Axioscope 5/7 MAT | en-US | Rev. 13 | 430035-7344-001...
- Page 91 Overclos- ing should be avoided so as not to impair the uniformity of the illumination of the field of view. Instruction Manual ZEISS Axioscope 5, Axioscope 5/7 MAT | en-US | Rev. 13 | 430035-7344-001...
-
Page 92: Setting Up For Transmitted Light Darkfield Microscopy Using The Köhler Method
3. Swivel the objective with the highest possible aperture into position on the nosepiece. 4. Place the sample on the stage. 5. Focus the sample. Instruction Manual ZEISS Axioscope 5, Axioscope 5/7 MAT | en-US | Rev. 13 | 430035-7344-001... - Page 93 Instruction Manual ZEISS Axioscope 5, Axioscope 5/7 MAT | en-US | Rev. 13 | 430035-7344-001...
-
Page 94: Setting The Darkfield Contrast With A Dry Darkfield Condenser
12. Focus the luminous-field diaphragm with the knurled knob for vertical adjustment. 13. Open the luminous-field diaphragm enough to make the edge of the diaphragm disappear from the field of view. Instruction Manual ZEISS Axioscope 5, Axioscope 5/7 MAT | en-US | Rev. 13 | 430035-7344-001... -
Page 95: Setting The Darkfield Contrast With An Immersion Oil Darkfield Condenser
20. For immersion oil objectives with an iris diaphragm, the contrast can be further optimized by turning the adjustment of the iris diaphragm. Instruction Manual ZEISS Axioscope 5, Axioscope 5/7 MAT | en-US | Rev. 13 | 430035-7344-001... -
Page 96: Setting Up For Transmitted Light Phase Contrast Microscopy
To increase the image contrast, a green 32 x 4 interference broadband filter can be mounted on the field diaphragm or inserted into the color glass carrier (if available). Instruction Manual ZEISS Axioscope 5, Axioscope 5/7 MAT | en-US | Rev. 13 | 430035-7344-001... -
Page 97: Setting Up For Transmitted Light Dic Microscopy
The analyzer module ACR P&C for transmitted light in the reflector turret/slider or the analyzer slider D/A fixed or rotatable in conjunction with a mounted intermediate plate for analyzer slider 12x46 is installed. Instruction Manual ZEISS Axioscope 5, Axioscope 5/7 MAT | en-US | Rev. 13 | 430035-7344-001... -
Page 98: Setting Up For Transmitted Light Plasdic Microscopy
DIC slider, adjust the optimal contrast. à The structures are visible in relief or in pseudo-darkfield. The relief display provides the best contrast. Instruction Manual ZEISS Axioscope 5, Axioscope 5/7 MAT | en-US | Rev. 13 | 430035-7344-001... -
Page 99: Setting Up For Transmitted Light Polarization
Optically anisotropic substances may remain dark when an isotropic direction, e.g. from optically single-axle or double-axle crystals, is oriented parallel to the observation direc- tion. Instruction Manual ZEISS Axioscope 5, Axioscope 5/7 MAT | en-US | Rev. 13 | 430035-7344-001... - Page 100 6. Insert the determined compensator into the slot as far as it will go. 7. Use the enclosed operating instructions for measurement preparation and measurement procedure. Instruction Manual ZEISS Axioscope 5, Axioscope 5/7 MAT | en-US | Rev. 13 | 430035-7344-001...
- Page 101 à The samples appear constantly and independently of the stage rotation in their specific interference color, which depends on the material, sample thickness and orientation. Instruction Manual ZEISS Axioscope 5, Axioscope 5/7 MAT | en-US | Rev. 13 | 430035-7344-001...
- Page 102 11. Remove an eyepiece from the tube to view the axial figure in the eyepiece tube. 12. For an improved assessment of the axial figure, insert a diopter or an auxiliary microscope (if available) in the eyepiece tube. Instruction Manual ZEISS Axioscope 5, Axioscope 5/7 MAT | en-US | Rev. 13 | 430035-7344-001...
- Page 103 The same refers also to biaxial crystals, if they are viewed along or approximately in the direction of one of the two optical axes. Instruction Manual ZEISS Axioscope 5, Axioscope 5/7 MAT | en-US | Rev. 13 | 430035-7344-001...
- Page 104 11. Push the Bertrand lens slider incorporated in the intermediate plate into its active position. à The axial figure appears in the field of view. 12. Focus the axial figure by shifting the lever of the Bertrand lens slider. Instruction Manual ZEISS Axioscope 5, Axioscope 5/7 MAT | en-US | Rev. 13 | 430035-7344-001...
-
Page 105: Setting Up For Reflected Light Techniques
Intensity/LM knob to adjust the light intensity. 4. Place a high-contrast reflected light sample into the sample holder of the mechanical stage. 5. Swivel the 10x objective into the beam path. Instruction Manual ZEISS Axioscope 5, Axioscope 5/7 MAT | en-US | Rev. 13 | 430035-7344-001... - Page 106 9. Use the focus drive to readjust the focus on the edge of the field diaphragm Instruction Manual ZEISS Axioscope 5, Axioscope 5/7 MAT | en-US | Rev. 13 | 430035-7344-001...
- Page 107 16. Readjust the aperture stop diameter after each objective change. Info Never use the aperture diaphragm for controlling image brightness. Use the Intensity/LM knob for illumination intensity! Instruction Manual ZEISS Axioscope 5, Axioscope 5/7 MAT | en-US | Rev. 13 | 430035-7344-001...
-
Page 108: Setting Up For Reflected Light Darkfield Microscopy Using The Köhler Method
HD objective into the beam path. 4. Completely open the aperture diaphragm A. 5. Switch off or remove neutral filters if applicable. 6. Place the sample on the stage. Instruction Manual ZEISS Axioscope 5, Axioscope 5/7 MAT | en-US | Rev. 13 | 430035-7344-001... -
Page 109: Setting Up For Reflected Light Dic Microscopy
ü Procedure 1. Swivel the DIC module on the reflector turret into the beam path. 2. Swivel the DIC compatible objective into the beam path. Instruction Manual ZEISS Axioscope 5, Axioscope 5/7 MAT | en-US | Rev. 13 | 430035-7344-001... -
Page 110: Setting Up For Reflected Light C-Dic Microscopy
105]. Procedure 1. Swivel the C-DIC module on the reflector turret into the beam path. 2. Swivel the DIC compatible objective into the beam path. Instruction Manual ZEISS Axioscope 5, Axioscope 5/7 MAT | en-US | Rev. 13 | 430035-7344-001... -
Page 111: Setting Up For Reflected Light Tic Microscopy
Procedure 1. Place the sample on the stage. 2. Focus the sample. 3. Swivel the C-DIC module on the reflector turret into the beam path. Instruction Manual ZEISS Axioscope 5, Axioscope 5/7 MAT | en-US | Rev. 13 | 430035-7344-001... - Page 112 8. Determine the values for a (distance between the interference stripes) and b (offset of the interference stripes along the step) in the interference image. Use an eyepiece reticle mi- crometer or a micrometer eyepiece. Instruction Manual ZEISS Axioscope 5, Axioscope 5/7 MAT | en-US | Rev. 13 | 430035-7344-001...
-
Page 113: Setting Up For Reflected Light Polarization Microscopy - Proof Of Bireflectance And Reflection
A suitable objective for Pol is installed [ 67], e.g. Epiplan-Neofluar Pol, EC Epiplan-Neofluar Pol, Epiplan Pol. The illumination is adjusted for reflected light brightfield microscopy [ 105]. ü Instruction Manual ZEISS Axioscope 5, Axioscope 5/7 MAT | en-US | Rev. 13 | 430035-7344-001... -
Page 114: Setting Up For Reflected Light Fluorescence Microscopy
The adjustment of reflected light fluorescence is facilitated by starting with an objective of av- erage magnification, e.g. EC Plan-Neofluar 20x/0.50, and a sample of high fluorescence. Demonstration samples can also be used for the start-up. Instruction Manual ZEISS Axioscope 5, Axioscope 5/7 MAT | en-US | Rev. 13 | 430035-7344-001... - Page 115 10. If using the HBO 100 light source, switch on the external power supply and let it warm up to operational temperature for about 15 minutes. Instruction Manual ZEISS Axioscope 5, Axioscope 5/7 MAT | en-US | Rev. 13 | 430035-7344-001...
-
Page 116: Switching Off The Microscope
The illumination is now adjusted for fluorescence microscopy. 5.6 Switching Off the Microscope Procedure 1. Switch the microscope off using the power switch On/Off. 2. Cover the microscope with the dust cover. Instruction Manual ZEISS Axioscope 5, Axioscope 5/7 MAT | en-US | Rev. 13 | 430035-7344-001... -
Page 117: Care And Maintenance
Make sure that no cleaning liquid or moisture gets inside the microscope. In case of damage, the affected parts of the microscope must be taken out of operation. Instruction Manual ZEISS Axioscope 5, Axioscope 5/7 MAT | en-US | Rev. 13 | 430035-7344-001... -
Page 118: Maintenance Schedule
To ensure optimal configuration and trouble-free function of your microscope over a longer pe- riod of time, we recommend that you enter into a service/maintenance agreement with ZEISS. For subsequent orders or when service is required, please get in touch with your local ZEISS service representative. -
Page 119: Cleaning An Optical Surface
A mild detergent may be added to the water (no solvent!). 2. Wipe off the area with the cloth. 3. Dry with a lint-free cloth. Instruction Manual ZEISS Axioscope 5, Axioscope 5/7 MAT | en-US | Rev. 13 | 430035-7344-001... -
Page 120: Replacing The 12 V, 50 W Halogen Lamp Of The Hal 50 Halogen Illuminator
5. Place the HAL 50 halogen light source with the connecting pins into the back side of the microscope and push until the lamp engages securely. Instruction Manual ZEISS Axioscope 5, Axioscope 5/7 MAT | en-US | Rev. 13 | 430035-7344-001... -
Page 121: Hal100 Light Source
Fig. 53: Replacing the HAL 100 light source bulb HAL 100 housing Bulb replacement tool Old bulb Spring lever (2x) Replacement bulb Bulb carrier Release button Bulb socket Instruction Manual ZEISS Axioscope 5, Axioscope 5/7 MAT | en-US | Rev. 13 | 430035-7344-001... - Page 122 The following action comprises several action sequences. These sequences are to be carried out in the specified order. § Coarse Adjusting [ 123] § Fine Adjusting [ 124] Instruction Manual ZEISS Axioscope 5, Axioscope 5/7 MAT | en-US | Rev. 13 | 430035-7344-001...
- Page 123 5. Adjust the adjusting screws so that the lamp filament of one image exactly fills the gaps of the reflected image. Instruction Manual ZEISS Axioscope 5, Axioscope 5/7 MAT | en-US | Rev. 13 | 430035-7344-001...
- Page 124 5. Adjust the adjusting screw such that the illumination of the image is as homogenous as possible. Instruction Manual ZEISS Axioscope 5, Axioscope 5/7 MAT | en-US | Rev. 13 | 430035-7344-001...
-
Page 125: Adjusting The Hbo 100 Light Source
4. Replace the adjustment tool in its original position. Instruction Manual ZEISS Axioscope 5, Axioscope 5/7 MAT | en-US | Rev. 13 | 430035-7344-001... -
Page 126: Replacing The Led Modules Of The Colibri 3 Led Light Source
PCBA Slot 2 for LED module Slot 3 for LED module Slot 4 for LED module Captive screw (4x) Front side of Colibri 3 Colibri 3 housing Instruction Manual ZEISS Axioscope 5, Axioscope 5/7 MAT | en-US | Rev. 13 | 430035-7344-001... -
Page 127: Recovering The Stage Travel Range In X-Axis
2. Move the stage to the left until it hits the end stop. 3. Move the stage to the right until it hits the end stop. Instruction Manual ZEISS Axioscope 5, Axioscope 5/7 MAT | en-US | Rev. 13 | 430035-7344-001... -
Page 128: Exchanging The Fuses In The Stand
4. Insert new fuses. 5. Push the fuse holder back into the fuse compartment until it locks in place. 6. Bring the microscope back into operation. Instruction Manual ZEISS Axioscope 5, Axioscope 5/7 MAT | en-US | Rev. 13 | 430035-7344-001... -
Page 129: Exchanging The Fuses In The External Power Supply For Hal 100
4. Insert new fuses. 5. Push the fuse holder back into the fuse compartment until it locks in place. 6. Bring the microscope back into operation. Instruction Manual ZEISS Axioscope 5, Axioscope 5/7 MAT | en-US | Rev. 13 | 430035-7344-001... -
Page 130: Troubleshooting
2/3-rule and the texture of the sample you are using, see Setting Up for Transmitted Light Brightfield Microscopy Using the KÖHLER Method 87]. Instruction Manual ZEISS Axioscope 5, Axioscope 5/7 MAT | en-US | Rev. 13 | 430035-7344-001... - Page 131 Unmount the LED10 lamp case using builtin LED10 illumina- from the microscope stand, tion). unplug and reinsert the con- nector to the socket. Check again. Instruction Manual ZEISS Axioscope 5, Axioscope 5/7 MAT | en-US | Rev. 13 | 430035-7344-001...
- Page 132 Re-adjust the distance of the tigues the eyes. tance of the pupils) is not ad- eyepiece, see Adjusting the justed correctly. Position of the Eyepieces 82]. Instruction Manual ZEISS Axioscope 5, Axioscope 5/7 MAT | en-US | Rev. 13 | 430035-7344-001...
- Page 133 The installed electrical equip- Call in the service personnel to ment may be defective. check or exchange the compo- nents, if necessary, see Con- tact [ 13]. Instruction Manual ZEISS Axioscope 5, Axioscope 5/7 MAT | en-US | Rev. 13 | 430035-7344-001...
-
Page 134: Resetting The Microscope To The Factory Settings
à After 20 s the indicator light blinks green. When the indicator stops blinking and remains GREEN, the reset to the default factory setting is successful. Instruction Manual ZEISS Axioscope 5, Axioscope 5/7 MAT | en-US | Rev. 13 | 430035-7344-001... -
Page 135: Decommissioning And Disposal
Instruction Manual ZEISS Axioscope 5, Axioscope 5/7 MAT | en-US | Rev. 13 | 430035-7344-001... -
Page 136: Disposal
In general, a well-visible warning sign must be affixed to the article itself and to the outside of the packaging, together with detailed information on the type of contamination. Instruction Manual ZEISS Axioscope 5, Axioscope 5/7 MAT | en-US | Rev. 13 | 430035-7344-001... -
Page 137: Technical Data And Conformity
Quality Relative humidity (without condensation) < 75 % Atmospheric pressure / altitude 800 to 1060 hPa / ≤ 2000 m above sea level Pollution degree Operational area closed rooms Instruction Manual ZEISS Axioscope 5, Axioscope 5/7 MAT | en-US | Rev. 13 | 430035-7344-001... - Page 138 12 V, 100 W HBO 100 Power consumption 100 VA V illumination LED illumination Wavelengths optional 385, 470, 505, 565, 625 nm fluorescence TL Stand Focusing manual/motorized stage focusing specifications Instruction Manual ZEISS Axioscope 5, Axioscope 5/7 MAT | en-US | Rev. 13 | 430035-7344-001...
- Page 139 44 mm height * Binocular part lower/Binocular part upper, e.g. 442/481 → 442 to 481 mm All specifications are for an inter-pupillary distance of 65 mm. Instruction Manual ZEISS Axioscope 5, Axioscope 5/7 MAT | en-US | Rev. 13 | 430035-7344-001...
-
Page 140: Applicable Standards And Regulations
Slot 4 Wavelength range [nm] 450-480 350-415 594-660 508-565 385 nm LED (423052-9593-000) 470 nm LED (423052-9573-000) 505 nm LED (423052-9562-000) 565 nm LED (423052-9602-000) 625 nm LED (423052-9522-000) O = usable X = not usable Instruction Manual ZEISS Axioscope 5, Axioscope 5/7 MAT | en-US | Rev. 13 | 430035-7344-001... -
Page 141: Accessories And System Expansions
Only the following accessories may be used with the microscope as their safe use has been con- firmed by ZEISS. Only original parts from ZEISS may be used. Check in advance whether your mi- croscope can be retrofitted with a system expansion or accessories. - Page 142 § HXP 120 light source § Colibri 3 light source § HBO 100 light source § HAL 50 light source § HAL 100 light source Instruction Manual ZEISS Axioscope 5, Axioscope 5/7 MAT | en-US | Rev. 13 | 430035-7344-001...
- Page 143 § Camera adapter 60N-C 2/3" 0.5x § Camera adapter 60N-C 2/3" 0.63x § Camera adapter 60N-C 1" 1.0x § Video adapter 60 C 1/3" 0.4x Instruction Manual ZEISS Axioscope 5, Axioscope 5/7 MAT | en-US | Rev. 13 | 430035-7344-001...
-
Page 144: Binocular Tubes
Optionally with upright or reversed image § viewing angle 30° § field of view 23 mm Fig. 58: Binocular Tube 30°/23 Eyepiece socket Binocular section Angle scale Dovetail ring mount Instruction Manual ZEISS Axioscope 5, Axioscope 5/7 MAT | en-US | Rev. 13 | 430035-7344-001... -
Page 145: Binocular Photo Tube Pol 20°/23 (100:0/0:100)
Slider for selecting the graduation Dovetail ring mount § Slider pushed in: 100% light to eye- pieces § Slider pulled out: 100% light to camera. 100% light to camera Instruction Manual ZEISS Axioscope 5, Axioscope 5/7 MAT | en-US | Rev. 13 | 430035-7344-001... -
Page 146: Binocular Ergo Photo Tube 20°/23 (100:0/0:100)
(right and left) § Slider pushed in: 100% light to eye- pieces § Slider pulled out: 100% light to camera Vertical scale Dovetail ring mount Instruction Manual ZEISS Axioscope 5, Axioscope 5/7 MAT | en-US | Rev. 13 | 430035-7344-001... -
Page 147: Binocular Ergo Photo Tube 15°/23 (50:50)
Fig. 61: Variants of binocular tubes Eyepiece socket Angle scale Binocular section Camera port Rotary knob for vertical adjustment (right and left) Instruction Manual ZEISS Axioscope 5, Axioscope 5/7 MAT | en-US | Rev. 13 | 430035-7344-001... -
Page 148: Light Sources
The HAL 100 is installed depending of the light path (reflected or transmitted). Fig. 62: HAL 100 Lamp housing Dovetail ring Vertical adjusting screw Horizontal adjusting screw Unlocking button Adjusting screw Instruction Manual ZEISS Axioscope 5, Axioscope 5/7 MAT | en-US | Rev. 13 | 430035-7344-001... - Page 149 RL/TL lamp Connection port for reflected light lamp Connection port for reflected light lamp Connection port Remote for illumina- Mains socket tion intensity control cable Instruction Manual ZEISS Axioscope 5, Axioscope 5/7 MAT | en-US | Rev. 13 | 430035-7344-001...
-
Page 150: Hbo 100 Light Source
The HBO 103 W/2 mercury vapor short-arc bulb is installed at the light source. ü The stand is equipped with the illumination mount. ü The protective cap is removed from the illumination mount of the stand. Instruction Manual ZEISS Axioscope 5, Axioscope 5/7 MAT | en-US | Rev. 13 | 430035-7344-001... - Page 151 5. Fasten the connector's coupling ring 6. Connect the mains socket of the PSU to the mains. Use the power cable Proceed in the reverse order for removal. Instruction Manual ZEISS Axioscope 5, Axioscope 5/7 MAT | en-US | Rev. 13 | 430035-7344-001...
- Page 152 Display of operating hour meter Reset button, resets the operating hour meter to "0" Connection port for HBO 100 light Mains socket source Instruction Manual ZEISS Axioscope 5, Axioscope 5/7 MAT | en-US | Rev. 13 | 430035-7344-001...
-
Page 153: Installing The Reversible Eyecups
The analyzer slider is inserted into the 12x46 slot of the intermediate plate for analyzer slider 12x46 mounted between stand and tube. Fig. 66: Analyzer slider TL/RL, fixed Empty position Analyzer Handle Instruction Manual ZEISS Axioscope 5, Axioscope 5/7 MAT | en-US | Rev. 13 | 430035-7344-001... -
Page 154: Analyzer Slider Tl/Rl, With Lambda Plate, 360° Rotatable
DIC Slider C 6x20 for objectives EC Epiplan 5x - 20x § DIC Slider C 6x20 for objectives EC Epiplan 50x - 100x Fig. 69: DIC Slider C 6x20 Setting wheel Setting screw DIC prism Instruction Manual ZEISS Axioscope 5, Axioscope 5/7 MAT | en-US | Rev. 13 | 430035-7344-001... -
Page 155: Stop Sliders For Aperture And Luminous-Field Diaphragms
When using fluorescent light, an FL attenuator (if not pre-installed) can be used instead of the aperture diaphragm to attenuate the excitation intensity. Fig. 70: 14x40 mm stop slider Diaphragm Centering screw Knurled wheel to open/close the di- Centering screw aphragm Instruction Manual ZEISS Axioscope 5, Axioscope 5/7 MAT | en-US | Rev. 13 | 430035-7344-001... -
Page 156: Stages
Vernier scale for display of the adjust- ment range in X ment range in Y Coaxial knurled knob for Y adjustment Coaxial knurled knob for X adjustment Instruction Manual ZEISS Axioscope 5, Axioscope 5/7 MAT | en-US | Rev. 13 | 430035-7344-001... - Page 157 5. Repeat the procedure if the sample detail shifts out of the center again when turning the stage. 6. Tighten the clamping screw and the screw cap. Instruction Manual ZEISS Axioscope 5, Axioscope 5/7 MAT | en-US | Rev. 13 | 430035-7344-001...
-
Page 158: Rotary Stage Pol 360° With Clamping Device
45° Fig. 73: Rotary Stage Pol 360° with clamping device Clamping device Knurled screw for locking the rotation, 360° rotation possible Angle scale Instruction Manual ZEISS Axioscope 5, Axioscope 5/7 MAT | en-US | Rev. 13 | 430035-7344-001... - Page 159 5. Insert the stage clips of the clamping device into the holes on the stage provided for this purpose. Proceed in the reverse order for removal. Instruction Manual ZEISS Axioscope 5, Axioscope 5/7 MAT | en-US | Rev. 13 | 430035-7344-001...
- Page 160 5. Rotate the stage again to check if the sample feature moves off. 6. Repeat the centering procedure, if necessary. 7. Tighten the screw cap. Instruction Manual ZEISS Axioscope 5, Axioscope 5/7 MAT | en-US | Rev. 13 | 430035-7344-001...
-
Page 161: Setting The Drive Length On The Stage Drive
4. Remove the upper additional sleeve from the Y-coaxial knurled knob by pulling it down. Proceed in the reverse order for installing. Instruction Manual ZEISS Axioscope 5, Axioscope 5/7 MAT | en-US | Rev. 13 | 430035-7344-001... -
Page 162: Adjusting The Friction Of The Coaxial Knurled Knobs On The Stage Drive
Large friction adjustment: (counter-clockwise) It should not be shifted more than one revolution. 4. Re-insert the adjusting pin into the coaxial knurled knob for the Y adjustment. Instruction Manual ZEISS Axioscope 5, Axioscope 5/7 MAT | en-US | Rev. 13 | 430035-7344-001... -
Page 163: Adjusting The Friction Of The Coaxial Knurled Knobs On The Ergonomic Stage Drive
1. Hold the Y-coaxial knurled knob and turn the light-colored knurled sleeve above it to the right (increased smoothness) or the left (decreased smoothness) until you reach the desired level. Instruction Manual ZEISS Axioscope 5, Axioscope 5/7 MAT | en-US | Rev. 13 | 430035-7344-001... -
Page 164: Loading The Reflector Module
4. Press the module against the upper spring clips of the reflector insert until it engages firmly. 5. Install the reflector insert. Proceed in the reverse order for removal. Instruction Manual ZEISS Axioscope 5, Axioscope 5/7 MAT | en-US | Rev. 13 | 430035-7344-001... -
Page 165: Changing The Filters Of A Reflector Module Fl P&C
§ Excitation filters with no direction indicating arrow should be installed with the reflec- tive coating pointing to the outside of the reflector module. Instruction Manual ZEISS Axioscope 5, Axioscope 5/7 MAT | en-US | Rev. 13 | 430035-7344-001... -
Page 166: Changing The Beam Splitter Of A Reflector Module Fl P&C
Take maximum care not to damage any optical or mechanical part when equipping a re- flector module. Fig. 77: Labeling the beam splitter Reflective coating of the beam splitter Beveled corner Beveled edge Instruction Manual ZEISS Axioscope 5, Axioscope 5/7 MAT | en-US | Rev. 13 | 430035-7344-001... - Page 167 12. Screw the fixation screws in place. 13. Attach the adhesive label with the name of the filter combination to the reflector module's side wall. Instruction Manual ZEISS Axioscope 5, Axioscope 5/7 MAT | en-US | Rev. 13 | 430035-7344-001...
-
Page 168: Loading The Condenser
The guide serves as a stop for the modulator disk. The pin of the disk’s clamping screw must slide into the orientation groove of the condenser. 4. Tighten the disk’s clamping screw. 5. Replace the condenser in its carrier. Instruction Manual ZEISS Axioscope 5, Axioscope 5/7 MAT | en-US | Rev. 13 | 430035-7344-001... -
Page 169: Assembling The Slit-Diaphragm For Plasdic Into The Modulator Disk
6. With the tool, screw in the adapter ring included with the slit-diaphragm. Proceed in the reverse order for removal. Instruction Manual ZEISS Axioscope 5, Axioscope 5/7 MAT | en-US | Rev. 13 | 430035-7344-001... -
Page 170: Changing Phc Dic Plasdic Diaphragms On The 0.9 Bf Df Phc Dic Achromatic-Aplanatic Condenser
5. Installing the upper stand part on the sample spaceextension [ 173] 6. Establishing the cable connections [ 174] 7. Installing the cover of the upper stand part [ 174] Instruction Manual ZEISS Axioscope 5, Axioscope 5/7 MAT | en-US | Rev. 13 | 430035-7344-001... -
Page 171: Removing The Cover Of The Upper Stand Part
2. Disconnect the cable connection between the main control board and the turret sen- sor / RL LED interface Instruction Manual ZEISS Axioscope 5, Axioscope 5/7 MAT | en-US | Rev. 13 | 430035-7344-001... -
Page 172: Removing The Upper Stand Part
2. Place the sample space extension on the lower stand part 3. Tighten the sample space extension with its 6 spacer bolts Instruction Manual ZEISS Axioscope 5, Axioscope 5/7 MAT | en-US | Rev. 13 | 430035-7344-001... -
Page 173: Assembling The Upper Stand Part On The Sample Space
2. Place the upper stand part on the sample space extension. 3. Tighten the upper stand part with 6 fixing screws. Instruction Manual ZEISS Axioscope 5, Axioscope 5/7 MAT | en-US | Rev. 13 | 430035-7344-001... -
Page 174: Establishing The Cable Connections
1. Secure the cables with a cable tie 2. Place the cover on the upper stand part 3. Screw in and tighten the 4 screws 4. Install the binocular tube [ 65]. Instruction Manual ZEISS Axioscope 5, Axioscope 5/7 MAT | en-US | Rev. 13 | 430035-7344-001... -
Page 175: Polarizers
The polarizer is mounted on the bottom of the condenser carrier. Fig. 88: Polarizer D, 90°, rotatable, removable Locking pin Lever for rotating the polarizer Handle of the polarizer for swivelling in/ Holding pin Locking clamp Instruction Manual ZEISS Axioscope 5, Axioscope 5/7 MAT | en-US | Rev. 13 | 430035-7344-001... -
Page 176: Polarizer, Fixed, With Lambda Plate, Rotatable
Fig. 90: Polarizer, rotatable, with color filter carrier Locking pin Handle of the polarizer for swivelling in/ Handle of the color filter carrier Holding pin Locking clamp Polarizer Color filter carrier Instruction Manual ZEISS Axioscope 5, Axioscope 5/7 MAT | en-US | Rev. 13 | 430035-7344-001... -
Page 177: Circular Polarizer D
Handle of the second filter carrier for Handle of the third filter carrier for swivelling in/out swivelling in/out Holding pin Locking clamp First filter carrier Second filter carrier Third filter carrier Instruction Manual ZEISS Axioscope 5, Axioscope 5/7 MAT | en-US | Rev. 13 | 430035-7344-001... -
Page 178: Low-Power System For Objectives 2.5X/4X
The illumination of weak objective magnifications can be centered with the centering screws. For this purpose, the condenser should be centered on the other objectives without the low-power system. Instruction Manual ZEISS Axioscope 5, Axioscope 5/7 MAT | en-US | Rev. 13 | 430035-7344-001... - Page 179 10 Accessories and System Expansions | 10.11 Polarizers Fig. 93: Low-power system for objectives 2.5x/4x Centering screw (2x) Locking pin Handle of the low-power system for Holding pin swivelling in/out Locking clamp Instruction Manual ZEISS Axioscope 5, Axioscope 5/7 MAT | en-US | Rev. 13 | 430035-7344-001...
- Page 180 6. Open the aperture diaphragm and luminous-field diaphragm completely. 7. Adjust both adjustment screws until the field of vision is optimally illuminated. Proceed in the reverse order for removal. Instruction Manual ZEISS Axioscope 5, Axioscope 5/7 MAT | en-US | Rev. 13 | 430035-7344-001...
-
Page 181: Assembling The Pol Components
Orientation groove Locating screw Eyepiece Procedure 1. Insert the eyepiece into the binocular photo tube. 2. Fit the locating screw into the tube’s orientation groove Instruction Manual ZEISS Axioscope 5, Axioscope 5/7 MAT | en-US | Rev. 13 | 430035-7344-001... -
Page 182: Centering The Objectives Of The Polarization Stand
4. Rotate the stage again to check if the sample feature moves off. 5. Repeat the centering procedure, if necessary. 6. Repeat the procedure for the other four objectives. Instruction Manual ZEISS Axioscope 5, Axioscope 5/7 MAT | en-US | Rev. 13 | 430035-7344-001... -
Page 183: Axiocam 202 Mono/208 Color
Port for camera control and image Port for power supply and communica- transfer (USB 3.0) tion to the microscope stand (via Com- mercial Micro-D cable) Instruction Manual ZEISS Axioscope 5, Axioscope 5/7 MAT | en-US | Rev. 13 | 430035-7344-001... -
Page 184: Assembling The Axiocam 202 Mono Or Axiocam 208 Color
6. Alternatively, connect the camera to a WLAN router, USB Type-C drive or PC, see also Oper- ating Modes Using the Axiocam 202 mono/208 color [ 185]. Proceed in the reverse order for removal. Instruction Manual ZEISS Axioscope 5, Axioscope 5/7 MAT | en-US | Rev. 13 | 430035-7344-001... -
Page 185: Operating Modes Using The Axiocam 202 Mono/208 Color
Record and save images on the USB drive § Record and save videos on the USB drive Fig. 98: Axiocam as standalone system USB Type-C drive (included in package) Instruction Manual ZEISS Axioscope 5, Axioscope 5/7 MAT | en-US | Rev. 13 | 430035-7344-001... - Page 186 Fig. 99: Axiocam connected to an HD monitor, TV or projector USB hub (input type C to output type A) USB Type-C drive provided in package Mouse, keyboard Instruction Manual ZEISS Axioscope 5, Axioscope 5/7 MAT | en-US | Rev. 13 | 430035-7344-001...
- Page 187 One-key fluorescence (this works only with Axiolab Bio-TL/FL) § Advanced features in Labscope/Matscope Fig. 100: Axiocam connected with Labscope/Matscope via a Wi-Fi dongle USB Wi-Fi dongle (please contact ZEISS Sales & Service Partner) Instruction Manual ZEISS Axioscope 5, Axioscope 5/7 MAT | en-US | Rev. 13 | 430035-7344-001...
- Page 188 Record and save images via software § One-key fluorescence (this works only with Axiolab Bio-TL/FL) § Advanced features in Labscope/Matscope Fig. 101: Axiocam connected with Labscope/Matscope via a WLAN router Instruction Manual ZEISS Axioscope 5, Axioscope 5/7 MAT | en-US | Rev. 13 | 430035-7344-001...
- Page 189 Record and save images via software § One-key fluorescence (this works only with Axiolab Bio-TL/FL) § Advanced features in Labscope/Matscope Fig. 102: Axiocam connected with Labscope/Matscope via a USB Instruction Manual ZEISS Axioscope 5, Axioscope 5/7 MAT | en-US | Rev. 13 | 430035-7344-001...
- Page 190 § Observe live images § Record and save images via software § Basic features in ZEN Fig. 103: Axiocam connected with ZEN software via a USB Instruction Manual ZEISS Axioscope 5, Axioscope 5/7 MAT | en-US | Rev. 13 | 430035-7344-001...
-
Page 191: Condenser, Achromatic-Aplanatic 0.9 Bf Df Phc Dic
If an additional component, e.g. a polarizer, has been mounted beneath the condenser carrier, the stage carrier should be removed before installing the condenser. Fig. 105: Installing the condenser, achromatic-aplanatic 0.9 BF DF PhC DIC Instruction Manual ZEISS Axioscope 5, Axioscope 5/7 MAT | en-US | Rev. 13 | 430035-7344-001... - Page 192 9. Screw in the clamping screw without clamping the vertical drive. Proceed in the reverse order for removal. Instruction Manual ZEISS Axioscope 5, Axioscope 5/7 MAT | en-US | Rev. 13 | 430035-7344-001...
-
Page 193: Centering The Darkfield Diaphragm Of The Condenser
4. Check the centering and the overlap of the lighter annular phase diaphragm (in the con- denser) with the darker phase ring (in the ob- jective). Both rings must be centered and overlapping Instruction Manual ZEISS Axioscope 5, Axioscope 5/7 MAT | en-US | Rev. 13 | 430035-7344-001... -
Page 194: Assembling The Base Plate On The Stand
3. Insert four hexagonal socket screws (M6) into the holes in the base plate. 4. Tighten the screws. Proceed in the reverse order for removal. Instruction Manual ZEISS Axioscope 5, Axioscope 5/7 MAT | en-US | Rev. 13 | 430035-7344-001... -
Page 195: Assembling The Intermediate Plate For Analyzer Slider
9. Tighten the clamping screw of the intermediate plate 10. Insert the analyzer slider into the slider slot , if applicable. Proceed in the reverse order for removal. Instruction Manual ZEISS Axioscope 5, Axioscope 5/7 MAT | en-US | Rev. 13 | 430035-7344-001... -
Page 196: Assembling The Tube Lens Turret
6. Mount the camera on the camera port of the magnification changer. Use the appropriate adapter. Proceed in the reverse order for removal. Instruction Manual ZEISS Axioscope 5, Axioscope 5/7 MAT | en-US | Rev. 13 | 430035-7344-001... -
Page 197: Replacing Filters In The Filter Wheel For Transmitted Light
4. Put the new filter into the position 5. Repeat the procedure for all filter wheel positions. 6. Re-mount the field diaphragm socket. Instruction Manual ZEISS Axioscope 5, Axioscope 5/7 MAT | en-US | Rev. 13 | 430035-7344-001... -
Page 198: Revision History
10 Revision History10.19 ZEISS Revision History Revi- Date of Introduced Modifications sion Issue 04/2022 Implementation of revision history Adaptation to Regulation (EU) 2017/746 (IVDR) Tab. 7: Revision History Instruction Manual ZEISS Axioscope 5, Axioscope 5/7 MAT | en-US | Rev. 13 | 430035-7344-001... -
Page 199: Glossary
Hertz, a measure for frequency P&C Volt-ampere, a measure for the apparent Push and Click power in an electrical circuit PCBA Printed Circuit Board Assembly Instruction Manual ZEISS Axioscope 5, Axioscope 5/7 MAT | en-US | Rev. 13 | 430035-7344-001... - Page 200 / or a clearly defined cus- tomer group. ZEISS service representative Specially trained service expert, either ZEISS staff or authorized service partner of ZEISS. ZEISS Efficient Navigation Instruction Manual ZEISS Axioscope 5, Axioscope 5/7 MAT | en-US | Rev. 13 | 430035-7344-001...
-
Page 201: Index
Electrical hazard 17 Contamination 136 Infection hazard 17 Skin irritation hazard 18 Voltage hazard 17 Hazards 16 Darkfield 54, 59, 92, 94, 95, 108 Darkfield condenser Instruction Manual ZEISS Axioscope 5, Axioscope 5/7 MAT | en-US | Rev. 13 | 430035-7344-001... - Page 202 53 installing 70 Reflector turret 53 Mechanical stage, rotatable assembling 68 centering 157 Requirements Modulator disk for Operators 16 Reticle 46 Rotary stage 52, 158 Instruction Manual ZEISS Axioscope 5, Axioscope 5/7 MAT | en-US | Rev. 13 | 430035-7344-001...
- Page 203 65 assembling components 66 Unpacking 63 Upper stand part adjusting 83 installing 64 Viewing height 82 Warning labels 19 lights 19 Weight and Sizes 137 Instruction Manual ZEISS Axioscope 5, Axioscope 5/7 MAT | en-US | Rev. 13 | 430035-7344-001...
- Page 204 Carl Zeiss Microscopy GmbH Carl-Zeiss-Promenade 10 phone: +49 1803 33 63 34 07745 Jena fax: +49 3641 64 3439 Germany info.microscopy.de@zeiss.com www.zeiss.com/microscopy...