Table of Contents
Advertisement
Quick Links
Installation Guide v1.0
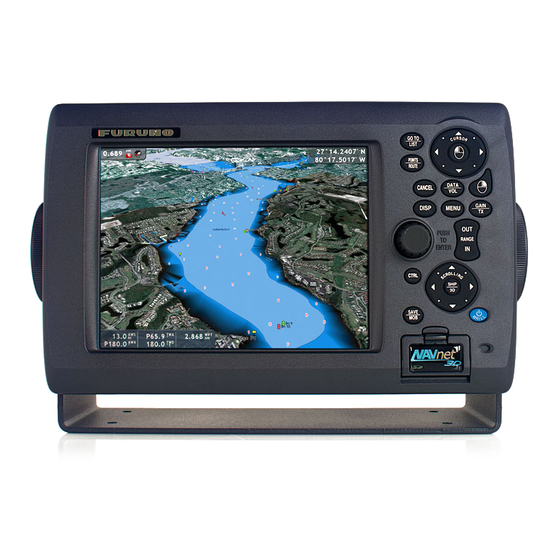
MFD8/12/BB
READ ME FIRST!
Please read this document before installing and
powering ON your NavNet Display
INSTALLATION TOOLS YOU WILL NEED: An ordinary USB MOUSE
AND USB KEYBOARD for the MFDBB Installation! These are also helpful
with the MFD8/12 Installation.
www.furunousa.com
Advertisement
Table of Contents

Related Manuals for Furuno NAVNET 3D MFD8/12/BB


Summary of Contents for Furuno NAVNET 3D MFD8/12/BB
-
Page 1: Read Me First
Installation Guide v1.0 MFD8/12/BB READ ME FIRST! Please read this document before installing and powering ON your NavNet Display INSTALLATION TOOLS YOU WILL NEED: An ordinary USB MOUSE AND USB KEYBOARD for the MFDBB Installation! These are also helpful with the MFD8/12 Installation. -
Page 2: Table Of Contents
Contents Mounting ... 11 1.1. MFD8/12 Mounting ... 11 1.1.1. MFD8/12 Flush Mounting ... 12 1.1.2. MFD 8/12 Desktop and Overhead Mounting ... 14 1.2. MFDBB Processor Mounting ... 15 1.2.1. MFDBB Processor Desktop or Deck Mounting ... 15 ... - Page 3 2.9.2. Audio ... 39 2.10. MFD8/12 Video, USB and Audio Connection ... 39 2.10.1. Waterproof Connection ... 39 2.10.2. Non Waterproof connection ... 42 Configuration ... 43 3.1. Introduction ... 43 3.1.1. Selecting a Master ... 44 ...
- Page 5 Standard supply (MFD8/12) Name Type Multi Function MFD8 Display MFD12 Installation CP19-00900 materials CP19-01000 Spare Parts SP19-00701 SP19-00801 Accessories FP19-01101 Optional supply (MFD8/12) Name Cable Assemblies MJ-A7SPF0007-050C NMEA0183 and M12-05BM+05BF-010 NMEA2000 Micro- Cables M12-05BM+05BF-020 M12-05BM+05BF-060 M12-05BFFM-010 M12-05BFFM-020 Part Number (PN) 000-011-780 1 set 000-011-781...
- Page 6 LTWMC-05BFFT- SL8001 DVI-D Cable DVI-D/D SINGLELINK DVI-D/D S-LINK External Buzzer OP03-136 Junction Box FI-5002 Rectifiers RU-3423 Furuno AC-to-DC PR-62 Power Supplies Network Hub HUB-101 φ6, 6 m, NMEA2000, w/micro 000-167-967 connector 000-167-175 LAN cross, 4-pair, 2 m 000-167-176 LAN cross, 4-pair, 5 m...
- Page 7 RJ45 Junction Box RJ45-to-RJ45 Straight Connector Boot OP19-7 Operator’s Manual OME-4440 NMEA 2000 IF-NMEA2K1 Interface Unit For Mast-Step or LAN cable RJ4-5CN-STR extension 001-028-090 Waterproofing Kit for MFD8/12 exposed connection points 000-167-802 Use where NMEA2000-to- AD10/0183 Data conversion is required for legacy products...
- Page 8 Standard supply (MFDBB) Name Type Processor Unit MPU-001 Control Unit MCU-001 Display Control Unit DCU12 Installation Materials CP19-00600 CP19-00700 CP19-00800 Spare Parts SP19-00501 SP19-00601 Accessories FP19-01201 FP19-01101 Optional supply (MFDBB) Name DVI-D Cable DVI-D/D SINGLELINK DVI-D/D S-LINK External Buzzer OP03-136 Code No.
- Page 9 Rectifier RU-1746B-2 Network Hub HUB-101 Joint Box TL-CAT-012 Junction Box FI-5002 Control Unit MCU-001 Display Control DCU12 Unit Cable Assy MJ-A7SPF0007-050C MJ-A6SPF0016-005C MOD-Z072-020+ MOD-Z072-050+ MOD-Z072-100+ MOD-Z073-030+ M12-05BM+05BF-010 M12-05BM+05BF-020 M12-05BM+05BF-060 M12-05BFFM-010 M12-05BFFM-020 M12-05BFFM-060 CB-05PM+05BF-010 000-167-140-10 For LAN cable extension 000-010-765 For NMEA 2000 000-154-028-10 5 m, NMEA0183, w/7P connector...
- Page 10 CB-05PM+05BF-020 CB-05PM+05BF-060 CB-05BFFM-010 CB-05BFFM-020 CB-05BFFM-060 NMEA connector LTWSS-050505-FMF- TS001 LTWMC-05BMMT- SL8001 LTWMC-05BFFT- SL8001 LTWNC050505FMF- TS001 LTWMN-05AMMT- SL8001 LTWMN-05AFFT- SL8001 Operator’s Manual OME-44460 NMEA 2000 IF-NMEA2K1 Interface Unit φ10, 2 m, NMEA 2000 000-167-969-10 φ10, 6 m, NMEA 2000 000-167-970-10 φ10, 1 m, NMEA 2000 000-167-971-10 φ10, 2 m, NMEA 2000 000-167-972-10...
-
Page 11: Mounting
1. Mounting 1.1. MFD8/12 Mounting MFD8 MFD12 When selecting a mounting location for the NN3D MFD8/12, keep the following in mind: • The temperature and humidity of the mounting location should be moderate and stable. • Install the unit away from exhaust pipes and ventilators. •... -
Page 12: Mfd8/12 Flush Mounting
1.1.1. MFD8/12 Flush Mounting 1. Prepare a cutout in the mounting location using the template sheet (supplied) for the MFD8 or 12. 2. Remove the front panel from the MFD by grasping it at its sides and pulling it towards you. 3. - Page 13 How to detach the front cover when flush mounted. To detach the front panel when the unit is flush mounted, use the special tool (supplied) as below. Note that the front cover may be damaged if this procedure is not followed! 1.
-
Page 14: Mfd 8/12 Desktop And Overhead Mounting
4. Use your hands to detach the front panel from the lower side. 1.1.2. MFD 8/12 Desktop and Overhead Mounting Follow the procedure below to mount the MFD8 or 12 on a desktop or overhead. 1. For MFD12, attach the liner to each side of the display unit. (Reverse the MFD12 Liners for overhead mounting.) 2. -
Page 15: Mfdbb Processor Mounting
1.2. MFDBB Processor Mounting The unit can be mounted on the deck, a desktop or on a bulkhead. Take special note that the MFDBB IS NOT WATERPROOF. Select a mounting location considering the points below: • Select a location where temperature and humidity are moderate and stable. •... -
Page 16: Mfdbb Processor Bulkhead Mounting
1.2.2. MFDBB Processor Bulkhead Mounting Mark four fixing holes positions on the bulkhead. Screw in two 6x30 self-tapping screws at upper fixing positions, leaving 5 mm protruding. Set the processor unit to the screws and screw in two self-tapping screws at lower positions. Tighten all screws. 1.2.3. - Page 17 How to detach the front panel when flush mounted To detach the front panel when the unit is flush mounted, use the tool (supplied) as below. Do not attempt to remove it by any other method, to prevent damage to the unit. 1.
- Page 18 2. Pull the tool to raise the panel slightly 3. Similarly use the tool to raise the panel at the right-side notch. 4. Insert the tool to the space at the one end of the unit, and pull it to raise the panel slightly.
-
Page 19: Wiring
2. Wiring 2.1. Overview 2.1.1. MFD8/12 Overview... -
Page 20: Mfdbb Overview
2.1.2. MFDBB Overview 2.2. Power Connections 2.2.1. MFD8/12 The MFD8/12 can be powered directly using nominal 12V or 24V DC. Only use the power cable supplied with the unit and connect it to the Power Connector at the rear of the unit. 2.2.2. - Page 21 To connect the power cable, remove the Power Terminal cover. Unfasten the four pan head screws and connect the power cable to the power terminal (upper: +, lower: -). Reattach the cover. Note that the recommended maximum cable length is 5 m.
-
Page 22: Data Ports (Nmea0183)
In other words, data sent and received must use the same baud rate for each individual data port. Please refer to the Appendix for installation example with the Furuno Pilot or Magnetic Compass PG500R Note: - Heading data from a NMEA2000 source/sensor will always be at the correct refresh speed for the DRS ARPA function 2.3.2. -
Page 23: Data 2 Description
Wiring Information Pin No. Color Shield Black Green Yellow Blue White 2.3.3. DATA 2 Description DATA2 can be used to connect additional NMEA 0183 instruments. Use the included cable assembly FRUDD-18AFFM-L180 (FUSA P/N 000-164-608). This included Pig- Tail Cable has an 18-Pin connector. DATA2 also provides additional Inputs/Outputs (Buzzer, Event …). - Page 24 Wiring Information Pin No. Color Light green Pink Purple White Gray Yellow Black/White Black Blue/White Blue Green/White Green Orange/White Orange Brown/White Brown Red/White Function NET-C IN (0V) NET-S IN (+12V IN) Shield BUZZER or EVENT IN SPEED-ALARM C SPEED-ALARM H +12V RD3-C RD3-H...
-
Page 25: Nmea2000 Description And Information
NMEA2000 port (Terminal Strip connector). You may directly connect various Furuno NMEA2000 sensors to the DRS radar sensor without having to run a separate NMEA2000 cable up the mast. The total number of sensors that can be connected to the NMEA2000 DRS port without external power connection depends on power consumption. -
Page 26: Nmea2000-0183 Data Conversion And Nmea2000 Bridging
NMEA0183 Wind Instrument such as the Furuno PB100 to NavNet3D, and have the corresponding information output on one (or several) MFD NMEA2000 ports to feed a NMEA2000 display such as the Furuno FI50. The opposite is also true. Ethernet Bridging of Individual NMEA2000 Networks/Backbones You may ONLY connect one MFD or DRS to the same NMEA2000 Network. -
Page 27: Drs (Radar) Connection
2.5. DRS (Radar) Connection Up to two DRS (Digital Radar Sensors) can be connected to a NavNet3D network. Every DRS comes with a supplied 15 Meter cable (FUSA P/N 000-167-636). Other cable lengths may be purchased if necessary (Note that the part numbers for the DRS25A are different): 10 Meter Cable (FUSA P/N 000-167-635) 20 Meter Cable (FUSA P/N 000-167-637) -
Page 28: Connecting The Drs To Mfd8/12
2.5.1. Connecting the DRS to MFD8/12 Standalone Installation: When the MFD8/12 and the Radar are the only Ethernet sensors, you can connect the Radar Ethernet connection directly to the back of the MFD8/12. Network Installation: As soon as multiple MFD8/12 or other Ethernet sensors (i.e. DFF1 Fish Finder, BBWX1 Sirius receiver, etc.) are used, the Radar Ethernet connection must be connected to an Ethernet Hub. -
Page 29: Connecting The Drs To Mfdbb
Example of straight Ethernet Coupler (FUSA P/N= RJ4-5CN-STR): Note: This Ethernet coupler is not waterproof. Ethernet Cables that can be used to extend the Ethernet Radar Connection: 2 Meter RJ45 to RJ45 Ethernet Cable (P/N 000-167-175) 5 Meter RJ45 to RJ45 Ethernet Cable (P/N 000-167-176) 10 Meter RJ45 to RJ45 Ethernet Cable (P/N 000-167-177) Please refer to the DRS Installation Guide for more information on connections inside the antenna... -
Page 30: Network
2.6. Network 2.6.1. Introduction NavNet3D (just like NavNet1 and VX2) uses standard TCP/IP Ethernet to share radar/sounder images and other navigation information from devices connected within a networked system. In any single NavNet 3D network, a combination of up to ten NavNet3D MFDs may be connected to each other. -
Page 31: Power Synchronization
Sleep mode) will turn the system (all MFDs) completely OFF. IMPORTANT: Sleep Mode functionality requires the use of Furuno proprietary Hubs. The Internal MFDBB Hub and the optional Furuno HUB101 both provide NN3D Sleep Mode functionality. Use of other generic Ethernet Hubs/Switches, while allowed, will not enable NN3D Sleep Mode! Caution must also be used in that only “Two Pair”... - Page 32 Furuno HUB101, “2-Pair” Ethernet cables must be used between each MFD and the generic Ethernet Switch so that the Furuno Power Synchronization signal does not interfere with or harm the Ethernet Switch. Furuno offes a 3 meter 2 Pair Ethernet cable (FUSA P/N= 000-167-171) In addition to allow the Power Synchronization signal to pass, the Furuno HUB101 has switch that can be set to “block”...
-
Page 33: Video Inputs
The MFDBB processor unit has an Internal Hub that is compatible with Power Synchronization. DIP switches inside the processor unit can be turned ON or OFF to enable/disable the Power Synchronization feature. The number on each DIP switch corresponds to the port number. Additionally, to allow the Power Synchronization to work, a setting in the NN3D MFD’s Software “Installation Wizard”... -
Page 34: Analog Video
Synchronization for more information) When Power Over Ethernet (POE) AXIS IP cameras are installed (example: AXIS212PTZ) Furuno recommends utilizing a separate POE Ethernet Switch to provide power and Ethernet data to each AXIS IP Camera with a single cable. Then, utilize a... - Page 35 The IP cameras need to have a specific assigned IP address (from 172.31.200.003 through 006). Please refer to the Appendix “How to configure the AXIS IP Camera” for more Information...
-
Page 36: External Monitors
The plug is DVI-D format and only a DVI monitor can be connected. The MFD8 has a 640x480 (VGA) DVI-D output. The MFD12 has an 800x600 (SVGA) DVI-D output. Furuno offers the following DVI cable: 5 Meter DVI Cable (FUSA P/N= 000-149-054) 10 Meter DVI Cable (FUSA P/N= CBL-DVI-10M) Please refer to 2.10.1Waterproof Connection when Waterproof is needed... -
Page 37: Usb And Audio Connection
Monitor “Clone” mode (in this case both monitor will show the same picture) Furuno offers the following DVI cable: 5 Meter DVI Cable (FUSA P/N= 000-149-054) 10 Meter DVI Cable (FUSA P/N= CBL-DVI-10M) 2.9. - Page 38 mouse software is permitted. However, the standard Mouse HID drivers will load automatically, allowing most mice and wireless mice to work fine. Generic USB keyboards may be used to enter Name and Numerical Position. The Keyboard can also emulate the key of NavNet3D: USB Keyboard Arrows (up, down, left, right) Page Up...
-
Page 39: Audio
Waterproof connections for the DVI, USB, Analog Video Input and Audio I/O ports require the optional connector boot (Type: OP19-7, PN: 001-028-090). Note: This option will not be available until October 2008. Furuno apologizes if this delay causes any inconvenience with respect to installations 1. - Page 40 2. Pass DVI-D, VIDEO, AUDIO and/or USB cables through the fixing plate (supplied). 3. Attach each connector to the appropriate location at the rear of the display unit. 4. Pass cables through the slit on the boot cover. 5. Install the rubber stopper to each cable. The largest hole is for the DVI-D cable.
- Page 41 6. Use the four plate screws (M3x10, supplied) to fasten the fixing plate and boot cover to the display unit. 7. Slide the rubber stopper into the hole of the rubber boot, and fasten the cable tie to hold the rubber boot and stopper. Note: When only the Ethernet, Power, DRS, DATA1, DATA2 and NMEA2000 connection are used the Waterproof Connector boot is not necessary.
-
Page 42: Non Waterproof Connection
2.10.2. Non Waterproof connection When you do not need waterproofing, use the cable fixing plate (supplied in standard installation materials). 1. Unfasten the four screws to detach the connector cover at the rear of the display unit. 2. Attach the cable fixing plate by using the binding screw (M3x10, supplied as the installation materials). -
Page 43: Configuration
3. Configuration 3.1. Introduction NavNet3D (just like NavNetVX2) uses Ethernet to share radar/sounder images and other navigation information from devices connected within a networked system. In any single NN3D network, a combination of up to ten NavNet3D MFDs may be connected to each other via Ethernet. -
Page 44: Selecting A Master
3.1.1. Selecting a Master When multiple MFDs are connected in a network, one MFD (and only one) needs to be designated as the “Master”. The MFD set as Master will act as a “DHCP server” and automatically performs the network configuration of all the other MFDs in the network. (The Master sets up the Hostnames, IP addresses etc…). -
Page 45: Installation Wizard Own Settings
“Own Setting” Tab This Tab configures the local ports of the MFD (NMEA0183 Input/Output, NMEA2000 Output) on which the Installation Wizard is currently used. This is also where the Master can be designated (DHCP Server turned ON) “Global” Tab This Tab contains configuration information that is global to the system and shared among MFDs. -
Page 46: Own Settings (Master, Power Synchronization, Monitor)
-The system will search for sensors on the network. Allow the system to fully perform the search (which takes about 30 seconds). Do not click the Skip button. -After the detection, the language selection screen appears. The default language is English. - Page 47 Note: Power Synchronization requires a HUB101 and proper hardware configuration. Please refer to 2.6.2 Power Synchronization paragraph for more Information Note: On the MFDBB, the same page allows you to select the monitor resolution and the Dual Screen mode configuration (when two monitors are used). Leave the DVI Resolution to “AUTO”...
-
Page 48: Nmea2000 Data Configuration
External Monitor for more information on Clone and Extended mode when two monitors are connected to a single MFDBB processor. After enabling the DHCP server click on “Exit” to validate the setting. The MFD will Power OFF automatically! Power ON the “Master” MFD. Wait a few minutes until the Installation Wizard appears on the Master then power ON all the other MFDs in the network and continue the Installation Wizard configuration on the Master MFD. -
Page 49: Nmea0183
Click on the “Next” button to continue the configuration. 3.2.3. NMEA0183 The three “NMEA0183 Port” tabs are used to configure the Input and Output of the individual MFD’s own NMEA0183 ports. It is important to understand that it is not possible to filter any received NMEA0183 Data at any of these ports on individual MFDs. - Page 50 IMPORTANT!: After configuring any NMEA0183 Input Port Sensors on the Master MFD, you must REPEAT THIS PROCEDURE at any other Slave MFDs in the network where you have connected NMEA0183 Input Sensors!! If this is not done, the sensors will not be available for selection as a Primary System Data Source in the Global Settings Tab.
- Page 51 the raw GPS fixes. A setting between 000 to 999 is available. The higher setting the more smoothed the raw data, however too high a setting slows response time to change in latitude and longitude. This is especially noticeable at high ship’s speeds. Increase the setting if the GPS fix changes.
-
Page 52: Installation Wizard Global Settings
is available again or the alarm is acknowledged (by key operation). Off: Alarm sounds three times. -After completing the NMEA0183 Configuration Procedures on the Master and Slave MFDs, return to the Master MFD to complete the installation process. -Click “Next” at the Master MFD to continue the configuration 3.3. -
Page 53: Assigning Nicknames
Note: The currently accepted engine data is as follows: - Engine Parameters (PGN 127488) Engine Speed Engine Boost Pressure - Engine Parameters (PGN 127489) Engine Oil Pressure Engine Temp Engine Temperature Status Engine Warning Status Click on “Next” to continue the configuration 3.3.2. - Page 54 Note: This page will display the NMEA0183 Input Ports of every MFD connected to the network as “Port1”, “Port2” and “Port3”. Each port refers to the MFD listed just above. Click on “Next” to continue the configuration...
-
Page 55: Camera Names
3.3.3. Camera Names You can assign names to each connected Analog and IP Camera. These names will be used by the RotoKey and for the Video ID in the main interface. The IP Camera names are Global and only need to be configured at the Master MFD. However, the Analog cameras must be named at each MFD where they are connected. - Page 56 “Own” settings for each MFD(s) before being able to select the corresponding instruments as a data source. Select the “Data Source” Tab. This tab allows you to select the Primary System Data Source for various data types used by the Navnet 3D Network. Name Position &...
- Page 57 Water Depth Water Temperature Wind Date & Time Roll and Pitch Note: If a NMEA0183 Instruments does not appear as selection, make sure that the Input Type was correctly connected and assigned at each MFD. Please refer to 3.2.3 NMEA0183. -If you don’t have any DRS (Radar) and Network sounder click on Exit to finish the installation.
-
Page 58: Sounder Configuration
For DFF1, click the Power pull-down menu, and choose 1kW or 600W d) If a Furuno satellite compass SC-30 or SC-50/110 is connected, set the distance between antenna unit (or sensor) of the satellite compass and transducer (high and low if connected) at the Transducer Position for SC pull-down menus. - Page 59 Manual, according to the transducer connected. Model Number: Furuno’s transducer Manual: Transducers other than Furuno b) If you choose Model Number at step a), click the High Frequency and Low Frequency pull-down menus, and choose the applicable model type. For Manual, set the high and low frequencies with the respective pull-down menus.
-
Page 60: Drs (Radar) Configuration
3.3.6. DRS (Radar) Configuration Up to two DRS can be connected on the NavNet3D network. - Select the Radar Source you want to configure - Click the Antenna Height pull-down menu, and choose the height of the antenna above the waterline, among under 10ft, 10ft-30ft or over 30ft. - Perform the heading adjustment as follows. - Page 61 - Click the Push STBY button to stop the transmission. Click on “Exit”. This will close the Installation Wizard and launch NN3D When the Agreement appears on the display, push RotoKey to agree. Important: If you are using a MFDBB, the Keyboard will not work until it is properly “Linked”...
- Page 62 MFDBB Keyboard/Processor Linking then continue to the next paragraph to finish the Radar Installation. When the MFD displays the main interface, push the [MENU] key. Use the RotoKey to scroll to the “Radar” page. Use the Cursor Pad or the mouse and click on “Radar Source”...
-
Page 63: Mfdbb Keyboard/Processor Linking
3.4. MFDBB Keyboard/Processor Linking MFDBB Keyboards are Ethernet network devices that need to be assigned (linked) to a specific MFDBB processor unit during installation. A special “key-push” sequence is used to cycle through the “Linking Codes” for all the MFDBB processor unit(s). If only one MFDBB processor unit is on the Network: Simultaneously press and hold the Left key of the Scrolling Pad, the Right key of the Cursor pad and push the RotoKey for 5sec. -
Page 64: Registering The System
To access the SystemID, press the [MENU] key on any MFD, turn the RotoKey to select the “My NavNet” page. The SystemID is the 20 digit number (beginning by “SI”) at the bottom of the page. It is highly recommended to immediately write down the SystemID on the Furuno Registration Card. 4.2. -
Page 65: Appendix
Example NN3D System Configurations 5.1.1. Basic Plotter/Fish Finder Installation The Furuno GPS (FUSA P/N BBWGPS) is directly connected to 7-Pin Port DATA1 of the MFD. The DFF1 Fish Finder (FUSA P/N DFF1) is directly connected to the Ethernet port of the MFD using the standard supply cable (3Meter). If the Ethernet connection... -
Page 66: Basic Plotter/Radar/Fish Finder Installation
5.1.2. Basic Plotter/Radar/Fish Finder Installation This is a single station Plotter/Radar/Fish Finder installation. The Furuno GPS (FUSA P/N BBWGPS) is directly connected to 7-Pin Port DATA1 of the MFD. Since two Ethernet sensor are on the network (DRS Radar and Fish Finder), a network switch (FUSA P/N HUB101) is necessary. - Page 67 Additional Furuno Network Sensors can also be plugged directly to the HUB (using a regular Ethernet cable): FA30 AIS Receiver/FA50 AIS Class B Transponder BBWX1 Sirius Satellite Weather Receiver FAX30 - Weather Fax Receiver...
-
Page 68: Dual Mfd Installation Example
This installation is a dual MFD installation with Radar Overlay and ARPA functionality (PG500 Heading Sensor included). The Furuno GPS (FUSA P/N BBWGPS) is directly connected to 7-Pin Port DATA1 of the MFD. The Furuno Heading Compass (FUSA P/N PG500) is connected to port DATA2 of the MFD. -
Page 69: Dual Screen Mfdbb Installation With Pilot Integration
5.1.4. Dual Screen MFDBB Installation with Pilot Integration Navpilot 500 Series Integration with NN3D MFDs is similar to Navnet vx2 integration. One difference is that NN3D MFDs no longer have an AD10 Heading Port. However, NN3D MFDs do require high speed NMEA0183 heading information (10Hz) for ARPA functionality. - Page 70 In this example, the MFDBB is configured for Extended Mode. The two monitors show independent screen displays that can be configured independently. Only one Keyboard is used to control both monitors (the cursor will “jump” back and forth from monitor to monitor).
-
Page 71: Configuring Axis Ip Cameras
5.2. Configuring AXIS IP Cameras 5.2.1. Introduction: In order to view and control Axis IP Cameras from an MFD in a Navnet 3D network, it is first necessary to assign the IP Address of a MPEG-4 capable AXIS IP Camera. This procedure will require a Windows PC connected via Ethernet to the AXIS IP Camera(s). - Page 72 Right Click on “Local Area Connection” and select “Properties” Select “Internet Protocol (TCP/IP)” and click on “Properties” Fill the IP fields as shown below. Click on OK to confirm and close the 2 windows.
-
Page 73: Set Up The Ip Address Of The Camera
Note that the new IP can take up to 20 seconds to be recognized. A pop-up in the lower right corner should show when the IP is correctly set. Turn OFF any Firewall that could prevent data to be exchanged between NavNet and the PC. You may also have to restart your computer. - Page 74 Click on “Copy to PC” The following window should appear. Just double click on “IPUtility” to launch the configuration software Note: If the Windows Firewall appears, click on “Unblock” to allow the software to configure correctly the IP Camera...
- Page 75 The AXIS IP utility will detect all the IP cameras connected on the network Note: If you use the same camera models in multiple locations, BE SURE to WRITE DOWN the IP Camera serial number (that can be found on the back of the camera) with the intended location to help correctly assign the IP camera’s name.
- Page 76 You will need to restart (power OFF and ON) the camera after the address is changed. (Just unplug and plug back the Ethernet cable if you are using the POE). It can take a while before the confirmation box appears. Click the “Close”...
-
Page 77: Configure The Camera
5.2.4. Configure the camera The cameras need to be configured using a Internet Explorer. Enter the IP address of the first IP camera: Set the password of the IP camera to “pass” and click “OK” Important: You cannot use another password and must use the word “pass”. When you press OK, a dialog box asking for a login/password will appear. - Page 78 When the webpage loads, pay attention to the top of the page to authorize the installation of the ActiveX. Click on the yellow bar and choose “Install ActiveX” At this point a camera image should appear Now, click on Setup...
- Page 79 1) In “Basic Configuration -> Users” select “Enable anonymous viewer…” and click on “Save” 2) In “Basic Configuration -> Date and Time” select “Synchronize with computer time” and click on “Save” 3) In “Live View Config -> Layout” select “MPEG4” as the default video format and click on save 4) Optional: When using a PTZ (moving) camera, you can set-up the default “Home”...
- Page 80 When the view is correctly set up, type “Home” for the Current position and select “Use current position as Home”. Click on “Add” to validate. If you don’t want the camera to return to the “Home” position automatically after 30 sec, just put 0 and validate.
- Page 90 MODEL FUSE(12/24V) MFD8 10/5 A MFD12 20/10 A MJ-A3SPF0017(MFD8) MJ-A3SPF0027-050ZC(MFD12) 12/24VDC 100/110/ *2 *4 DPYC-1.5 220/230VAC RECTIFIER PR-62 1φ,50/60Hz IV-8sq. OR RU-3423 GPS受信機 GPS RECEIVER GP-320B データ変換器 CB-05BFFM,1/2/6m CONVERTER アカ IF-NMEA2K1 クロ シロ または OR アオ JUNCTION BOX FI-5002 LTWDD-18AFFM,2m U-AIS TRANSPONDER アカ...
- Page 101 Printed in Japan All rights reserved. Pub. No. IME-44460-A (HIMA ) MFDBB The paper used in this manual is elemental chlorine free. ・FURUNO Authorized Distributor/Dealer A : APR *00016722210* *00016722210* *00016722210* *00016722210* * 0 0 0 1 6 7 2 2 2 1 0 *...