Table of Contents
Advertisement
U P
®
C
ASME A112.18.1 / CSA B125.1
Models/Modelos/Modèles
978-DST, 978-SD-DST & 9978-DST
Series/Series/Seria
Write purchased model number here.
Escriba aquí el número del modelo comprado.
Inscrivez le numéro de modèle ici.
WARNING: THIS FAUCET IS NOT TO BE USED WITH PORTABLE
DISHWASHERS! / ADVERTENCIA: ¡SESTA LLAVE NO SE DEBE UTILIZAR
CON MAQUINAS LAVAPLATOS PORTATILES! / AVERTISSEMENT: ON NE
DOIT PAS BRANCHER UN LAVE-VAISSELE PORTATIF SUR CE ROBINET!
MEETS OR EXCEEDS — ASME A112.18.1 / CSA B125.1
ALCANZA O EXCEDE LAS SIGIENTES NORMAS —
ASME A112.18.1 / CSA B125.1
LE ROBINET EST CONFORME OU SUPèRIEUR AUX EXIGENCES DES
NORMES SUIVANTES: ASME A112.18.1 / CSA B125.1
For easy installation of your Delta
faucet you will need:
• To READ ALL the instructions completely
before beginning.
• To READ ALL warnings, care, and maintenance
information.
Para instalación fácil de su llave Delta
usted necesitará:
• LEER TODAS las instrucciones completamente
antes de empezar.
• LEER TODOS los avisos, cuidados, e
información de mantenimiento.
Pour installer votre robinet Delta
facilement, vous devez:
• LIRE TOUTES les instructions avant de débuter;
• LIRE TOUS les avertissements ainsi que toutes
les instructions de nettoyage et d'entretien.
®
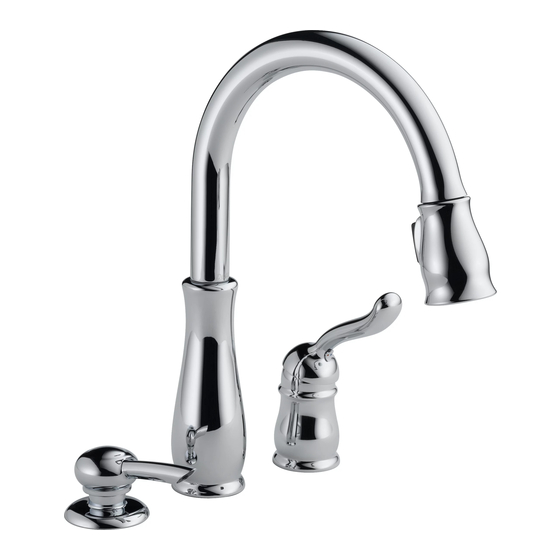
SINGLE LEVER LELAND
PULL DOWN KITCHEN FAUCETS
PALANCA DESLIZABLE LELAND
PARA LLAVES DE COCINA
ROBINETS MONOCOMMANDE LELAND
À BEC-DOUCHETTE RÉTRACTABLE POUR
ÉVIER DE CUISINE
You may need/Usted puede necesitar/
Articles dont vous pouvez avoir besoin:
T E FLO N
1
®
®
1/8"
®
T E FLO N
1/29/09
Rev. C
Advertisement
Table of Contents

Summary of Contents for Delta 978-SD-DST Series
- Page 1 • To READ ALL the instructions completely before beginning. • To READ ALL warnings, care, and maintenance information. Para instalación fácil de su llave Delta usted necesitará: • LEER TODAS las instrucciones completamente antes de empezar. • LEER TODOS los avisos, cuidados, e información de mantenimiento.
- Page 2 Delta Faucet Company recommends using a professional plumber for all installation & repair. Delta will replace, FREE OF CHARGE, during the warranty period, any part or finish that proves defective in material and/or workmanship under normal installation, use & service. Replacement parts may be obtained by calling 1-800-345-DELTA (in the U.S.
- Page 3 Spout Installation NOTE: These faucets are designed to fit a maximum countertop thickness of 2 1/4". If you are installing the faucet on a Stainless Steel or a thin sink use RP37490 Stabilization Plate SUPPLIED WITH FAUCET. SHUT OFF WATER SUPPLIES. Thread screws (1) approximately 4 complete turns into mounting nut (2).
- Page 4 Hose Installation Insert hose guide (1) into hose end (2) as shown. Pass hose (2) up through tip of spout (3). It may take several attempts to feed hose. Note: Let hose protrude from spout to prevent being pulled into spout or briefly attach sprayer. Remove hose guide (1). Slide hose weight (4) over end of hose (2).
- Page 5 Delta is not responsible for tubing that is cut too short or cut in a way that will not allow for a leak-free joint.
- Page 6 Correct method Método Correcto Bonne méthode Custom Fit Connections - Plastic Sleeve Installation Instructions 1. Identify desired length of tube (1). Leave 1" - 2" of extra length to allow for easier installation and cut tube. Ensure cut is straight and burr free. 2.
- Page 7 1/8" Thread sleeve (1) over bonnet (2) and hand tighten. Place handle (3) on stem (4) and secure with set screw (5). Install button (6) into set screw hole. Rosque el excedente de la manga del ajuste (1) el capo (2) y la mano aprieta.
- Page 8 Setting The Handle Limit Stop (Optional) This faucet includes an integrated handle limit stop that has two positions. Position 1, to the left, allows full handle motion (the full range between “all cold” to “all hot”). The faucet is set in position 1 in the factory. Position 2, to the right, allows half of the normal handle motion (“all cold”...
- Page 9 Maintenance If faucet exhibits very low flow: A. Remove and clean Aerator (1) with supplied wrench (2), or B. SHUT OFF WATER SUPPLIES. Replace valve cartridge (3). If faucet leaks from under handle: Remove handle and unthread trim cap (4). Using a wrench, ensure bonnet nut (5) is tight.
- Page 10 RP54537▲ Spout Assembly with Magnet Ensamble del Tubo de Salida con Imán Bec avec Aimant RP51480▲ Sprayer Assembly Ensamble de rociador Pulvérisateur RP50815 Aerator Aereador Aérateur RP52116 Wrench Llave Clé RP50788 Spout Gasket Empaque Joint RP50785 Mounting Hardware Herramientas para la Instalación Pièces de montage RP21945 Tuerca...
- Page 11 Notes / Notas / Notes...
- Page 12 Notes / Notas / Notes...


