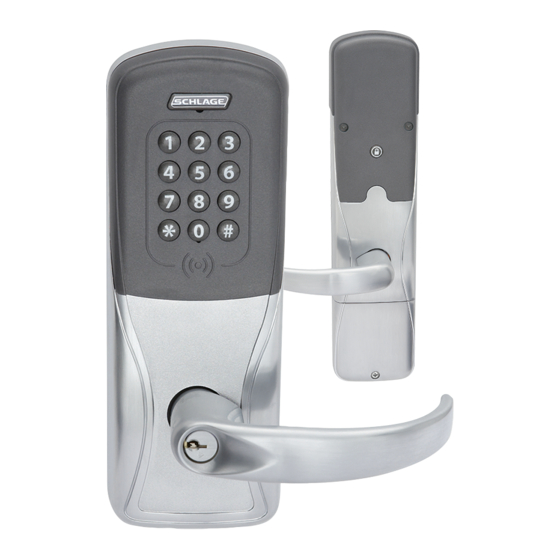
Schlage AD300 Install Manual
Hide thumbs
Also See for AD300:
- User manual (16 pages) ,
- Instructions manual (12 pages) ,
- Installation instructions and owner's manual (2 pages)
Summary of Contents for Schlage AD300
- Page 1 Install Guide Schlage AD300, AD400 Verkada Inc. 405 E 4th Ave, San Mateo, CA 94401 All specifications are subject to change without notice sales@verkada.com Copyright © Verkada Inc. All rights reserved.
-
Page 2: Document Details
Document Document Details V1.0 (20211008) (V1.0 first published 20211008) Firmware Firmware version can be verified on Verkada Command command.verkada.com. Verkada Inc. 405 E 4th Ave, San Mateo, CA 94401 All specifications are subject to change without notice sales@verkada.com Copyright © Verkada Inc. All rights reserved. - Page 3 The AD series of locks has the AD400 wireless lockset and the AD300 wired lock set. They act the same to the end user. The only difference is the AD300 wires directly to the AC41 via RS485 and the AD400 connects to the AC41 through a wireless bridge called the PIM-400-485. The configuration process in Command is identical with the exception of selecting Wireless - AD400 or Wired-AD300 in Command when adding the locks.
-
Page 4: Common Use Cases
These verticals use wireless locks because they do not require expensive wiring to be run through walls and allow much more flexibility. They are also much more cost effective than wired doors. This integration allows us to work with existing customers with AD300 and AD400 wireless locks. -
Page 5: Items Required
Command.. The Schlage Utility Software connects to the PIM 400-485. using the SUS cable. Connect the Schlage SUS cable to the phone using USB C. Connect the PIM 400-485 to the power supply and connect the SUS-A cable to the phone and the PIM. - Page 6 “Cable not connected”. Upon connecting the SUS-A cable the Android operating system will ask if you “Allow Schlage Utility Software to access SUS A-CABLE?”. Select “OK”. When you connect the PIM to the phone you will need to couple it.
- Page 7 Installation PIM-400-485 Cont. If the coupling is successful, you will see a message at the bottom. Now that you've coupled the PIM to the SUS phone, you can start programming it. PIM 400-485 Programming Tap into Device Configuration. Let's define the PIM addresses. There are three fields that need to be defined. They are: RS485 Address - This is the address of the PIM in relation to the AC41.
- Page 8 Please note that that the Verkada integration limits each PIM to 4 wireless locks. If using multiple Schlage devices, such as a PIM hub and an AD300, wire the data pins in parallel to each other. They are addressed so the AC41 knows which one it's talking to.
- Page 9 This is because it has a built in DPI sensor and has extra holes for wires to pass through. For hardware installation instructions, please see: Schlage AD Series Cylindrical Installation Instructions https://us.allegion.com/content/dam/allegion-us-2/web- documents-2/InstallInstructions/Schlage_AD-Series_for_ Cylindrical_Installation_Instructions_102104.pdf Note: The cables are fragile and should ●...
- Page 10 Installation AD400 Lock Programming All AD400 locks need to be given an address. This is done using the Schlage Utility Software (SUS,) which is a free Android app (there is no iOS app). To configure the AD400, you first start by linking it to the PIM. The first step is to couple the PIM to the phone to enable it to program itself.
- Page 11 Connecting the PIM/AD300 to the AC41 The PIM (or AD300 lock) connects to the AC41 over single pair RS485. This means that you need to use two wires for data and two wires for data. You can take power from one of the 12v outputs in the AC41.
- Page 12 Adding the AC41 to Command When adding the AC41 to Command, the AC41 will need to be set to “Schlage Mode”. This setting can only be set when adding the controller to Command. If you forget, you will need to decommission the AC41 and then re-add it.
- Page 13 AD400 Address. You will be able to see the paired pim and door addresses in the schlage sus app. Once this information is entered it will be associated with the door. AD400s have DPI and Rex built into the device.
- Page 14 Troubleshooting Guidelines Verify that your ACU is in schlage mode - if you forgot to set it to Schlage mode, you will need to decommission it and re-add it. Verify that the AD400s and PIM 400-485s have been successfully paired Ensure that the addresses for each PIM400-485 and AD400 were successfully configured.
- Page 15 Appendix Support Thank you for purchasing this Verkada product. If for any reason things don’t work right, or you need assistance, please contact us immediately. verkada.com/support Sincerely, The Verkada Team Verkada Inc. 405 E 4th Ave, San Mateo, CA 94401 All specifications are subject to change without notice sales@verkada.com Copyright ©...


