Table of Contents
Advertisement
Available languages
Available languages
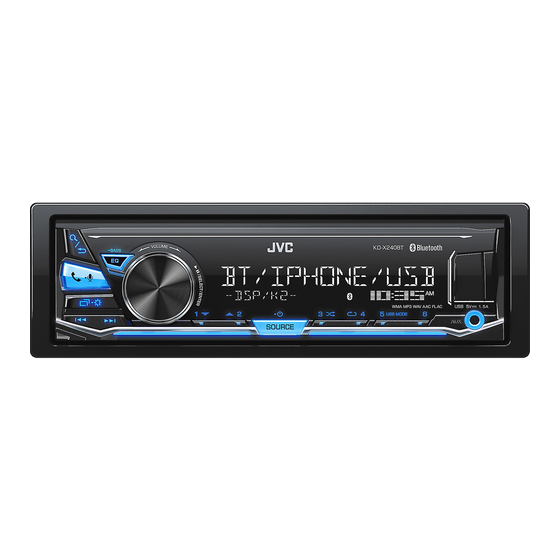
KD-SX24BT
DIGITAL MEDIA RECEIVER
INSTRUCTION MANUAL
RÉCEPTEUR MULTIMÉDIA NUMÉRIQUE
MANUEL D'INSTRUCTIONS
RECEPTOR DE MEDIOS DIGITALES
MANUAL DE INSTRUCCIONES
For customer Use:
Enter below the Model No. and Serial No. which are
located on the top or bottom of the cabinet. Retain this
information for future reference.
Model No.
Serial No.
ENGLISH
FRANÇAIS
ESPAÑOL
B5A-2255-00 [K]
Advertisement
Chapters
Table of Contents

Related Manuals for JVC KD-SX24BT


Summary of Contents for JVC KD-SX24BT
- Page 1 ENGLISH FRANÇAIS ESPAÑOL KD-SX24BT DIGITAL MEDIA RECEIVER INSTRUCTION MANUAL RÉCEPTEUR MULTIMÉDIA NUMÉRIQUE MANUEL D’INSTRUCTIONS RECEPTOR DE MEDIOS DIGITALES MANUAL DE INSTRUCCIONES For customer Use: Enter below the Model No. and Serial No. which are located on the top or bottom of the cabinet. Retain this information for future reference.
- Page 2 Información acerca de la eliminación de equipos eléctricos y electrónicos al final de la vida FCC WARNING útil (aplicable a los países que hayan adoptado sistemas independientes de recogida de This equipment may generate or use radio frequency energy. Changes or modifications to this residuos) equipment may cause harmful interference unless the modifications are expressly approved in the Los productos con el símbolo de un contenedor con ruedas tachado no podrán ser...
- Page 3 IC (Industry Canada) Notice CAUTION This device complies with Industry Canada’s licence-exempt RSSs. This equipment complies with FCC/IC radiation exposure limits set forth for an uncontrolled environment and meets the FCC radio frequency (RF) Exposure Guidelines and RSS-102 of the IC radio Operation is subject to the following two conditions: frequency (RF) Exposure rules.
- Page 4 SOFTWARE LICENSE AGREEMENT Article 3 Conditions for Grant of License 1. When the User transfers the Product, it may also transfer the license to use the Licensed Software The software embedded in the Product (hereinafter the "Licensed Software") provided by Licensor is embedded in the Product (including any related materials, updates and upgrades) on condition that copyrighted to or sublicensable by the Licensor, and this Agreement provides for the terms and conditions no original, copies or related materials continue in the possession of the User, and that the User shall...
- Page 5 Important Notice concerning the Software Article 8 Termination In case the User falls under any of the events described in the following items, the Licensor may immediately terminate this -jansson Agreement or claim that the User compensates for the damage incurred by the Licensor due to such event: (1) when the User violated any provision of this Agreement;...
-
Page 6: Table Of Contents
CONTENTS BEFORE USE BEFORE USE IMPORTANT • To ensure proper use, please read through this manual before using this product. It is especially important BASICS that you read and observe Warning and Caution in this manual. • Please keep the manual in a safe and accessible place for future reference. GETTING STARTED 1 Cancel the demonstration WARNING... -
Page 7: Basics
BASICS Faceplate Attach Volume knob Display window Detach How to reset Detach button On the faceplate Turn on the power Press • Press and hold to turn off the power. Adjust the volume Turn the volume knob. Press the volume knob to mute the sound or pause playback. •... -
Page 8: Getting Started
Turn the volume knob to select [12H] or [24H], then press the knob. For details on how to update the firmware, visit To set the date <http://www.jvc.net/cs/car/>. Turn the volume knob to select [DATE SET], then press the knob. FACTORY RESET YES: Resets the settings to default (except the stored station). ;... -
Page 9: Radio
RADIO GETTING STARTED CLOCK TIME SYNC ON: The clock time is automatically set using the Clock Time (CT) data in FM Radio Broadcast Data System signal. ; OFF: Cancels. CLOCK ON: The clock time is shown on the display even DISPLAY when the unit is turned off. ; OFF: Cancels. “ST”... - Page 10 RADIO Other settings IF BAND AUTO: Increases the tuner selectivity to reduce interference noises from adjacent FM stations. (Stereo effect may be lost.) ; WIDE: Subjects to Press and hold interference noises from adjacent FM stations, but sound quality will not Turn the volume knob to select an item (see the following table), be degraded and the stereo effect will remain.
-
Page 11: Usb/Ipod/Android
When connecting an Android device, “Press [VIEW] to install JVC MUSIC PLAY APP” is shown. Follow the instructions to install the application. You can also install the latest version of JVC MUSIC PLAY application on your Android device (commercially available) before connecting. - Page 12 (via USB input terminal). Preparation: • To return to the previous setting item, press Install the latest version of JVC Remote application on your device before • To cancel, press and hold connecting. For more information, visit <http://www.jvc.net/cs/car/>.
-
Page 13: Pandora
Pandora® Preparation: Create and store a new station Install the latest version of the Pandora application on your device (iPhone/iPod touch), then create an account and log in to Pandora. Press • Select [ON] for [PANDORA SRC] in [SOURCE SELECT]. ( 4) Turn the volume knob to select [NEW STATION], then press the knob. -
Page 14: Iheartradio
iHeartRadio® Preparation: On the faceplate Install the latest version of iHeartAuto application on your device Playback/pause Press the volume knob. (iPhone/iPod touch), then create an account and log in to iHeartRadio. • Select [ON] for [IHEART SRC] in [SOURCE SELECT]. ( 4) Skip a track for custom station Press T. -
Page 15: Bluetooth
BLUETOOTH® BLUETOOTH — Connection Pair and connect a Bluetooth device for the first time Press to turn on the unit. Supported Bluetooth profiles – Hands-Free Profile (HFP) Search and select “KD-SX2 BT” on the Bluetooth device. – Advanced Audio Distribution Profile (A2DP) “BT PAIRING”... -
Page 16: Android
• The unit answers the call automatically if [AUTO ANSWER] is set to a selected time. ( 13) – [AUTO PAIRING] is set to [ON]. ( 15) During a call: – JVC MUSIC PLAY application is installed on • The buttons stop blinking. the Android device ( 7) and [AUTO MODE] is •... - Page 17 BLUETOOTH® Make the settings for receiving a call On the faceplate Press to enter Bluetooth mode. While having two active calls... Turn the volume knob to select an item (see the following table), End current call and activate Press and hold or the volume then press the knob.
- Page 18 BLUETOOTH® Settings in memory RECENT CALL (Applicable only if the phone supports PBAP.) 1 Press the volume knob to select a name or a phone number. Store a contact in memory • “<” indicates call received, “>“ indicates call made, “M” indicates call missed.
- Page 19 BLUETOOTH® Default: XX Bluetooth compatibility check mode BT MODE You can check the connectivity of the supported profile between the PHONE SELECT* Selects the phone or audio device to connect or disconnect. Bluetooth device and the unit. “ ” appears in front of the device name when connected. •...
-
Page 20: Repeat Play
(via Bluetooth or via USB input terminal) or Android smartphone (via Bluetooth). Audio player via Bluetooth Preparation: Install the latest version of JVC Remote application on your device before Press repeatedly to select BT AUDIO. connecting. For more information, visit <http://www.jvc.net/cs/car/>. - Page 21 BLUETOOTH® Internet radio via Bluetooth ANDROID YES: Selects Android smartphone to use the application via Bluetooth. ; NO: Cancels. You can listen to internet radio (Pandora and iHeartRadio) on the iPhone/ ANDROID LIST * Selects the Android smartphone to use from the list. iPod touch/Android device via Bluetooth on this unit.
-
Page 22: Aux
AUDIO SETTINGS Use a portable audio player Connect a portable audio player (commercially available). 3.5 mm (1/8") stereo mini plug with “L” shaped connector (commercially available) Portable audio player Select a preset equalizer Press repeatedly. Auxiliary input jack (or) Press , then turn the volume knob within 5 seconds. Select [ON] for [BUILT-IN AUX] in [SOURCE SELECT]. - Page 23 AUDIO SETTINGS Default: XX LOUDNESS LEVEL 01/LEVEL 02: Boosts low or high frequencies to produce a well- balanced sound at low volume. ; OFF: Cancels EQ SETTING SUB.W LEVEL * SPK-OUT * (Not applicable when 3-way crossover is selected.) PRESET EQ Select a preset equalizer suitable to the music genre. SUB.W 00 to SUB.W +06 (SUB.W +03): Adjusts the •...
- Page 24 AUDIO SETTINGS Speaker output settings SPK/PRE OUT (Not applicable when 3-way crossover is selected.) [SPK/PRE OUT] Depending on the speaker connection method, select the appropriate (Applicable only if [X ' OVER TYPE ] is set to [2-WAY]) setting to get the desired output. ( Speaker output settings) Select the output setting for the speakers [SPK/PRE OUT], based on the SPEAKER SIZE Depending on the crossover type you have selected ( [X ' OVER...
- Page 25 AUDIO SETTINGS 2-way crossover setting items Crossover settings Below are the available setting items for 2-way crossover and 3-way SPEAKER SIZE crossover. FRONT SIZE 3.5"/4"/4.75"/5"/6.5"/6.75"/7"/4×6/5×7/6×8/ Caution 6×9/7×10 Select a crossover type according to how the speakers are connected. TWEETER SMALL/MIDDLE/LARGE/NONE (not connected) ( 32) REAR * 3.5"/4"/4.75"/5"/6.5"/6.75"/7"/4×6/5×7/6×8/6×9/7×10/...
- Page 26 AUDIO SETTINGS 3-way crossover setting items Digital Time Alignment settings Digital Time Alignment sets the delay time of the speaker output to SPEAKER SIZE create a more suitable environment for your vehicle. TWEETER SMALL/MIDDLE/LARGE • For more information, 23, Determining the value for [DISTANCE] and [GAIN] MID RANGE 3.5"/4"/4.75"/5"/6.5"/6.75"/7"/4×6/5×7/6×8/6×9 of [DTA SETTINGS].
-
Page 27: Display Settings
DISPLAY SETTINGS AUDIO SETTINGS Determining the value for [DISTANCE] and [GAIN] of [DTA SETTINGS] If you specify the distance from the center of the currently set listening position to every speaker, the delay time will be automatically computed and set. 1 Determine the center of the currently set listening position as the reference point. -
Page 28: References
Connector (on the reverse side of the faceplate) More information For: – Latest firmware updates and latest compatible item list – JVC original application – Any other latest information Visit <http://www.jvc.net/cs/car/>. Playable files • For detailed information and notes about the playable audio files, visit <http://www.jvc.net/cs/car/>. - Page 29 REFERENCES • Via Bluetooth: About Bluetooth Made for • Depending on the Bluetooth version of the device, some Bluetooth devices may not be able – iPod touch (5th and 6th generation) to connect to this unit. – iPhone 4S, 5, 5S, 5C, 6, 6 Plus, 6S, 6S Plus, SE •...
-
Page 30: Troubleshooting
TROUBLESHOOTING REFERENCES Source name Display information Symptom Remedy PANDORA/ Station name (Date/Clock) Shared/Radio (Date) Song title Sound cannot be heard. • Adjust the volume to the optimum level. PANDORA BT (Artist) Song title (Album name) Song title (Date/Clock) • Check the cords and connections. Playing time (Date/Clock) Station name (Date/Clock) with music “MISWIRING CHECK... - Page 31 ( 25) to insufficient network connectivity. Cannot playback at • Make sure JVC MUSIC PLAY APP is installed on the “THUMBS N/A” Registration of thumbs up/thumbs down is not allowed.
- Page 32 • Reduce the distance between the unit and the Bluetooth Contact (USA only) is poor device. Call: 1-800-252-5722 ( or ) visit: <http://www.jvc.com> • Move the car to a place where you can get a better signal reception. Sound is being •...
-
Page 33: Specifications
SPECIFICATIONS FM Frequency Range 87.9 MHz — 107.9 MHz (200 kHz step) Frequency Response (±3 dB) 20 Hz — 20 kHz 87.5 MHz — 108.0 MHz (50 kHz step) Input Maximum Voltage 1 000 mV Usable Sensitivity (S/N = 26 dB) 8.2 dBf (0.71 μV/75 Ω) Input Impedance 30 kΩ Quieting Sensitivity (DIN S/N = 46 dB) 17.2 dBf (2.0 μV/75 Ω) Frequency Response (±3 dB) 30 Hz — 15 kHz Version Bluetooth 3.0 Signal-to-Noise Ratio (MONO) -
Page 34: Installation/Connection
INSTALLATION/CONNECTION SPECIFICATIONS Warning Operating Voltage 14.4 V • The unit can only be used with a 12 V DC power supply, negative ground. (10.5 V — 16 V allowable) • Disconnect the battery’s negative terminal before wiring and mounting. Maximum Current Consumption 10 A • Do not connect Battery wire (yellow) and Ignition wire (red) to the car chassis or Ground wire (black) to prevent a short circuit. - Page 35 INSTALLATION/CONNECTION Part list for installation Installing the unit (in-dash mounting) (A) Faceplate (B) Trim plate Do the required wiring. ( 32) (C) Mounting sleeve (D) Wiring harness Hook on the top side Orientate the trim Dashboard of plate as illustrated your car before fitting.
- Page 36 IMPORTANT We recommend installing the unit with a commercially available Rear/subwoofer output JVC Amplifier * custom wiring harness specific for your car and leave this job to For 3-way crossover: Woofer output professionals for your safety. Consult your car audio dealer.
- Page 38 TABLE DES MATIERES AVANT L’UTILISATION AVANT L’UTILISATION IMPORTANTES • Pour utiliser correctement l’appareil, veuillez ce manuel complément avant de l’utiliser. Il est particulièrement important que FONCTIONNEMENT DE BASE vous lisiez et acceptiez les avertissements et les précautions de ce manuel. •...
- Page 39 FONCTIONNEMENT DE BASE Façade Attachez Bouton de volume Fenêtre d’affichage Détachez Comment réinitialiser Touche de détachement Pour Sur la façade Mettez l’appareil sous tension Appuyez sur • Maintenez la touche enfoncée pour mettre l’appareil hors tension. Ajustez le volume Tournez le bouton de volume. Appuyez sur le bouton de volume pour couper le son ou mettre la lecture en pause.
- Page 40 , puis appuyez n’ e st pas activée). sur le bouton. Pour en savoir plus sur la mise à niveau du micrologiciel, consultez <http://www.jvc.net/cs/car/>. Pour régler la date Tournez le bouton de volume pour choisir [DATE SET] , puis appuyez sur le FACTORY RESET : Réinitialise les réglages aux valeurs par défaut (sauf la station mémorisée). ;...
- Page 41 RADIO PRISE EN MAIN CLOCK TIME SYNC : L’horloge est réglée automatiquement à l’aide des données d’horloge (CT) comprises dans les données du signal FM Radio Broadcast Data System. ; : Annulation. CLOCK : L’horloge apparaît sur l’affichage même quand l’appareil DISPLAY est hors tension. ; : Annulation.
- Page 42 RADIO Autres paramètres IF BAND AUTO : Augmente la sélectivité du tuner pour réduire les interférences des stations FM WIDE adjacentes. (L’ e ffet stéréo peut être perdu.) ; : Il y a des interférences des stations FM Maintenez enfoncée adjacentes, mais la qualité du son n’ e st pas dégradée et l’ e ffet stéréo est conservé. Tournez le bouton de volume pour sélectionner un élément (voir le MONO SET * tableau suivant), puis appuyez sur le bouton.
- Page 43 (en vente dans le commerce) Lors de la connexion d’un périphérique Android, “Press [VIEW] to install JVC MUSIC PLAY APP” apparaît. Suivez les instructions pour installer l’application. Vous pouvez aussi intaller la dernière version de l’application JVC MUSIC PLAY sur votre périphérique Android avant la connexion. Pour plus d’informations, consultez <http://www.jvc.net/cs/car/>.
- Page 44 Appuyez sur pour entrer en recherche de caractères. Préparation: Tournez le bouton de volume pour sélectionner le caractère Installez la dernière version de l’application JVC Remote sur votre périphérique avant la souhaité. connexion. Pour plus d’informations, consultez <http://www.jvc.net/cs/car/>. ^A^: Lettres majuscules (A à Z) _A_: Lettres minuscules (a à...
- Page 45 Pandora® Préparation: Création et mémorise une nouvelle station Installez la dernière version de l’application Pandora sur votre appareil (iPhone/iPod touch), puis créez un compte et connectez-vous sur Pandora. Appuyez sur • Sélectionnez [ON] pour [PANDORA SRC] dans [SOURCE SELECT] ( 4) Tournez le bouton de volume pour choisir [NEW STATION] , puis appuyez...
- Page 46 iHeartRadio® Préparation: Pour Sur la façade Installez la dernière version de l’application iHeartAuto sur votre appareil (iPhone/iPod touch), puis créez un compte et connectez-vous sur iHeartRadio. Lecture/pause Appuyez sur le bouton de volume. • Sélectionnez [ON] pour [IHEART SRC] dans [SOURCE SELECT] ( 4) Saute une plage pour choisir une...
- Page 47 BLUETOOTH® BLUETOOTH — Connexion Faites le pairage et connectez un périphérique Bluetooth pour la première fois Profiles Bluetooth pris en charge Appuyez sur pour mettre l’appareil sous tension. – Hands-Free Profile — Profile mains libres (HFP) Cherchez et sélectionnez “KD-SX2 BT” sur le périphérique Bluetooth. –...
- Page 48 [AUTO PAIRING] est réglé sur [ON] ( 15) Pendant un appel: – L’application JVC MUSIC PLAY est installée sur le • Les touches s’arrêtent de clignoter. ( 7) [AUTO MODE] périphérique Android • Si vous mettez hors tension l’appareil ou détachez la façade, la connexion Bluetooth est déconnectée.
- Page 49 BLUETOOTH® Réalise les réglages de réception d’un appel Pour Sur la façade Appuyez sur pour entrer en mode Bluetooth. Quand vous avez deux appels actifs... Tournez le bouton de volume pour sélectionner un élément (voir le tableau suivant), puis appuyez sur le bouton. Terminez l’appel actuel et Maintenez enfoncé...
- Page 50 BLUETOOTH® Réglages en mémoire RECENT CALL (Applicable uniquement quand le téléphone prend en charge PBAP.) Appuyez sur le bouton de volume pour sélectionner un nom ou un numéro de téléphone. Stockage d’un contact en mémoire • “<” indique l’appel reçu, “>” indique un appel passé, “M” indique un appel manqué. •...
- Page 51 BLUETOOTH® Défaut: Mode de vérification de la compatibilité Bluetooth BT MODE Vous pouvez vérifier la connectivité du profile pris en charge entre le périphérique Bluetooth et l’appareil. PHONE SELECT Permet de sélectionner le téléphone ou le périphérique audio à connecter ou déconnecter. •...
- Page 52 (via Bluetooth ou via la prise d’entrée USB) ou le smartphone Android (via Bluetooth). Préparation: Lecteur audio via Bluetooth Installez la dernière version de l’application JVC Remote sur votre périphérique avant la Appuyez répétitivement sur pour sélectionner BT AUDIO. connexion. Pour plus d’informations, consultez <http://www.jvc.net/cs/car/>.
- Page 53 BLUETOOTH® Radio internet via Bluetooth ANDROID : Sélectionnez le smartphone Android pour utiliser l’application via Bluetooth. ; : Annulation. Vous pouvez écouter la radio internet (Pandora et iHeartRadio) sur votre périphérique ANDROID LIST * Sélectionnez le smartphone Android à utiliser dans la liste. iPhone/iPod touch/Android via le Bluetooth de cet appareil.
- Page 54 RÉGLAGES AUDIO Utilisation d’un lecteur audio portable Connectez un lecteur audio portable (en vente dans le commerce). Mini fiche stéréo de 3,5 mm (1/8 pouces) avec connecteur en forme de “L” (en vente dans le commerce) Lecteur audio portable Choisissez un égaliseur préréglé Appuyez répétitivement sur Prise d’...
- Page 55 RÉGLAGES AUDIO Défaut: LOUDNESS LEVEL 01 LEVEL 02 : Accentue les basses ou hautes fréquences pour produire un son plus équilibré aux faibles niveaux de volume. ; : Annulation EQ SETTING SUB.W LEVEL * SPK-OUT * (Non applicable quand la transition 3 voies est sélectionnée.) PRESET EQ Sélectionne un égaliseur préréglé...
- Page 56 RÉGLAGES AUDIO Réglages de sortie d’enceinte SPK/PRE OUT (Non applicable quand la transition 3 voies est sélectionnée.) [SPK/PRE OUT] En fonction de la méthode de connexion des enceintes, sélectionner le réglage approprié (Applicable uniquement si [X ' OVER TYPE ] est réglé sur [2-WAY]) Réglages de sortie d’enceinte pour obtenir la sortie souhaitée.
- Page 57 RÉGLAGES AUDIO Options de réglage de la transition 2 voies Réglages de transition Voici les options de réglage disponibles pour la transition 2 voies et la transition 3 SPEAKER SIZE voies. FRONT SIZE 3.5" 4" 4.75" 5" 6.5" 6.75" 7" 4×6 5×7 6×8...
- Page 58 RÉGLAGES AUDIO Options de réglage de la transition 3 voies Réglages de l’alignement temporel numérique L’alignement temporel numérique règle la temporisation de la sortie d’enceinte pour SPEAKER SIZE créer un environnement qui convient mieux à votre véhicule. TWEETER SMALL/MIDDLE/LARGE • Pour plus d’informations, 23, Déterminez la valeur pour [DISTANCE] et [GAIN] de [DTA SETTINGS] MID RANGE...
- Page 59 RÉGLAGES D’AFFICHAGE RÉGLAGES AUDIO Déterminez la valeur pour [DISTANCE] et [GAIN] de [DTA SETTINGS] Si vous spécifiez la distance à partir du centre de la positon d’ é coute actuellement réglée sur n’importe quel réglage, la temporisation est calculée automatiquement et réglée. Détermine le centre de la position d’...
- Page 60 Connecteur (sur la face arrière de la façade) Pour: – Les dernières mise à jour du micrologiciel et la liste de compatibilité la plus récente – Application originale JVC – Autres informations récentes Consultez <http://www.jvc.net/cs/car/>. Fichiers pouvant être lus • Pour des informations détaillées et des remarques sur les fichiers audio compatibles, reportez-vous à...
- Page 61 RÉFÉRENCES • Via Bluetooth: À propos de Bluetooth Made for • En fonction de la version Bluetooth du périphérique, il se peut que certains périphériques Bluetooth ne puissent pas – iPod touch (5th et 6th generation) être connectés à cet appareil. –...
- Page 62 GUIDE DE DÉPANNAGE RÉFÉRENCES Nom de la source Informations sur l’affichage Symptôme Remède PANDORA/ Nom de la station (Date/Horloge) Partagée/Radio (Date) Titre de morceau Le son ne peut pas être entendu. • Ajustez le volume sur le niveau optimum. PANDORA BT (Artiste) Titre de morceau (Nom de l’album) Titre de morceau (Date/Horloge)
- Page 63 ( 25) d’une connectivité réseau insuffisante. Lecture impossible en mode • Assurez-vous que JVC MUSIC PLAY APP est installé sur le périphérique “THUMBS N/A” L’ e nregistrement de pouces vers le haut/vers le bas n’ e st pas permis. AUTO MODE ( 7) Android.
- Page 64 • Déplacez la voiture dans un endroit où vous pouvez obtenir un meilleur Contactez (USA uniquement) signal de réception. Appelez: 1-800-252-5722 ( ou ) consultez: <http://www.jvc.com> Le son est interrompu ou saute • Réduisez la distance entre cet appareil et le lecteur audio Bluetooth.
- Page 65 SPÉCIFICATIONS FM Plage de fréquences 87,9 MHz — 107,9 MHz (pas de 200 kHz) Réponse en fréquence (±3 dB) 20 Hz — 20 kHz 87,5 MHz — 108,0 MHz (pas de 50 kHz) Tension maximum d’ e ntrée 1 000 mV Sensibilité utilisable (S/B = 26 dB) 8,2 dBf (0,71 μV/75 Ω) Impédance d’ e ntrée 30 kΩ...
- Page 66 INSTALLATION/RACCORDEMENT SPÉCIFICATIONS Avertissement Tension de fonctionnement (10,5 V — 16 V 14,4 V • L’appareil peut uniquement être utilisé avec une alimentation de 12 V CC, à masse négative. admissible) • Déconnectez la borne négative de la batterie avant le câblage et le montage. Consommation de courant maximale 10 A •...
- Page 67 INSTALLATION/RACCORDEMENT Liste des pièces pour l’installation Installation de l’appareil (montage encastré) Façade Plaque d’assemblage Réalisez les connexions nécessaires. Manchon de montage Faisceau de fils Crochet sur le côté supérieur Orientez la plaque de Tableau de bord garniture de la façon de votre voiture illustrée avant la fixation.
- Page 68 Nous recommandons d’installer l’appareil en utilisant un harnais de câblage en Sortie arrière/caisson de grave vente dans le commerce recommandé spécifiquement pour votre voiture et, pour JVC Amplificateur Pour la transition 3 voies: Sortie de l’ e nceinte votre sécurité, de laisser ce travail a des professionnels. Consultez votre revendeur des graves autoradio.
-
Page 70: General
CONTENIDO ANTES DEL USO ANTES DEL USO IMPORTANTE • Antes de utilizar este producto y para asegurar su uso correcto, lea completamente este manual. En especial, lea y observe las PUNTOS BÁSICOS Advertencias y Precauciones incluidas en este manual. • Guarde el manual en un lugar seguro y accesible para futuras consultas. PROCEDIMIENTOS INICIALES 1 Cancele la demostración ADVERTENCIA... -
Page 71: Puntos Básicos
PUNTOS BÁSICOS Placa frontal Fijar Rueda de volumen Ventanilla de visualización Desmontar Cómo reinicializar Botón de liberación Para En la placa frontal Encender la unidad Pulse • Pulse y mantenga pulsado para apagar la unidad. Ajustar el volumen Gire la rueda de volumen. Pulse la rueda de volumen para enmudecer el sonido o pausar la reproducción. -
Page 72: Procedimientos Iniciales
Para obtener información sobre cómo actualizar el firmware, visite Para ajustar la fecha <http://www.jvc.net/cs/car/>. Gire la rueda de volumen para seleccionar [DATE SET] y, a continuación, pulse FACTORY RESET : Se restablecen los ajustes predeterminados (excepto la emisora la rueda. -
Page 73: Radio
RADIO PROCEDIMIENTOS INICIALES CLOCK TIME SYNC : El reloj se ajusta automáticamente en sincronización con los datos de CT (hora del reloj) de la señal del FM Radio Broadcast Data System. ; : Se cancela. CLOCK : La hora del reloj siempre se visualiza en la pantalla DISPLAY cuando la unidad está... - Page 74 RADIO Otros ajustes IF BAND AUTO : Aumenta la selectividad del sintonizador para reducir las interferencias WIDE con emisoras FM adyacentes. (Se puede perder el efecto estéreo.) ; : Sujeto a Pulse y mantenga pulsado interferencias de las emisoras FM adyacentes, pero la calidad del sonido no se degrada y se Gire la rueda de volumen para seleccionar un elemento (consulte la conserva el efecto estereofónico.
-
Page 75: Usb/Ipod/Android
Cuando conecte un dispositivo Android, se mostrará “Press [VIEW] to install JVC MUSIC PLAY APP”. Siga las instrucciones para instalar la aplicación. Antes de la conexión, también puede instalar la versión más reciente de la aplicación JVC MUSIC PLAY en su dispositivo Android. Para obtener más información, visite <http://www.jvc.net/cs/car/>. - Page 76 Preparativos: Pulse la rueda de volumen para iniciar la búsqueda. Antes de la conexión, instale la versión más reciente de la aplicación JVC Remote en su dispositivo. Para obtener más información, visite <http://www.jvc.net/cs/car/>. • Para volver al elemento de ajuste anterior, pulse •...
-
Page 77: Pandora
Pandora® Preparativos: Cree y almacene una emisora nueva Instale la última versión de la aplicación Pandora en su dispositivo (iPhone/iPod touch) y, a continuación, cree una cuenta e inicie sesión en Pandora. Pulse • Seleccione [ON] para [PANDORA SRC] [SOURCE SELECT] ( 4) Gire la rueda de volumen para seleccionar [NEW STATION]... -
Page 78: Iheartradio
iHeartRadio® Preparativos: Para En la placa frontal Instale la última versión de la aplicación iHeartAuto en su dispositivo (iPhone/ iPod touch) y, a continuación, cree una cuenta e inicie sesión en iHeartRadio. Reproducción/pausa Pulse la rueda de volumen. • Seleccione [ON] para [IHEART SRC]... -
Page 79: Bluetooth
BLUETOOTH® BLUETOOTH — Conexión Emparejar y conectar por primera vez un dispositivo Bluetooth Perfiles Bluetooth compatibles Pulse para encender la unidad. – Perfil manos libres (HFP) Busque y seleccione “KD-SX2 BT” en el dispositivo Bluetooth. – Perfil Avanzado de Distribución de Audio (A2DP) “BT PAIRING”... - Page 80 [ON] ( 15) • Los botones dejan de parpadear. – La aplicación JVC MUSIC PLAY está instalada en el • Si apaga la unidad o extrae el placa frontal, la conexión Bluetooth se interrumpe. ( 7) [AUTO MODE] dispositivo Android y la opción...
- Page 81 BLUETOOTH® Realice los ajustes para recibir una llamada Para En la placa frontal Pulse para ingresar al modo Bluetooth. Mientras tiene dos llamadas activas... Gire la rueda de volumen para seleccionar un elemento (consulte la siguiente tabla), y, a continuación, pulse la rueda. Finalizar la llamada actual y Mantenga pulsado o la rueda de...
- Page 82 BLUETOOTH® Ajustes en la memoria RECENT CALL (Solo si el teléfono es compatible con PBAP.) Pulse la rueda de volumen para seleccionar un nombre o un número de teléfono. Almacenar un contacto en la memoria • “<” indica llamada recibida, “>” indica llamada realizada, “M” indica llamada perdida. •...
- Page 83 BLUETOOTH® Predeterminado: Modo de comprobación de compatibilidad Bluetooth BT MODE Puede comprobar la conectividad del perfil compatible entre el dispositivo Bluetooth y la unidad. PHONE SELECT Selecciona el teléfono o el dispositivo de audio que desea conectar o desconectar. • Asegúrese de que no haya ningún dispositivo Bluetooth emparejado. Al conectarse, aparece “...
- Page 84 USB) o un smartphone Android (a través de Bluetooth). Preparativos: Antes de la conexión, instale la versión más reciente de la aplicación JVC Remote en su Reproductor de audio a través de Bluetooth dispositivo. Para obtener más información, visite <http://www.jvc.net/cs/car/>.
- Page 85 BLUETOOTH® Radio Internet a través de Bluetooth ANDROID : Seleccione smartphone Android para usar la aplicación a través de Bluetooth. ; : Se cancela. Puede escuchar radio Internet (Pandora e iHeartRadio) en un dispositivo iPhone/ ANDROID LIST * Seleccione en la lista el smartphone Android a usar. iPod touch/Android a través de Bluetooth de esta unidad.
-
Page 86: Aux
AJUSTES DE AUDIO Uso de un reproductor de audio portátil Conecte un reproductor de audio portátil (disponible en el mercado). Miniclavija estéreo de 3,5 mm (1/8 pulgada) con conector en “L” (disponible en el mercado) Reproductor de audio portátil Seleccionar un ecualizador preajustado Pulse repetidamente. - Page 87 AJUSTES DE AUDIO Predeterminado: LOUDNESS LEVEL 01 LEVEL 02 : Refuerza las frecuencias altas o bajas para producir un sonido bien balanceado a bajos niveles de volumen. ; : Se cancela EQ SETTING SUB.W LEVEL * SPK-OUT * (No aplicable si se ha seleccionado crossover de 3 vías.) PRESET EQ Selecciona un ecualizador predefinido adecuado para el género musical.
- Page 88 AJUSTES DE AUDIO Ajustes salida altavoz SPK/PRE OUT (No aplicable si se ha seleccionado crossover de 3 vías.) [SPK/PRE OUT] Dependiendo del método de conexión del altavoz, seleccione la configuración apropiada (Aplicable solo si [X ' OVER TYPE ] está ajustado a [2-WAY]) Ajustes salida altavoz para obtener la salida deseada.
- Page 89 AJUSTES DE AUDIO Elementos de ajuste de crossover de 2 vías Ajustes de crossover A continuación se describen los elementos de ajuste disponibles para crossover de SPEAKER SIZE 2 vías y crossover de 3 vías. FRONT SIZE 3.5" 4" 4.75" 5"...
- Page 90 AJUSTES DE AUDIO Elementos de ajuste de crossover de 3 vías Ajustes de la alineación del tiempo digital La Alineación de Tiempo Digital ajusta el tiempo de retardo de la salida de los altavoces SPEAKER SIZE creando un entorno más adecuado para su vehículo. TWEETER SMALL/MIDDLE/LARGE •...
-
Page 91: Ajustes De Visualización
AJUSTES DE VISUALIZACIÓN AJUSTES DE AUDIO Calculando el valor para [DISTANCE] y [GAIN] de [DTA SETTINGS] Si especifica la distancia desde el centro de la posición de escucha seleccionada hacia cada altavoz, el tiempo de retraso se calculará y ajustará automáticamente. Establezca el centro de la posición de escucha seleccionada como el punto de referencia. -
Page 92: Referencias
Conector (en el reverso de la placa frontal) Más información Para: – Últimas actualizaciones de firmware y lista de los últimos elementos compatibles – Aplicación original JVC – Cualquier otra información más reciente Visite <http://www.jvc.net/cs/car/>. Archivos reproducibles • Para obtener información detallada y notas acerca de los archivos de audio que pueden reproducirse, visite <http://www.jvc.net/cs/car/>. - Page 93 REFERENCIAS • A través de Bluetooth: Acerca de Bluetooth Made for • Dependiendo de la versión Bluetooth del dispositivo, algunos dispositivos pueden no conectarse a esta unidad. – iPod touch (5th y 6th generation) • Esta unidad puede no funcionar con algunos dispositivos Bluetooth. –...
-
Page 94: Localización Y Solución De Problemas
LOCALIZACIÓN Y SOLUCIÓN DE PROBLEMAS REFERENCIAS Nombre de la fuente Información en pantalla Síntoma Solución PANDORA/PANDORA BT Nombre de la emisora (Fecha/Reloj) Compartida/Radio (Fecha) Título de la El sonido no se escucha. • Ajuste el volumen al nivel óptimo. canción (Artista) Título de la canción (Título del álbum) Título de la canción •... - Page 95 “RATING ERR” El registro con el pulgar arriba/abajo ha fracasado debido a conectividad a red insuficiente. No se puede reproducir en • Asegúrese de que JVC MUSIC PLAY APP esté instalado en el dispositivo [AUTO MODE] ( 7) Android. “THUMBS N/A”...
- Page 96 La calidad del sonido del • Reduzca la distancia entre la unidad y el dispositivo Bluetooth. Llame al: 1-800-252-5722 ( o ) visite: <http://www.jvc.com> teléfono es baja • Mueva el automóvil a un lugar donde exista mejor recepción de señal.
-
Page 97: Especificaciones
ESPECIFICACIONES FM Gama de frecuencias 87,9 MHz — 107,9 MHz (pasos de 200 kHz) Respuesta de frecuencia (±3 dB) 20 Hz — 20 kHz 87,5 MHz — 108,0 MHz (pasos de 50 kHz) Voltaje de entrada máximo 1 000 mV Sensibilidad útil (Relación señal/ruido = 26 dB) 8,2 dBf (0,71 μV/75 Ω) Impedancia de entrada 30 kΩ... -
Page 98: Instalación/Conexión
INSTALACIÓN/CONEXIÓN ESPECIFICACIONES Advertencia Voltaje de trabajo 14,4 V • La unidad puede utilizarse solamente con una fuente de alimentación de 12 V CC con negativo a masa. (10,5 V — 16 V admisibles) • Desconecte el terminal negativo de la batería antes de realizar el cableado y el montaje. Consumo de corriente máxima 10 A •... - Page 99 INSTALACIÓN/CONEXIÓN Lista de piezas para la instalación Instalación de la unidad (montaje en el tablero) Placa frontal Placa embellecedora Prepare el cableado necesario. Manguito de montaje Mazo de conductores Gancho en el lado superior Antes del montaje, oriente Salpicadero del la placa embellecedora automóvil tal como se muestra en la...
- Page 100 INSTALACIÓN/CONEXIÓN Conexión del cableado IMPORTANTE Se recomienda instalar la unidad con un mazo de cables disponible en el mercado que sea adecuado para su automóvil y, para fines de seguridad, deje esta tarea Amplificador de Salida posterior/subwoofer en manos de profesionales. Consulte con un distribuidor de productos de audio Para crossover de 3 vías: Salida del woofer para automóviles.
- Page 104 EXEMPLARY, OR CONSEQUENTIAL DAMAGES (INCLUDING, BUT NOT LIMITED TO, PROCUREMENT OF use of such marks by JVC KENWOOD Corporation is under license. Other trademarks and trade names SUBSTITUTE GOODS OR SERVICES; LOSS OF USE, DATA, OR PROFITS; OR BUSINESS INTERRUPTION) are those of their respective owners.