Table of Contents

Related Manuals for Electrolux ETW10540W


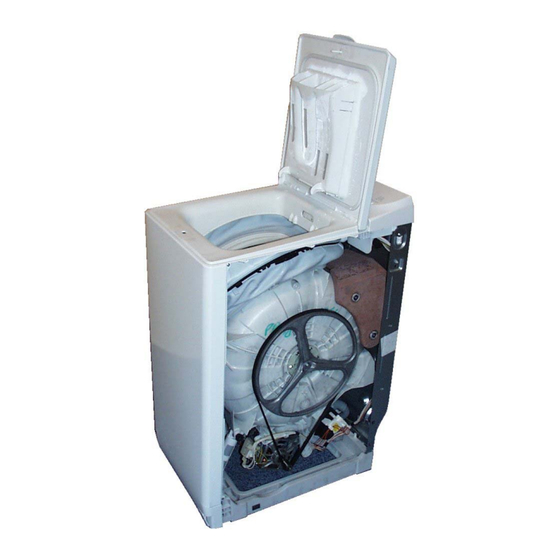
Summary of Contents for Electrolux ETW10540W
- Page 1 SERVICE MANUAL WASHING Washing machines, Toploader Range 40 cm Tub C3-TOY-Appliances © Electrolux Distripart GmbH Publ.-Nr.: Muggenhofer Straße 135 599 53 12 68 D-90429 Nürnberg Germany Fax +49 (0)911 323 1022 DGS-TDS-N 04.08 Edition:...
-
Page 2: Table Of Contents
............29 motor ....................30 drain pump ................... 30 NTC-sensor in the heating element ............. 32 drum support positioning DSP ............. 32 CHANGES ....................33 DGS-TDS-N 04.08 R.B. © Electrolux - 2 - 599 53 12 68 EN... -
Page 3: A) Safety Precautions
A top of “polypropylene”, a housing lid on which the water inlet tray is fixed, a functional support including the control panel with the electrical components and the water distributor. DGS-TDS-N 04.08 R.B. © Electrolux - 3 - 599 53 12 68 EN... -
Page 4: D) Dimensions
DIMENSIONS DGS-TDS-N 04.08 R.B. © Electrolux - 4 - 599 53 12 68 EN... -
Page 5: E) Access To The Components
Unlock the control panel of side panel. Push the control panel and slide it backward. Tilt control panel upward. Unlock the flat cable and the wires Remove the control panel. DGS-TDS-N 04.08 R.B. © Electrolux - 5 - 599 53 12 68 EN... - Page 6 Shift and lock control panel to the front. The disassembling of the control panel gives access to: user interface analog pressure switch suppressor inletvalve DGS-TDS-N 04.08 R.B. © Electrolux - 6 - 599 53 12 68 EN...
-
Page 7: Electronic
Remove the three fixation screws from the electronic. Unlock the electronic from the rear panel. Disconnect all plugs. Screws Anchoring Anchoring Assembling Warning: Take care to the correct wiring when assembling. DGS-TDS-N 04.08 R.B. © Electrolux - 7 - 599 53 12 68 EN... -
Page 8: Supressor
Remove the left side panel. Remove the one fixation screw from the electronic. Detach hose clamp and pull off hose. Release air trap and draw it off the tub. DGS-TDS-N 04.08 R.B. © Electrolux - 8 - 599 53 12 68 EN... -
Page 9: Inlet Valve
Remove the control panel. Remove the cover Unlock two wirings at the valves. Open two hose clamps at the water distributor.. Pull off the two distribution hoses DGS-TDS-N 04.08 R.B. © Electrolux - 9 - 599 53 12 68 EN... - Page 10 Press in the clips using a screwdriver and turn the valve. Unlock the inlet valve. Assembling Attention: During assembly you absolutely must assemble the cover because of the splash guard. DGS-TDS-N 04.08 R.B. © Electrolux - 10 - 599 53 12 68 EN...
-
Page 11: Water Distributor
Remove the cover. Open two hose clamps at the water distributor. Pull off the two distribution hoses. Remove the 1 screw. Unlock and remove water distributor. Anchoring DGS-TDS-N 04.08 R.B. © Electrolux - 11 - 599 53 12 68 EN... -
Page 12: Side Panel
Remove the right and left side panel. Unscrew the two lower side fixation screws. Unscrew the two lower fixation screws. Unscrew the two upper side fixation screws. Remove the front panel. DGS-TDS-N 04.08 R.B. © Electrolux - 12 - 599 53 12 68 EN... -
Page 13: Base Panel
Warning: During the assembling of the base panel take care that the side clips are in place. Transport wheel a) Disassembling Remove the right side panel. Release the transport roll with the screwdriver and pull it out downward. DGS-TDS-N 04.08 R.B. © Electrolux - 13 - 599 53 12 68 EN... -
Page 14: Detergent Box
Remove the main lid. Warning: Put the water inlet tray or a cloth on the drum that the fixing pins cannot fall into the appliance when removing. DGS-TDS-N 04.08 R.B. © Electrolux - 14 - 599 53 12 68 EN... -
Page 15: Table
Disassembling Remove the main lid. Remove the tension ring. Remove the control panel. Remove the water distributer. Remove the analogic pressure switch. Remove the the inlet valve. DGS-TDS-N 04.08 R.B. © Electrolux - 15 - 599 53 12 68 EN... - Page 16 Remove two screws at the backplate. Release upper part at the backplate and draw it slightly upward. Draw upper part backward and release it ahead at the front plate. Anchoring DGS-TDS-N 04.08 R.B. © Electrolux - 16 - 599 53 12 68 EN...
-
Page 17: Door Lock
Put the door lock in front of the slides. Lock it by pushing to the right. Turn in the screw. Warning: Take care that the clip (A) is correctly locked. DGS-TDS-N 04.08 R.B. © Electrolux - 17 - 599 53 12 68 EN... -
Page 18: Rubber Below
Remove the rubber below. Grease new rubber bellow in the area of the attachment. This enables an easier assembly of the rubber bellow. DGS-TDS-N 04.08 R.B. © Electrolux - 18 - 599 53 12 68 EN... - Page 19 Press new rubber bellow at the top into the groove at the upper part. Attention: Take care of a correct built-in position of the rubber bellow! DGS-TDS-N 04.08 R.B. © Electrolux - 19 - 599 53 12 68 EN...
-
Page 20: Left And Right Weight
Remove the left weight. Attention: Remove the old silicone at the fixing bolts. During assembly fix the screws additionally with silicone in the borehole. DGS-TDS-N 04.08 R.B. © Electrolux - 20 - 599 53 12 68 EN... -
Page 21: Shock Absorber
Disassembling / Assembling - Remove the left and right side panel. - Leave the lower and the upper pivot. - Take out the shock absorber. front rear Anchoring DGS-TDS-N 04.08 R.B. © Electrolux - 21 - 599 53 12 68 EN... -
Page 22: Bearings
Loosen and remove the 6 fixing screws of the bearing. Unhinge ground (only left bearing). Remove the bearing using a screwdriver. Remove the shield with O-ring using a screwdriver. Shield with O-ring DGS-TDS-N 04.08 R.B. © Electrolux - 22 - 599 53 12 68 EN... -
Page 23: Tub Complete
Remove the left and right side panel. Cut the lower shaft-sealing with pliers and remove it. Untighten and remove the 3 screws for the fixation of the weight. DGS-TDS-N 04.08 R.B. © Electrolux - 23 - 599 53 12 68 EN... - Page 24 Release and pull off the cables. Release and pull off heating. Remove a screw and pull off the air trap out of the tub. Release the pressure sensor hose. DGS-TDS-N 04.08 R.B. © Electrolux - 24 - 599 53 12 68 EN...
- Page 25 Remove the drive belt. Remove screw and pull off pulley. Remove the 2 screws. Remove the 1 screw. DGS-TDS-N 04.08 R.B. © Electrolux - 25 - 599 53 12 68 EN...
- Page 26 Remove the right weight. Remove two screws and pull off DSP. (following model) Release and pull of lines. DGS-TDS-N 04.08 R.B. © Electrolux - 26 - 599 53 12 68 EN...
- Page 27 Remove the 3 fixation screws. Take out the drainpump. Detach hose clamp at the drain hose ad draw off drain hose Remove the 2 fixation screws. DGS-TDS-N 04.08 R.B. © Electrolux - 27 - 599 53 12 68 EN...
- Page 28 Unhinge two springs each left and right at the tub. Pull out bolt at both shock absorbers. Release pressure switch hose at the tub. Turn tub and remove it from the housing. DGS-TDS-N 04.08 R.B. © Electrolux - 28 - 599 53 12 68 EN...
-
Page 29: Drum Paddle With Fluff Filter Flap
Drum paddle with fluff filter flap Disassembling Open the main lid. Remove the 4 fixation screws. Remove the drum paddle DGS-TDS-N 04.08 R.B. © Electrolux - 29 - 599 53 12 68 EN... -
Page 30: Drainpump
Remove the 2 fixation screws. Take out the motor. Drainpump Disassembling Remove the right side panel. Release and pull of lines. Remove the 3 fixation screws. DGS-TDS-N 04.08 R.B. © Electrolux - 30 - 599 53 12 68 EN... - Page 31 Take out the drainpump. DGS-TDS-N 04.08 R.B. © Electrolux - 31 - 599 53 12 68 EN...
-
Page 32: Ntc-Sensor In The Heating Element
Screws a) Disassembling / Assembling - Remove the right side panel. - Remove the drive belt and the pulley. - Unscrew the 2 screws from the DSP. DGS-TDS-N 04.08 R.B. © Electrolux - 32 - 599 53 12 68 EN... -
Page 33: F) Changes
CHANGES Date Page changed DGS-TDS-N 04.08 R.B. © Electrolux - 33 - 599 53 12 68 EN... - Page 34 STR 108 293 800 © Electrolux...
- Page 35 VDR 108 293 800 © Electrolux...