Table of Contents
Advertisement
Quick Links
Advertisement
Table of Contents

Related Manuals for Sovereign GT5614


Summary of Contents for Sovereign GT5614
- Page 1 30CM PUSH LAWN MOWER Item No. 310091 Model No. GT5614 Technical Support & Parts 01904 727509 Mon-Fri 9am-5pm Sat-Sun 11am-4pm www.coreservice.co.uk ORIGINAL INSTRUCTION MANUAL Please read these instructions fully before starting assembly. HHGL Limited, MK9 1BA. HHGL (ROI) Limited, D02 X576...
-
Page 2: Table Of Contents
CONTENTS General safety warnings Intended use Warning symbols In the box Assembly Maintenance Troubleshooting Technical data Sharpening the blade Disposal Getting help Warranty... -
Page 3: General Safety Warnings
GENERAL SAFETY WARNINGS Safety Warnings WARNING! Read all safety warnings and instructions. Failure to follow the warnings and instructions may result in fire and/or serious injury. WARNING! Read all safety warnings and instructions designated by the symbol. Save all warnings and instructions for future reference. - Page 4 • Never mow while people, especially children or pets, are nearby. • Keep in mind that the operator or user is responsible for accidents or hazards occurring to other people or their property. PREPARATION • While mowing, always wear substantial footwear and long trousers.
- Page 5 • Do not mow excessively steep slopes. • Use extreme caution when reversing or pulling the mower towards you. • Stop the blades if the mower has to be tilted for transportation when crossing surfaces other than grass, and when transporting the mower to and from the area to be mowed.
- Page 6 • Use personal protective equipment (PPE). Always wear eye protection and non-skid safety shoes. • Do not overreach. Keep proper footing and balance at all times. This enables better control of the mower in unexpected situations. • Dress properly. Do not wear loose clothing or jewellery.
-
Page 7: Intended Use
• Maintain the mower. Check for misalignment or binding of moving parts, breakage of parts and any other condition that may affect the mowers operation. If damaged, have the mower repaired before use. Many accidents are caused by poorly maintained tools. •... -
Page 8: Warning Symbols
WARNING SYMBOLS Safety symbols The purpose of safety symbols is to attract your attention to any possible dangers. The safety symbols and their explanations require your careful attention and full understanding. The symbol warnings do not, by themselves, eliminate any danger. The instructions and warnings they give are no substitute for proper accident prevention measures. -
Page 9: In The Box
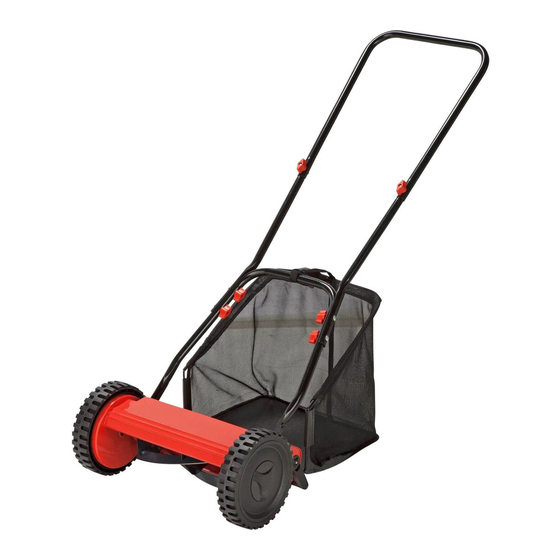
IN THE BOX Parts 1. Upper handle 2. Handle extensions 3. Lower handle 4. Cylinder blade 5. Mower body 6. Grass collecting box 7. Cutting height adjustment knob 8. Wheels 9. Grass collecting box support strap... -
Page 10: Assembly
ASSEMBLY WARNING! Before using the mower, read the instruction book carefully. Fitting the handle Slide the upper handle over the two handle extensions until the holes are lined up, then secure using the nuts and screws provided (see Fig. A). Fig. - Page 11 Fig. B3 Fig. C Now the handle is fully assembled and ready to be attached to the mower head. To attach the handle to the mower head, locate the two metal lugs found in front of the cutting bar adjustment knobs. To attach the handle, insert one of the large holes in the handle arm over the lug, then repeat the same process with the other side.
- Page 12 Insert the metal frames into the plastic holes (see Fig. D2, D3 and D4). Fig. D2 Fig. D3 Fig. D4 Wrap the metal frames with the plastic hems (see Fig. D5, D6 and D7). Fig. D5 Fig. D6 Fig. D7...
- Page 13 Fitting the grass collection box WARNING! The grass collection box must be fitted before using the mower. Attach the box to the lawn mower body by sliding the holes in the front of the box over the attachment hooks in front of the cutting height roller.
- Page 14 Fixed blade setting WARNING! This operation will have to be done whilst carefully turning the cylinder blade. We strongly recommend that thick gardening gloves are worn. The fixed blade must be set correctly in order for the lawn mower to work efficiently.
- Page 15 Adjusting the cutting height Depending on the length of grass you are cutting, you may want to adjust the cutting height of the lawn mower. This can be done by raising or lowering the cutting height roller. To adjust the cutting height, pull the cutting height adjustment knobs on both sides away from the mower body, and then move them forward or backward to adjust the cutting height.
-
Page 16: Maintenance
Refit the box and support strap. Unhook the support strap from the box and tilt the mower handle back. Lift the handle a little, then take out the box (see Fig. G3). Fig. G3 MAINTENANCE Note: To ensure long and reliable service, carry out the following maintenance regularly. -
Page 17: Troubleshooting
Be careful during adjustment of the mower, to prevent entrapment of fingers between moving blades and fixed parts. Caution! Do not touch rotating blade. TROUBLESHOOTING WARNING! Only perform the steps described within these instructions. All further inspection, maintenance and repair work must be performed by an authorised service centre or a similarly qualified specialist if you cannot solve the problem yourself. -
Page 18: Sharpening The Blade
SHARPENING THE BLADE Before taking the time and effort to sharpen the blades, make sure that it needs sharpening. Most issues can be solved by ensuring the blades are properly adjusted. 1. Prop up the push mower so that the blade reel can be rotated by turning the wheels. -
Page 19: Disposal
Note: After each use, hose the mower clean and wipe it dry. Wipe all the metal parts with a thin film of WD-40 or mineral oil. DISPOSAL The mower and its accessories are made of various recyclable materials. Dispose of the mower in accordance with your local recycling regulations. -
Page 20: Warranty
WARRANTY This product is covered by a 1 year warranty. The warranty covers any manufacturing defect in materials, workmanship and finish. Any claim under this warranty must be made by going to your nearest Homebase store, taking your proof of purchase with you, and claims must be made within 1 year of the date of purchase.