Table of Contents
Advertisement
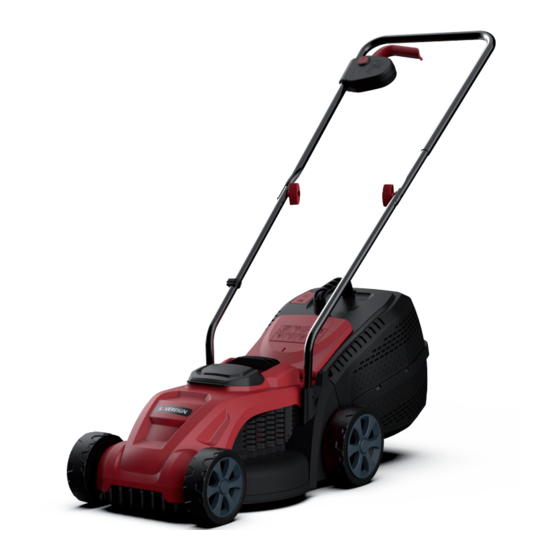
18V CORDLESS LAWN MOWER
Article No. 555376
Model No. LM 32H
ORIGINAL INSTRUCTION MANUAL
Please read these instructions fully before starting assembly.
HHGL Limited, MK9 1BA; HHGL (ROI) Limited, D02 X576
Technical Support & Parts
01904 727509
Mon-Fri 9am-5pm Sat-Sun 11am-4pm
www.coreservice.co.uk
July 21
Advertisement
Table of Contents

Related Manuals for Sovereign LM 32H


Summary of Contents for Sovereign LM 32H
- Page 1 18V CORDLESS LAWN MOWER Article No. 555376 Model No. LM 32H Technical Support & Parts 01904 727509 Mon-Fri 9am-5pm Sat-Sun 11am-4pm www.coreservice.co.uk ORIGINAL INSTRUCTION MANUAL Please read these instructions fully before starting assembly. HHGL Limited, MK9 1BA; HHGL (ROI) Limited, D02 X576...
-
Page 2: Table Of Contents
CONTENTS General safety warnings Intended use Warning symbols In the box Assembling the lawn mower Operating the lawn mower Maintenance and storage Troubleshooting Technical data Recycling and disposal Getting help Warranty... -
Page 3: General Safety Warnings
GENERAL SAFETY WARNINGS Safety Warnings WARNING! Read all safety warnings and instructions. Failure to follow the warnings and instructions may result in electric shock, fire and/or serious injury. WARNING! Read all safety warnings and instructions designated by the symbol. Save all warnings and instructions for future reference. - Page 4 GENERAL POWER TOOL SAFETY WARNINGS Training • Read the instructions carefully and make sure you fully understand them. Make sure you are familiar with the controls and the correct use of the product. • Never allow children or people unfamiliar with these instructions to use the product.
- Page 5 • Ensure the switch is in the ‘off’ position before inserting the battery pack. Inserting the battery pack into a machine that is switched on can result in injury. General Operation • Use the tool only with specifically designated battery packs. Use of any other battery packs will increase the risk of injury and fire.
- Page 6 • Never operate the product with defective guards or shields or without safety devices in place, such as deflectors or grass collector. • When switching on the motor, keep feet well away from the blades. • Do not tilt the product when switching on the motor, except if the product has to be tilted for starting.
- Page 7 • If the product starts to vibrate abnormally: - Inspect for any damages. - Replace or repair any damaged parts. - Check for and tighten any loose parts. Chargers • This appliance can be used by children aged from 8 years and above and persons with reduced physical, sensory or mental capabilities or lack of experience and knowledge if they have been given supervision or instruction concerning use of...
- Page 8 • The charger is designed to use a standard household 230-240 V~ 50/60HZ power source; ensure that the plug matches the outlet. • Never modify the plug in any way, this will reduce the risk of electric shock. • Do not abuse the cord of the charger. Never use the cord for carrying, pulling or unplugging the charger.
- Page 9 • Disconnect the charger from the power supply when not in use. This will reduce the risk of electric shock or damage to the charger. • If the supply cord is damaged, it must be replaced by the manufacturer, its service agent or similarly qualified persons in order to avoid a hazard.
- Page 10 Battery pack • Fully charge the battery pack before first use. • Recharge the battery pack immediately when the power output starts to slow. DO NOT CONTINUE TO USE THE PRODUCT WHEN THE BATTERY LEVEL IS LOW. • To prevent serious damage to the battery, charge in temperatures above 5ºC or below 45ºC.
- Page 11 • When the battery pack is not in use keep it away from other metal objects, such as paperclips, coins, keys, nails, screws or other small metal objects that can make a connection from one terminal to another. • Do not dismantle, open or shred cells or battery pack.
-
Page 12: Intended Use
• Every deep discharge cycle decreases the capacity of the battery pack. To prolong battery life, it is recommended that you charge the battery every six months, within extended periods of time when the product is not in use. Servicing •... -
Page 13: Warning Symbols
WARNING SYMBOLS Safety symbols The purpose of safety symbols is to attract your attention to any possible dangers. The safety symbols and their explanations require your careful attention and full understanding. The symbol warnings do not, by themselves, eliminate any danger. The instructions and warnings they give are no substitute for proper accident prevention measures. - Page 14 Keep bystanders away. Objects thrown by the product could hit the user or other bystanders. Always ensure that other people and pets remain at a safe distance from the product when it is in operation. Beware of sharp blades. Blades continue to rotate after the motor is switched off.
- Page 15 Warning symbols on the battery pack To reduce the risk of injury, the user must read this instruction manual carefully. Do not throw into water. Do not throw on fire. Do not subject the battery to strong sunlight over long periods of time.
- Page 16 Warning symbols on the charger To reduce the risk of injury, the user must read this instruction manual carefully. Indoor use only. Class II equiment. T/2A Fuse T 2A time lag fuse with rated current of 2A. Pole orientation. WEEE symbol. Waste electrical products should not be disposed of with household waste.
-
Page 17: In The Box
IN THE BOX Parts 1. Upper handle 7. Carry handle 2. Switch box 8. Rotating knobs x 2 3. Lock-off button 9. Start lever 4. Cable clips x 2 10. Battery pack 5. Grass bag 11. Charger 6. Battery pack locating tank 12. -
Page 18: Assembling The Lawn Mower
ASSEMBLING THE LAWN MOWER Assemble the lower brace 1. Insert the lower brace into the slot on the mower deck. 2. Use two installation screws to fix the lower brace. Attach the top handle to lower brace Mount the top handle to the lower brace using the two rotating knobs. - Page 19 Fitting the cable clip Ensure that the cable clips supplied are used to fix the cable to the lower brace. Mounting the grass catcher 1. Fit the upper part onto the lower part by fxing all the outer clips correctly.
- Page 20 2. Fit the handle onto the top of the grass catcher so that it clicks into place. 3. Lift the safety flap, and hang the grass box on the hook. Fold the safety flap onto the grass box.
- Page 21 REMOVING AND INSERTING THE BATTERY PACK Insert the battery pack Push the battery pack into the tank until you hear a click. This means the battery pack has been locked in position; close the battery pack tank cover. NOTICE: Make sure that the latch on the mower snaps into place and that the battery pack is secured to the mower before starting operation.
- Page 22 NOTE: Safety key This lawn mower is fitted with a safety key, this prevents the accidental start up of your cordless lawn mower. The safety key has been designed to totally disable the lawn mower when it is removed. CHECKING THE BATTERY CAPACITY Push the power indicator button, and the remaining percentage of battery capacity will show on screen.
- Page 23 CHARGING PROCEDURE 1. Plug the charger into an appropriate power supply. When connected, there will be a green LED light. 2. Insert the charger plug (12) into the charging hole (A1) in battery pack (10), make sure the plug is fully in position. The light on the charger will turn red and the three green LED lights on the battery pack will flash alternately.
- Page 24 3. Use the charger in normal room temperatures whenever possible. To prevent overheating, do not cover the charger and do not charge battery packs in direct sunlight or near heat sources. 4. If the battery pack does not charge properly: (1) Check the main socket by plugging in a lamp or other appliance.
-
Page 25: Operating The Lawn Mower
WARNING! Never attempt to open the battery pack for any reason. If the plastic housing of the battery pack breaks or cracks, return to a service centre for recycling; do not put it into further use. OPERATING THE LAWN MOWER NOTE: This battery pack has been shipped in a low charge condition. - Page 26 Switching on/off 1. Ensure the start lever is released. Insert the safety key. 2. To switch on, press the lock-off button, and squeeze the start lever towards the handle,release the lock-off button 3. To switch off, release the start lever. NOTE: Do not continue to press the start button after an automatic shut-off of the machine, as this will result in battery damage.
- Page 27 Working with the Lawn mower Regular mowing encourages increased foliation of the grass and kills off weeds at the same time. Therefore, not only does each mowing increase the density of the lawn, it also produces an evenly resilient lawn, The first cut is to be made in around April, at a growth height of 70~80mm.
- Page 28 Function of full indicator If the grass bag is empty or it is not filled with grass, the grass full indicator will be open. If the grass bag is filled with grass the grass full indicator will be closed. Emptying the grass bag When the grass bag indicator closes, this is a sign that you should empty the grass bag.
-
Page 29: Maintenance And Storage
MAINTENANCE AND STORAGE WARNING! Before performing any maintenance or cleaning work, always ensure that the battery pack/safety key have been removed. Wait until the blade has stopped completely and the machine has cooled down. Cleaning the product Use a soft brush to remove accumulated dust and debris. Wear safety glasses to protect your eyes whilst cleaning. - Page 30 WARNING: Replace or re-sharpen the mower blade at the end of the season. Always have the mower blade re-sharpened or replaced by a recommended service centre. Unbalanced blades will cause the lawn mower to vibrate violently, which can increase the risk of accidents occurring.
- Page 31 As the colours of the wire in the mains lead of this product may not correspond with the coloured markings identifying the terminals in your plug, proceed as follows: The blue wire must be connected to the terminal marked N or coloured black.
-
Page 32: Troubleshooting
TROUBLESHOOTING WARNING: Before performing any repair work, ensure that the battery pack has been removed. WARNING: Always wear heavy-duty gloves when adjusting or cleaning, especially when handling sharp objects. Fault/malfunction Cause Remedy Safety key is not Insert safety key inserted Battery is not Remove the battery correctly inserted... - Page 33 Cutting height is Adjust cutting too low height The lawn / grass Allow the lawn to is wet Grass bag is not Underside of the Clean the underside filled sufficiently mower deck is of the mower deck clogged Cutting blade Replace cutting is worn or blade...
-
Page 34: Technical Data
TECHNICAL DATA Model no. LM 32H Voltage 18V d.c. Battery type Lithium-ion No-load speed 3500/min Cutting width 320mm Cutting height 25-65mm Capacity of grass bag 30 litres Weight 9.5kg Battery pack Model ZDBP18014001 Battery capacity Charging time 2.5hr Battery charger Model... -
Page 35: Recycling And Disposal
The declared vibration value has been measured in accordance with a standard test method (according to EN 60335-2-77) and may be used for comparing one product with another. The declared vibration value may also be used in a preliminary assessment of exposure. RECYCLING AND DISPOSAL Waste electrical products should not be disposed with household waste. -
Page 36: Warranty
WARRANTY This product is covered by a 1 year warranty. The warranty covers any manufacturing defect in materials, workmanship and finish. Any claim under this warranty must be made by going to your nearest Homebase store, taking your proof of purchase with you, and claims must be made within 1 year of the date of purchase.