Endress+Hauser Levelflex FMP56 Brief Operating Instructions
Profibus pa guided wave radar
Hide thumbs
Also See for Levelflex FMP56:
- Operating instructions manual (218 pages) ,
- Technical information (102 pages) ,
- Brief operating instructions (60 pages)
Table of Contents
Advertisement
Quick Links
KA01073F/00/EN/15.17
71385726
Products
Brief Operating Instructions
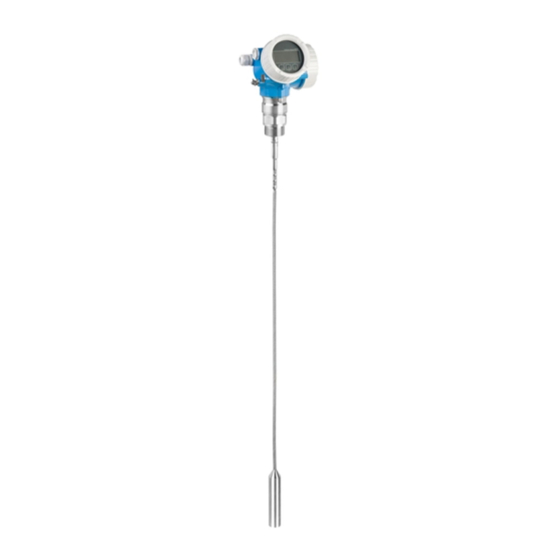
Levelflex FMP56, FMP57
PROFIBUS PA
Guided wave radar
These Instructions are Brief Operating Instructions; they are
not a substitute for the Operating Instructions pertaining to
the device.
Detailed information about the device can be found in the
Operating Instructions and the other documentation:
Available for all device versions via:
– Internet:
www.endress.com/deviceviewer
– Smart phone/tablet: Endress+Hauser Operations App
Solutions
Services
Advertisement
Table of Contents

Related Manuals for Endress+Hauser Levelflex FMP56


Summary of Contents for Endress+Hauser Levelflex FMP56
- Page 1 Operating Instructions pertaining to the device. Detailed information about the device can be found in the Operating Instructions and the other documentation: Available for all device versions via: – Internet: www.endress.com/deviceviewer – Smart phone/tablet: Endress+Hauser Operations App...
- Page 2 Levelflex FMP56, FMP57 PROFIBUS PA Order code: XXXXX-XXXXXX Ser. no.: XXXXXXXXXXXX Ext. ord. cd.: XXX.XXXX.XX Serial number www.endress.com/deviceviewer Endress+Hauser Operations App A0023555 Endress+Hauser...
-
Page 3: Table Of Contents
Levelflex FMP56, FMP57 PROFIBUS PA Table of contents Table of contents Important document information ..........4 Symbols . -
Page 4: Important Document Information
Important document information Levelflex FMP56, FMP57 PROFIBUS PA Important document information Symbols 1.1.1 Safety symbols Symbol Meaning DANGER! This symbol alerts you to a dangerous situation. Failure to avoid this situation will result in DANGER serious or fatal injury. WARNING! This symbol alerts you to a dangerous situation. - Page 5 Levelflex FMP56, FMP57 PROFIBUS PA Important document information 1.1.4 Symbols for certain types of information Symbol Meaning Symbol Meaning Permitted Preferred Procedures, processes or actions that Procedures, processes or actions that are permitted. are preferred. Forbidden Procedures, processes or actions that Indicates additional information.
-
Page 6: Basic Safety Instructions
The manufacturer is not liable for damage caused by improper or non-designated use. Verification for borderline cases: ‣ For special measured materials and cleaning agents, Endress+Hauser is glad to provide assistance in verifying the corrosion resistance of wetted materials, but does not accept any warranty or liability. -
Page 7: Workplace Safety
The measuring system meets the legal requirements of the applicable EC guidelines. These are listed in the corresponding EC Declaration of Conformity together with the standards applied. Endress+Hauser confirms successful testing of the device by affixing to it the CE mark. Endress+Hauser... -
Page 8: Product Description
The measuring system meets the legal requirements of the applicable EAC guidelines. These are listed in the corresponding EAC Declaration of Conformity together with the standards applied. Endress+Hauser confirms successful testing of the device by affixing to it the EAC mark. Product description Product design 3.1.1... -
Page 9: Incoming Acceptance And Product Identification
): All information about the measuring device is displayed. • Enter the serial number from the nameplates into the Endress+Hauser Operations App or scan the 2-D matrix code (QR code) on the nameplate with the Endress+Hauser Operations App: all the information for the measuring device is displayed. - Page 10 Incoming acceptance and product identification Levelflex FMP56, FMP57 PROFIBUS PA 4.2.1 Nameplate Order code: Ser. no.: Ext. ord. cd.: Order code: Ser. no.: Ext. ord. cd.: A0021952 2 Example of a nameplate Order code Serial number (Ser. no.) Extended order code (Ext. ord. cd.)
-
Page 11: Storage, Transport
Levelflex FMP56, FMP57 PROFIBUS PA Storage, Transport Storage, Transport Storage conditions • Permitted storage temperature: –40 to +80 °C (–40 to +176 °F) • Use the original packaging. Transport product to the measuring point WARNING Housing or probe may be damaged or break away. -
Page 12: Mounting
Mounting Levelflex FMP56, FMP57 PROFIBUS PA Mounting Mounting requirements 6.1.1 Suitable mounting position A0021468 3 Mounting requirements for Levelflex Endress+Hauser... - Page 13 Levelflex FMP56, FMP57 PROFIBUS PA Mounting Mounting distances • Distance (A) between wall and rod or rope probe: – for smooth metallic walls: > 50 mm (2 in) – for plastic walls: > 300 mm (12 in) to metallic parts outside the vessel –...
- Page 14 Mounting Levelflex FMP56, FMP57 PROFIBUS PA 6.1.2 Securing the probe Securing rope probes A0012609 Sag of the rope: ≥ 1 cm per 1m of the probe length (0.12 inch per 1 ft of the probe length) Reliably grounded end of probe...
- Page 15 Levelflex FMP56, FMP57 PROFIBUS PA Mounting Securing rod probes • For WHG approvals: For probe lengths ≥ 3 m (10 ft) a support is required. • In general, rod probes must be supported if there is a horizontal flow (e.g. from an agitator) or in the case of strong vibrations.
- Page 16 Mounting Levelflex FMP56, FMP57 PROFIBUS PA NOTICE Poor grounding of the end of probe may cause measuring errors. ‣ Apply a narrow sleeve which has good electrical contact to the probe. NOTICE Welding may damage the main electronics module. ‣...
-
Page 17: Mounting The Device
Levelflex FMP56, FMP57 PROFIBUS PA Mounting Mounting the device 6.2.1 Required mounting tools • For mounting thread 3/4": Hexagonal wrench 36 mm • For mounting thread 1-1/2": Hexagonal wrench 55 mm • To shorten rod or coax probes: Saw • To shorten rope probes: –... - Page 18 Mounting Levelflex FMP56, FMP57 PROFIBUS PA Rope material Torque for set screws 4 mm (0.16 in) 40 mm (1.6 in) 3 mm 5 Nm (3.69 lbf ft) 6 mm (0.24 in) 55 mm (2.2 in) 4 mm 15 Nm (11.06 lbf ft) PA >...
- Page 19 Levelflex FMP56, FMP57 PROFIBUS PA Mounting A0014241 Field for the new probe length For documentation purposes, enter the new probe length into the Quick Setup which can be found in the electronics housing behind the display module. 6.2.3 Mounting the device...
- Page 20 Mounting Levelflex FMP56, FMP57 PROFIBUS PA Devices with mounting thread are screwed into a welding boss or a flange and are usually also secured with these. • Tighten with the hexagonal nut only: – Thread 3/4": Hexagonal wrench 36 mm –...
- Page 21 Levelflex FMP56, FMP57 PROFIBUS PA Mounting • Uncoil rope and lower it slowly and carefully into the vessel. • Do not kink the rope. • Avoid any backlash, since this might damage the probe or the vessel fittings. Mounting rope probes in a partially full silo It is not always possible to empty a silo which is already in operation.
- Page 22 Mounting Levelflex FMP56, FMP57 PROFIBUS PA Mounting the electronics housing ø42...60 (1.65...2.36) 122 (4.8) 127...140 (5...5.51) 161 (6.34) 162...175 (6.38...6.89) A0014793 4 Mounting the electronics housing using the mounting bracket; dimensions: mm (in) Wall mounting Pipe mounting Connecting the cable...
- Page 23 Levelflex FMP56, FMP57 PROFIBUS PA Mounting 6 Nm 6 Nm (4.42 lbf ft) (4.42 lbf ft) = 100 (4) = 100 (4) 6 Nm 6 Nm (4.42 lbf ft) (4.42 lbf ft) A0014794 5 Connecting the cable. There are the following possibilities:...
- Page 24 Mounting Levelflex FMP56, FMP57 PROFIBUS PA Unscrew the securing screw using an open-ended wrench. Rotate the housing in the desired direction. Tighten the securing screw (1.5 Nm for plastic housing; 2.5 Nm for aluminum or stainless steel housing). 6.2.6 Turning the display module...
-
Page 25: Post-Installation Check
Levelflex FMP56, FMP57 PROFIBUS PA Mounting Post-installation check Is the device undamaged (visual inspection)? Does the device conform to the measuring point specifications? For example: • Process temperature • Process pressure (refer to the chapter on "Material load curves" of the "Technical Information"... -
Page 26: Electrical Connection
Electrical connection Levelflex FMP56, FMP57 PROFIBUS PA Electrical connection Connection conditions 7.1.1 Terminal assignment PROFIBUS PA / FOUNDATION Fieldbus A0011341 6 Terminal assignment PROFIBUS PA / FOUNDATION Fieldbus Without integrated overvoltage protection With integrated overvoltage protection Cable screen: Observe cable specifications... - Page 27 Levelflex FMP56, FMP57 PROFIBUS PA Electrical connection Terminal for potential equalization line Cable entries Overvoltage protection module Endress+Hauser...
- Page 28 Electrical connection Levelflex FMP56, FMP57 PROFIBUS PA 7.1.2 Device plug connectors For the versions with fieldbus plug connector (M12 or 7/8"), the signal line can be connected without opening the housing. Pin assignment of the M12 plug connector Meaning Signal +...
- Page 29 Levelflex FMP56, FMP57 PROFIBUS PA Electrical connection 7.1.3 Power supply PROFIBUS PA, FOUNDATION Fieldbus "Power supply; Output" "Approval" Terminal voltage E: 2-wire; FOUNDATION Fieldbus, switch output • Non-Ex 9 to 32 V G: 2-wire; PROFIBUS PA, switch output • Ex nA •...
-
Page 30: Connecting The Measuring Device
Electrical connection Levelflex FMP56, FMP57 PROFIBUS PA External overvoltage protection module HAW562 or HAW569 from Endress+Hauser are suited as external overvoltage protection. For detailed information please refer to the following documents: • HAW562: TI01012K • HAW569: TI01013K Connecting the measuring device... - Page 31 Levelflex FMP56, FMP57 PROFIBUS PA Electrical connection Loosen the screw of the securing clamp on the connection compartment cover and turn the securing clamp 90° counterclockwise. Unscrew the connection compartment cover. Push the cable through the cable entry . To ensure tight sealing, do not remove the sealing ring from the cable entry.
-
Page 32: Post-Connection Check
Electrical connection Levelflex FMP56, FMP57 PROFIBUS PA ≤ 3 (0.12) A0013661 8 Dimensions: mm (in) To remove cables from the terminal: Using a flat-blade screwdriver ≤ 3 mm, press down on the slot between the two terminal holes while simultaneously pulling the cable end out of the terminal. -
Page 33: Integration Into A Profibus Network
Levelflex FMP56, FMP57 PROFIBUS PA Integration into a PROFIBUS network Integration into a PROFIBUS network Overview of the device database files (GSD) Manufacturer ID 17 (0x11) Ident number 0x1558 Profile version 3.02 GSD file Information and files under: • www.endress.com GSD file version •... - Page 34 Integration into a PROFIBUS network Levelflex FMP56, FMP57 PROFIBUS PA 2 + 8 = 10 A0015902 10 Example of hardware addressing: switch 8 is in position "OFF"; switches 1 to 7 define the address. 8.2.2 Software addressing Set switch 8 to "ON".
-
Page 35: Commissioning Via Wizard
Levelflex FMP56, FMP57 PROFIBUS PA Commissioning via wizard Commissioning via wizard A wizard guiding the user through the initial setup is available in FieldCare and DeviceCare Connect the device to FieldCare or DeviceCare (for details refer to the "Operating options" chapter of the Operating Instructions). -
Page 36: Commissioning (Via Operating Menu)
Commissioning (via operating menu) Levelflex FMP56, FMP57 PROFIBUS PA Commissioning (via operating menu) 10.1 Display and operating module 10.1.1 Display appearance User ABC_ DEFG HIJK LMNO PQRS TUVW A0012635 12 Appearance of the display and operation module for on-site operation Measured value display (1 value max. - Page 37 Levelflex FMP56, FMP57 PROFIBUS PA Commissioning (via operating menu) 10.1.2 Operating elements Meaning Minus key For menu, submenu Moves the selection bar upwards in a picklist. A0018330 For text and numeric editor In the input mask, moves the selection bar to the left (backwards).
- Page 38 Commissioning (via operating menu) Levelflex FMP56, FMP57 PROFIBUS PA 10.1.3 Opening the context menu Using the context menu, the user can call up the following menus quickly and directly from the operational display: • Setup • Conf. backup disp. • Env.curve •...
-
Page 39: Operating Menu
Levelflex FMP56, FMP57 PROFIBUS PA Commissioning (via operating menu) 10.2 Operating menu Parameter/Submenu Meaning Description Language Defines the operating language of the on-site display. Setup When appropriate values have been assigned toall setup parameters, the measured should be completely configured in a standard application. -
Page 40: Unlock The Device
Commissioning (via operating menu) Levelflex FMP56, FMP57 PROFIBUS PA 10.3 Unlock the device If the device has been locked, it must be unlocked before the measurement can be configured. For details refer to the Operating Instructions of the device: BA01009F (FMP56/FMP57, PROFIBUS PA) 10.4... -
Page 41: Configuration Of A Level Measurement
Levelflex FMP56, FMP57 PROFIBUS PA Commissioning (via operating menu) 10.5 Configuration of a level measurement 20 mA 100% 4 mA A0012838 14 Configuration parameters for level measurements in solids LN = Length of probe R = Reference point of the measurement... -
Page 42: User-Specific Applications
Commissioning (via operating menu) Levelflex FMP56, FMP57 PROFIBUS PA Setup → Level Displays the measured level L. Setup → Distance Displays the distance D between the reference point R and the level L. Setup → Signal quality Displays the signal quality of the level echo. - Page 44 *71385726* 71385726 www.addresses.endress.com...