Table of Contents
Advertisement
Advertisement
Table of Contents

Related Manuals for Nanoxia DEEP SILENCE 2


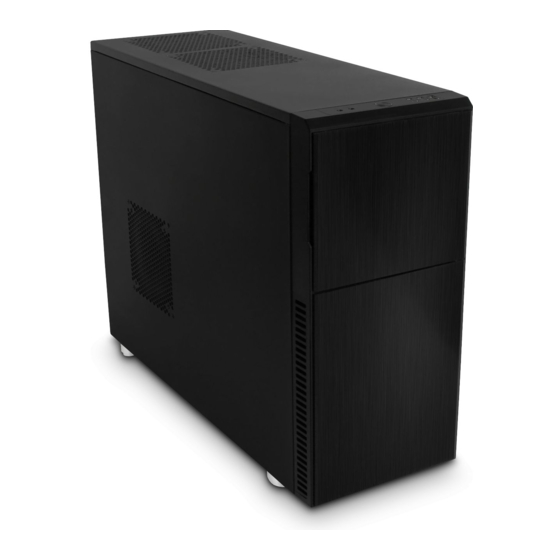
Summary of Contents for Nanoxia DEEP SILENCE 2
-
Page 2: Table Of Contents
I. Introduction _______________________________________02 • Specifications ____________________________________02 • Accessories ______________________________________02 • Features _________________________________________03 II. Installation Instructions ______________________________06 1. Installation of the motherboard _____________________06 2. Installation of the power supply _____________________07 3. Installation of external drives ________________________08 3.1 Optical drives _________________________________08 3.2 Utilising the external 3.5 inch bay ________________09 4. -
Page 3: Introduction
I. Introducti on Congratulati ons on the purchase of your new Nanoxia Deep Silence 2 PC tower. We are confi - dent that you will be delighted by your new PC case for many years to come. Nanoxia’s Deep Silence series have been designed and developed by an experienced team of developers in Germany. -
Page 4: Features
2-channel fan control for up to six fans Noise Insulati on The Nanoxia Deep Silence 2 has been developed with the aim of off er the buyer a low-noise case, while at the same ti me allow for extremely low system temperatures. The sound insulati -... - Page 5 PSU. This reduces any vibrations caused by the PSU being transmitted onto the case. The whole concept of sound proofing of the Deep Silence 2 meets the highest expectations. Ventilation System The Nanoxia Deep Silence 2 has an integrated ventilation system consisting of three standard Deep Silence fans and a built-in 2-channel fan controller for up to six fans.
- Page 6 2 x 120/140 mm fans Watercooling-ready The Nanoxia Deep Silence 2 can be confi gured for use of water cooling systems. The moun- ti ng bracket between motherboard and hard drive cage is designed to make opti mal use of the above-average depth of the Nanoxia Deep Silence 2 case for water cooling systems.
-
Page 7: Installation Instructions
Installation Instructions 1. Installing the Motherboard In order to ensure an easy installation of your motherboard, we suggest the following procedure: 1. Please consult the following charts to find your motherboard form factor: E-ATX Mainboard ATX Mainboard Micro-ATX Mainboard Mini-ITX Mainboard 2. -
Page 8: Installation Of The Power Supply
4. Next you should mount the CPU cooler - for very large CPU coolers, the attachment of the EPS extension cable after installation can be difficult. 5. Now place the motherboard gently inside the case and lead the EPS extension cable through the opening provided in the top left of the mainboard tray. -
Page 9: Installation Of External Drives
3. Installation of external drives 3.1 Optical drives To install the optical drives, please remove both side panels. The installation of optical drives is tool-free. Then loosen the lock on both sides by drag- ging the black slider backwards (1). Then slide the drive into the desired positi- Lock the holder by pushing the slider back to its original position (2). -
Page 10: Utilising The External 3.5 Inch Bay
3.2 Utilizing the external 3.5 inch bay If you for example desire to place a 3.5 inch card reader, you can use the internal adapter for this purpose. Before you take out the internal adapter, please remove the 3.5 inch steel cover as shown on the picture. -
Page 11: Installation Of Hard Disk Drives
4. Installation of hard drives Install the 2.5 or 3.5 inch hard drives in the illustrated mounting frames. In order to extract the frame, squeeze the protruding brackets and pull the slide out gently. To install a hard drive into a bracket insert the disk so that the connectors point to the back and attach the hard drive using the screws provided. -
Page 12: Removing The Front Panel
6. Fan assembly and cleaning of the dust filters The air intake openings in the front and at the bottom of the Deep Silence 2 are equipped with easy to clean dust filters. We recommend that you clean them on a regular basis. - Page 13 Opti onal case fans: Note: Additi onal case fans in the side panel and the bott om of the Deep Silence 2 should be mounted so that cooler air is introduced into the case. If you install case fans in the mounti ng bracket, those should support the movement of air from front to back.
- Page 14 Additional fans in the top cover: If you want to install more fans at the top of the case, please remove the Nanoxia Vent- Cover first by unscrewing the screws on the outside of the case. Then hold the fan from the inside and secu- re it to the top by fastening the screws from the outside.
-
Page 15: Connecting The Fans To The 2-Channel Fan Controller
The dust filter at the bottom: The dust filter at the bottom can be pulled out for easy cleaning. 7. Connecting the fans to the 2-channel fan controller The fan controller is powered by a 4-pin Molex connector that is connected directly to the power supply. -
Page 16: Operation Of The 2-Channel Fan Controller
8. Operation of the 2-channel fan controller The sliders of the fan control can be found behind the upper front door. The left slider operates the fans of the first channel (A1, A2 and A3); the right slider controls the fans of the second channel (B1, B2 and B3). -
Page 17: Installation Of A Water Cooling
10. Installati on of a water cooling The Nanoxia Deep Silence 2 is equipped with a special mounti ng bracket that is ideally pre- pared to receive a 120/240 mm radiator. It makes it possible to mount a radiator and can be equipped with up to four fans for maximum heat-dissipati on. -
Page 18: Connecting The Front Connectors With The Motherboard
11. Connecting the front connectors with the motherboard 11.1 USB 2.0 Diagram 11 A shows the standard pin assignment of the USB cable plug. The pins are assigned in a way to fit on current motherboards as shown in diagram 11B. -
Page 19: Usb 3.0
11.2 USB 3.0 Diagram 11D shows the typical pin assignment of the internal 19-Pin USB 3.0. The pins are assigned in a way to fit on a current motherboards (diagram 11E). Referring to the mother- board manual, please check that the internal 19-pin USB 3.0 port is identical to the one shown diagram 11E. - Page 20 11.4 AC 97 Diagram 11G shows the standard pin assignment of the AC 97 cable plug. The pins are assig- ned in a way to fit on a current motherboards as shown in diagram 11H. Referring to your motherboard manual, please check if that the AC 97 port is identical to the typical shown in diagram 11H.
-
Page 21: Support
For general inquiries, comments, suggestions and the like please refer to: info@nanoxia-world.com We are sure that you will be satisfied with Nanoxia Deep Silence 2 for many years to come, so please enjoy your new PC case. Your Nanoxia Support-Team...