Table of Contents
Advertisement
Quick Links
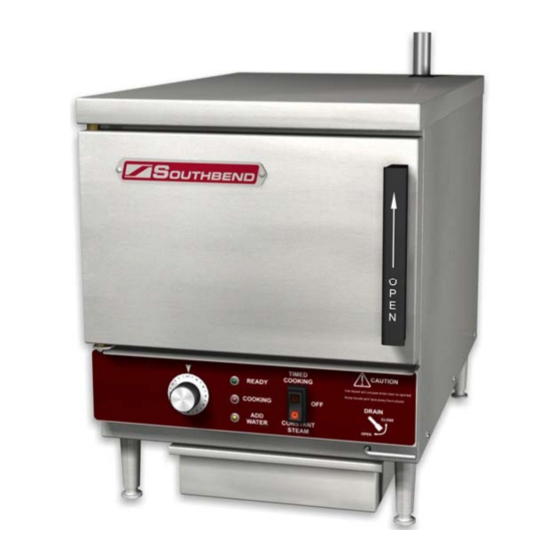
OPERATOR'S MANUAL
Improper installation, adjustment, alteration, service or maintenance can cause property damage,
injury or death. Read the installation, operating and maintenance instructions thoroughly before
MANUAL 1195733 REV0 (11/22/2011)
Electric, Counter Steamer
EZ18-3
!
WARNING
installing or servicing this equipment.
1100 Old Honeycutt Road, Fuquay-Varina, NC 27526
www.southbendnc.com
IMPORTANT FOR FUTURE REFERENCE
Please complete this information and retain this
manual for the life of the equipment:
Model #:
Serial #:
Date Purchased:
EZ18-5
HEAVY DUTY STEAM
Advertisement
Table of Contents

Related Manuals for Southbend EZ18-3


Summary of Contents for Southbend EZ18-3
- Page 1 Model #: Serial #: Date Purchased: OPERATOR’S MANUAL Electric, Counter Steamer EZ18-3 EZ18-5 WARNING Improper installation, adjustment, alteration, service or maintenance can cause property damage, injury or death. Read the installation, operating and maintenance instructions thoroughly before installing or servicing this equipment.
-
Page 2: Table Of Contents
INSTALLATION AND OPERATION MANUAL, PAN STEAMERS, MODELS EZ18-3, EZ18-5 TABLE OF CONTENTS DESCRIPTION PAGE 1.0 SERVICE CONNECTIONS ..........4 2.0 INTRODUCTION . -
Page 3: Service Connections
INSTALLATION AND OPERATION MANUAL, PAN STEAMERS, MODELS EZ18-3, EZ18-5 1.0 SERVICE CONNECTIONS EZ18-3 EZ18-5 EZ18-3 EZ18-5 MANUAL 1195733 REV0 (11/22/2011) HEAVY DUTY STEAM... -
Page 4: Introduction
2.0 INTRODUCTION DESCRIPTION The model EZ18-3 steamer comes equipped with a standard 9 kW heating block that can be reduced to 6 kW on single phase supplies. Model EZ18-5 steamer comes equipped with a standard 15 kW heating block that can be reduced to 10 kW on single phase supplies. -
Page 5: Installation
INSTALLATION AND OPERATION MANUAL, PAN STEAMERS, MODELS EZ18-3, EZ18-5 3.0 INSTALLATION UNPACKING Immediately after unpacking the steamer, check for possible shipping damage. If the steamer is found to be damaged after unpacking, save the packaging materials and contact the carrier within 15 days of delivery. - Page 6 INSTALLATION AND OPERATION MANUAL, PAN STEAMERS, MODELS EZ18-3, EZ18-5 3.0 INSTALLATION (Continued) PLUMBING CONNECTIONS No plumbing connections are required as steamer is filled manually. DRAIN CONNECTIONS No drain connection is required. WATER CONDITION For best results Crown recommends that the water supply meet the following specification: Hardness: Less than 2 grains or 35 ppm.
-
Page 7: Performance Check
INSTALLATION AND OPERATION MANUAL, PAN STEAMERS, MODELS EZ18-3, EZ18-5 4.0 PERFORMANCE CHECK WARNING: The steamer and its parts are hot. Use care when operating, cleaning or servicing the steamer. The cooking compartment contains live steam and hot water. Stay clear while opening the door. -
Page 8: Operating Instructions
INSTALLATION AND OPERATION MANUAL, PAN STEAMERS, MODELS EZ18-3, EZ18-5 5.0 OPERATING INSTRUCTIONS CONTROLS Door Handle Move handle up to open door to cooking cavity. Ready Pilot Light When lit, indicates the steamer cavity is above 150° F (65° C) and is ready for the cooking cycle. - Page 9 INSTALLATION AND OPERATION MANUAL, PAN STEAMERS, MODELS EZ18-3, EZ18-5 5.0 OPERATING INSTRUCTIONS (Continued) COOKING CAUTION: Live steam and accumulated hot water in the compartment may be released when the door is opened. Close drain valve. Remove the deflector plate to expose the bottom of the cavity.
- Page 10 INSTALLATION AND OPERATION MANUAL, PAN STEAMERS, MODELS EZ18-3, EZ18-5 5.0 OPERATING INSTRUCTIONS (Continued) SHUTDOWN CAUTION: When the unit is not in use, leave the cooking compartment doors ajar to prolong the life of the door gasket. Drain the steamer after each day’s use.
- Page 11 INSTALLATION AND OPERATION MANUAL, PAN STEAMERS, MODELS EZ18-3, EZ18-5 5.0 OPERATING INSTRUCTIONS (Continued) Inspect the drain opening to assure there are no obstructions. Replace the pan supports and deflector in compartment and leave door ajar. WARNING: When this appliance is installed with casters and is...
-
Page 12: Cooking Guidelines
INSTALLATION AND OPERATION MANUAL, PAN STEAMERS, MODELS EZ18-3, EZ18-5 6.0 COOKING GUIDELINES Frozen vegetables should always be cooked in perforated 12" x 20" x 2-1/2 “ (1/1 65 mm) pans, 7-1/2 lbs. (3.4 kg) maximum per pan. Frozen entrees should be underlined with a perforated pan for best results. If they are defrosted first, the heating time will be decreased. - Page 13 INSTALLATION AND OPERATION MANUAL, PAN STEAMERS, MODELS EZ18-3, EZ18-5 6.0 COOKING GUIDELINES (Continued) 15. Eggs may be cooked out of the shell if they are to be chopped which eliminates peeling after steaming. 16. The steam cooker can be opened during the cooking period to add or remove items.
- Page 14 INSTALLATION AND OPERATION MANUAL, PAN STEAMERS, MODELS EZ18-3, EZ18-5 6.0 COOKING GUIDELINES (Continued) DEPTH OF PAN NUMBER OF PANS EZ18-3 EZ18-5 1" 2 ½" 4" 6" MANUAL 1195733 REV0 (11/22/2011) HEAVY DUTY STEAM...
-
Page 15: Preventive Maintenance
INSTALLATION AND OPERATION MANUAL, PAN STEAMERS, MODELS EZ18-3, EZ18-5 7.0 PREVENTIVE MAINTENANCE A good preventive maintenance program begins with the daily cleaning procedure. Additional preventive maintenance operations are presented in this section. In establishments that employ full-time maintenance personnel, the tasks described can be assigned to them. For other installations, tasks requiring mechanical or electrical experience should be performed by an authorized service agency. - Page 16 INSTALLATION AND OPERATION MANUAL, PAN STEAMERS, MODELS EZ18-3, EZ18-5 7.0 PREVENTIVE MAINTENANCE (Continued) CLEANING Weekly, or more often if necessary: Clean exterior with a damp cloth and polish with a soft dry cloth. Use a non-abrasive cleaner to remove discolourations.
- Page 17 INSTALLATION AND OPERATION MANUAL, PAN STEAMERS, MODELS EZ18-3, EZ18-5 7.0 PREVENTIVE MAINTENANCE (Continued) Set the power switch to “TIMED COOKING” and set the timer to 30 minutes. At the end of the 30 minute cook cycle, turn power switch “OFF” and drain the contents of the cavity.
-
Page 18: Troubleshooting
INSTALLATION AND OPERATION MANUAL, PAN STEAMERS, MODELS EZ18-3, EZ18-5 8.0 TROUBLESHOOTING GENERAL PROBLEM PROBABLE CAUSE REMEDY 1. C a. Main power circuit breaker tripped. Locate external circuit breaker for incoming OOKING INDICATOR power and place in ON position. LIGHT FAILS TO LIGHT... - Page 19 INSTALLATION AND OPERATION MANUAL, PAN STEAMERS, MODELS EZ18-3, EZ18-5 8.0 TROUBLESHOOTING (Continued) COMPONENT TESTING 60-MINUTE TIMER Timer Contacts Defective timer contacts will result in failure of cooker compartment to operate. When this occurs, remove the side panel and proceed as follows: 1.
- Page 20 INSTALLATION AND OPERATION MANUAL, PAN STEAMERS, MODELS EZ18-3, EZ18-5 8.0 TROUBLESHOOTING (Continued) 3. Set timer dial (any setting beyond “0 - Minute”). If operation is correct, the motor will turn the dial toward “0 - Minute”. If the motor fails to operate, it is defective and the entire timer must be replaced.
- Page 21 INSTALLATION AND OPERATION MANUAL, PAN STEAMERS, MODELS EZ18-3, EZ18-5 8.0 TROUBLESHOOTING (Continued) Wiring WARNING: Disconnect the power supply to the appliance before cleaning or servicing. Using an ohmmeter, wiring continuity between the connections shown on the wiring diagram is readily verified. This is best done in stages, removing only those wires required for each continuity check.
- Page 22 INSTALLATION AND OPERATION MANUAL, PAN STEAMERS, MODELS EZ18-3, EZ18-5 8.0 TROUBLESHOOTING (Continued) Exterior Panel Removal WARNING: To prevent hazard in servicing the cooker, be certain that the electrical disconnect circuit breaker for the steamer is OFF before removing side panels.
-
Page 23: Wire Diagrams
INSTALLATION AND OPERATION MANUAL, PAN STEAMERS, MODELS EZ18-3, EZ18-5 9.0 WIRE DIAGRAMS EZ18 MANUAL 1195733 REV0 (11/22/2011) HEAVY DUTY STEAM... - Page 24 INSTALLATION AND OPERATION MANUAL, PAN STEAMERS, MODELS EZ18-3, EZ18-5 EZ18 MANUAL 1195733 REV0 (11/22/2011) HEAVY DUTY STEAM...
- Page 25 INSTALLATION AND OPERATION MANUAL, PAN STEAMERS, MODELS EZ18-3, EZ18-5 EZ18 MANUAL 1195733 REV0 (11/22/2011) HEAVY DUTY STEAM...