Toro LT2240 Installation Instructions Manual
Hide thumbs
Also See for LT2240:
- Installation instructions manual (28 pages) ,
- Operator's manual (68 pages)
Table of Contents
Advertisement
Quick Links
Road Light Kit
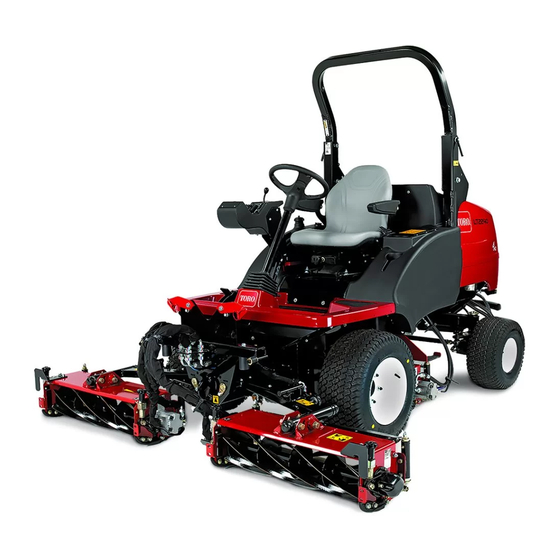
LT2240 Compact, LT3440 4-Wheel Drive Triple Reel, or LT-F3000
Triple Flail Mower
Model No. 02850—Serial No. 400000000 and Up
This product complies with all relevant European directives; for details, please see the Declaration of
Incorporation (DOI) at the back of this publication.
Important:
The wiring system for this machine is designed for use with LED lights only. Use
Toro-supplied lights only.
Safety
Safety and Instructional
Decals
Safety decals and instructions are
easily visible to the operator and are
located near any area of potential
danger. Replace any decal that is
damaged or missing.
134-5457
1. Installation location
© 2021—The Toro® Company
8111 Lyndale Avenue South
Bloomington, MN 55420
decal134-5457
Register at www.Toro.com.
Form No. 3445-510 Rev B
Installation Instructions
*3445-510*
Original Instructions (EN)
Printed in the UK
All Rights Reserved
Advertisement
Table of Contents

Related Manuals for Toro LT2240


Summary of Contents for Toro LT2240
- Page 1 Form No. 3445-510 Rev B Road Light Kit LT2240 Compact, LT3440 4-Wheel Drive Triple Reel, or LT-F3000 Triple Flail Mower Model No. 02850—Serial No. 400000000 and Up Installation Instructions This product complies with all relevant European directives; for details, please see the Declaration of Incorporation (DOI) at the back of this publication.
-
Page 2: Installation
Installation Loose Parts Use the chart below to verify that all parts have been shipped. Procedure Description Qty. – No parts required Prepare to install the road light kit. Right, rear light assembly Left, rear light assembly Install the ROPS components. Bolt (16 x 110 mm) Flange nut (16 mm) Reflector... -
Page 3: Preparing The Machine
Procedure Description Qty. Fuse (10 A) Install the fuses and flasher relay (for Fuse (15 A) Model 31654). Flasher relay Mini fuse (7.5 A) Install the fuses (for Models 31657 and 31659). Flasher relay – No parts required Connect the battery. Test and calibrate the brake-pressure –... -
Page 4: Opening The Hood
Removing the Storage Compartment Models 31657 and 31659 At the left side of the operator’s platform, open the door of the storage compartment (Figure g344733 Figure 4 1. Nut (negative 2. Negative battery post battery-cable terminal) Lift the negative battery cable from the battery post (Figure Note:... - Page 5 Installing the Reflectors Parts needed for this procedure: Reflector Procedure Remove the backing film and mount the 2 reflectors to the back of the hood as shown in Figure 7 Figure g344223 Figure 5 1. Pivot bolt (16 x 100 mm) 2.
- Page 6 Installing the Headlight, Turn Signal, and Hazard Switches Parts needed for this procedure: Headlight switch Turn signal switch Hazard switch Installing the Switches Model 31654 g344364 Figure 10 Remove the plugs shown from the control arm (Figure 9 Figure 10). Discard the plugs.
- Page 7 g344362 Figure 14 g344367 Figure 12 1. Headlight switch 2. Hazard switch 1. Button-head screw (8 x 20 2. Switch plate Install the previously removed instrument panel and switch plate from the control arm (Figure Figure 12). Pull through the control-arm harness connectors with the following labels: Installing the Switches •...
- Page 8 g351225 Figure 18 1. Plug Pull harness connectors with the following labels g351205 Figure 16 through the control arm : • 1. Locknut (#10) 3. Flange-head screw (#10 x AZARD WITCH 3/8 inch) • IGNAL WITCH 4. Right control-arm panel 2.
- Page 9 Important: Assemble the right control-arm panel to the Do not overtighten the fasteners, control arm (Figure 21) with the Phillips-head as you could damage the light assembly. screw (#10 x 3-1/2 inches), locknut (#10), and 5 flange-head screws (#10 x 3/8 inch). g351204 Figure 21 1.
- Page 10 Installing the Light Bar Mounting Brackets Parts needed for this procedure: Light bar mount Flange nut (8 mm) Flange-head bolt (8 x 65 mm) Washer (8 mm) Identifying the Mounting Bracket Hole Positions g344485 Figure 24 1. Model 31654 3. Model 31659 2.
- Page 11 Assembling the Mounting Brackets to the Light Bar Align the holes in the mounting bracket with the holes in the arm of the light bar (Figure 26) that you identified in Identifying the Mounting Bracket Hole Positions (page 10). Note: Ensure that the tab of the mounting bracket is aligned away from the light assembly.
-
Page 12: Installing The Transducer
Loosely assemble the mounting bracket to the latch plate (Figure 30) with a flange-head bolt (6 x 25 mm) and flange locknut (6 mm). Loosely assemble the mounting bracket to the pivot-arm plate (Figure 30) with a flange-head bolt (8 x 30 mm) and flange locknut (8 mm). Repeat steps at the other mounting bracket. - Page 13 g344293 Figure 34 Remove the cap from the brake pressure sensor g344291 connector (Figure 35). Figure 32 1. Adapter fitting (1/4 x 7/16 2. Brake-pressure inch) transducer Torque the brake-pressure transducer to 27 N∙m (20 ft-lb). Remove the cable tie that secures the 3-pin connector of the machine wire harness labeled to the hose adjacent to BRAKE PRESSURE SENSOR...
- Page 14 Installing the Transducer Models 31657 and 31659 without the Differential Lock Kit At the right side of the traction pump, remove the plug from port MB of the pump (Figure 36). g344080 Figure 37 1. Reducer fitting (3/4 x 7/16 2.
- Page 15 g344918 Figure 41 1. Front-traction manifold 3. Front of the machine 2. 3-pin connector (labeled BRAKE PRESSURE SENSOR Remove the hex-socket plug from port-PS of the front traction manifold (Figure 42). g344073 Figure 40 1. 3-pin connector—machine 3. Brake-pressure wire harness (labeled transducer BRAKE PRESSURE SENSOR 2.
- Page 16 Assembling the Number Plate Machines without the Optional Parts needed for this procedure: Number plate Number-plate bracket Number-plate light g344935 Phillips-head screw (#6 x 1 inch) Figure 43 Locknut (#6) 1. Adapter fitting (1/4 x 7/16 3. Port-PS (front traction inch) manifold) Flange-head bolt (6 x 20 mm)
- Page 17 Installing the Number-Plate Bracket and Light Machines without the Optional Parts needed for this procedure: Flange-head bolt (6 x 20 mm) Washer (1/4 x 3/4 inch) Flange nut (6 mm) Cushioned support clamp g344531 Figure 45 1. Locknut (#6) 3. Number-plate light Removing the Bulkhead 2.
- Page 18 Assembling the Number Plate and 3 washers (1/4 x 3/4 inch) , and a flange locknut (6 mm) as shown in Figure Light You will install the locknut to the machine left Place the assembled number-plate bracket flange-head bolt in Securing the Plate-Light onto the bulkhead and align the bracket as far Harness to the Bulkhead (page...
- Page 19 Assembling the Plate-Light Securing the Plate-Light Harness Connector to the Bulkhead At the bulkhead, insert the terminal of the white Assemble a cushioned support clamp onto the light wire into the pin 1 position of the 2-pin harness of the number-plate light (Figure 53).
- Page 20 Routing and Connecting the Wire Harness to the Front Light Bar Assembly Route the wire harness segment labeled LH through the left opening in the front EADLIGHT arm pivot-plate mount and then through the latch plate (Figure 56). g344563 g345099 Figure 54 Figure 56 Route the wire harness segment labeled RH...
- Page 21 g344574 Figure 60 Install the 2 tube insert into the sides of the front g344617 Figure 58 light bar assembly (Figure 61). Connecting the Headlights Assemble the swivel-interface shell to the 6-pin connector (Figure 59). g344583 Figure 61 Secure the wire harness using cable ties. g347278 Figure 59 Connecting the Light Wire Harness...
- Page 22 g346878 Figure 63 1. Cap 3. 6-pin connector (labeled g344639 Figure 64 IGHTING ARNESS —light NTERCONNECT kit wire harness) 2. 6-pin connector (labeled IGHTING ARNESS Connecting the License Plate —machine NTERCONNECT wire harness) Harness Model 31654 Plug the 6-pin connector of the light kit At the back of the electrical panel, remove the wire harness labeled L IGHTING...
- Page 23 Connecting the License Plate Assemble a cushioned support clamp onto the branch of the kit harness labeled L ICENSE LATE Harness as shown in Figure IGHT Models 31657 and 31659 At the back of the electrical panel, remove the upper right flange locknut that secures the controller to the panel (Figure 68).
- Page 24 electrical panel with the flange locknut (Figure Connect to the LH R and RH R IGHTS 69). connectors to the left rear and right rear IGHTS light assemblies (Figure 71). Align the bulkhead to the electrical panel. Plug the connector of the number plate-light Securing the Kit Wire Harness harness into the connector of the kit harness labeled L...
- Page 25 Installing the Bulkhead Assemble the bulkhead to the electrical panel (Figure 74) with the 4 bolts, 4 lock washers, and 4 washers that you removed in Removing the Bulkhead (page 17). g028923 Figure 75 1. Fuse (10 A) 2. Fuse (15 A) g347229 Figure 74 At the back of the electrical-mount panel, plug...
- Page 26 Installing the Fuses and Flasher Relay Models 31657 and 31659 Parts needed for this procedure: g347112 Figure 78 Mini fuse (7.5 A) 1. 2-socket 2. Flasher relay Flasher relay connector (labeled —control ELAY LASHER arm-harness) Procedure Plug flasher relay into the 2-socket connector, Remove the fuse-block cover located next to the and secure relay and harness using a cable tie.
-
Page 27: Connecting The Battery
Connecting the Battery, Lowering the Platform, and Closing the Hood No Parts Required Connecting the Battery Assemble the terminal of the negative battery cable (Figure 80) onto the negative battery post. g328512 Figure 81 1. Washer 3. Storage compartment 2. Knob Close the storage-compartment door. - Page 28 g290370 Figure 84 1. Platform-latch handle g290371 Figure 82 As the platform nears the fully lowered position, move the platform-latch handle (Figure toward the front of the machine. Note: This ensures that the latch hooks clear the locking bar. g290369 Figure 83 1.
-
Page 29: Preparing For Calibration
Testing and Calibrating the Brake Lights No Parts Required Testing the Brake Lights Model 31654: Close the hood. Start the engine and run it to warm the coolant to 70 to 75°C (160 to 170 °F). Raise the cutting units and release the parking brake. Slowly drive the machine forward. - Page 30 Plug the cable into the computer. Calibrating the Brake-Pressure Transducer Model 31654 Open the D 1 program. ANFOSS Contact your authorized Toro distributor for access to this program. Select Brake Light Parameters from the menu (Figure 86). g345519 Figure 86...
- Page 31 Plug the diagnostic cable into the C connector. IAGNOSTIC Contact your authorized Toro distributor for a cable. Plug the cable into the computer. Ensure that the parking brake is engaged, and start the engine. Calibrating the Brake-Pressure Transducer Models 31657 and 31659 Open the Toro Diag program at ToroConnect.
-
Page 32: Finishing Calibration
g345518 Figure 88 Select the Config tab at the top of the screen (Figure 88). Select Max Brake Pressure (psi) inside the Config menu and set the default as standard (Figure 88). Adjust the brake-light pressure as follows: Important: When increasing or decreasing the pressure (psi), do so in 1 to 5 increments. •... -
Page 33: Completing The Installation
Operation Adjusting the Headlights Completing the Installation Adjust the headlights so that the horizontal part of the cut-off of the beam is tilted downward at 2.0%. Loosen the nut that secures the headlights to No Parts Required the bracket. Adjust the headlights into position by hand. Closing the Hood Tighten the nut to hold the light in the correct position. -
Page 34: Brake Lights
(when the control pedal returns to the N position—only while driving forward). EUTRAL Maintenance Maintaining the Lights Replace all worn or damaged parts with genuine Toro parts. • Periodically check that all lights are working. • Ensure that the headlights are adjusted correctly. - Page 35 Notes:...
- Page 36 Notes:...
- Page 37 The method of transmission shall be electronic transmittal. This machinery shall not be put into service until incorporated into approved Toro models as indicated on the associated Declaration of Conformity and in accordance with all instructions, whereby it can be declared in conformity with all relevant Directives.
- Page 38 The Toro Company (“Toro”) respects your privacy. When you purchase our products, we may collect certain personal information about you, either directly from you or through your local Toro company or dealer. Toro uses this information to fulfil contractual obligations - such as to register your warranty, process your warranty claim or to contact you in the event of a product recall - and for legitimate business purposes - such as to gauge customer satisfaction, improve our products or provide you with product information which may be of interest.
- Page 39 Countries Other than the United States or Canada Customers who have purchased Toro products exported from the United States or Canada should contact their Toro Distributor (Dealer) to obtain guarantee policies for your country, province, or state. If for any reason you are dissatisfied with your Distributor's service or have difficulty obtaining guarantee information, contact your Authorized Toro Service Center.