Hoover WindTunnel Owner's Manual
Hide thumbs
Also See for WindTunnel:
- Owner's manual (42 pages) ,
- User manual (25 pages) ,
- Owner's manual (19 pages)
Table of Contents
Advertisement
Available languages
Available languages
Quick Links
WindTunnel
Bagless by HOOVER
™
Thank You
for choosing
HOOVER!
This product was designed for
easy assembly (see page 4)
Owner's Manual
ENGLISH
pp.1-14
ESPAÑOL
pág. 15-22
FRANÇAIS
p. 23-30
Index
Assembling Cleaner ..........................3-4
Carton Contents....................................3
Cleaner Descriptions ............................5
How To Use ........................................5-7
Cleaning Tools ..................................7
Embedded DirtFINDER™ Feature....6
If You Have a Problem ..................13-14
Clearing Blockages ........................14
Important Safeguards ..........................2
Lubrication ..........................................13
Authorized Service..........................13
Cleaning filters ..............................8-9
Emptying Dirt Cup ............................8
Replacing Agitator Brush Roll ......11
Replacing Power Hand Tool
Agitator Brush Roll ......................12
Replacing Belt ............................10-11
Replacing Power Hand Tool Belt ..12
Replacing Edge Groomers ............11
Replacing Headlight........................10
Thermal Protector ..............................13
Warranty ..............................................14
Parts & accessories mail order
form ..................................................31
®
hoover.com
Advertisement
Chapters
Table of Contents

Related Manuals for Hoover WindTunnel


Summary of Contents for Hoover WindTunnel
-
Page 1: Table Of Contents
WindTunnel ™ Bagless by HOOVER Thank You for choosing HOOVER! Owner’s Manual ENGLISH pp.1-14 ESPAÑOL pág. 15-22 FRANÇAIS p. 23-30 Index Assembling Cleaner ......3-4 Carton Contents........3 Cleaner Descriptions ......5 How To Use ........5-7 Cleaning Tools ........7 Embedded DirtFINDER™ Feature..6 If You Have a Problem ....13-14 Clearing Blockages ......14... - Page 2 HOOVER SALES & SERVICE CENTERS 2200 S. Monaco Pkwy. MINNESOTA ALABAMA 6900 San Pedro, Suite 137 2256 Waycross Rd. CANADA Denver, CO 80222 8922 Highway 7 3980B Airport Blvd. San Antonio, TX 78216 Forest Park, OH 45240 Hoover Canada (303) 757-4904 St.
- Page 3 • Do not use with damaged cord or plug. If appliance is not working as it should, has been dropped, damaged, left outdoors, or dropped into water, take it to a Hoover Sales and Service Center or Authorized Hoover Warranty Service Dealer (Depot).
-
Page 4: Assembling Cleaner
This cleaner was inspected and packaged carefully before being shipped from the factory. If you should happen to need assistance during assembly or operation: Visit us on-line at hoover.com to find the service outlet nearest you (click on the “Service” button) OR Call 1-800-944-9200 for an automated referral of service outlet locations (U.S. only) OR Call 1-330-499-9499 to speak with a representative in our Consumer Response Center. -
Page 5: Cleaner Descriptions
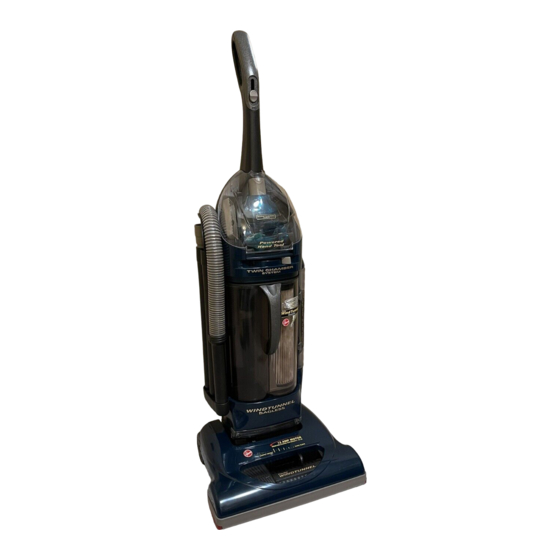
2. How to use The assembled cleaner will look like the drawing. Model with Powered Hand Tool is shown. Cleaner description 1. Handle 19. Embedded DirtFINDER™ sensi- 2. ON/OFF switch tivity switch 3. Tool cover 20. Edge groomers 4. Dusting brush 21. - Page 6 To let you know that the dirt, set the switch (B) to the “HI” DirtFINDER™ feature is ready, the position. red light will come on when the • At other times, the red light may cleaner is first turned on. After a few stay on for a considerable amount of seconds, the red light will go off and time.
- Page 7 Cleaning tools 2-13 2-12 Tools allow for cleaning surfaces above the floor and for reaching hard to clean areas. Handle must be in the upright position for tool use. CAUTION: Agitator continues to rotate while cleaner handle is in How to attach tool upright position.
-
Page 8: Maintenance
3. Maintenance When to empty It is recommended that the dirt cup be Familiarize yourself with these home emptied before the dirt reaches the maintenance tasks as proper use dirt inlet opening on back of dirt cup and care of your cleaner will ensure (Fig. - Page 9 Reposition dry filter, grill and screw. Replace dirt cup. Should you want to replace this filter, ask for HOOVER part No. 38762-008. Do not operate cleaner without To remove this filter when it 3-12 any of the filters in place.
- Page 10 Excessive force is not required. broken. What to buy To assure effective operation, use only genuine HOOVER belts with your cleaner. When purchasing a new belt, ask for HOOVER part No. 38528-033. 3-18 3-19 3-17 How to replace Removing belt...
-
Page 11: Replacing Agitator Brush Roll
(some models only) Agitator brush roll replacement When agitator brush roll brushes are worn, the brush roll should be replaced. Ask for HOOVER part No. 48414-088. 3-25 Installing groomers Lift off both old edge groomers and 2. Unscrew the two Phillips screws slide new edge groomers into position and remove belt guard (B). -
Page 12: Replacing Belt
The agitator is equipped with two section. ball bearings that should be lubricat- 4. When cleaner is unplugged ed periodically by a Hoover Sales and the motor cools for 30 min- and Service Center or an Authorized utes, the thermal protector automat- Hoover Warranty Service Dealer 4. - Page 13 4. If you have a Service Problem: Cleaner hard to push Possible cause problem To obtain approved HOOVER ser- Possible solution vice and genuine HOOVER parts, If a minor problem occurs, it usually • Incorrect carpet height setting locate the nearest Hoover Sales...
-
Page 14: Warranty
The Hoover Company on-line at hoover.com This warranty does not cover pick up, delivery, or house calls; however, if you mail your appliance to a Hoover Sales and Service Center for warranty service, Checking under bottom plate transportation will be paid one way. - Page 15 Centro de ventas Reemplazo de la correa del accesorio y de servicio de Hoover o al Concesionario autorizado de servicio de Hoover de mano turboaccionado ......21 (Depósito).
-
Page 16: Contenido De La Caja
(OFF). hacia la derecha o izquierda para provista con el producto parta hallar el soltar fácilmente el cordón. Centro de Servicio de Fábrica Hoover 24. Asa para transportarla o en las Páginas Amarillas bajo “Vacuum 25. Tubos de extensión Cleaners - Household”... -
Page 17: Accesorios De Limpieza
El mango de su aspiradora tiene tres aspiradora para limpiar alfombras de escaleras posiciones: vertical, para almacenamiento distintos espesores, deslice el control de Use la manguera y el accesorio de y para usar los accesorios de limpieza; la altura de la boquilla (D) a la posición mano turboaccionado* o la boquilla para de funcionamiento, para uso general deseada. - Page 18 Cómo limpiar los desconectar la manguera, procesa en orden inverso.) Conecte los tubos de accesorios extensión o los accesorios a otro Para limpiar la manguera y el accesorio Saque la tapa. extremo de la manguera. de mano turboaccionado, quite la *Se puede obtener a un costo adicional Nota: No es necesario quitar el filtro de suciedad con un paño humedecido en...
- Page 19 Hoover. Está ubicada debajo de la placa Presione la puerta para volver a ponerla superior del depósito para polvo. inferior de la aspiradora y se debe en su lugar.
-
Page 20: Reemplazo Del Rodillo De Escobillas Del
3-25 Cuando compre un nuevo agitador, pida Remoción de la correa usada Cómo reemplazarlo la pieza No. 48414-115 de HOOVER. Saque el rodillo de escobillas del 1. Desprenda el accesorio de la agitador y la correa usada. manguera y voltéelo de manera que la 3-23 Bote la correa usada.