
Related Manuals for LG PQCPA11A0E


Summary of Contents for LG PQCPA11A0E
-
Page 1: Air Conditioner
INSTALLATION/OWNER'S MANUAL AIR CONDITIONER Please read this manual carefully before operating your set and retain it for future reference. TYPE : Advanced Control Platform MODEL : PQCPA11A0E, PQCPB11A0E P/NO : MFL37115820 www.lg.com... -
Page 2: Table Of Contents
Advanced Control Platform 1. ACP FUNCTIONS & SPECIFICATION ...1-1 Functions of ACP ...1-1 Denomination of ACP ...1-4 Components of ACP ...1-6 Hardware specification of ACP...1-7 2. INSTALLING ACP...2-1 Before installing the ACP ...2-2 • Using the single ACP as web server ...2-3 •... - Page 3 • If the ACP is connected to the AC Manager ...2-49 • If the ACP is not connected to the AC Manager...2-50 Making sure and checking the ACP installation ...2-67 3. ACP OPERATION BY USING THE LG ACCS ...3-1 Accessing the ACCS...3-1 Reviewing the initial ACCS screen...3-4 Controlling the air conditioner...3-7...
- Page 4 Note for safety Note for safety In order to prevent the user's injury or the damage of the product, keep the followings to use the product. ■ The service center or the professional installation agency cettified by our company should perform the installation because the professional technique is required to install.
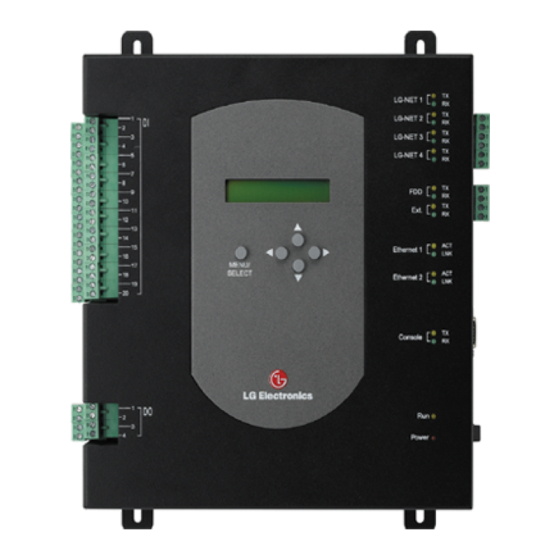
- Page 5 Any question about the product should be asked to the service center or the professional installation agency. • The non-professional may cause accident, electric shock, explosion or injury. LG-NET 1 LG-NET 2 LG-NET 3 LG-NET 4 Ext. Ethernet 1 MENU/ SELECT...
- Page 6 Note for safety Do not install the product at the wet place. • It may cause to degrade the insulating ability and may cause fire. LG-NET 1 LG-NET 2 LG-NET 3 LG-NET 4 Ext. Ethernet 1 MENU/ SELECT Ethernet 2...
- Page 7 If the product is flooded, consult the service centre or the professional installation agency. • It may cause fire or electric shock. LG-NET 1 LG-NET 2 LG-NET 3 LG-NET 4 Ext. Ethernet 1 MENU/ SELECT Ethernet 2 Console Power ■ When using Do not use strong detergent such as solvent, but a soft cloth.
-
Page 8: Acp Functions & Specification
• Set the network environment (IP address, net mask, gateway) • Set one of Peak/Demand function to use • Set the language displayed on the LG ACCS screen • Set whether to use the schedule feature or not • Set whether to use the watthour meter feature or not. - Page 9 ➲ Control 256 indoor units of the airconditioner at maximum ➲ Monitoring the error and operation state ➲ Controlling the peak/demand electric power ➲ Setting the system Installation/Owner's Manual LG-NET 1 LG-NET 2 LG-NET 3 LG-NET 4 Ext. Ethernet 1...
- Page 10 The 16-room simple central controller can be interconnected with the ACP. When the ACP centrally controlling all airconditioners and the simple central controller at each floor of the building are used together, the airconditioner can be controlled more easily. LG-NET 1 LG-NET 2 LG-NET 3 LG-NET 4 Ext.
-
Page 11: Denomination Of Acp
Ethernet port (spare) Ethernet port spare for the function extension of the ACP RS232 port RS232 port for updating the software of the ACP 1. ACP Functions & Specification LG-NET 1 LG-NET 2 LG-NET 3 LG-NET 4 Ext. Ethernet 1... - Page 12 These terminal are used to set the indoor unit to operate or stop for responding High or Low signal of each external input signal. In case of PQCPA11A0E model, a separate IO Kit (Model: PQCPE11A0E) can be purchased and installed to use for connecting the external signal.
-
Page 13: Components Of Acp
We are not responsible for any problem caused by using the adaptor other than the standardized one offered by us, so using any non-standard part should be prohibited. You can consult the LG System Air Conditioner Support Division about the applicable product. -
Page 14: Hardware Specification Of Acp
• External input port: 20EA (Pulse contable, DC 12V) • External output port: 4EA (Relay output, 5V) For the PQCPA11A0E model, the IO Kit (PQCPE11A0E) should be separately purchased for connecting the above port 20EA (for displaying RS communication status, Ethernet communication... -
Page 15: Installing Acp
Install the ACP and set the network environment and the function. STEP 4. ACCS access and Information input Set the access environment at the LG ACCS, the ACP operation program and enter the air conditioner information. STEP 5. Make sure and check the ACP installation Make sure and check that the ACP is normally installed. -
Page 16: Before Installing The Acp
2. Installing ACP Before installing the ACP ACP provides 4 RS485 ports to connect the indoor unit. Maximum of 16 units can be connected to PI485 for outdoor unit in 1 RS385 port, and maximum of 31 units for SINGLE/Ventilator PI485. 256 indoor units at maximum can be connected to one ACP. -
Page 17: Using The Single Acp As Web Server
Using the hub If it is connected via the hub, the network can be configured as shown at the following example. (Direct Cable) Multi V LG-NET 1 LG-NET 2 LG-NET 3 LG-NET 4 Ext. Ethernet 1... - Page 18 2. Installing ACP Not using the hub If it is connected without the hub, the network can be configured as shown at the following example. LG-NET 1 LG-NET 2 LG-NET 3 LG-NET 4 Ext. Ethernet 1 MENU/ SELECT Ethernet 2...
-
Page 19: Connecting The Single Acp To The Ac Manager
Using the hub If it is connected via the hub, the network can be configured as shown at the following example. (Direct Cable) LG-NET 1 LG-NET 2 LG-NET 3 LG-NET 4 Ext. - Page 20 2. Installing ACP Not using the hub If it is connected without the hub, the network can be configured as shown at the following example. AC Manager Cross cable LG-NET 1 LG-NET 2 LG-NET 3 LG-NET 4 Ext. Ethernet 1...
-
Page 21: Connecting More Than On Acps To The Ac Manager
Connecting more than on ACPs to the AC Manager When more than one ACP are connected to the AC Manager via the hub, the ACP should be connected with the network structure as shown at the following examples. Direct cable Simple central controller (possible to connect when necessary) -
Page 22: Setting The Indoor Unit Address
By considering the entire installation configuration connecting to one ACP, set the address to each indoor unit not to be overlapped. 00~FF in hexadecimal can be set to the indoor unit address. The following example sets the address to the indoor unit. LG-NET 1 LG-NET 2 LG-NET 3 LG-NET 4 Ext. - Page 23 Setting address with wired remote controller AUTO SWING OPERATION Timer Set no. Time Timer Program Program Hour 1. Press Week Program & Set/Clr keys at the same time. 2. Set the indoor unit address using the temperature controller. Allowed Range : 00-FF Group No.
- Page 24 2. Installing ACP Setting address with wireless remote controller CANCEL PLASMA 2-10 You can set the address of the indoor unit through the wireless remote controller that controls the indoor unit. To set the address of the indoor unit with the wireless remote controller, proceed as follows.
- Page 25 Information: Checking the set address CANCEL PLASMA You can check the set address by using the wireless remote controller. To check the set address, proceed as follows. . With the [Wind Up/Down] button pressed, press the [RESET] button. The [Wind Up/Down] button must be pressed for more than 3 seconds.
-
Page 26: Setting The Pi485 And Connecting The Cable
2. Installing ACP Setting the PI485 and Connecting the cable After setting the address of the indoor unit, install the PI485 and set the DIP switch. And then, connect the RS485 cable for communicating with the ACP. Note: Installing the PI485 Installing the PI485 deponds on the outdoor unit. - Page 27 Note: PCB part number The MPS product with the common PCB applied has the following PCB part number: • PCB P/NO. : 6871A20910A ~ Z • PCB P/NO. : 6871A20917A ~ Z • PCB P/NO. : 6871A20918A ~ Z Caution: Setting the PI485 DIP switch If the air conditioner selection switch is incorrectly set, the air conditioner may incorrectly operate.
-
Page 28: Connecting The 2Pin Connector
2. Installing ACP Connecting the 2PIN connector If you want to use the individual lock function for setting mode, wind flow, and temperature lock by the central control, the 2PIN connector should be connected to the CN_DRY terminal of the PI485 according to the product type. - Page 29 If the user sets the temperature to 25°C, the command is blocked at the remote controller. Set ‘Heating, 20C, Strong wind, Temperature lock’ The remote controller displays ‘HL’ message It is not possible for the user to operate. Multi V LG-NET 1 LG-NET 2 LG-NET 3 LG-NET 4 Ext.
-
Page 30: Connceting Rs485 Cable To Pi485
2. Installing ACP Connceting RS485 cable to PI485 In order to connect the PI485 and the ACP, two RS485 cables should be connected to the BUS_A and the BUS_B of the PI485. Connect the RS485 cables by referring to the following figure. When connecting more than one PI485 to one ACP, connect the BUS_A/BUS_B of the PI485 to the BUS_A/BUS_B of the other PI485 respectively. - Page 31 The following figure shows the example for connecting more than one PI485 to one ACP. LG-NET 1 LG-NET 2 LG-NET 3 LG-NET 4 Ext. Ethernet 1 MENU/ SELECT Ethernet 2 Console Power 2. Installing ACP Installation/Owner's Manual 2-17...
- Page 32 2. Installing ACP Tip: Connection setup when using the simple central controller together with the ACP The simple central controller can be used with the ACP. Connect the simple central controller to the ACP as follows: Note: Checking the LGAP Label Check the LGAP Label at the right side of the case of the simple central controller.
-
Page 33: Installing The Acp And Connecting The Cable
Installing the ACP and Connecting the cable After setting the PI485, the ACP should be installed at the suitable place and the RS485 cable should be connected to communicate with the PI485. And, the Ethernet cable should be connected for connecting to the Internet or the AC Manager. -
Page 34: Connecting Rs485 Cable To Acp
The RS485 cable connecting to the PI485 to the LG-NET port (RS485 port) of the ACP. Connect the connector connecting the RS485 cable to one of the ports LG-NET1~LG-NET4. The number of LG-NET ports is 1~4 and it is possible to connect to any of them to use. - Page 35 64 outdoor units at maximum can be connected to one port of the RS485 of the ACP and 256 indoor units at maximum can be connected to one ACP. When there are many outdoor units to connect, connect the outdoor units suitably from LG-NET1 to LG-NET4 with the BUS form. Otherwise, the ACP may cause the malfunction.
- Page 36 2. Installing ACP The following figure shows the example of the incorrect connection of the RS485 of the ACP. LG-NET 1 LG-NET 2 LG-NET 3 LG-NET 4 Ext. Ethernet 1 MENU/ Ethernet 2 SELECT Console Power 2-22 PI485 PI485 PI485...
-
Page 37: Connecting Ethernet Cable To Acp
Connecting Ethernet cable to ACP After connecting the ACP and the RS485 cable, the Ethernet cable should be connected to the ACP. The ACP can be connected to the hub via the Ethernent cable or directly to the AC Manager. Connecting the ACP and the hub The ACP is connected to the basic Internet network installed at the field, generally to the hub. -
Page 38: Connecting Power Adaptor To Acp
2. Installing ACP Connecting Power adaptor to ACP After connecting the Ethernet cable, the power adaptor should be connected for supplying the power to the ACP. Connect the power adaptor supplied with the ACP product to the power adaptor connection port of the ACT as shown at the below figure. -
Page 39: Configuring The Acp Network
The network environment of the ACP can be set by the LCD and the buttons at the front side of the ACP. The current ACP information and the menu are displayed at the LCD, and the menu can be changed and selected by pressing 'MENU/SELECT' button and Up/Down/Left/Right (▲, ▼, ◀, ▶) buttons. LG-NET 1 LG-NET 2 LG-NET 3 LG-NET 4 Ext. - Page 40 When the power switch is turned on, the ACP booting screen is displayed on the LCD as shown at the below figure, and when booting is completed, the initial ACP screen is displayed. ACP booting screen LG Electronics Wait for booting Note: Software version The software version of the current ACP is displayed at the initial ACP screen.
- Page 41 Entering into the environment setup mode Press 'MENU/SELECT' button of the ACP to enter into the environment setup mode of the ACP. When the 'MENU/SELECT' button is pressed for the first time, the menu to set the IP address is displayed as shown below.
- Page 42 2. Installing ACP How to set the network address The network address consists of four 3-digit numbers. In case of setting the network address, the name of the related address is displayed on the LCD of the ACP. Press Up/Down/Left/Right (▲, ▼, ◀, ▶) button to set.
-
Page 43: Setting The Ip Address
Setting the IP address In order for the user to use the functions of the ACP via the web, the unique IP address should be given to the ACP. Set the IP address as follows: Press the 'MENU/SELECT' button of the ACP. [MENU] screen is displayed as shown at below. Press the 'MENU/SELECT' button again. -
Page 44: Setting The Gateway Address
2. Installing ACP Setting the gateway address After setting the IP address, the gateway address should be set. Set the gateway address as follows: Press the 'MENU/SELECT' button of the ACP and then press Left/Right (◀,▶) button to display the following Gateway setup screen. Press the 'MENU/SELECT' button again. The screen to enter the gateway address is displayed. -
Page 45: Setting The Netmask Address
Setting the netmask address After setting the gateway address, the netmask address should be set. Set the netmask address as follows: Press the 'MENU/SELECT' button of the ACP and then press Left/Right (◀,▶) button to display the following Netmask setup screen. Press the 'MENU/SELECT' button again. The screen to enter the netmask address is displayed. -
Page 46: Checking The Network Environment
2. Installing ACP Checking the network environment When the IP address, the gateway address, and the netmask address are set, the essential network environment setup of the ACP is completed. So, make sure that all settings are successfully completed. Check the network environment setting as follows: Press the 'MENU/SELECT' button of the ACP and then press Left/Right (◀,▶) button to display the following Information screen. -
Page 47: Setting The Functions Of The Acp
Setting the functions of the ACP The following functions can be set by using the menu of the ACP: • Select Peak or Demand • Select the web display language • Set the schedule to use • Set the wattage display to use Before setting the functions of the ACP The function setting of the ACP should be changed depending on the case that only the ACP is used or the case that the ACP is interconnected with the external devices such as AC Manager, Wattmeter... -
Page 48: Selecting Peak Or Demand
2. Installing ACP Selecting Peak or Demand The ACP offers the function to manage the wattage consumed by the connected air conditioner, by which the electric charges can be effectively saved. The ACP offers two functions to limit the peak wattage of the air conditioner as follows: •... - Page 49 Use Up/Down (▲,▼) button to set the desired wattage control method. Press the Up (▲) button to set the Peak method, or press the Down (▼) button to set the Demand method. MENU/ SELECT When the 'MENU/SELECT' button is pressed, the set wattage control method is applied to the system.
-
Page 50: Selecting The Accs Display Language
System), the control program to use the functions of the ACP, is displayed. Note: How to use the LG ACCS For more information on the method to use the LG ACCS, see Chapter 3. ACP operation by using the ACCS The following figure is the initial screen of the LG ACCS program. - Page 51 MENU/ SELECT 2. Installing ACP [Set Language] KR(0)/EN(1):1 Example for setting the LG ACCS to display in English SW ver. 2.77.2 Installation/Owner's Manual 2-37...
-
Page 52: Setting Whether To Use The Schedule Function Or Not
Setting whether to use the schedule function or not The LG ACCS, the operation program of the ACP, offers the schedule setup function for the indoor unit of the air conditioiner connected to the ACP to automatically operate at the specified time. - Page 53 2. Installing ACP When the 'MENU/SELECT' button is pressed, whether to use the schedule function or not is applied to the system. But, there is no 'MENU/SELECT' button pressed for a specific period (about 5 seconds), it returns to the initial screen with the setting not applied to the system, and the existing set method is used.
-
Page 54: Setting Whether To Use The Wattage Display Function Or Not
Setting whether to use the wattage display function or not The LG ACCS, the operation program of the ACP, offers the wattage display interconnection function to check and manage the wattage of the indoor unit of the air conditioner connected to the ACP. - Page 55 2. Installing ACP When the 'MENU/SELECT' button is pressed, whether to use the wattage display function or not is applied to the system. But, there is no 'MENU/SELECT' button pressed for a specific period (about 5 seconds), it returns to the initial screen with the setting not applied to the system, and the existing set method is used.
-
Page 56: Setting Error History Display
2. Installing ACP Setting error history display LG ACCS, operating program of ACP, provides error history function to monitor various types of errors occurring in between the air condition and indoor unit connected to ACP. For the error history function, the user can select conveniently whether to display in LG ACCS or not. -
Page 57: Configuring The Accs Access
Configuring the ACCS access The user can use the LG ACCS program at the computer connected with the ACP via the network to control the functions of the ACP. The LG ACCS (Advanced Centralized Control System) is the function control program of the ACP developed with the Java. The LG ACCS is automatically executged when the user accesses the ACP by using the Internet Explorer with no separate program installed. - Page 58 2. Installing ACP After selecting the [Advanced] tab at the 'Internet Option' window, check whether there is the 'Microsoft VM' item or not. If it is possible to check at the checkbox, the VM(Virtual Machine) is already installed at the Windows. Check only the 'Use Java JIT Compiler (system rebooting required)' item at the 'Microsoft VM' item and unselect all other items.
-
Page 59: Checking The Ms Explorer Security Setting
Checking the MS Explorer security setting For the stable operation of the LG ACCS (Advanced Centralized Control System), the security setting of the Microsoft Internet Explorer, a web browser, should be changed. Change the security setting of the Microsoft Internet Explorer by the following procedure. Here, it is described by the example changing the setting at the Windows XP operating environment. - Page 60 2. Installing ACP After selecting the [Security] tab at the 'Internet Option' window, press [Custom Level] at the bottom. 'Security setup' window is displayed. When the 'Security setup' window is displayed, find out 'Microsoft VM' and check 'Custom' When [Java Custom Settings] button is displayed later, click it. Then, 'Internet' window is displayed. 2-46 Click Click...
- Page 61 After selecting 'Edit Right' tab at the Internet window, set 'Run Unsigned Content' item to 'Enable.' Press [OK] button to exit 'Internet' window. Press [OK] button at the previous 'Security setup' window. 'Warning!' window for checking the security setting is displayed. Press [Yes] button. 2.
- Page 62 2. Installing ACP Finally, press [OK] button at the 'Internet Options' window. Now, the security setup to use the LG ACCS is completed. 2-48 Click...
-
Page 63: Entering The Indoor Unit & Ventilator Information
• When the ACP is connected to the AC Manager, register the information by using the AC Manager • When the ACP is not connected to the AC Manager, register the information by using the LG ACCS program of the ACP... -
Page 64: If The Acp Is Not Connected To The Ac Manager
LG ACCS (Advanced Centralized Control System) program of the ACP. Accessing the LG ACCS In order to enter the indoor unit information by using the LG ACCS program of the ACP, you should access the LG ACCS, first of all. - Page 65 When the IP address is correctly entered, the following LG ACCS Login screen is displayed. Enter the ID and the password and then click [Login] button. Set the ID to 'admin' and the password to 'digital21' for the first access to the ACP.
- Page 66 2. Installing ACP When the login is successfully done, the initial screen of the LG ACCS is displayed as shown at the below. Click [System setup] button, the last mentu. The system setup screen to set the system is displayed.
- Page 67 Each outdoor unit information is used as the information of the physical group connecting the indoor unit. Click [Outdoor unit input] at 'System setup' screen of the LG ACCS to display the window for setting the group number.
- Page 68 2. Installing ACP Click [Default input] button. The outdoor unit information (group number) is automatically entered. Except the outdoor units as many as the number of the outdoor units (the number of groups) to set according to the air conditioner installation plan, delete all remaining outdoor units by pressing button.
- Page 69 Enter the setting value suitable for each item. When you click the item to set, the related item changes to yellow, whose setting value can be modified. See the following table for the description on the item to set. Item G/W No.
- Page 70 2. Installing ACP When you click [Done] button, 'Outdoor unit information input' window is closed and it returns to the previous screen. Click [Default input] button at 'Air conditioner setup' tab. The groups as many as the number of set outdoor units are automatically created and the information of the air conditioner included at the group is also created.
- Page 71 Enter the air conditioner group name and the information of the indoor unit. When each displayed item is clicked, it's color is changed to yellow for its contents to be directly entered or the list box is displayed. Enter the setting value suitable for each item. See the following table for the description on the setting item.
- Page 72 2. Installing ACP Dip switch Physical address Model name Maximum consumed power For the remaining three groups, set the number of the indoor units and the item by the procedure same to Step 7 and 8. When all items are set, press [Save] button to save. Press [Save] button to display the window to confirm to save the setting information.
- Page 73 The saving process is performed. When the air conditioner setup is successfully done, the group and the air conditioner information set at present can be checked. Possible to check the set group and air conditioner information 2. Installing ACP Installation/Owner's Manual 2-59...
- Page 74 2. Installing ACP Note: Physical and Logical group At the ACP, the connected air conditioners can be grouped by using the concept “Physical group” and “Logical group.” The physical group is the outdoor unit physically connecting the indoor unit. The example of the physical group is setting the address to the indoor unit at the installation step.
- Page 75 To set up the ventilator, you must first enter the group number of the ventilator. The information of each outdoor unit is used as the physical group information connecting the ventilator. When you click on [Enter ventilator group] button in the 'System setting' screen of LG ACCS, the window to set the group number is displayed.
- Page 76 2. Installing ACP Click [Default input] button. The group number (outdoor unit number) is automatically entered. Leave the item(s) as many as the number of groups to set according to the installation plan of the ventilator, and press button to delete all remaining outdoor units. Here, because two groups (group number 0 and 1) are assumed to be set in total, leave only two groups as shown at the below figure.
- Page 77 Enter the setting value suitable to each item. When the item to be set is clicked, the related item is changed to yellow and its setting value can be modified. See the below table for the description on the item to set. Item Group number Enter the number to classify the ventilator group.
- Page 78 2. Installing ACP When [Done] button is clicked, 'Outdoor unit information input' window is closed and it returns to the previous screen. Click [Default input] button at 'Ventilating setup' tab. The group(s) are automatically created as many as the number of the set outdoor units, and the information about the ventilator included at the group is created.
- Page 79 Enter the ventilator group name and the information of the ventilator. When each displayed item is clicked, it's color is changed to yellow for its contents to be directly entered or the list box is displayed. Enter the setting value suitable for each item. See the following table for the description on the setting item.
- Page 80 2. Installing ACP For the remaining one group, set the number of the ventilators and the item by the procedure same to Step 7 and 8. When all items are set, press [Save] button to save. Press [Save] button to display the window to confirm to save the setting information.
-
Page 81: Making Sure And Checking The Acp Installation
First, it should be checked whether the indoor unit of the air conditioner is connected or not by executing the LG ACCS of the ACP. Check the condtion of the ACP by the following flow chart. Air conditioner is not found... - Page 82 Monitoring the ACP condition after the lock all and the temperature lock Execute the LG ACCS of the ACP to select all indoor units and execute the lock all function. And then, after performing the temperature lock function again, monitor the ACP condition. Check the ACP condtion according to the following flow chart.
-
Page 83: Acp Operation By Using The Lg Accs
LG ACCS for operating the ACP. Accessing the ACCS In order to enter the indoor unit information by using the LG ACCS program of the ACP, first of all, the LG ACCS should be accessed. - Page 84 3. ACP operation by using the LG ACCS . When the IP address is correctly entered, the following LG ACCS Login screen is displayed. Enter the ID and the password and then click [Login] button. Set the ID to 'admin' and the password to 'digital21' for the first access to the ACP.
- Page 85 3. ACP operation by using the LG ACCS . The initial screen of the LG ACCS is displayed as shown at the below. When you click the button of the function to control, the screen is changed to use the related function.
-
Page 86: Reviewing The Initial Accs Screen
ACP web server. The user can control the indoor unit and the ventilator of the air conditioner connected to the ACP and monitor various status information by using the LG ACCS. When accessing the AG ACCS, the following LG ACCS program will be executed. - Page 87 LG ACCS window buttons You can exit or minimize the LG ACCS window. Item Minimize the LG ACCS window to be displayed at the task bar at the bottom only. Not used. Exit the LG ACCS setup and the LG ACCS window.
- Page 88 3. ACP operation by using the LG ACCS Message window It displays the message about the operation information and the error information of the indoor unit of the air conditioner. Current time window It displays the current time (year, month, day, day of the week, time).
-
Page 89: Controlling The Air Conditioner
Controlling the air conditioner You can use the LG ACCS to control the functions such as selecting the air conditioner group or the air conditioner, the operation mode, the air flow, the air direction, the lock, the temperature control, and the stop. - Page 90 3. ACP operation by using the LG ACCS Air conditioner operation status window It displays the operation status of each air conditioner, the operation mode, the temperature of the space with the indoor unit installed, and the desired temperature. Group name & Operation status lamp The name of the selected group and the status of each air conditioner belonging to the group are displayed at the top of the air conditioner operation status window.
- Page 91 The desired temperature set at the air conditioner is displayed at the desired temperature. The desired temperature is not displayed if the air conditioner performs the ventilation or the dehumidification operatioin or at the error condition. 3. ACP operation by using the LG ACCS Icon The current air conditioner is at the peak operation ratio control status.
- Page 92 3. ACP operation by using the LG ACCS Selecting the air conditioner group or the air conditioner window This window displays the list of the air conditioner group or the air conditioner set at the system. Also, the air group and the air conditioner for controlling the air conditioner can be selected.
- Page 93 Autumn. When it is selected, the desired temperature can not be set. It evaluates the indoor condition and maintains the optimal condition automatically. 3. ACP operation by using the LG ACCS Description Note: Setting the desired temperature Because too much cooling is harmful for health, set the suitable desired temperature.
- Page 94 3. ACP operation by using the LG ACCS Air flow It controls the air flow. The types of air flow to set are as follows: Air flow Air direction It sets the air direction of the current air conditioner to Up & down or Left & right.
- Page 95 COOL Mirror) model of the Multi model, use the temperature lock, the mode lock and the airflow lock at a time. 3. ACP operation by using the LG ACCS Set the desired indoor temperature of the air conditioner. The desired temperature can be set...
-
Page 96: Controlling The Ventilator
3. ACP operation by using the LG ACCS Controlling the ventilator You can use the LG ACCS to control the functions such as selecting the ventilating group and the ventilator, the operation mode, the air flow, the additional function and the lock. - Page 97 Also, more than one ventilator can be selected together by clicking them. 3. ACP operation by using the LG ACCS These buttons are located at 'Group' list and 'Ventilating' list. It is...
- Page 98 3. ACP operation by using the LG ACCS Ventilator operation status window This window displays the information such as operation mode of each ventilator, air directioin, lock feature and additional function. Group name & Operation status lamp The name of the selected ventilating group and the status of each ventilator belonging to the group are displayed with the lamp at the left side of the ventilator operation status window.
- Page 99 The additional icons displayed on the screen are as follows: Icon Note: Additional function It may not be performed depending on the product. 3. ACP operation by using the LG ACCS Description Weak air flow. Strong air flow. Air flow at maximu.
- Page 100 3. ACP operation by using the LG ACCS Filter The Lock function of the ventilator can be set not by the user individually but by centrally. The icon displays whether the lock function is set or not. The lock icons displayed on the...
- Page 101 (representative cold virus) in the room by considering the health as well as the environment. Note: Additional function It may not be performed depending on the product. 3. ACP operation by using the LG ACCS Description Description Installation/Owner's Manual...
- Page 102 3. ACP operation by using the LG ACCS Lock It sets the lock function of the ventilator. When the lock function is set, the ventilator can not be controlled by the wirless or wired remote controller. Use the lock function not for the user individually, but to centrally control the ventilator.
-
Page 103: Setting The Schedule
Reviewing the schedule setup screen Click 'Schedule' menu at the top of the LG ACCS for setting the schedule. Click 'Schedule' menu to display the schedule setup screen as follows: 3. ACP operation by using the LG ACCS... - Page 104 3. ACP operation by using the LG ACCS Pattern setup button and Mode change button The schedule set by the user should be stored and applied as pattern. The setup mode and the view mode are classified at the schedule menu to minimize the maloperation of the user.
- Page 105 When the mode is change to the view mode during setting the schedule, all schedules being setting are cancelled. Before changing to the view mode, decide whether to save the schedule or not. 3. ACP operation by using the LG ACCS Installation/Owner's Manual 3-23...
- Page 106 3. ACP operation by using the LG ACCS Select Air conditioner group & Air conditioner window It displays the list of the air conditioner group and the air conditioner set at the system. Also, the air conditioiner group and the air conditioner can be selected for setting the schedule.
- Page 107 It circulates the fresh air. The ventiliation only may be used in Spring and Autumn. When it is selected, the desired temperature can not be set. 3. ACP operation by using the LG ACCS At this window, the operation can be set for the air conditioner to be controlled at the specified time according to the schedule.
- Page 108 3. ACP operation by using the LG ACCS Air flow It controls the air flow. The types of air flow to set are as follows: Air flow Air direction Lock 3-26 It sets to ventilate with a small of air flow.
- Page 109 Operation time display Schedule display window 3. ACP operation by using the LG ACCS . The desired temperature can be set for both the cooling and the heating with the range of 18°C ~ 30°C. It displays the operation start time and the operation stop time of the period selected from the weekly operation schedule table.
- Page 110 3. ACP operation by using the LG ACCS Save the setting button & Apply/Cancel the schedule button Use [Delete All] or [Save the setting] button to initialize the schedule or set and save the schedule at the system. Also, [Apply the schedule] and [Cancel the schedule] buttons are used to apply and cancel the saved schedule to the system.
- Page 111 Exception handling schedule button Exception handling schedule & Exit the exception handling button 3. ACP operation by using the LG ACCS It is the function excluding the specified date from the set weekly operation schedule. The other schedule can be set to the excluded date suitable to the related date.
- Page 112 3. ACP operation by using the LG ACCS Exception handling list Date selection window In order to delete the existing setting, after specifying the related data at the calendar, when the exceptional schedule title to delete is displayed at 'Title input' field, click [Delete] button. And then, when you click [Save] button, the related schedule is deleted from the system.
- Page 113 However, it operates only when the specified schedule is applied and operates (it does not operate at the schedule stopped condition). 3. ACP operation by using the LG ACCS It can stop all air condition system at the specified time. It is optional, so it is not the essential item to be set for setting the exception handling schedule.
-
Page 114: Example For Setting The Schedule
• Operation: Cooling, Air flow 'Middle', Temperature '23°C', Lock function set • Saving pattern: Pattern5 . When you click 'Schedule' menu at the LG ACCS screen, the following screen is displayed. Click [View mode] button to switch to the schedule setup mode. When you click [View mode] button, it is switched to the setup mode and the [View mode] button is changed to [Setup mode] button. - Page 115 . Now, select the target to which the schedule is applied. Here, because it is applied to all '1st grade' group, all air conditioners are selected by pressing [Select All] button. Select the group. and click [Select All] button to specify all 3. ACP operation by using the LG ACCS Click 'Pattern5' and the [Set] button Installation/Owner's Manual 3-33...
- Page 116 3. ACP operation by using the LG ACCS Now, specify the operation for the schedule to perform. Set 'Cooling operation' as operation, 'Middle' as air flow, and '23°C as desired temperature. Specify the schedule operation (Cooling, Middle air flow. Desired temperature 23°C) .
- Page 117 . Now, press [Save the setting] button to save the set schedule. When you click [Save the setting] button, the window to confirm saving is displayed. Click [Done] button to save the schedule. After elicking [Save the setting] button, click [Done] button when confirming to 3. ACP operation by using the LG ACCS save Installation/Owner's Manual 3-35...
- Page 118 3. ACP operation by using the LG ACCS . Now, press [Setup mode] button to switch to the view mode. When you click each air conditioner name of the 1st grade, you can find that the same schedule is applied to each group. Also, you can find wich operation is set by clicking the schedule time.
- Page 119 [Exit the exception handling] to exit from setting the exception handling schedule. Click [Excetion handling schedule] button to display the exception handling setup window [Exception handling schedule] button is changed to [Exit the exception handling] button 3. ACP operation by using the LG ACCS Installation/Owner's Manual 3-37...
- Page 120 3. ACP operation by using the LG ACCS . Select the data for adding the exceptional date from the calendar. And then, when you enter the exceptional schedule titlem into 'Title input' field and click [Add] button, the exception schedule is added to the list.
- Page 121 . Click [View mode] button to switch to the schedule setup mode. When you click the [View mode] button, it is switched to the setup mode and [View mode] button to [Setup mode] button. Changed from View mode to Setup mode 3. ACP operation by using the LG ACCS Check 'Schedule' field Installation/Owner's Manual...
- Page 122 3. ACP operation by using the LG ACCS . Select the target to which the exception handling schedule is applied. Here, because it is applied to all '1st grade' group, all air conditioners are selected by pressing [Select All] button.
- Page 123 Specify the schedule time by clicking or dragging . Set to stop all air conditioners at 12:00. Set '12:00' at 'Stop All' item and click [Done] button. 3. ACP operation by using the LG ACCS After setting 'Stop All' time, click [Done] button.
- Page 124 3. ACP operation by using the LG ACCS . Now, press [Save the setting] button to save the set exception handling schedule. When you click [Save the setting] button, the window to confirm saving is displayed. Click [Done] button to save the exception handling schedule.
- Page 125 3. ACP operation by using the LG ACCS . When setting the exception handling schedule is completed, click [Exit the exception handling] button to close the exception handling setup window and return to the previous schedule view screen. Click [Exit the exception...
-
Page 126: Controlling The Peak Operation Rate
3. ACP operation by using the LG ACCS Controlling the peak operation ratio It maintains the consumed power to be kept lower than or equal to the target power by monitoring the wattage of the air conditioner. It can control to save the energy by forcefully starting or stopping the air conditioner according to the specified peak operation rule. - Page 127 In order to control the peak operation ratio, click 'Peak power' menu at the top of the LG ACCS. When you click 'Peak power' menu, the following air conditioner control screen is displayed. Note: When there is no peak power menu If the ACCS menu does not have 'Peak power' menu but 'Demand' menu, it is set for the setting of the ACP to use the demand power control function.
- Page 128 3. ACP operation by using the LG ACCS Wattage monitor The following peak control setting information and operation information are displayed at the wattage monitor. • Function operation status • Current wattage and operation ratio • Desired wattage and operation ratio •...
- Page 129 In order to change the peak operation ratio, except the method using number input method described at the following section. 3. ACP operation by using the LG ACCS The graph for displaying the current operation status and setting the power control function is displayed at the left side of the peak operation ratio control screen.
- Page 130 3. ACP operation by using the LG ACCS Setting the power control (text) Desired power Desired operation ratio Operation switching period 3-48 The setup item to set the wattage in kW or % is displayed at the right side of the peak operation ratio control screen.
- Page 131 When you execute 'Save' after setting the system information at 'System setup' menu, the existing information of the peak excluded air conditioner is initialized, so be careful. 3. ACP operation by using the LG ACCS ) button. The related air...
- Page 132 3. ACP operation by using the LG ACCS Saving the setting Note: Setting the peak Set the peak at the peak operation condition, or perform the peak operation after setting the peak. After setting the peak, if the peak operation is not performed, the actual peak operation ratio is not set.
- Page 133 However, when the current operation uses the power less than or equal to the target operation ratio setting, the air conditioner can be individually managed. 3. ACP operation by using the LG ACCS Installation/Owner's Manual 3-51...
- Page 134 3. ACP operation by using the LG ACCS In order to control the demand power, click 'Demand power' menu at the top of the LG ACCS. When you click 'Demand power' menu, the following air conditioner control screen is displayed.
- Page 135 Current wattage and operation ratio Desired wattage and operation ratio 3. ACP operation by using the LG ACCS Description It displays to which percentage of the entire operation ratio the operation ratio of the current air conditioner reaches. Also, it displays the current wattage in kW.
- Page 136 Because the demand control is set by the externally connected demand controller, the items such as desired power, desired operation ratio and operation switching period can not be set wihin the LG ACCS program. 3-54 The graph for displaying the current operation status and setting the power control function is displayed at the left side of the demand control screen.
- Page 137 Because the demand control is set by the externally connected demand controller, the items such as desired power, desired operation ratio and operation switching period can not be set wihin the LG ACCS program. 3. ACP operation by using the LG ACCS It displays the desired power in kW per hour to operate the peak operation function.
-
Page 138: Monitoring The Air Conditioner Status
You can see the operation status and the error status of each air conditioner set all air conditioner groups at the LG ACCS at a glance. In order to view the status information of the air conditioner, click 'Monitoring' menu at the top of the LG ACCS. When you click 'Monitoring' menu, the following monitoring screen is displayed. - Page 139 The desired temperature to set the indoor temperature. Start/Stop The operation status of the air conditioner. The error code is displayed if the error is occurred. Remarks - Network Error (NE) - System Error (SE) 3. ACP operation by using the LG ACCS Description Installation/Owner's Manual 3-57...
-
Page 140: Reviewing The Error History
Reviewing the error history The LG ACCS saves and records the information of the error occurred from all indoor units of the air conditioners connected to the ACP. You can see this error history at 'Error history' menu of the LG ACCS. - Page 141 When you press [Print] button, the queried error history can be saved as the file with the Excel format. 3. ACP operation by using the LG ACCS You can set and query the information about the error occurred within the desired period. The start date and the end date of the period to query can be set by pressing each calendar button ) within the query period.
- Page 142 3. ACP operation by using the LG ACCS Error history list Item Icon Date Time Index Air conditioner name Error code Contents 3-60 Description The type of occurred error is displayed as icon. Error occurred from the network. Error occurred from the system (outdoor & indoor unit).
-
Page 143: Outdoor Unit
Reviewing the wattage (incteconnecting with the power display) The LG ACCS offers the power display interconnection function to check and manage the wattage of all indoor units of the air conditioners connected to the ACP. If this function is used, when the outdoor unit is shared with officetel, residential-commercial building, and school, it can be effectively controlled because the wattage for each indoor unit is displayed. - Page 144 3. ACP operation by using the LG ACCS In order to use the power display interconnection function to check the wattage, click 'Wattage' menu at the top of the LG ACCS. When you click 'Wattage' menu, the following wattage screen is displayed. Wattage monitor The wattage monitor displays the total wattage of the air conditioner groups connected to the ACP and the wattage for each group.
- Page 145 It displays the list of the groups set at the system. Wattage by indoor unit list It displays the wattage by indoor unit list. The information for each item is as follows: 3. ACP operation by using the LG ACCS ) at the right side of the query Item...
- Page 146 3. ACP operation by using the LG ACCS Detailed history for each air conditioner Setting the wattage query period You can set the period to query the wattage at the right side of the 'Wattage' screen. Query period display 'Start' calendar 3-64 It displays the set query period.
- Page 147 3. ACP operation by using the LG ACCS 'End' calendar The end date of the query period can be set at 'End' calendar. Apply & Cancel button When you click [Apply] button after setting the query period, the wattage within the set query period is displayed at 'Wattage' screen.
-
Page 148: Setting The System
Caution: Interconnecting the ACP with the AC Manager When the ACP is interconnected with the AC Manager, if the system is set by the LG ACCS of the ACP, it may cause the maloperation of the air conditioner. When interconnecting the ACP with the AC Manager, set the system by the AC Manager. - Page 149 In order to register, delete or modify the air conditioner at the system, click 'System setup' menu of the LG ACCS. When you click 'System setup' menu, the following system setup screen is displayed. Note: Air conditioner setup and the ventilating setup The air conditioner setup is almost same to the ventilating setup.
- Page 150 3. ACP operation by using the LG ACCS Group input window A new group is added or the information of the existing group can be changed or deleted at the Group input window. Also, the group information and the indoor unit (or ventilator) information can be conveniently entered by using the default input button.
- Page 151 3. ACP operation by using the LG ACCS Air conditioner (or ventilator) information input window and Temporary saving window You can add, modify or delete the indoor unit or the ventilator. Air conditioner information input You can set a new indoor unit or ventilator information at this window.
- Page 152 3. ACP operation by using the LG ACCS The information to set at the air conditioner (or ventilator) is as follows: Item Type Physical address Model name Maximum consumed power Caution: Maximum consumed power Fi the peak/demand control function is used, the maximum consumed power for each indoor unit should be essentially entered.
- Page 153 In order to delete the existing air conditioner or ventilator information, click side. The related information is deleted. 3. ACP operation by using the LG ACCS button to apply the temporarily saved air conditioner or ventilator again. Besides the information of the indoor unit...
- Page 154 3. ACP operation by using the LG ACCS Caution: Deleting the outdoor unit When the outdoor unit information is deleted, the information of the indoor unit connected the related outdoor unit is also deleted. Item G/W Number Outdoor unit number...
- Page 155 Enter the name of the ventilator group that the user can easily recognize. (Example. 1 floor) 3. ACP operation by using the LG ACCS When you click on [Enter ventilator group] button located on the right side of the screen, ventilator group input window will be displayed.
- Page 156 3. ACP operation by using the LG ACCS Entering the administrator information Time synchronization button 3-74 [Time synchronization] button aligns (synchronizes) the time of the user's PC with the system time of ACP. The schedule function of ACP must be executed at accurate time according user setting. If you are...
- Page 157 When you click [Confirm] button at the confirmation window, the not saved information of the setting up to now is returned to the last save status, so be careful. 3. ACP operation by using the LG ACCS Click [Last save state' button not to change the information.
- Page 158 3. ACP operation by using the LG ACCS Save button Caution: Initializing the information of other functions When saving is done at 'System setup' menu, all existing information such as schedule, peak operation ratio control (peak excluded air conditioner) and error log are initialized.
- Page 159 For more information, see Chapter 2. 'Entering the Indoor unit & Ventilator information.' 3. ACP operation by using the LG ACCS Installation/Owner's Manual 3-77...
-
Page 160: Reference
If Tx or RX LED of Ports 1~4 of the EE-NET is not blinking when installing the product. When installing the product, if TX or RX LED of the ports 1~4 of the LG-NET is not blinking, set and execute the group of the indoor/outdoor unit. -
Page 161: Guide For The Open Source Software
Guide for Open source software The following GPL/LGPL execution files and libraries used at this product conform to the GPL/LGPL license contract. GPL execution file Linux kernel 2.4 Sysvinit Bash busybox tinylogin EEPL library glibc If you request the source code to the EE electronics via the following e-mail, you can receive the CD- ROM containing it by paying the cost including media cost and transportation cost. -
Page 162: Utp Cable Connection Chart
4. Reference UTP cable connection chart UTP cable Twisted copper line The UTP cable consists of 8 wires, of which four lines (No. 1 and 2 for receiving (Rx) and No. 3 and 6 for transmitting (Tx)) are actually used for the data transmission at the general LAN environment. It can be largely classified two types according to the method for connecting the line for receiving and transmitting.