LG Minibeam Nano PV150G Owner's Manual
Hide thumbs
Also See for Minibeam Nano PV150G:
- Owner's manual (77 pages) ,
- Instructions manual (95 pages)

Related Manuals for LG Minibeam Nano PV150G


Summary of Contents for LG Minibeam Nano PV150G
- Page 1 사용설명서 LG Minibeam Nano DLP Projector 사용전에 안전을 위한 주의사항을 반드시 읽고 정확하게 사용하세요. PV150G 자세한 사용 방법은 LG 홈페이지 또는 스마트기기로 확인할 수 있습니다. www.lge.co.kr P/NO : SAC30666090 (1706-REV03)
-
Page 2: 라이선스
라이선스 라이선스 돌비 래버러토리스의 허가를 얻어 제조한 제품입니다. 돌비 및 더블 D 심볼은 래버러토리스의 상표입니다. 본 제품은 엄격한 DivX 비디오 재생 테스트를 통과한 DivX 인증 제품입니다. DivX Video-On-Demand(VOD) 영화를 재생하기 위하여, 반드시 본 제품을 등록하십시오. ® 먼저 제품 설정 메뉴의 DivX VOD 섹션에서... - Page 3 라이선스 The terms HDMI and HDMI High-Definition Multimedia Interface, and the HDMI logo are trademarks or registered trademarks of HDMI Licensing LLC in the United States and other countries. 잠깐 • 본 설명서에 사용되는 제품 그림과 화면 표시는 소비자의 제품 동작을 돕기...
-
Page 4: 안전을 위한 주의사항
안전을 위한 주의사항 안전을 위한 주의사항 안전을 위한 주의사항은 제품을 안전하고 정확하게 사용하여 예기치 못한 위험이나 손해를 사전에 방지하기 위함입니다. • 주의사항은 경고와 주의 두 가지로 구분되어 있으며, 경고와 주의의 의미는 다음과 같습니다. 경고: 지시사항을 위반할 때, 심각한 상해나 사망이 발생될 가능성이 있는 경우... - Page 5 안전을 위한 주의사항 • • 먼지가 많은 장소에 설치하지 미니빔을 옮길 때에는 꼭 전원 마세요. 버튼을 눌러 미니빔을 끄고 전원 - 화재의 위험이 있습니다. 플러그, 기기 간의 접속코드 등을 뺀 • 후 이동하세요. 목욕탕이나 비바람에 노출된 장소 - 코드가 손상되어 화재, 감전의 또는...
- Page 6 안전을 위한 주의사항 • • 반드시 접지해 주세요. (접지가 미니빔이나 AC 어댑터에서 제공되지 않는 기기는 제외) 연기나 타는 냄새가 날 경우 바로 - 접지가 잘 되어 있지 않으면 사용을 중단하고 전원코드를 고장이나 누전 시 감전될 수도 콘센트에서 분리한 후 서비스 센터로 있습니다.
- Page 7 정품만 사용하세요. 그 외의 다른 - 제품 고장 및 화재의 원인이 제품은 사용하지 마세요. 됩니다. • - 화재, 감전의 원인이 됩니다. 부속품으로 제공된 AC 어댑터 혹은 LG에서 승인하고 인정한 어댑터만 사용하세요. - 다른 AC 어댑터를 연결할 때 화면이 깜빡이는 현상이 나타날 수 있습니다.
- Page 8 안전을 위한 주의사항 • 동작 중이거나 전원이 꺼진 사용할 때 직후에는 배기구를 포함한 본 제품 주변에 고열이 발생하므로 접촉을 경고 피해주세요. • 미니빔 위에 꽃병, 화분, 컵, 화장품, • 도시 가스 등의 가스 누설이 있을 약품 등 액체용기 및 장식용품, 촛불 때에는...
- Page 9 안전을 위한 주의사항 • • 온도가 지나치게 높은 장소에는 스크린과 눈의 거리는 화면 대각선 미니빔이나 건전지가 장착된 길이의 약 5에서 7배 정도 떨어져서 리모컨을 두지 마세요. 시청하세요. - 화재의 원인이 됩니다. - 너무 가까운 곳에서 지속적으로 시청하면 시력이 나빠질 수 주의...
- Page 10 안전을 위한 주의사항 • 미니빔 케이스 등과 같은 플라스틱 청소 부분을 청소할 때는 전원코드를 빼고 부드러운 헝겊으로 가볍게 경고 닦아주세요. 분무기로 물을 뿌리거나 • 청소할 때 미니빔 본체 각 부분에 물걸레로 닦지 마세요. 특히, 각종 직접 물을 뿌리지 마세요. 제품에 세정제, 자동차...
- Page 11 안전을 위한 주의사항 • 반드시 접지를 하십시오. (접지가 기타 제공되지 않는 기기는 제외) • 통풍구 등을 통하여 제품 내부에 경고 금속류나 불에 타기 쉬운 물건을 • 외출 시에는 애완동물 및 기타 집어 넣거나 떨어뜨리지 마세요. 동물이 건드릴 수 없는 곳에 제품을 - 화재, 감전의...
- Page 12 • 건전지를 던지거나 분해하지 마십시오. - 건전지 손상으로 인한 화재 및 폭발의 위험이 있습니다. • LG에서 승인하고 인정한 건전지만 사용하십시오. - 화재 및 폭발의 원인이 됩니다. • 건전지 보관 시 열쇠, 클립과 같은 금속성 물체 가까이 두지 마십시오. - 과도한 전류로 인한 급격한 온도...
-
Page 13: Table Of Contents
차례 차례 라이선스 리모컨 안전을 위한 주의사항 미니빔을 보려면 배터리를 사용할 때 준비 배터리 사용 시간 정보 부속품 미니빔을 보려면 별매품 - 미니빔의 전원을 켜려면 각 부분의 이름 - 스크린 영상의 초점 조정 - 본체 - 미니빔을 보려면 - 옆면 자주쓰는... - Page 14 차례 유지보수 내 미디어를 사용하려면 - 동영상을 감상하려면 청소 - 사진을 감상하려면 - 렌즈의 청소 - 음악을 감상하려면 - 미니빔 케이스의 청소 - 문서파일을 보려면 서비스에 대해서 상세설정 무선제원 설정메뉴 영상 설정 무선 LAN 모듈 (WN8122E1) 무선 제 원 음성 설정 시간...
-
Page 15: 부속품
준비 준비 그림은 실물과 다를 수 있습니다. 부속품 부속품을 확인하세요. 각종 부속품은 제품의 품질향상을 위해 예고 없이 변경되는 수가 있으며, 새로운 부속품이 추가되거나 삭제될 수 있습니다. 전원 외부입력 조용히 페이지 음량 영상모드 화면가림 확인 나가기 ꕣ 설정메뉴 간편설정 화면정지 화면크기 키스톤▲... - Page 16 준비 • HDMI 입력/USB 입력 단자에 HDMI 케이블/ USB 케이블 또는 USB 플래시 드라이브를 연결할 때는 폭 18 mm, 두께 10 mm 이하의 제품을 사용하시기 바랍니다. 사용할 USB 케이블이나 USB 플래시 드라이브 사이즈가 미니빔의 USB 단자와 사이즈가 맞지 않을 경우 USB 2.0을 지원하는 연장 케이블을 사용하세요.
-
Page 17: 별매품
준비 별매품 별매품 구입은 전자상가 또는 인터넷 쇼핑몰에서 구입하거나 판매점 (제품 구입처)에 문의하세요. 각종 별매품은 제품의 품질향상을 위해 예고 없이 변경되는 수가 있으며, 새로운 별매품이 추가될 수도 있습니다. 미니빔 시청용 스크린 삼각대 MHL 또는 Slimport 케이블 HDMI 케이블... -
Page 18: 각 부분의 이름
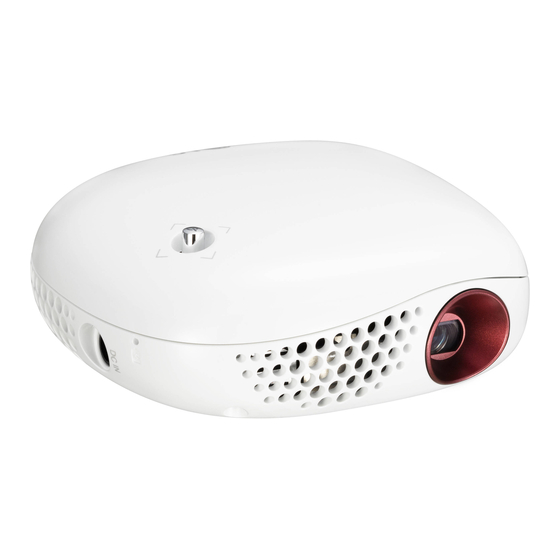
준비 각 부분의 이름 미니빔은 고정밀 기술로 만들어진 제품입니다. 하지만, 아주 작은 흑점이나 휘점이 화면에 지속적으로 보일 수도 있습니다. 이는 제조 공정상 일반적으로 나타날 수 있는 것으로 기능상 장애는 아닙니다. 본체 조이스틱 버튼 배기구 스피커 흡기구 초점링 렌즈 1) 배기 방향으로 고열이 발생하므로 배기 방향에서 사용하지 마세요. 2) 미니빔... - Page 19 준비 옆면 번호 설명 DC IN (DC 입력) 단자 배터리 충전 표시등 - 빨강: 충전 중 - 녹색: 충전 완료...
- Page 20 준비 뒷면 번호 설명 (이어폰 단자) 단자 스위치 - OFF: 미니빔을 완전히 끕니다. - ON: 미니빔이 켜지며 대기상태가 됩니다. 장기간 사용하지 않거나 이동시에는 반드시 스위치를 OFF로 하세요. (USB 단자)
-
Page 21: 조이스틱 버튼을 사용하려면
준비 조이스틱 버튼을 사용하려면 버튼을 누르거나 조이스틱을 상, 하, 좌, 우로 움직여 미니빔을 작동할 수 있습니다. 조이스틱 간편 기능 미니빔이 꺼진 상태에서 조이스틱 버튼을 전원 켜짐 한번 눌렀다 놓습니다. 미니빔이 켜진 상태에서 조이스틱 버튼을 몇 초간 눌렀다 놓습니다. 전원 꺼짐 (단, 조이스틱... -
Page 22: 조이스틱 메뉴 설정
준비 조이스틱 메뉴 설정 미니빔이 켜진 상태에서 조이스틱 버튼을 한번 누르세요. 조이스틱 버튼을 상, 하, 좌, 우로 움직여 메뉴 ( ) 를 선택할 수 있습니다. 원하는 메뉴로 이동 후 조이스틱 버튼을 한번 누르면 해당 메뉴가 선택됩니다. 프로젝터 끄기 미니빔의 전원을 끕니다. 외부입력을... -
Page 23: 미니빔 상태 표시등
준비 미니빔 상태 표시등 전원 LED 동작 표시등 전원 LED 동작 표시등 빨강 Stand by (전원 대기 상태) 전원 공급된 상태에서 동작 중일 때 꺼짐... -
Page 24: 설치 시 주의사항
준비 설치 설치 시 주의사항 • 환기가 잘되지 않는 곳에 설치하지 마세요. - 미니빔 내부의 열이 적체되는 것을 방지하기 위해서는 공기 순환이 잘 되는 곳에 설치해야 합니다. 환기구를 막을 수도 있으니 미니빔 옆에 물건을 두지 마세요. 통풍구가 막히면 미니빔 내부의 온도가 올라가게 됩니다. - 미니빔을... - Page 25 준비 - 미니빔의 주위에 30 cm 이상의 공간을 두세요. • 온도가 높거나 습기가 많은 곳에 설치하지 마세요. - 온도나 습도가 매우 높은 곳 또는 온도가 너무 낮은 곳에는 설치하지 마세요. • 먼지가 많은 곳에 설치하지 마세요. - 화재의 위험이 있습니다. •...
-
Page 26: 화면크기별 투사거리
준비 화면크기별 투사거리 미니빔을 컴퓨터 또는 영상신호원과 함께 견고하고 수평을 유지하는 표면에 설치합니다. 미니빔을 스크린으로부터 적합한 거리에 설치합니다. 미니빔과 스크린간의 거리가 실제의 영상크기를 결정합니다. 렌즈가 스크린에 대해 직각을 유지하도록 미니빔을 설치하세요. 스크린에 대해 직각이 유지되지 않는 경우 화면에 경사가 지기 때문에 화질이 떨어지게 됩니다. - Page 27 준비 16:9 화면시 화면크기 화면가로길이 (Y) 화면세로길이 (X) 투사거리 (D) (mm) (mm) (mm) (mm) 1089 1271 1016 1454 1143 1636 1270 1107 1818 1397 1218 2000 1524 1328 2182 1651 1439 2364 1778 1550 2547 1905 1660 2729 2032 1771 2911 2159 1882...
-
Page 28: 삼각대를 이용한 미니빔 설치 방법
준비 삼각대를 이용한 미니빔 설치 방법 • 이 미니빔는 카메라용 삼각대를 이용하여 설치가 가능합니다. • 그림과 같이 카메라용 삼각대의 카메라 설치 부분에 카메라 대신 미니빔을 조립하여 사용할 수 있습니다. • 삼각대 고정 시 체결용 볼트의 길이는 국제규격인 4.5 mm 이하의 사용을 권장합니다. -
Page 29: 켄싱턴(Kensington)도난방지 장치를 이용하려면
준비 켄싱턴(Kensington)도난방지 장치를 이용하려면 • 미니빔의 도난을 방지하기 위해 제품 연결부에 켄싱턴(Kensington) 도난방지 자물쇠 구멍이 있습니다. 아래의 그림과 같이 연결하세요. • 켄싱턴(Kensington) 도난방지 장치의 자세한 내용은 켄싱턴(Kensington) 도난방지 장치 구입시 첨부된 사용설명서를 참조하세요. • 켄싱턴(Kensington) 도난방지 장치는 소비자가 별도로 구입하셔야 합니다. •... -
Page 30: 리모컨
리모컨 리모컨 리모컨의 뒷면에 있는 뚜껑을 열고 건전지 넣는 곳에 표기된 것과 같은 건전지를 방향 표시대로 넣으세요. 건전지는 새것으로 사용하세요. 전원 전원 외부입력 조용히 미니빔을 켜거나 끕니다. 조용히 미니빔에서 소리가 나지 않게 할 때 선택하세요. 페이지 음량 외부입력 외부입력을 변경합니다. 음량... - Page 31 리모컨 설정메뉴 전원 외부입력 조용히 설정메뉴를 표시하거나 닫습니다. 간편설정 간편설정 메뉴로 이동합니다. 페이지 음량 화면정지 움직이는 화면을 정지시킵니다. (화면정지 기능은 USB 모드 이외의 모든 영상모드 화면가림 확인 모드에서 작동합니다.) 나가기 화면크기 ꕣ 화면크기를 변경합니다. 설정메뉴 간편설정 USB 모드로 진입합니다. 화면정지 화면크기...
- Page 32 리모컨 잠깐 • 리모컨을 사용할 때는 리모컨 수광부에서 3 m/ 좌,우 30°범위 내에서 사용할 수 있습니다. • 원활한 리모컨의 작동을 위해 IR 단자 (리모컨 수광부)를 막지 마세요. • 리모컨을 휴대용 가방에 넣어 이동할 때 가방 안에 들어 있는 본체, 케이블 또는 문서...
-
Page 33: 미니빔을 보려면
미니빔을 보려면 미니빔을 보려면 배터리를 사용할 때 배터리가 부족합니다! 프로젝터가 곧 꺼집니다. • 배터리가 부족할 경우 표시됩니다. • 배터리가 부족하면 잠시 후 미니빔의 전원이 꺼집니다. • 화면에 배터리 부족 문구가 나오면 반드시 배터리를 충전하세요. 배터리 사용 시간 정보 시간 및 표시 상태... - Page 34 • 미니빔을 처음 사용할 때는 배터리를 완전히 충전하세요. • 이 설명서에 나와 있는 배터리 표준 사용 시간은 LG에서 측정한 수치를 기준으로 한 것이므로 실제 시간은 사용 방법에 따라 달라질 수 있습니다. • 배터리 사용 시간은 방송 유형, 작동 온도, 사용 기간, 사용자 설정 등에 따라...
-
Page 35: 미니빔을 보려면
미니빔을 보려면 미니빔을 보려면 미니빔의 전원을 켜려면 본 사용설명서에 사용되는 메뉴 화면 표시는 소비자의 제품 동작을 돕기 위한 예시이므로 실제 화면과 다를 수 있습니다. 전원코드를 바르게 연결하세요. 뒷 단자의 스위치를 ON으로 맞추고 조이스틱 버튼이나 리모컨의 전원 버튼을 누르세요. (OFF로 되어있으면 전원이 켜지지 않습니다.) 언어... -
Page 36: 미니빔을 보려면
미니빔을 보려면 미니빔을 보려면 전원대기 상태일 때 전원 버튼을 눌러 미니빔을 켜세요. 외부입력 버튼을 눌러 원하는 입력을 선택하세요. 아래의 버튼을 이용하여 시청 중 미니빔을 조절할 수 있습니다. 버튼 설명 음량 +,- 음량을 조절합니다. 음소거를 합니다. 조용히 간편설정 메뉴로 이동합니다. 간편설정 화면크기... -
Page 37: 자주쓰는 기능
미니빔을 보려면 자주쓰는 기능 화면크기를 변경하려면 간편설정 버튼을 누르세요. 버튼으로 화면크기를 선택한 후 확인 버튼을 누르세요. 메뉴 설명 화면의 크기에 맞춰 16:9 비율로 조절합니다. 16:9 고화질 영상을 손실 없이 가장 좋은 화질로 볼 수 있는 기능입니다. 원본화면 • 원본화면은 수신되는 신호에 따라 화면 주변부에 노이즈가 발생할... -
Page 38: 키스톤 기능을 이용하려면
미니빔을 보려면 키스톤 기능을 이용하려면 키스톤은 스크린이나 미니빔이 기울어져 투사각이 직각을 이루지 못할 경우 투사된 화면의 위, 아래 폭을 스크린의 형태에 맞도록 조절하여 화면의 모양이 사다리꼴 형태로 일그러지지 않도록 해주는 기능입니다. 키스톤 기능을 이용하면 약간의 화질 열화가 발생할 수 있으므로 최적의 투사각을 얻을... -
Page 39: 외부입력 기기를 조절하려면
미니빔을 보려면 외부입력 기기를 조절하려면 외부입력을 선택하려면 연결된 외부입력을 선택할 수 있습니다. • 리모컨의 외부입력 버튼을 누르면 외부입력 선택화면으로 변경됩니다. - 연결된 입력이 먼저 나타납니다. 단, 스크린쉐어는 언제나 활성화 되어있습니다. • 외부입력 버튼으로 입력신호를 선택하면 연결된 입력으로만 전환됩니다. 버튼을 이용하면 모든 입력으로 전환할 수 있습니다. 외부... - Page 40 미니빔을 보려면 외부입력 기기명을 설정하려면 외부 입력단자에 대해 어느 입력단자에 어떤 기기를 연결했는지를 표시하기 위한 기능입니다. 연결기기명 편집 HDMI 닫기 리모컨의 외부입력 버튼을 눌러 입력신호 화면으로 이동하세요. 빨강 버튼을 누르세요. 버튼을 눌러 기기명을 선택하세요.
-
Page 41: 화면가림 기능을 사용하려면
미니빔을 보려면 화면가림 기능을 사용하려면 화면가림 기능을 사용하려면 회의나 교육시 주목을 요구하는 경우에 화면가림 기능을 이용하세요. 화면가림 버튼을 누르면 화면이 배경색으로 가려지게 됩니다. 배경색 선택은 "화면가림 배경색을 선택하려면"을 참조하세요. 화면가림 기능을 해제하려면 아무 버튼이나 누르세요. 화면을 일시적으로 가리려면 리모컨의 화면가림 버튼을 누르세요. 미니빔이... -
Page 42: 간편설정을 이용하려면
미니빔을 보려면 간편설정을 이용하려면 자주쓰는 메뉴를 손쉽게 설정할 수 있습니다. 간편설정 버튼을 눌러 간편설정으로 이동하세요. 버튼으로 원하는 항목을 선택한 후 확인 버튼을 누르세요. 메뉴 설명 화면 크기를 변경합니다. 화면크기 영상의 상하 또는 좌우를 바꾸어 투사할 수 있는 투사모드 기능입니다. 영상모드를 변경합니다. 영상모드... -
Page 43: 미니빔을 즐기려면
미니빔을 즐기려면 미니빔을 즐기려면 스크린쉐어를 이용하려면 미니빔에서 외부입력을 스크린쉐어로 설정합니다. 연결하고자 하는 기기에서 스크린쉐어 관련 기능을 활성화합니다. 연결하고자 하는 기기에서 미니빔을 검색하여 연결을 선택합니다. (노트북으로 연결 시 최초 접속에 한해 노트북 화면에 표시되는 Pincode를 입력하세요.) 연결하고자 하는 기기에서 요청을 수락하면 스크린쉐어가 실행됩니다. 주의... -
Page 44: 내 미디어
내 미디어 내 미디어 사용하기 전에 USB 저장장치를 연결하려면 미니빔의 USB 입력단자에 USB 저장장치 (외장HDD, USB Memory)를 연결하면 USB 에 저장된 콘텐츠를 미니빔에서 쉽고 편하게 감상할 수 있습니다. 그림과 같이 USB 플래시 드라이브을 연결하세요. USB 플래시 드라이브 USB 저장장치를 제거하려면 간편설정... - Page 45 내 미디어 USB 저장장치 사용상의 주의사항 • 자동 인식 프로그램이 내장되어 있거나, 자체 드라이버를 사용하는 USB 저장장치의 경우에는 동작되지 않을 수 있습니다. • 일부 USB 저장장치의 경우 동작되지 않거나 동작이 원활하지 않을 수 있습니다. • USB 연장 케이블을 사용할 경우 동작되지 않거나 동작이 원활하지 않을 수 있습니다.
-
Page 46: 내 미디어를 사용하려면
내 미디어 내 미디어를 사용하려면 리모컨의 설정메뉴 버튼을 누르세요. 내 미디어를 선택하세요. 목록에서 원하는 파일을 선택하세요. 선택한 파일을 감상할 수 있습니다. 미디어 감상 중 옵션을 설정하여 재생관련 설정을 할 수 있습니다. 내 미디어 지원 파일 • 최대 데이터 전송률: 20 Mbps (Mega bit per second) •... - Page 47 내 미디어 동영상 지원 파일 Maximum: 1920 x 1080 @ 30p (only Motion JPEG 640 x 480 @ 30p) 확장자 코덱 VC-1 Advanced Profile, VC-1 Simple and Main 비디오 .asf, Profiles .wmv WMA Standard, WMA 9 Professional 오디오 DivX3.11, DivX4, DivX5, DivX6, XVID, H.264 / AVC 비디오...
- Page 48 내 미디어 오디오 지원 파일 파일형식 아이템 정보 Bit rate 32 kbps에서 320 kbps 32 kHz에서 48 kHz Sampling rate 32 kbps에서 640 kbps Bit rate 32 kHz, 44.1 kHz, 48 kHz Sampling rate 32 kbps에서 448 kbps Bit rate MPEG Sampling rate 32 kHz에서...
-
Page 49: 동영상을 감상하려면
내 미디어 동영상을 감상하려면 영화 목록에서 USB로 연결된 저장장치의 동영상을 감상할 수 있습니다. 동영상 재생 중 재생조절, 옵션 설정 등을 할 수 있습니다. 동영상 재생시 주의사항 • 사용자에 의해 만들어진 일부 자막에 대하여 정상적으로 동작하지 않을 수 있습니다. • 동영상 파일과 자막 파일은 같은 폴더에 위치해야 합니다. 이 때 동영상 파일과 자막... - Page 50 내 미디어 영화 목록 화면 연결된 장치의 동영상 파일을 재생합니다. USB 저장장치를 연결하세요. USB 버튼을 누르세요. 버튼으로 영화 목록을 선택한 후 확인 버튼을 누르세요. 버튼으로 원하는 파일을 선택한 후 확인 버튼을 누르세요. 페이지 1/1 ꘧ 영화 목록 페이지 이동 USB 저장장치 Drive1 Drive2 Drive3...
- Page 51 내 미디어 번호 설명 썸네일 비정상적인 파일 지원하지 않는 파일 파일 목록 상위 폴더로 이동합니다. 현재 페이지/모든 폴더 페이지 수 배터리 잔량을 표시합니다. 현재 페이지/모든 파일 페이지 수 최상위 폴더로 이동합니다. 상위 폴더로 이동합니다. 종료...
- Page 52 내 미디어 재생 중 아래와 같이 재생을 조절할 수 있습니다. 나가기 옵션 숨김 나가기 간편설정 항목 설명 재생위치를 표시합니다. 버튼으로 원하는 위치로 이동하여 재생 위치를 변경할 수 있습니다. 재생을 정지하고 영화목록으로 돌아갑니다. 정상적인 재생으로 돌아갑니다. 재생을 일시정지합니다. 아무 버튼도 누르지 않고 10분이 지나면, 일시정지가...
- Page 53 내 미디어 영화 목록의 옵션 간편설정 버튼을 누르세요. 버튼으로 원하는 옵션으로 이동한 뒤, 확인 버튼을 누르세요. 버튼으로 각 항목별로 원하는 값을 설정하세요. 동영상 재생 설정 항목 설명 화면의 크기를 선택할 수 있습니다. 화면 • 전체화면: 영상비율에 맞춰 전체화면으로 재생됩니다. 크기 •...
- Page 54 내 미디어 DivX 등록 코드를 확인하려면 DivX 등록 코드 번호를 확인하세요. 자세한 등록 절차는 www.divx.com/vod에서 안내 받으실 수 있으며, 등록 후에 ® DivX DRM으로 구성된 VOD를 즐기실 수 있습니다. 설정메뉴에서 일반 1로 이동한 후 DivX(R) VOD를 누르세요. 등록 해제 닫기 버튼으로...
- Page 55 내 미디어 DivX 등록 코드를 해제하려면 DivX 등록 해제 코드를 사용하여 DivX DRM 기능을 비활성화 할 수 있습니다. 설정메뉴에서 일반 1로 이동한 후 DivX(R) VOD를 누르세요. 버튼으로 해제로 이동한 후 확인 버튼을 누르세요. 예를 선택하세요. 귀하의 제품은 이미 등록이 되어 있습니다. 등록해제...
-
Page 56: 사진을 감상하려면
내 미디어 사진을 감상하려면 연결된 장치의 사진 파일을 감상합니다. 사진 지원 파일 PHOTO(*.JPEG) 기준선: 64픽셀(가로) x 64픽셀(세로) - 15360픽셀(가로) x 8640픽셀(세로) 프로그레시브: 64픽셀(가로) x 64픽셀(세로) - 1920픽셀(가로) x 1440픽셀(세로) • JPEG 파일만 지원합니다. • 지원하지 않는 파일은 아이콘으로 표시됩니다. • 손상되거나... - Page 57 내 미디어 사진 목록 화면 USB 저장장치를 연결하세요. USB 버튼을 누르세요. 버튼으로 사진 목록을 선택한 후 확인 버튼을 누르세요. 버튼으로 원하는 파일을 선택한 후 확인 버튼을 누르세요. 페이지 1/1 ꘧ 사진 목록 페이지 이동 USB 저장장치 Drive1 Drive2 Drive3 Drive4 Drive5 페이지...
- Page 58 내 미디어 번호 설명 파일 목록 상위 폴더로 이동합니다. 현재 페이지/모든 폴더 페이지 수 배터리 잔량을 표시합니다. 현재 페이지/모든 파일 페이지 수 최상위 폴더로 이동합니다. 상위 폴더로 이동합니다. 종료...
- Page 59 내 미디어 재생중 아래와 같이 재생을 조절할 수 있습니다. 01_a.jpg 2008/12/10 1920 x 1080 479 KB [1/4] 숨김 슬라이드쇼 배경음악 옵션 나가기 간편설정 항목 설명 사진을 넘길 수 있습니다. 모든 사진을 슬라이드로 보여줍니다. 슬라이드 • 쇼 슬라이드 속도는 옵션 → 사진 재생 설정에서 설정할 수 있습니다. 전체화면으로...
- Page 60 내 미디어 사진 목록의 옵션 간편설정 버튼을 누르세요. 버튼으로 원하는 옵션으로 이동한 뒤, 확인 버튼을 누르세요. 버튼으로 각 항목별로 원하는 값을 설정하세요. 사진 재생 설정 항목 설명 슬라이드 • 슬라이드 쇼를 할 때 사진의 변경 속도를 선택할 수 있습니다. 속도 사진...
-
Page 61: 음악을 감상하려면
내 미디어 음악을 감상하려면 연결된 장치의 음악 파일을 재생합니다. 음악 지원 파일 *.MP3 Bit rate range 32 Kbps에서 320 Kbps • Sampling rate MPEG1 Layer3 : 32 kHz, 44.1 kHz, 48 kHz • Sampling rate MPEG2 Layer3 : 16 kHz, 22.05 kHz, 24 kHz 음악... - Page 62 내 미디어 번호 설명 썸네일 비정상적인 파일 지원하지 않는 파일 파일 목록 상위 폴더로 이동합니다. 현재 페이지/모든 폴더 페이지 배터리 잔량을 표시합니다. 현재 페이지/모든 파일 페이지 최상위 폴더로 이동합니다. 상위 폴더로 이동합니다. 종료...
- Page 63 내 미디어 재생중 아래와 같이 재생을 조절할 수 있습니다. ꘧ 페이지 1/1 페이지 이동 음악 목록 USB 저장장치 Drive1 페이지 1/1 Butterfly_... 03:25 002. - B02.mp3 나가기 옵션 숨김 간편설정 항목 설명 원하는 위치를 선택하여 재생위치를 변경할 수 있습니다. 재생을 정지합니다. 정상적인...
- Page 64 내 미디어 음악 목록의 옵션 간편설정 버튼을 누르세요. 버튼으로 원하는 옵션으로 이동한 뒤, 확인 버튼을 누르세요. 버튼으로 각 항목별로 원하는 값을 설정하세요. 음악 재생 설정 항목 설명 반복 재생을 선택할 수 있습니다. 반복재생 랜덤 재생을 선택할 수 있습니다. 랜덤재생 음성 설정 음성...
-
Page 65: 문서파일을 보려면
내 미디어 문서파일을 보려면 연결된 장치의 문서 파일을 보여줍니다. 지원파일 목록 XLS, XLSX, DOC, DOCX, PPT, PPTX, TXT, PDF, HWP 마이크로소프트 오피스 (Microsoft Office): 97/2000/2002/2003/2007 버전 어도비 (Adobe) PDF: 1.0/1.1/1.2/1.3/1.4 버전 한글: 97/2003/2007 버전 • 파일 뷰어로 문서를 볼 때 문서를 재구성하기 때문에 PC와는 다르게 보일 수 있습니다. - Page 66 내 미디어 파일목록 화면 USB 저장장치를 연결하세요. USB 버튼을 누르세요. 버튼으로 파일 목록을 선택한 후 확인 버튼을 누르세요. 버튼으로 원하는 파일을 선택한 후 확인 버튼을 누르세요. 페이지 1/1 ꘧ 파일 목록 페이지 이동 USB 저장장치 Drive1 Drive2 Drive3 Drive4 Drive5 페이지...
- Page 67 내 미디어 재생 중 아래와 같이 재생을 조절할 수 있습니다. • 페이지 이동을 누르면 페이지 번호를 선택할 수 있는 팝업 창이 나타납니다. 페이지 번호를 입력하여 원하는 페이지로 이동합니다. • 음량 +, - 버튼을 누르면 줌인이나 줌 아웃을 할 수 있습니다. 확인...
- Page 68 내 미디어 파일 목록의 옵션 간편설정 버튼을 누르세요. 버튼으로 각 항목별로 원하는 값을 설정하세요. 파일 뷰어 옵션 설정 항목 설명 문서를 읽어올 때 사용자가 보게 될 한 페이지씩만 처리하는 방식으로 초기 로딩 시간이 짧으나,사이즈가 켜짐 큰 페이지로 넘어갈 때 로딩 시간이 길어질 수 있습니다. 한...
-
Page 69: 상세설정
상세설정 상세설정 설정메뉴 설정메뉴 버튼을 누르세요. 버튼으로 설정을 원하는 항목을 선택한 후 확인 버튼을 누르세요. 버튼으로 원하는 항목을 설정한 후 확인 버튼을 누르세요. 메뉴 설명 최적의 상태로 영상을 조절합니다. 영상 소리를 설정하고 음량을 조절합니다. 음성 시간관련 설정을 합니다. 시간 무선관련 설정을 합니다. 무선... -
Page 70: 영상 설정
상세설정 영상 설정 설정메뉴 버튼을 누르세요. 영상 버튼으로 ꔂ 이동 ꔉ 확인 영상을 선택한 후 • ꕊ 절전모드 : 최소절전 확인 버튼을 누르세요. • 영상모드 : 표준 영상 버튼으로 명암 • 원하는 항목을 설정한 후 확인 버튼을 누르세요. 밝기 • - 이전... - Page 71 상세설정 메뉴 설명 시청환경 또는 영상물의 종류에 맞는 최적의 영상모드를 선택합니다. 각각의 영상모드의 설정을 변경하여 조절할 수 있습니다. 모드 비디오의 영상효과를 최대화한 모드입니다. 선명한 영상 명암, 밝기, 선명도를 높게하여 화면이 선명하게 보입니다. 일반적인 명암과 밝기, 선명도의 화면으로 표준 영상 나타납니다. 영상모드...
- Page 72 상세설정 메뉴 설명 화면에 나타나는 색상을 연하게 또는 진하게 조정합니다. 색농도 화면에 나타나는 빨강/초록 색상의 균형을 맞춥니다. 색상 고급설정 상세설정을 합니다. 부가설정을 할 수 있습니다. 부가설정 사용자가 설정한 영상값들을 초기화합니다. 초기화 영상모드 별로 초기화됩니다. 원하는 영상모드를 선택한 후 초기화하세요. 화면크기 화면크기를...
- Page 73 상세설정 메뉴 설명 들판이나 산 등의 자연색 영역만 별도로 조절합니다. 잔디색 보정 영상 신호의 입력 신호대 출력의 관계에 따른 계조 곡선을 감마 설정합니다. * 입력신호, 영상모드에 따라 설정할 수 있는 항목이 달라집니다. 고급설정 메뉴 설명 영상의 밝기에 따라 명암을 최적의 상태로 보정합니다. 명암보정...
- Page 74 상세설정 메뉴 설명 전문가 설정인 경우 색온도의 각각의 설정에 따라 아래와 같이 세부 조정이 가능합니다. 감마: 1.9, 2.2, 2.4를 선택할 수 있습니다. a. 조정방식: 2 포인트 - 패턴: 내부, 외부 - 포인트: 낮음, 높음 - Red/Green/Blue: 각각 -50에서 +50까지 조정할 수 있습니다.
- Page 75 상세설정 메뉴 설명 빨강/녹색/파랑/청록/자홍/노랑 색상을 원하는 대로 조정하여 볼 수 있는 기능입니다. 전문가들이 테스트 패턴을 사용하여 조정할 때 이용하는 것으로 다른 색에 영향을 주지 않고 6가지 색(빨강/ 녹색/파랑/청록/자홍/노랑) 영역에 대해 선택 조정이 가능합니다. 색상조정 일반영상에서는 조정해도 색변화가 잘 느껴지지 않습니다. - 채도...
-
Page 76: 음성 설정
상세설정 음성 설정 설정메뉴 버튼을 누르세요. 음성 버튼으로 음성을 ꔂ 이동 ꔉ 확인 선택한 후 확인 버튼을 누르세요. • 음향모드 : 표준 버튼으로 원하는 • 클리어 보이스 II 항목을 설정한 후 확인 버튼을 • 자동음량 : 꺼짐 누르세요. - 이전 화면으로 돌아가려면 버튼을... -
Page 77: 시간 설정
상세설정 시간 설정 설정메뉴 버튼을 누르세요. 시간 버튼으로 ꔂ 이동 ꔉ 확인 시간을 선택한 후 취침예약 : 꺼짐 • 확인 버튼을 누르세요. 자동꺼짐 : 60분 • 버튼으로 자동대기 : 4 시간 • 원하는 항목을 설정한 후 확인 버튼을 누르세요. - 이전 화면으로 돌아가려면 버튼을... -
Page 78: 무선 설정
상세설정 무선 설정 설정메뉴 버튼을 누르세요. 무선 버튼으로 무선을 ꔂ 이동 ꔉ 확인 선택한 후 확인 버튼을 누르세요. 스크린쉐어 : [PJTR][LG]PV150G[0000] • 버튼으로 원하는 • 연결 그룹 항목을 설정한 후 확인 버튼을 • 채널 누르세요. - 이전 화면으로 돌아가려면 버튼을 누르세요. - Page 79 상세설정 일반 1 설정 설정메뉴 버튼을 누르세요. 일반 1 버튼으로 일반 1을 ꔂ 이동 ꔉ 확인 선택한 후 확인 버튼을 누르세요. 언어설정 • 버튼으로 원하는 DivX(R) VOD • 항목을 설정한 후 확인 버튼을 초기설정 • 누르세요. - 이전 화면으로 돌아가려면 •...
- Page 80 상세설정 일반 2 설정 설정메뉴 버튼을 누르세요. 일반 2 버튼으로 일반 2를 ꔂ 이동 ꔉ 확인 선택한 후 확인 버튼을 누르세요. • 키스톤 버튼으로 원하는 • 자동 키스톤 : 켜짐 항목을 설정한 후 확인 버튼을 • 투사모드 : 표준 누르세요. - 이전...
- Page 81 상세설정 메뉴 설명 영상의 상하 또는 좌우를 바꾸어 투사할 수 있는 기능입니다. • 별도 구입한 투명 스크린 후면에서 투사할 경우 반전을 선택하세요. 투사모드 • 제품을 천장에 설치한 경우 역상을 선택하세요. • 투사모드가 반전/역상일 때 스피커의 좌/우가 자동으로 바뀝니다. 약 1200 m 이상의 고도에서 사용하는 경우 켜짐으로 높은...
-
Page 82: 외부기기를 연결하려면
외부기기를 연결하려면 외부기기를 연결하려면 미니빔과 여러가지 외부기기를 연결합니다. 컴퓨터/노트북 비디오 디지털 기기 게임기 헤드폰 핸드폰 HDMI - 83쪽 메모리 - 44쪽 헤드폰 - 84쪽 핸드폰 (MHL/Slimport) - 85쪽... -
Page 83: 디지털 방송 수신기나 Dvd, 비디오, 외부 기기 등을 연결하려면
외부기기를 연결하려면 디지털 방송 수신기나 DVD, 비디오, 외부 기기 등을 연결하려면 디지털 방송 수신기나 DVD, 비디오, PC, 노트북 등을 HDMI 케이블로 연결한 후 다양한 기능을 이용할 수 있습니다. HDMI 연결 HDMI 케이블을 사용하면, 고화질과 고음질의 영상 시스템을 즐길 수 있습니다. HDMI 케이블로... -
Page 84: 헤드폰을 연결하려면
외부기기를 연결하려면 아래 표는 노트북과 연결 시 출력 헤드폰을 연결하려면 설정 전환의 예를 보여줍니다. 자세한 내용은 컴퓨터와 함께 제공된 헤드폰 연결 설명서의 "외부 출력", 미니빔의 소리를 헤드폰으로 들을 수 "외부 모니터 연결" 또는 유사한 있습니다. 제목의 내용을 참조하십시오. 브랜드 출력 설정 전환 [Fn]+[F3] [Fn]+[F3] Panasonic... -
Page 85: 핸드폰의 미러링 기능을 이용하려면
외부기기를 연결하려면 핸드폰의 미러링 기능을 이용하려면 MHL/Slimport 연결 미니빔과 핸드폰을 연결하여 핸드폰의 영상과 사운드를 미니빔로 출력하기 위해서는 HDMI 변환 젠더를 사용해야 합니다. 핸드폰 종류에 따라 호환되는 HDMI 변환 젠더가 다르므로 MHL/Slimport 중에 그에 맞는 전용 젠더를 구매하여 사용하세요. (해당 기능의 지원 여부는 해당기기의 제조사에 문의하세요.) 별매품... - Page 86 외부기기를 연결하려면 잠깐 • 단자에 핸드폰을 연결하면 미니빔에서 핸드폰 화면을 볼 수 있습니다. - MHL/Slimport를 지원하는 핸드폰만 동작됩니다. - 일부 어플리케이션의 경우 리모컨으로 조작할수 있습니다. (단, 리모컨 버튼 중 은 동작하지 않습니다.) • 다음과 같은 경우에는 MHL/Slimport 케이블을 미니빔에서 분리 (연결해제)하세요.
-
Page 87: 유지보수
유지보수 유지보수 미니빔 청소를 하여 최적의 상태를 유지합니다. 청소 렌즈의 청소 표면에 먼지나 얼룩이 나타나는 경우에는 언제나 렌즈를 청소해야 합니다. 렌즈 표면은 공기 분사기 또는 부드럽고 마른 헝겊으로 청소하세요. 렌즈상의 먼지나 얼룩을 지우고자 하는 경우에는 공기 분사기 또는 시중에 판매되는 렌즈 클리닝 제품이나 알코올을 면봉이나 융에 묻혀서 가볍게 문질러 닦아주세요. -
Page 88: 서비스에 대해서
서비스에 대해서 서비스에 대해서 ◆ 고객의 권리 ◆ 고객께서는 제품 사용 중에 고장 발생시, 구입일로부터 1년동안 무상 서비스를 받으실 수 있는 소중한 권리가 있습니다. 단, 고객 과실 및 천재지변에 의해 고장이 발생한 경우에는 무상 기간내라도 유상 처리됨을 알려드립니다. ◆ 유상 서비스 (고객의 비용 부담)에 대한 책임 ◆ 서비스... - Page 89 - 전기 용량을 틀리게 사용하여 고장이 발생한 경우 - 설치 후 이동시 떨어뜨림 등에 의한 고장, 손상 발생시 - 당사에서 미지정한 소모품, 옵션품사용으로 고장 발생시 - LG전자 서비스 센터의 수리기사가 아닌 사람이 제품을 수리 또는 개조하여 고장 발생시 그밖의 경우...
-
Page 90: 무선제원
무선제원 무선제원 • 제작자 및 설치자는 해당 무선 설비가 전파혼신 가능성이 있으므로 인명안전과 관련된 서비스는 할 수 없음. 무선 LAN 모듈 (WN8122E1) 무선 제원 표준 IEEE802.11a/b/g/n 주파수 범위 2400 MHz에서 2483.5 MHz 5150 MHz에서 5250 MHz 출력 802.11a: 13.5 dBm (최대) 802.11b: 17 dBm 802.11g: 15 dBm... -
Page 91: 제품규격
제품규격 제품규격 모델 PV150G (PV150G-KR) 854 (수평) × 480 (수직) 해상도 (픽셀) 16:9 (수평:수직) 종횡비 투사거리 0.36 m에서 3.64 m (25.4 cm에서 254 cm) (영상크기) 상향 투사율 100 % 리모컨 사용거리 AC 100 - 240 V~, 50 / 60 Hz 전원... - Page 92 제품규격 모델 PV150G (PV150G-KR) 온도 0︒C에서 40︒C 작동 보관 -20︒C에서 60︒C 작동 환경 습도 (상대습도) 작동 0 %에서 80 % 0 %에서 85 % 보관 * 사용설명서에 언급된 어댑터만 사용하시기 바랍니다. * 본 사용설명서에 표시된 내용(외관디자인 및 규격)은 제품의 품질향상을 위해 예고없이...
- Page 93 제품규격 지원되는 HDMI(PC) 모드 수평 주파수(kHz) 수직 주파수(Hz) 해상도 640 x 350 31.468 70.09 640 x 480 31.469 59.94 720 x 400 31.469 70.08 800 x 600 37.879 60.31 848 x 480 31.020 60.00 1024 x 768 48.363 60.00 1152 x 864 54.348 60.053 1280 x 1024...
- Page 94 제품규격 지원되는 HDMI/DVI-DTV 모드 해상도 수평 주파수(kHz) 수직 주파수(Hz) 31.47 480p 31.47 59.94 31.50 576p 31.25 45.00 60.00 720p 44.96 59.94 37.5 33.75 60.00 1080i 33.72 59.94 28.125 67.500 67.432 59.939 27.000 24.000 1080p 26.97 23.976 33.75 30.000 33.71 29.97 56.25 •...
- Page 95 제품규격 오픈 소스 안내 정보 본 제품에 탑재된 GPL, LGPL, MPL 및 그 외 오픈소스 라이센스 하에 개발된 소스 코드를 얻으려면, http://opensource.lge.com 를 방문하십시오. 소스 코드를 비롯하여 해당하는 모든 라이센스의 내용 및 저작권 표시, 보증 책임이 없다는 표시를 다운로드 할 수 있습니다. 본...
- Page 96 기호 기호 교류 전류(AC)를 나타냅니다. 직류 전류(DC)를 나타냅니다. 2종 기기를 나타냅니다. 전원 대기상태를 나타냅니다. "켜짐"(전원) 상태를 나타냅니다. 위험 전압을 나타냅니다.
- Page 97 ARS 안내에 따라 제품을 정확하게 선택하시면 해당 제품의 전문 상담원에게 최고의 서비스를 받으실 수 있습니다. 고객을 위해 우수한 품질의 서비스를 제공하는 기업에게 사단법인 사 단 법 한국서비스진흥협회에서 서비스 품질을 인증하는 마크로 LG전자는 서비스 품질 인 한 국 서 우수기업입니다. 비...
- Page 98 Owner's Manual LG Minibeam Nano DLP Projector Please read the safety information carefully before using this product. PV150G www.lge.co.kr...
-
Page 99: Licenses
LICENSES LICENSES Manufactured under license from Dolby Laboratories. Dolby and the double-D symbol are trademarks of Dolby Laboratories. This DivX Certified device has passed rigorous ® testing to ensure it plays DivX video. ® To play purchased DivX movies, first register your device at vod.divx.com. -
Page 100: Safety Precautions
SAFETY PRECAUTIONS SAFETY PRECAUTIONS Please take note of safety instructions to prevent any potential accident or misuse of the product. • Safety precautions are given in two forms, i.e. WARNING and CAUTION. WARNING and CAUTION are understood to mean as follows: WARNING: Failure to follow the instructions may cause serious injury and even death CAUTION: Failure to follow the instructions may cause minor injury to people or damage to the product... - Page 101 SAFETY PRECAUTIONS • Do not place the projector in direct • Do not use the projector in a damp sunlight or near heat sources such as place such as a bathroom where it is radiators, fires, stoves, etc. likely to get wet. - This may result in fire.
- Page 102 SAFETY PRECAUTIONS - The power cord may be • The power plug should be inserted damaged, resulting in fire or fully into the power outlet. electric shock. - An unstable connection may cause a fire. • Do not place the projector on an unstable or vibrating surface such as •...
- Page 103 Ensure the power cord and plug are • Only use the official power cord pro- not damaged, modified, severely vided by LG Electronics. Do not use bent, twisted, pulled, sandwiched other power cords. or hot. Do not use the product if the - This may result in fire or electric power outlet is loose.
- Page 104 - This may result in electric shock. or any AC adapters approved and • Do not insert pieces of metal such certified by LG Electronics. as coins, hairpins or metal debris, or - Any other AC adapter connected flammable materials such as paper may result in the screen or matches into the projector.
- Page 105 SAFETY PRECAUTIONS - There is a high risk of electric • When you play a game by shock. connecting a game console to a projector, it is recommended that • Do not look directly into the lens you maintain a distance of more than when the projector is in use.
- Page 106 SAFETY PRECAUTIONS Cleaning • In the event that no image appears on the screen or no sound is heard, WARNING stop using the projector. Switch off the projector, unplug it from the power • Do not spray water directly to the outlet and contact our service center.
- Page 107 SAFETY PRECAUTIONS • When cleaning plastic parts, such • Remove the plug from the outlet as the projector case, disconnect before cleaning the product. the product from the power first and - Otherwise, this may result in wipe with a soft cloth. Do not spray electric shock.
- Page 108 SAFETY PRECAUTIONS • To prevent damage to lamp, CAUTION unit must remain plugged in for • Do not use or store the projector approximately 3 minutes after power outdoors for long periods of time. down to allow for proper cool down •...
- Page 109 • Always use batteries approved and • Make sure you use the same type of certified by LG Electronics. battery for replacement. - This will prevent damage or fire. (Battery type: CR2032 / 3 V) - In the event of a battery contact •...
- Page 110 CONTENTS CONTENTS LICENSES REMOTE CONTROL SAFETY PRECAUTIONS USING THE PROJECTOR Using the battery PREPARATION Battery using time information Accessories Watching Projector Optional Extras - Turning the Projector On Parts and Components - Focus of the Screen Image - Main Unit - Using the projector - Side Additional Options - Back - Adjusting Aspect Ratio Using the Joystick Button - Using the Keystone Function - Basic functions...
- Page 111 CONTENTS MY MEDIA CONNECTING DEVICES Before Using Connecting HD Receiver, DVD Player, - Connecting a USB Device or VCR Player - Removing a USB Device - HDMI Connection To Use My Media Connecting Headphones - Watching the Videos - Headphone Connection - Viewing the Photos Using the Mirroring Function of a - Listening to Music Mobile Phone - Viewing Files - MHL/Slimport Connection CUSTOMIZING SETTINGS MAINTENANCE...
-
Page 112: Preparation
PREPARATION PREPARATION The pictures may differ slightly from the actual product. Accessories Accessories included with the projector are show below. Accessories are subject to change without prior notice. New accessories may be added or old ones removed. 전원 외부입력 조용히 페이지... - Page 113 PREPARATION • When connecting an HDMI or USB cable, or connecting a USB flash drive to the HDMI or USB port, use a product that has a width of 18 mm or less and a height of 10 mm or less. If the USB cable or USB flash drive does not fit the USB ports of the projector, use an extension cable that supports USB 2.0.
-
Page 114: Optional Extras
PREPARATION Optional Extras To purchase optional accessories, visit an electronics store or online shopping site or contact the retail store where you purchased the product. Optional accessories are subject to change without prior notice. Projection Screen Tripod MHL or Slimport Cable HDMI Cable... -
Page 115: Parts And Components
PREPARATION Parts and Components This projector is manufactured using high-precision technology. You may, however, see tiny black dots and/or bright colored dots (red, blue or green) that continuously appear on the projector screen. This is a normal result of the manufacturing process and does not indicate a malfunction. Main Unit Joystick button Vent... -
Page 116: Side
PREPARATION Side Description DC IN Port Battery Charge Indicator - Red: Charging - Green: Charging complete... -
Page 117: Back
PREPARATION Back Description (Headphone Port) Port Switch - OFF: Turns the projector off completely. - ON: Turns the projector on and the projector goes into Standby mode. Place the switch to OFF when you move the projector or when you intend not to use the projector for long periods of time. -
Page 118: Using The Joystick Button
PREPARATION Using the Joystick Button You can operate the projector by pressing the button or moving the joystick left, right, up, or down. Basic functions When the projector is turned off, place your Power On finger on the joystick button, press it once, and release it. When the projector is turned on, place your finger on the joystick button, press it once for a few seconds, and release it. -
Page 119: Adjusting The Menu
PREPARATION Adjusting the menu When the projector is turned on, press the joystick button one time. You can adjust the menu items ( ) moving the joystick button left, right, up, or down. Move to the desired menu item, and then press the joystick button once to select it. -
Page 120: Projector Status Indicators
PREPARATION Projector Status Indicators LED Power Indicator LED Power Indicator Power standby state The projector is operating with the power on. -
Page 121: Installation
PREPARATION Installation Installation Precautions • Place the projector in a well-ventilated environment. - To prevent internal overheating, install the projector in a well-ventilated place. Do not place anything near the projector that may block its air vents. If the air vents are blocked, the internal temperature of the projector will increase. - Page 122 PREPARATION - Leave an adequate open area (30 cm or more) around the projector. • Do not install the projector in a hot or humid environment. - Only install the projector in a place of moderate temperature and low humidity. •...
-
Page 123: Projection Distance Per Screen Size
PREPARATION Projection Distance per Screen Size Place the projector on a sturdy, level surface, together with the computer or audio/video source. Place the projector an appropriate distance away from the screen. The distance between the projector and the screen determines the actual size of the image. - Page 124 PREPARATION 16:9 Aspect Ratio Screen Size Screen Width Screen Height Projection Distance (mm) (Y) (mm) (X) (mm) (D) (mm) 1089 1271 1016 1454 1143 1636 1270 1107 1818 1397 1218 2000 1524 1328 2182 1651 1439 2364 1778 1550 2547 1905 1660 2729 2032 1771 2911 2159 1882 1058 3093 2286 1992...
-
Page 125: How To Install The Projector On A Tripod
PREPARATION How to Install the Projector On a Tripod • You can install the projector using a camera tripod. • As shown below, you can mount the projector instead of a camera on the tripod. • When stabilizing the tripod, we recommend using a locking bolt of standard size 4.5 mm or less. -
Page 126: Kensington Security System
PREPARATION Kensington Security System • This projector has a Kensington Security Standard connector as an anti-theft mechanism. Connect a Kensington Security System cable as shown below. • For more information on installation and use of the Kensington Security System, refer to the user’s guide provided with the Kensington Security System. •... -
Page 127: Remote Control
REMOTE CONTROL REMOTE CONTROL Open the lid at the back of the remote control and insert the batteries as described in the instructions. Use new batteries. 전원 전원 외부입력 Turns the projector on or off. 조용히 조용히 Mutes the sound of the projector. 페이지... - Page 128 REMOTE CONTROL 설정메뉴 전원 외부입력 Displays or closes the Settings menu. 조용히 간편설정 Enters the quick menu. 페이지 음량 화면정지 Freezes the moving image. (Available in any mode other than USB mode.) 영상모드 화면가림 화면크기 확인 Resizes an image. 나가기 ꕣ Accesses USB mode.
- Page 129 REMOTE CONTROL NOTE • When using the remote control, the optimal operation range is 3 meters or less (left/ right) and within a 30 degree arc of the remote control IR receiver. • For seamless operation, do not block the IR receiver.
-
Page 130: Using The Projector
USING THE PROJECTOR USING THE PROJECTOR Using the battery Low battery! The projector will turn off soon • It is displayed when the battery is running out. • As your battery is low, the projector will be turned off in a minute. • If the screen shows a low battery message, be sure to charge the battery. Battery using time information Status Time and Display... - Page 131 • As the battery is consumable, its lifetime gradually decreases. When the battery’s life is reduced by half, replace it with a new battery from an LG Electronics customer center. • Do not charge the battery using any equipment other than that supplied with the product.
-
Page 132: Watching Projector
USING THE PROJECTOR Watching Projector Turning the Projector On The menu screen display in this owner's manual is an example to help users understand how to operate the product and may look different from the actual screen. Connect the power cord correctly to turn the projector on. Place the switch on the rear port area to ON and press the 전원... -
Page 133: Using The Projector
USING THE PROJECTOR Using the projector When in standby mode, press the 전원 button to turn the projector on. Press the 외부입력 button and select the input signal you want. Control the projector using the following buttons while watching the screen. Button Description Adjusts the volume level. 음량 +,- Mutes the sound of the projector. -
Page 134: Additional Options
USING THE PROJECTOR Additional Options Adjusting Aspect Ratio Press the 간편설정 button. Use the buttons to select Aspect Ratio and press the 확인 button. Menu Description 16:9 Resizes images to the 16:9 ratio. Displays the picture in the original size without cutting off the edges. Just Scan •... -
Page 135: Using The Keystone Function
USING THE PROJECTOR Using the Keystone Function To prevent the screen image from becoming trapezoidal, Keystone adjusts the top and bottom width of the image if the projector is not set up at a right angle to the screen. Because the Keystone function may cause inferior screen image quality, use this function only when it is not possible to set up the projector at an optimal angle. -
Page 136: Changing Input Device
USING THE PROJECTOR Changing input device To select an external input You can select inputs connected to the projector. • Press the 외부입력 button on the remote control to display the input selection screen. - Connected inputs are displayed first. However, SCREEN SHARE input is always activated. • Select an input signal using the remote control's 외부입력 button to connect the projector to the desired input. - Page 137 USING THE PROJECTOR Selecting an Input Label Displays which devices are connected to which input ports. Input Label HDMI Close Press the 외부입력 button on the remote control to display the input selection screen. Press the Red button. Use the button to select one of the input labels.
-
Page 138: Blank Function
USING THE PROJECTOR Blank Function Using the Blank Function This function may be effective when you need to draw attention during a meeting or training. Press the 화면가림 button, and the screen is covered by the background color. You can change the background color by referring to "Selecting the background color of the blank image". -
Page 139: Using The Quick Menu
USING THE PROJECTOR Using the Quick Menu You can easily customize your frequently used menus. Press the 간편설정 button. Press the button to select a menu and press 확인 button. Menu Description Aspect Ratio Resizes the picture. PJT Mode Turns the projected image upside down or flips it horizontally. Picture Mode Changes the picture mode. -
Page 140: Entertainment
Windows, and some other operating systems, may not be compatible with SCREEN SHARE. • Ice Cream Sandwich, Jellybean, and KitKat versions of LG’s Android devices are guaranteed to be compatible. • When connecting via SCREEN SHARE, place the device close to the projector. -
Page 141: My Media
MY MEDIA MY MEDIA Before Using Connecting a USB Device Connect a USB device (external HDD, USB memory) to the USB port of projector to enjoy the content files stored in the USB device with your projector. You cannot write or delete data in the USB device. - Page 142 MY MEDIA Tips for using a USB device • If the USB storage device has a built-in auto recognition program or uses its own driver, it may not work. • Some USB storage devices may not work or may work incorrectly. • If you use a USB extension cable, the USB device may not be recognized or may not work properly.
-
Page 143: To Use My Media
MY MEDIA To Use My Media Press the 설정메뉴 button on the remote control. Select MY MEDIA. Select desired file from the list. Watch the chosen file. Sets play related settings by checking option during disk playback. My Media supporting file • Maximum data transmission rate: 20 Mbps (Mega bit per second) •... - Page 144 MY MEDIA Video Supported Codec Maximum: 1920 x 1080 @ 30p (only Motion JPEG 640 x 480 @ 30p) Extension Codec Video VC-1 Advanced Profile, VC-1 Simple and Main Profiles .asf, .wmv Audio WMA Standard, WMA 9 Professional Video DivX3.11, DivX4, DivX5, DivX6, XVID, H.264 / AVC .divx, .avi Audio MPEG-1 Layer I, II, MPEG-1 Layer III (MP3), Dolby Digital...
- Page 145 MY MEDIA Supported audio files File Item Info Format Bit rate 32 kbps to 320 kbps Sampling rate 32 kHz to 48 kHz Bit rate 32 kbps to 640 kbps Sampling rate 32 kHz, 44.1 kHz, 48 kHz Bit rate 32 kbps to 448 kbps MPEG Sampling rate 32 kHz to 48 kHz Bit rate 24 kbps to 3844 kbps AAC,...
-
Page 146: Watching The Videos
MY MEDIA Watching the Videos In the Movie List, you can watch movies stored on the connected USB device. Controls playback and sets options while viewing videos. Tips for Playing Video Files • Some subtitles created by users may not work properly. • The video and subtitle files should be placed in the same folder. For subtitles to display correctly, the video and subtitle files must have the same name. - Page 147 MY MEDIA Browsing Movie List Play a video file stored from a connected device. Connect a USB storage device. Press the USB button. Use the button to select Movie List and press the 확인 button. Use the , or button to select the file you want and press the 확인...
- Page 148 MY MEDIA Description Thumbnails Abnormal file File not supported File List Moves to the upper level folder. Current page/Total no. of folder pages Displays the remaining battery life. Current page/Total no. of file pages Moves to the top level folder. Moves to the upper level folder. Exit Movie List.
- Page 149 MY MEDIA Control playback by using the following buttons. 나가기 Option Hide Exit Q.MENU Item Description Shows the current playing position. Use buttons to move forward or backward. Stops playing and returns to Movie List. Returns to normal playback. Pauses the media player. If no button is pressed on the remote control for 10 minutes after pausing, the playback is restarted.
- Page 150 MY MEDIA Options for Movie List Press the 간편설정 button. Use the button to move to a desired option and press the 확인 button. Use the , or button to set up each item. Set Video Play. Item Description Selects the size of a playback screen. •...
- Page 151 MY MEDIA Registering the DivX code Checks DivX Reg. Code for replaying DivX protected videos. Register at http://vod.divx.com. Use Reg. Code to rent or purchase movies at www.divx.com/vod. In the Settings menu, move to OPTION 1 and press DivX(R) VOD. Registration Deregistration Close Press the button to move to Registration and press the 확인 button. You must register your device to play DivX(R) protected videos.
- Page 152 MY MEDIA To deregister the DivX code Use the DivX deregistration code to deactivate the DivX DRM function. In the Settings menu, move to OPTION 1 and press DivX(R) VOD. Use the button to go to Deregistration and press the 확인 button. Select Yes. Your device is already registered. Are you sure you wish to deregister? Deregistration code : ******** Deregister at http://vod.divx.com...
-
Page 153: Viewing The Photos
MY MEDIA Viewing the Photos You can view photos stored on a connected device. Supported Photo Files PHOTO (*.JPEG) Baseline 64-pixel (width) x 64-pixel (height) - 15360-pixel (width) x 8640-pixel (height) Progressive 64-pixel (width) x 64-pixel (height) - 1920-pixel (width) x 1440-pixel (height) • Only JPEG files are supported. •... - Page 154 MY MEDIA Browsing Photo List Connect a USB storage device. Press the USB button. Use the buttons to select Photo List and press the 확인 button. Use the , or button to select the file you want and press the 확인 button. Page 1/1 Photo List PAGE Page Change...
- Page 155 MY MEDIA Description File List Moves to the upper level folder. Current page/Total no. of folder pages Displays the remaining battery life. Current page/Total no. of file pages Moves to the top level folder. Moves to the upper level folder. Exits Photo List.
- Page 156 MY MEDIA Control playback by using the following buttons. 01_a.jpg 2008/12/10 1920 x 1080 479 KB [1/4] Slideshow Hide Exit Option Q.MENU Item Description Selects the previous or next photo. All photos are displayed during slide show. Slideshow • Set Slide Speed in the Option → Set Photo View. menu. You can listen to music while viewing photos in full size.
- Page 157 MY MEDIA Options for Photo List Press the 간편설정 button. Use the button to move to a desired option and press the 확인 button. Use the , or button to set up each item. Set Photo View. Item Description Slide Speed Selects a slideshow speed. Selects a music folder for the background music. •...
-
Page 158: Listening To Music
MY MEDIA Listening to Music You can play audio files stored on the connected device. Supported Music Files *.MP3 Bit rate range 32 Kbps to 320 Kbps • Sampling rate MPEG1 Layer3: 32 kHz, 44.1 kHz, 48 kHz • Sampling rate MPEG2 Layer3: 16 kHz, 22.05 kHz, 24 kHz Browsing Music List Connect a USB storage device. - Page 159 MY MEDIA Description Thumbnails Abnormal file File not supported File List Moves to the upper level folder. Current page/Total no. of folder pages Displays the remaining battery life. Current page/Total no. of file pages Moves to the top level folder. Moves to the upper level folder. Exits Music List.
- Page 160 MY MEDIA Control playback by using the following buttons. Page 1/1 Music List PAGE Page Change USB STORAGE DEVICE Drive1 Page 1/1 Butterfly_... 03:25 002. - B02.mp3 Exit Option Hide Q.MENU Item Description Changes the playing position. Stops playing. Returns to normal playback. Pauses the media player.
- Page 161 MY MEDIA Options for Music List Press the 간편설정 button. Use the button to move to a desired option and press the 확인 button. Use the , or button to set up each item. Set Audio Play. Item Description Repeat Selects repeat play. Random Selects random play. Set Audio.
-
Page 162: Viewing Files
MY MEDIA Viewing Files You can see document files stored on a connected device. Supported File Formats XLS, XLSX, DOC, DOCX, PPT, PPTX, TXT, PDF, HWP Microsoft Office: 97/2000/2002/2003/2007 Version Adobe PDF: 1.0/1.1/1.2/1.3/ 1.4 Version Hangul: 97/2003/2007 Version • File Viewer realigns a document, so it may look different from what is displayed on a PC. - Page 163 MY MEDIA Browsing File List Connect a USB storage device. Press the USB button. Use the button to select File List and press the 확인 button. Use the button to select the file you want and press the 확인 button. Page 1/1 File List PAGE Page Change USB STORAGE DEVICE...
- Page 164 MY MEDIA Control playback by using the following buttons. • Click Go Page then the pop-up window for selecting the number of page appears. Input the page to move to the page you want. • Press the 음량 +, - button to zoom in or zoom out. Press the 확인...
- Page 165 MY MEDIA Options for File List Press the 간편설정 button. Use the , or button to set up each item. Set FileViewer Option Item Description Loads and displays pages one by one. The initial loading time is short but a content heavy page may be displayed slowly. Single Page Loads all pages of a file to memory before it starts to Loading...
-
Page 166: Customizing Settings
CUSTOMIZING SETTINGS CUSTOMIZING SETTINGS SETTINGS Press the 설정메뉴 button. Use the , or button to select the desired item and press the 확인 button. Use the , or button to set up the desired item and press the 확인 button. Menu Description PICTURE Adjusts the image quality for optimal viewing. -
Page 167: Picture Settings
CUSTOMIZING SETTINGS PICTURE Settings Press the 설정메뉴 button. PICTURE Use the , or buttons ꔂ Move ꔉ OK to select PICTURE and press the 확인 button. • ꕊ Energy Saving : Minimum Use the , or button to • Picture Mode : Standard set up the desired item and press the •... - Page 168 CUSTOMIZING SETTINGS Menu Description Selects the picture mode optimized for the viewing environment or the program. You can also customize advanced options for each mode. Mode Maximizes the visual effect of video. Vivid Heightens contrast, brightness, and sharpness to display vivid images. Displays images in standard levels of contrast, Standard brightness, and sharpness.
- Page 169 CUSTOMIZING SETTINGS Menu Description Adjusts the sharpness of the borders between bright and Sharpness dark. Horizontal and Vertical Sharpness are available only in Expert1 / Expert2. Color Adjusts the intensity of all colors. Tint Adjusts the balance between red and green levels. Advanced Customizes the advanced settings.
- Page 170 CUSTOMIZING SETTINGS Menu Description Skin colour spectrum can be separately set to implement the Skin Color skin colour as defined by the user. Sky Color Sky colour is set separately. Natural colour spectrum (meadows, hills, etc.) can be separately Grass Color set. Sets the gradation curve according to the output of the picture Gamma signal in relation to the input signal.
- Page 171 CUSTOMIZING SETTINGS Menu Description In Expert mode, you can customize the options of each mode. Gamma : Select 1.9, 2.2,or 2.4. a. Method : 2 Points - Pattern : Inner, Outer - Points : Low, High - Red/Green/Blue : The adjustment range for each color is from -50 to +50.
- Page 172 CUSTOMIZING SETTINGS Menu Description Adjusts Red/Green/Blue/Cyan/Magenta/Yellow colors. Allows an expert to adjust the tint using a test pattern. Six colors (Red/Green/Blue/Cyan/Magenta/Yellow) can be selectively adjusted without affecting other colors. You Color may not see colors change on a normal picture even after Management adjustment.
-
Page 173: Audio Settings
CUSTOMIZING SETTINGS AUDIO Settings Press the 설정메뉴 button. AUDIO Use the , or button ꔂ Move ꔉ OK to select AUDIO and press the 확인 button. • Sound Mode : Standard Use the , or button to • Clear Voice II set up the desired item and press the •... -
Page 174: Time Settings
CUSTOMIZING SETTINGS TIME Settings Press the 설정메뉴 button. TIME Use the , or button to ꔂ Move ꔉ OK select TIME and press the 확인 button. • Sleep Timer : Off Use the , or button to set up the desired item and press the •... -
Page 175: Wireless
WIRELESS Use the , or button to ꔂ Move ꔉ OK select WIRELESS and press the 확인 • SCREEN SHARE : [PJTR][LG]PV150G[0000] button. Group • Use the , or button to Channel set up the desired item and press the •... -
Page 176: Option 1 Settings
CUSTOMIZING SETTINGS OPTION 1 Settings Press the 설정메뉴 button. OPTION 1 Use the , or button to ꔂ Move ꔉ OK select OPTION 1 and press the 확인 button. • Language Use the , or button to • DivX(R) VOD set up the desired item and press the •... -
Page 177: Option 2 Settings
CUSTOMIZING SETTINGS OPTION 2 Settings Press the 설정메뉴 button. Use the , or button to OPTION 2 ꔂ Move ꔉ OK select OPTION 2 and press the 확인 button. Keystone • Use the , or button to Auto Keystone : On • set up the desired item and press the PJT Mode : Front •... - Page 178 CUSTOMIZING SETTINGS Menu Description This function turns the projected image upside down or flips horizontal. • Select Rear when projecting from the back of the transparent screen purchased separately. PJT Mode • Select Front Ceiling when installing the product on the ceiling. • When the PJT Mode is Rear Ceiling/Front Ceiling, the left/ right of the speaker changes automatically.
-
Page 179: Connecting Devices
CONNECTING DEVICES CONNECTING DEVICES You can connect various external devices to the projector. Computer/Notebook Video Digital Device Games Console Headphone Mobile Phone HDMI - Page 83 USB Device - page 44 Headphone - Page 84 Mobile Phone (MHL/Slimport) - Page 85... -
Page 180: Connecting Hd Receiver, Dvd Player, Or Vcr Player
CONNECTING DEVICES Connecting HD Receiver, DVD Player, or VCR Player You can use various features after connecting a HD receiver, DVD player,VCR player, PC, laptop, etc. to the projector with an HDMI cable. HDMI Connection With an HDMI cable, you can enjoy high quality picture and sound. port of the projector to the HDMI Using a HDMI cable, connect the output port of the device to connect. -
Page 181: Connecting Headphones
CONNECTING DEVICES Connecting Headphones The table below shows examples of switching the output. For more Headphone Connection information, refer to the External Output, Connecting to an External You can listen to the audio through a Monitor, or similar sections of the headphone. owner's manual of your computer. Brand Switching Output [Fn]+[F3]... -
Page 182: Using The Mirroring Function Of A Mobile Phone
CONNECTING DEVICES Using the Mirroring Function of a Mobile Phone MHL/Slimport Connection You must use a HDMI adapter to connect your cell phone to the projector and to output images and sound from your cell phone to the projector. The compatible HDMI adapters are different, depending upon your cell phone type. Therefore, purchase an appropriate MHL or Slimport adapter. - Page 183 CONNECTING DEVICES NOTE • When you connect a mobile phone to the port, you can see the mobile phone screen through a projector. - This only applies to mobile phones that support MHL/Slimport. - You can use the remote control for some applications. (In this case, ,and buttons will not work with the...
-
Page 184: Maintenance
MAINTENANCE MAINTENANCE Clean your projector to keep it in optimal condition. Cleaning Cleaning the Lens If there is any dust or staining on the lens surface, you must clean the lens. Use an air spray or a cleaning cloth to clean the lens. To remove dust or stains, use an air spray or apply a small amount of cleaning agent onto a swab or soft cloth to lightly rub the lens. -
Page 185: Specifications
SPECIFICATIONS SPECIFICATIONS MODELS PV150G (PV150G-KR) Resolution (Pixel) 854 (Horizontal) × 480 (Vertical) Aspect Ratio 16:9 (Horizontal:Vertical) Projection Distance 0.36 m to 3.64 m (25.4 cm to 254 cm) (Video size) Ratio of Upward 100 % Projection Working range of the remote control AC 100 - 240 V~, 50 / 60 Hz Power 19 V 1.3 A or... - Page 186 SPECIFICATIONS MODELS PV150G (PV150G-KR) Temperature Operation 0 °C to 40 °C Storage -20 °C to 60 °C Operation environment Relative humidity Operation 0 % to 80 % Storage 0 % to 85 % * Use only power supplies listed in the user instructions. * Contents in this manual may be changed without prior notice due to upgrade of product functions.
- Page 187 SPECIFICATIONS Supported HDMI (PC) Modes Resolution Horizontal Frequency (kHz) Vertical Frequency (Hz) 640 x 350 31.468 70.09 640 x 480 31.469 59.94 720 x 400 31.469 70.08 800 x 600 37.879 60.31 848 x 480 31.020 60.00 1024 x 768 48.363 60.00 1152 x 864 54.348 60.053 1280 x 1024 63.981 60.02...
- Page 188 SPECIFICATIONS Supported HDMI/DVI-DTV Mode Resolution Horizontal Frequency (kHz) Vertical Frequency (Hz) 31.47 480p 31.47 59.94 31.50 576p 31.25 45.00 60.00 720p 44.96 59.94 37.5 33.75 60.00 1080i 33.72 59.94 28.125 67.500 67.432 59.939 27.000 24.000 1080p 26.97 23.976 33.75 30.000 33.71 29.97 56.25 • To provide the best picture quality, a 848 x 480 (480p) resolution is recommended.
- Page 189 In addition to the source code, all referred license terms, warranty disclaimers and copyright notices are available for download. LG Electronics will also provide open source code to you on CD-ROM for a charge covering the cost of performing such distribution (such as the cost of media, shipping, and handling) upon email request to opensource@lge.com.
-
Page 190: Symbols
SYMBOLS SYMBOLS Refers to alternating current(AC). Refers to direct current(DC). Refers to class II equipment. Refers to stand-by. Refers to “ON” (power). Refers to dangerous voltage.