
Related Manuals for LG PF1500


Summary of Contents for LG PF1500
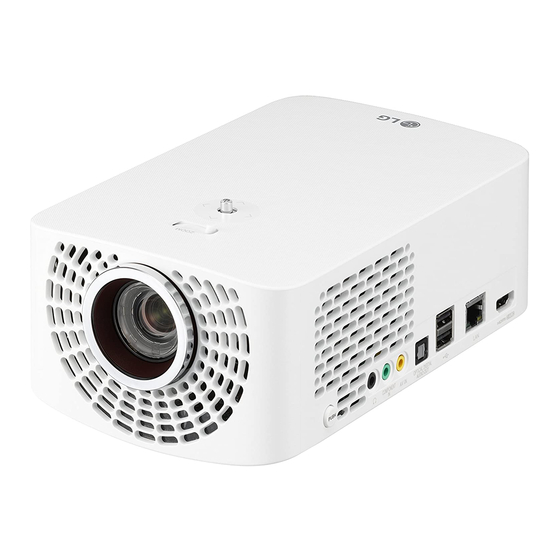
- Page 1 Owner's Manual LG Minibeam Pro DLP Projector Please read the safety information carefully before using this product. PF1500 www.lg.com...
-
Page 2: Licenses
LICENSES LICENSES Supported licenses may differ by model. For more information about licenses, visit www.lg.com. Manufactured under license from Dolby Laboratories. Dolby and the double-D symbol are trademarks of Dolby Laboratories. This DivX Certified device has passed rigorous ® testing to ensure it plays DivX video. - Page 3 LICENSES This device meets the EMC requirements for home appliances (Class B) and is intended for home usage. This device can be used in all regions. NOTE  • Image shown may differ from your projector. • Your projector’s OSD (On Screen Display) may differ slightly from that shown in this manual.
-
Page 4: Safety Precautions
SAFETY PRECAUTIONS SAFETY PRECAUTIONS Please take note of the safety instructions to prevent any potential accident or misuse of the projector. • Safety precautions are given in two forms, i.e., WARNING and CAUTION as detailed below. WARNING Failure to follow the instructions may cause serious injury and even death. - Page 5 SAFETY PRECAUTIONS • Do not allow children to cling to • Ensure good ventilation around or climb up to the projector. the projector. The distance - This may cause the projector between the projector and the to fall, causing injury or death. wall should be at least 30 cm.
- Page 6 SAFETY PRECAUTIONS Power • Prevent dust from collecting on the power plug pins or outlet. - This may result in fire. WARNING • To turn off the main power, • The appliance coupler is used remove the power plug, which as the disconnect device. should be positioned so it is - Please make sure the device easy to access for operation.
- Page 7 • Only use the official power cord unplug it from the power outlet provided by LG Electronics. Do and contact our service centre. not use other power cords. - This may result in fire or - This may result in fire or electric shock.
- Page 8 SAFETY PRECAUTIONS • Unplug the power cord from the CAUTION outlet during a lightning storm. • Do not place heavy objects on - This will prevent shock or the projector. damage to the projector. - It may fall down and cause •...
- Page 9 SAFETY PRECAUTIONS Cleaning • Do not block the light beam emitted from the projector using a book or other object. WARNING - Lengthy exposure to the • Do not spray the projector with projector beam may result in water when cleaning. Make sure fire.
- Page 10 SAFETY PRECAUTIONS Others CAUTION • Contact your seller or our WARNING service centre once a year to • When you go out, place the clean the internal parts of the projector out of reach of projector. animals, and remove the power - If you do not clean the plug from the wall outlet.
- Page 11 SAFETY PRECAUTIONS • To prevent damage to lamp, CAUTION unit must remain plugged in for • Do not mix new batteries with approximately 3 minutes after old ones. power down to allow for proper - Burst or leaking batteries may cool down (not applicable on result in damage or injury.
- Page 12 SAFETY PRECAUTIONS • Do not store batteries at temperatures higher than 60 °C or in high humidity. - This may result in explosion or fire. • Keep the batteries and remote out of reach of children. - This will prevent personal injury or damage to the product.
-
Page 13: Table Of Contents
CONTENTS CONTENTS LICENSES USING THE PROJECTOR 32 Watching Projector SAFETY PRECAUTIONS 4 - Initial Setup - Focus and Position of the PREPARATION Screen Image Accessories - Watching With the Projector 36 Optional Extras Additional Options Parts and Components - To adjust Aspect Ratio - Main Unit - Using the Edge Adj (4 Corner - Side Keystone) Function - Back... - Page 14 - To Reset Premium - To Use a USB Wired/wireless Mouse To Use LG Smart World - To Use a USB Wired/wireless - To Sign Up With LG Smart Keyboard World - To Install An App On Your Projector - To Manage My Information 71...
-
Page 15: Contents
CONTENTS 3D FUNCTION Connecting a Digital Amp 117 Using the Mirroring Function While Watching 3D of a Mobile Phone Requirements for Watching 3D - MHL Connection Images - Using the DLP-LINK (DLP- MAINTENANCE Ready) Type Glasses Cleaning To view 3D images - Cleaning the Lens - Supported 3D Mode - Cleaning the Projector Case CUSTOMIZING SETTINGS 92 INFORMATION SETTINGS PICTURE Settings To Update Projector Software SOUND Settings... -
Page 16: Preparation
PREPARATION PREPARATION The pictures may differ slightly from the actual product. Accessories Accessories included with the projector are show below. Accessories are subject to change without prior notice. New accessories may be added or old ones removed. Magic Remote Control Owner's Manual CD Owner's Manual Two AA Batteries... -
Page 17: Optional Extras
Optional accessories are subject to change without prior notice. Projection Screen Tripod HDMI Cable 3D glasses Video Cable Audio Cable (DLP-LINK or DLP Ready Type) Optical Cable LG Audio Device MHL Cable... -
Page 18: Parts And Components
PREPARATION Parts and Components This projector is manufactured using high-precision technology. You may, however, see tiny black dots and/or bright coloured dots (red, blue, or green) that continuously appear on the projector screen. This is a normal result of the manufacturing process and does not indicate a malfunction. Main Unit Joystick Button Vent... -
Page 19: Side
PREPARATION Side 2 3 4 5 Description PUSH button (Headphone Port) COMPONENT IN Port AV IN Port OPTICAL DIGITAL AUDIO OUT Port (USB port) LAN Port Port... -
Page 20: Back
PREPARATION Back Description IR Reciver Port DC IN Port... -
Page 21: Using The Joystick Button
PREPARATION Using the Joystick Button You can operate the projector by pressing the button or moving the joystick left, right, up, or down. Basic functions Power On When the projector is turned off, place your finger on the joystick button, press it once, and release it. Power Off When the projector is turned on, place your finger on the joystick button,... -
Page 22: Adjusting The Menu
PREPARATION Adjusting the menu When the projector is turned on, press the joystick button one time. You can adjust the menu items ( , ) moving the joystick button left, right, up, or down. Move to the desired menu item, and then press the joystick button once to select it. -
Page 23: Installation
PREPARATION Installation - Leave an adequate open area (30 cm or more) around the projector. Installation Precautions • Place the projector in a well- ventilated environment. - To prevent internal overheating, install the projector in a well-ventilated place. Do not place anything •... -
Page 24: Projection Distance Per Screen Size
PREPARATION Projection Distance per Screen Size 1 Place the projector on a sturdy, level surface, together with the PC or audio/video source. 2 Place the projector an appropriate distance away from the screen. The distance between the projector and the screen determines the actual size of the image. - Page 25 PREPARATION 16:9 Aspect Ratio (Wide) Projection Screen Size Screen Width Screen Height Distance (mm) (Y) (mm) (X) (mm) (D) (mm) 1061 1016 1230 1143 1371 1270 1107 1526 1397 1218 1682 1524 1328 1837 1651 1439 1992 1778 1550 2147 1905 1660 2302 2032 1771 2458 2159 1882 1058 2613 2286 1992...
-
Page 26: How To Install The Projector On A Tripod
PREPARATION How to Install the Projector On a Tripod • You can install the projector using a camera tripod. • As shown below, you can mount the projector instead of a camera on the tripod. • When stabilizing the tripod, we recommend using a locking bolt of standard size 4.5 mm or less. -
Page 27: Kensington Security System
PREPARATION Kensington Security System • This projector has a Kensington Security Standard connector as an anti-theft mechanism. Connect a Kensington Security System cable as shown below. • For more information on installation and use of the Kensington Security System, refer to the user’s guide provided with the Kensington Security System. -
Page 28: Magic Remote Control
MAGIC REMOTE CONTROL MAGIC REMOTE CONTROL If the battery low message appears while using the Projector, replace the batteries. As shown in the figure, press the top of the battery cover and slide it down the cover. Insert two new and identical batteries (1.5 V, AA type) with + and - poles pointing in the correct direction in the remote control. -
Page 29: Magic Remote Control
MAGIC REMOTE CONTROL (EXIT) Changes the input source. (Voice recognition) Network connection is required to use the voice recognition function. 1. Press the voice recognition button. 2. Speak when the voice display window appears on the left of the Projector screen. * Use the Magic Remote no further than 10 cm from your face. -
Page 30: To Register The Magic Remote Control
MAGIC REMOTE CONTROL Displayed when you press If you point and hold the Wheel (OK) button pointer at the bottom left of on the magic remote the screen while watching control. Check external input projector, the MY APPS information. icon is displayed. Clicking the icon displays the MY APPS menu. -
Page 31: Using The Magic Remote Control
MAGIC REMOTE CONTROL Using the Magic Remote Control • Shake the magic remote control lightly when there is no pointer displayed on the screen. A pointer will be displayed on the screen. - The pointer disappears if the remote control is not used for a certain period of time. •... -
Page 32: Using The Projector
USING THE PROJECTOR USING THE PROJECTOR Watching Projector Initial Setup The menu screen display in this owner's manual is an example to help users understand how to operate the product and may look different from the actual screen. 1 Connect the power cord correctly. 2 After waiting for a moment, press the POWER button on the remote control or the joystick button. - Page 33 USING THE PROJECTOR...
- Page 34 USING THE PROJECTOR - The initial settings are completed when you select the settings above. NOTE • (Home) → To change the mode while using the projector, go to SETTINGS → OPTION and select Mode Setting.
-
Page 35: Focus And Position Of The Screen Image
USING THE PROJECTOR Focus and Position of the Screen Image When an image appears on the screen, check if it is in focus and fits the screen properly. Zoom Ring Focus Ring • To adjust the focus of the image, rotate the focus ring. • To adjust the size of the image, rotate the zoom ring. To move the screen image upward/downward, adjust the height of the foot at the bottom of the projector. -
Page 36: Watching With The Projector
USING THE PROJECTOR Watching With the Projector 1 When in standby mode, press the POWER button to turn the projector 2 Select the (Home) → INPUT LIST and select the input signal you want. 3 Control the projector using the following buttons while watching projector. Button Description Moves to the previous/next page. -
Page 37: Additional Options
USING THE PROJECTOR Additional Options To adjust Aspect Ratio Select (Home) → SETTINGS → PICTURE → Aspect Ratio Selects the screen aspect ratio. Menu Description 16:9 Resizes images to fit the screen width. Displays video images in the original size without removing parts of the edge of the image. Just Scan •... -
Page 38: Using The Edge Adj (4 Corner Keystone) Function
USING THE PROJECTOR Using the Edge Adj (4 Corner Keystone) Function Edge Adj (4 Corner Keystone) adjusts the horizontal and vertical sides of the projected image if the projector is at an angle and not perpendicular to the screen. This feature ensures the shape of the projected image is not distorted. -
Page 39: Changing Input Device
USING THE PROJECTOR Changing Input Device To select an external input Selects external input. • Select (Home) → INPUT LIST or press the INPUT button on the remote control to display the input selection screen. - Connected inputs are displayed first. However, AV is always activated. • Select an input signal using the remote control's INPUT button to connect the projector to the desired input. - Page 40 USING THE PROJECTOR Selecting an Input Label Displays which devices are connected to which input ports. 1 Select (Home) → INPUT LIST or press the INPUT button on the remote control to display the input selection screen. 2 Press the Red button. 3 Press the button to go to the desired input and press the Wheel (OK) button.
-
Page 41: To Use Simplink
USING THE PROJECTOR To Use SIMPLINK SIMPLINK is a feature that enables you to control and manage various multimedia devices conveniently using the projector remote control only via the SIMPLINK menu. 1 Connect the projector's HDMI terminal with the SIMPLINK device's HDMI output terminal using an HDMI cable. For home theatre units with a SIMPLINK function, connect HDMI terminals as above, and use an optical cable to connect OPTICAL DIGITAL AUDIO OUT from the projector to Optical Digital Audio In of the SIMPLINK device... - Page 42 USING THE PROJECTOR Explanation of SIMPLINK Features Menu Description Plays the multimedia device on the projector Direct Play instantly. Select Selects the desired device via the SIMPLINK menu multimedia to control it from the projector screen instantly. device Manages the multimedia device with the projector Disc playback remote control.
-
Page 43: Using The Quick Menu
USING THE PROJECTOR Using the Quick Menu You can customize frequently used menus. 1 Select (Home) → MY APPS → Quick Menu. 2 Press the button to select a menu and press Wheel (OK) button. Menu Description Aspect Ratio Resizes the picture. Picture Mode Changes the picture mode. Sound Mode Sets the sound mode. Sets the projector to be turned off at the specified Sleep Timer time. -
Page 44: To Set Sound
Dolby Digital Plus Dolby Digital HE-AAC Dolby Digital To connect and use an LG audio device LG audio device allows you to enjoy rich powerful sound easily. • (Home) → SETTINGS → SOUND → Sound Out → LG Sound Sync (Optical) Connect an LG audio device with the logo to the OPTICAL... - Page 45 HBS-730, LG HBS-800 (Product availability may vary by country.) • For wireless connection, if the device fails to connect. Check the device power to connect and if the LG Audio device is in a proper operating condition. • If two or more devices are detected, the first detected device is connected first.
-
Page 46: Entertainment
ENTERTAINMENT ENTERTAINMENT To use Smart Features To use Home Screen • Press the (Home) button on the remote control. With all projector features on one screen, everyone can access a wealth of content and applications conveniently via the quick and easy-to-use menu, arranged by themes such as MY APPS, etc. Movie Weather News... -
Page 47: To Use My Apps
ENTERTAINMENT To use MY APPS • (Home) → MY APPS • Select MY APPS at the lower left of the home screen. • Check pre-installed apps and apps you have downloaded. To edit items in MY APPS • Select (Home) → MY APPS → (Edit). • On the MY APPS page, select (Edit) at the top of the screen to move or delete apps. -
Page 48: To Connect Network
ENTERTAINMENT To Connect Network A wireless or wired network connection is required to use smart features. When connected to the network, you can use premium content, LG Smart World, DLNA and more. One-click Network Connection Connects easily to a wired/wireless network. • (Home) → SETTINGS → NETWORK → Network Connection to connect to an available network automatically. -
Page 49: To Use The Wi-Fi Direct Function
ENTERTAINMENT To Use the Wi-Fi Direct Function Wi-Fi Direct is a function that allows your projector to connect with a Wi-Fi Direct device without Internet connection. With SmartShare™, you can watch the files stored on a device connected via Wi-Fi Direct. • Select (Home) → SETTINGS → NETWORK → Wi-Fi Direct. 1 ... -
Page 50: Tips For Network Settings
• LG Electronics is not responsible for any network connection problems or any faults, malfunctions and errors caused by an network connection. •... -
Page 51: Smartshare
SMARTSHARE SMARTSHARE Smartshare is the name of contents sharing and usage function that includes USB Connection, SCREEN SHARE (Miracast™, Intel's WiDi), DLNA and others. Before Using Connecting a USB Device Connect a USB device (external HDD, USB memory) to the USB port of projector to enjoy the content files stored in the USB device with your projector. - Page 52 SMARTSHARE Tips for using a USB device • If the USB storage device has a built-in auto recognition program or uses its own driver, it may not work. • Some USB storage devices may not work or may work incorrectly. • If you use a USB extension cable, the USB device may not be recognized or may not work properly.
-
Page 53: To Use Smartshare
SMARTSHARE To use SmartShare™ 1 Press the (Home) button on the magic remote control. 2 Select SMARTSHARE™. You can watch the photo, music, video, and document on the projector by connecting a USB or home network (DLNA). The photo, music, video, and document files of all devices connected to the projector are displayed. (For the document files, only those in the devices connected via USB are displayed.) Description... -
Page 54: Watching The Videos
SMARTSHARE Watching the Videos In the Videos, you can watch movies stored on the connected USB device. Controls playback and sets options while viewing videos. Playing video - warning • Some subtitles created by users may not work properly. • The video and subtitle files should be placed in the same folder. For subtitles to display correctly, the video and subtitle files must have the same name. - Page 55 SMARTSHARE To control video playback You can control playback using the following buttons. Shows the current playing position. Use the button to move forward or backward. Item Description Resumes normal playback. Pauses the video player. Displays in slow motion. Whenever this button is pressed, the playback speed is increased or decreased by one unit.
-
Page 56: Viewing The Photos
SMARTSHARE Viewing the Photos You can view photos stored on a connected device. To control photo view You can control playback using the following buttons. Item Description Selects the previous or next photo. If no picture is selected, all photos in the current folder are displayed in a slide show. -
Page 57: Listening To Music
SMARTSHARE Listening to Music You can play audio files stored on the connected device. To control music playback You can control playback using the following buttons. Changes the playing position. Item Description Plays the previous/next file. Pauses the music player. Resumes normal playback. Sets the repeat playback. Sets the random playback. -
Page 58: Viewing Files
SMARTSHARE Viewing Files You can see document files stored on a connected device. Supported File Formats XLS, XLSX, DOC, DOCX, PPT, PPTX, TXT, PDF, HWP Microsoft Office 97/2000/2002/2003/2007 version Adobe PDF 1.0/1.1/1.2/1.3/1.4 version HWP 2007 version • File Viewer realigns a document, so it may look different from what is displayed on a PC. -
Page 59: To Set Smartshare™ Related Functions
SMARTSHARE To Set SmartShare™ Related Functions Select (Home) → SMARTSHARE™ → Settings. Changes settings related to SmartShare™ content playback. Advanced Setting Item Description My Minibeam Changes the name that appears when searching for Name the projector from other devices. Network Status Checks the network connection. Allows use of wireless connection functions such as Wi-Fi Direct Wi-Fi Direct and WiDi. - Page 60 SMARTSHARE Video Supported Codec Maximum resolution: 1920 x 1080 @ 30p Extension Codec VC-1 Advanced Profile, VC-1 Simple and Main Video .asf Profile .wmv Audio WMA Standard, WMA 9 Professional DivX3.11, DivX4, DivX5, DivX6, XViD, H.264/ Video AVC, Motion Jpeg, MPEG-4 Part 2 .divx MPEG-1 Layer I, II, MPEG-1 Layer III (MP3), .avi...
-
Page 61: To Use Screen Share (Miracast™ / Intel's Widi Function)
SMARTSHARE Available photo file File type Item Info Minimum: 64 x 64 2D Maximum: JPEG (jpeg, jpg, jpe) - Normal Type: 15360 (W) x 8640 (H) - Progressive Type: 1920 (W) x 1440 (H) Minimum: 64 x 64 3D (jps) Maximum: - Normal Type: 15360 (W) x 8640 (H) 4:3 size: 3648 x 2736 2592 x1944 3D (mpo) -
Page 62: To Connect Dlna
• You may not connect your projector to a non-LG Electronics device even when it is detected. • It is recommended you to connect a device to a 5 GHz router. -
Page 63: To Connect Dlna Dmr (Digital Media Renderer)
SMARTSHARE To connect DLNA DMR (Digital Media Renderer) If the PC's operating system is Windows 7 or Windows 8 or the DLNA- certified device (e.g., mobile phone) is connected via a network, you can play music / videos / photos on projector without installing a separate program. -
Page 64: Smartshare™ Pc Sw Installing And Setting
SmartShare™ PC SW Installing and Setting Install the SmartShare™ PC SW (DLNA) program on your PC. 1 Download the setup file from the path below in order to use the DLNA function. http://www.lg.com/de/support/smart-share 2 Install the downloaded DLNA software. 3 You can run the program when installation is complete. -
Page 65: In Case Of A Dlna Malfunction
SMARTSHARE In Case of a DLNA Malfunction • If a DLNA feature does not work properly, check network settings. • A 5-GHz access point is needed to view 1080p videos via DLNA. A 2.4-GHz access point may cause frequent buffering or other problems. • DLNA may not work properly on a wireless network. It is recommended to use a wired connection. -
Page 66: To Use A Premium Service
SMARTSHARE To Use a Premium Service • (Home) → PREMIUM • This service gives you easy access to a wide variety of content, such as video, news, and UCC, at any time, as long as you are connected to the network. Premium content includes specialized country-specific services taking regional cultural sensitivities into account as well as global content. -
Page 67: To Use Paid Content
If you are using the LG billing system, you can purchase paid content after signing up for LG Projector. You can sign up for on the sign-up screen on your projector or the LG website (www.lgappstv.com). You can then sign into both the projector and the website with a single ID. -
Page 68: To Reset Premium
Refer to the web site of each content provider for questions, troubleshooting, or latest information about Content. LG Electronics does not take any legal responsibility for content services and related information including discontinuation of service by the service provider. -
Page 69: To Use Lg Smart World
To Use LG Smart World • Select (Home) → MY APPS → LG Smart World. LG Smart World is a projector application service available through Projector Service. You can download and enjoy many different apps (for fee or free) including education, entertainment, life, and news. App 1 App 8... -
Page 70: To Sign Up With Lg Smart World
• The website (www.lgappstv.com) is not available in some countries. To Install An App On Your Projector • (Home) → MY APPS → LG Smart World Sign up is required to download and run apps. 1 Click the Sign In button at the top of the home screen to log in. -
Page 71: To Manage My Information
/ moved from the MY APPS screen. • A USB Flash Drive containing apps cannot be used for other data. (For USB Apps Only) To Manage My Information • (Home) → MY APPS → LG Smart World 1 Sign in. 2 Select the currently signed-in ID at the top of the screen. 3 ... -
Page 72: To Use Search Function
You can search apps and contents using the Search function of LG Projector. When you enter keywords using the input device, such as the remote control, you can find apps of LG Smart World and some contents of the Premium service. Links are also provided to go for web search. -
Page 73: To Use The Voice Recognition Function
SMARTSHARE To Use the Voice Recognition Function Using this Function Through Search 1 Go to (Home) → MY APPS → Search. Select the voice recognition icon on the left of the text field. 2 Speak slowly and clearly after the voice recognition window appears. 3 After the voice recognition is completed, the Similar List window pops up. - Page 74 SMARTSHARE NOTE • The website (www.lgappstv.com) is not available in some countries. • While the recognised result is in the text field, if you retry the voice recognition function, the previous result will be replaced with the new one. • You can use Voice Search when you press the on the Magic remote control even if QWERTY keyboard is shown on your screen.
-
Page 75: To Use Voice Mate Function
SMARTSHARE To Use Voice Mate Function What Is Voice Mate? Voice Mate allows you to search desirable programs and content with your voice and adjust the projector. 1 Press the voice recognition button on the magic remote control. 2 When the Voice Display bar is activated on the left of the screen, say what you want to watch. -
Page 76: How To Use Voice Mate
SMARTSHARE How to Use Voice Mate? • To use all the functions and services of Voice Mate, you need to set Smart Wizard and Time. Set up the network, region, auto tuning, and universal remote control through the Smart Wizard. • In order to use Voice Mate, you must set up the network, time, region, and tuning. -
Page 77: See Avatar
SMARTSHARE See Avatar Using the Avatar • (Home) → SETTINGS → OPTION → See Avatar You can use the avatar when you use voice recognition. You can check the voice recognition status via the message from the avatar and it helps you to enter your speech correctly. •... -
Page 78: To Use Internet
SMARTSHARE To Use Internet • (Home) → INTERNET • Types URL manually on projector or visits websites added to favourite. Description Types in the web address. Chooses when you open several web browsers. Add the current page to favourites. • Internet supports up to Flash 11 but does not support platform- dependent technology like ActiveX. -
Page 79: Frequently Asked Questions For Projector
Frequently Asked Questions for Projector Sign up is required to use LG Smart World. You can sign up on either your projector or the LG website (www.lgappstv.com). Free apps are available immediately after signing up. You can purchase paid apps using your credit card registered with the website or credits. - Page 80 Please check if the projector model supports LG Smart World. Can I use apps from • The apps provided from LG Projector's LG LG Projector’s LG Smart World can be used only on an LG Smart World on both Projector. a projector and a • Apps may be purchased from the website (www.lgappstv.com) but cannot be used on...
- Page 81 • If you provide other information than the should I do? ID and password when signing up on your projector or the LG website (www.lgappstv. com), you can recover your password on the website. • The following payment methods are available to purchase paid apps on your projector: credit card, credits, and carrier billing.
- Page 82 ID or change it to the email address. • The LG account allows you to sign into all of the LG Smart service with a single ID and password. You can use the following services with your LG account:...
-
Page 83: Using Advanced Functions
USING ADVANCED FUNCTIONS USING ADVANCED FUNCTIONS To Use Screen Remote To Use Screen Remote Press the button on the magic remote control. Select a button on the screen remote displayed on the screen using the magic remote control. • The type of buttons on the screen remote varies depending on the region or the type of a connected device. -
Page 84: To Use The Universal Control Function
USING ADVANCED FUNCTIONS To Use the Universal Control function With the Magic Remote control, you can control a set-top box, Blu-ray player, home theatre system, etc. 1 Check if a device you want to set is connected to your projector. 2 After pressing the button on the Magic Remote control, select the icon of a device you want in the change device tab. -
Page 85: To Use A Usb Input Device On
It is recommended to use a product which is tested for compatibility with the LG Projector. LOGITECH K200, LOGITECH K400, MICROSOFT Comfort Curve 2000, MICROSOFT MS800, and LG Electronics ST-800 • You can change the input language by pressing the language switch key... -
Page 86: 3D Function
3D FUNCTION 3D FUNCTION 3D technology uses different video frames for each eye to add depth to the video. While Watching 3D WARNING • If you view 3D video or images too closely for a long period of time, you may experience eyestrain. • If you watch the projector or game screen for a long time with 3D glasses on, you may experience dizziness or eye fatigue. - Page 87 3D FUNCTION • Warning about photosensitivity seizures - Some users may experience a seizure or other abnormal symptoms when they are exposed to a flashing light or particular patterns from a video game. If anyone in your family has a history of epilepsy or has ever experienced any kind of seizure, please consult your doctor before viewing 3D images.
- Page 88 3D FUNCTION • Elderly viewers may have a reduced depth perception than younger viewers. Avoid watching video nearer than the recommended distance. • Watch 3D images within the optimum viewing angle and distance. • If you are outside the viewing angle or distance, you may not be able to see 3D images.
-
Page 89: Requirements For Watching 3D Images
3D FUNCTION Requirements for Watching 3D Images * Optimum viewing angle: Top/Bottom/Left/Right 9° Recommended viewing distance: 3 m to 5 m Recommended screen size: 101 cm  * Watching 3D videos should be done in dark room environments only. NOTE • The pairing with the DLP-LINK glasses is affected by the intensity of light reflected from the screen. -
Page 90: Using The Dlp-Link (Dlp-Ready) Type Glasses
3D FUNCTION Using the DLP-LINK (DLP-Ready) Type Glasses 1 While watching 3D images from the projector, press buttons on the glasses. 2 When you press the button, the glasses flicker while synchronizing with the 3D images. (The flickering is a unique operation method of DLP- LINK type glasses. It may be different depending on the glasses type.) 3 ... -
Page 91: Supported 3D Mode
3D FUNCTION Supported 3D Mode Horizontal Vertical Supported 3D Signal Resolution Frequency Frequency Formats (kHz) (Hz) Side by side 37.5 (half), Top and Bottom 1280 x 720p Frame Packing 89.9 / 59.94 / 60 Side by side 28.125 1920 x 1080i (half), Top and 1080 33.7 Bottom... -
Page 92: Customizing Settings
CUSTOMIZING SETTINGS CUSTOMIZING SETTINGS SETTINGS 1 Press the (Home) button and select SETTINGS. 2 Use the button to select the desired item and press the Wheel (OK) button. 3 Use the , or button to set up the desired item and press Wheel (OK) button. 4 ... -
Page 93: Picture Settings
CUSTOMIZING SETTINGS PICTURE Settings 1 Press the (Home) button and select SETTINGS. 2 Use the buttons to select PICTURE and press the Wheel (OK) button. 3 Use the , or button to set up the desired item and press the Wheel (OK) button. - To return to the previous menu, press the (BACK) button. - Page 94 CUSTOMIZING SETTINGS Menu Description Selects the picture mode optimized for the viewing environment or the program. You can also customize advanced options for each mode. Mode Maximizes the visual effect of video. Vivid Heightens contrast, brightness, and sharpness to display vivid images. Displays images in standard levels of Standard contrast, brightness, and sharpness.
- Page 95 CUSTOMIZING SETTINGS Menu Description Picture Option Sets optional settings. Resets values customized by the user. Picture Reset Each picture mode is reset. Select the picture mode you wish to reset. You can set the 3D mode On or Off. Adjusts various aspects of 3D imaging. Mode Provides the appropriate 3D depth.
- Page 96 CUSTOMIZING SETTINGS Advanced Control Menu Description Dynamic Adjusts contrast and colour to the optimal level Contrast according to the screen’s brightness. Dynamic Adjusts colours for more natural-looking colours. Colour Selects the range of colours that can be expressed. Colour • Standard: Displays the original colours of an input Gamut signal regardless of the display features.
- Page 97 CUSTOMIZING SETTINGS Expert Control Menu Description Dynamic Adjusts contrast and colour to the optimal level Contrast according to the screen’s brightness. Super Provides a crystal-clear picture by improving the Resolution details in areas where the picture is blurry or unclear. Selects the range of colours that can be expressed. •...
- Page 98 CUSTOMIZING SETTINGS Menu Description Adjusts Red/Green/Blue/Cyan/Magenta/Yellow colours. Allows an expert to adjust the tint using a test pattern. Six colours (Red/Green/Blue/Cyan/ Magenta/Yellow) can be selectively adjusted without affecting other colours. You may not see colours Colour change on a normal picture even after adjustment. Management - Saturation Red/Green/Blue/Cyan/Magenta/ System...
- Page 99 CUSTOMIZING SETTINGS Picture Option Menu Description Noise Reduction Reduces screen noise in the video. MPEG Noise Eliminates noise generated while creating digital Reduction picture signals. Adjusts the brightness or darkness of the screen Black Level to suit the black level of the picture input using the degree of darkness (black level) of the screen.
-
Page 100: Sound Settings
CUSTOMIZING SETTINGS SOUND Settings 1 Press the (Home) button and select SETTINGS. 2 Use the buttons to select SOUND and press the Wheel (OK) button. 3 Use the , or button to set up the desired item and press the Wheel (OK) button. - To return to the previous menu, press the (BACK) button. - Page 101 (Optical/ • Digital Sound Out Sets up Digital HDMI ARC) Sound Output. Sound Out LG Sound Sound is output through an LG audio Sync device connected to the OPTICAL (Optical) DIGITAL AUDIO OUTPUT port. Sound output is through the Bluetooth Bluetooth device. Sound is output through headphones.
- Page 102 Adjusts how the sound is synced to external speakers, such as an external speaker connected to the digital audio External output port, LG audio device, projector Speaker speaker, SPDIF, and headphone. AV Sync. The + and - buttons allow the viewer to Adjust synchronize the audio with the video.
-
Page 103: Time Settings
CUSTOMIZING SETTINGS TIME Settings 1 Press the (Home) button and select SETTINGS. 2 Use the button to select TIME and press the Wheel (OK) button. 3 Use the , or button to set up the desired item and press the Wheel (OK) button. - To return to the previous menu, press the (BACK) -
Page 104: Lock Settings
CUSTOMIZING SETTINGS LOCK Settings 1 Press the (Home) button and select SETTINGS. 2 Use the button to select LOCK and press the Wheel (OK) button. - To enter the LOCK menu, enter the preset 4-digit password. The initial password is set as 0000. 3 ... -
Page 105: Option Settings
CUSTOMIZING SETTINGS OPTION Settings 1 Press the (Home) button and select SETTINGS. 2 Use the button to select OPTION and press the Wheel (OK) button. 3 Use the , or button to set up the desired item and press the Wheel (OK) button. - To return to the previous menu, press the (BACK) button. - Page 106 CUSTOMIZING SETTINGS Menu Description Sets the speed and shape of the pointer that appears on the projector screen. Speed Sets the moving speed of the pointer. Selects a pointer shape from various Shape options. Size Chooses the size of the pointer. Set to On.
- Page 107 CUSTOMIZING SETTINGS Menu Description Makes the projector turn on automatically when the power code is connected to the projector. Item Auto Power When the power code is connected to the projector, it turns on automatically. When the power code is connected to the projector, it goes into standby mode.
-
Page 108: Network Settings
CUSTOMIZING SETTINGS NETWORK Settings 1 Press the (Home) button and select SETTINGS. 2 Use the button to select NETWORK and press the Wheel (OK) button. 3 Use the , or button to set up the desired item and press the Wheel (OK) button. - To return to the previous menu, press the (BACK) button. - Page 109 CUSTOMIZING SETTINGS Menu Description This function allows you to change a wired Internet connection to your projector to Wi-Fi, allowing you to connect various external devices or to use wireless Internet. Soft AP Sets to On/Off. Sets the Wi-Fi security number. • You can set the security key with a Security combination of English letters and...
-
Page 110: Support
CUSTOMIZING SETTINGS SUPPORT 1 Press the (Home) button and select SETTINGS. 2 Use the button to select SUPPORT and press the Wheel (OK) button. 3 Use the , or button to set up the desired item and press the Wheel (OK) button. - To return to the previous menu, press the (BACK) button. -
Page 111: Connecting Devices
CONNECTING DEVICES CONNECTING DEVICES You can connect various external devices to the projector.  Computer/Notebook Video/DVD Digital Device LG Audio Device Games Console Headphone Mobile Phone HDMI - Page 112 Composite (AV) - Page 113 Component - Page 114 USB Device - Page 51 Headphone - Page 117... -
Page 112: Connecting To Hd Receiver, Dvd, Or Vcr Player, External Devices
CONNECTING DEVICES Connecting to HD NOTE Receiver, DVD, or VCR Player, External ARC(Audio Return Channel) Devices • External audio devices that support SIMPLINK and ARC Connect an HD receiver, DVD, must be connected using VCR player, or external devices port. to the projector and select an • When connected with a appropriate input mode. -
Page 113: Hdmi To Dvi Connection
CONNECTING DEVICES HDMI to DVI Connection AV Connection Using an HDMI to DVI cable, Connect the output ports of an connect the projector's external device and the AV IN port to the DVI OUT ports of the projector using an AV port. cable. Press the INPUT button on the remote control to select AV. -
Page 114: Component Connection
CONNECTING DEVICES Connecting a PC Component Connection You can enjoy a video by The projector supports Plug & connecting the component port Play. Your PC will automatically of an external device to the detect the projector and requires COMPONENT IN port of the no driver installation. projector. -
Page 115: Hdmi To Dvi Connection
CONNECTING DEVICES HDMI to DVI Connection NOTE Using an HDMI to DVI cable, connect the projector's • It is recommended to use port to the DVI OUT an HDMI connection for the port. best image quality. To output audio, use an audio • Depending on the graphics cable for connection. -
Page 116: Connecting A Laptop
CONNECTING DEVICES Connecting a Laptop The table below shows examples of switching the output. For You can connect the projector to a more information, refer to the laptop to use various functions. External Output, Connecting to an External Monitor, or similar HDMI Connection sections of the owner's manual of your computer. -
Page 117: Connecting Headphones
CONNECTING DEVICES Connecting Connecting a Digital Headphones You can listen to the audio through Using an optical cable, connect a headphone. the digital audio input port of a digital amp to the OPTICAL DIGITAL AUDIO OUT port of the projector. The output of an amp with a digital converter must be set to the desired audio format. - Page 118 CONNECTING DEVICES NOTE • Refer to the user manual of the audio device to connect. • When connecting this product to other devices, make sure to turn off and unplug all the devices. • The audio output of this product has wide-ranging audio bandwidth, so the receiver volume must be adjusted properly.
-
Page 119: Using The Mirroring Function Of A Mobile Phone
CONNECTING DEVICES Using the Mirroring Function of a Mobile Phone MHL Connection The Mobile High-definition Link (MHL) is an interface that can connect a mobile phone to the projector and play video and audio from the mobile phone through the projector. This only applies to products with a HDMI input that supports MHL. (To find out whether your device is MHL-certified, please contact your device manufacturer.) For MHL support, check the... -
Page 120: Maintenance
MAINTENANCE MAINTENANCE Clean your Projector to keep it in optimal condition. Cleaning Cleaning the Lens If there is any dust or staining on the lens surface, you must clean the lens. Use an air spray or a cleaning cloth to clean the lens. To remove dust or stains, use an air spray or apply a small amount of cleaning agent onto a swab or soft cloth to lightly rub the lens. -
Page 121: Information
INFORMATION INFORMATION To Update Projector Software Uses Software Update to check and obtain the latest version. It is also possible to check manually for available updates. 1 Press the (Home) button and select SETTINGS. 2 Select SUPPORT and go to Software Update. Item Description Software Update Set it to On. -
Page 122: Before Reporting A Problem, Check The Following
INFORMATION Before Reporting a Problem, Check the Following: If the following symptoms occur, please carry out the checks and adjustments described below. There may be no malfunction. General Problem Solution • This is not a problem. Image noise that There is a delay after the may occur when the projector is first projector is switched on switched is being cleaned up. -
Page 123: Sound
INFORMATION Sound (Home) → SETTINGS → SUPPORT → Sound Test First run a Sound Test to verify that the sound signal output is normal. If there is no problem with the test sound, check connected external devices. Problem Solution • Check if the audio output settings for the Screen display is on but projector are configured correctly. -
Page 124: Pc Connection Problem
INFORMATION PC Connection Problem Problem Solution • Verify that the computer and the projector The screen display are securely connected. does not come on after connecting to • Turn the projector off and back on using the the computer. remote control. • Restart the PC with the projector on. • Check whether the resolution is correctly set for PC input. -
Page 125: Problems Replaying Movies In My Media
INFORMATION Problems Replaying Movies in My Media Problem Solution • Check whether the file on the USB storage I cannot view the files device can be read on a computer. on the Movie List. • Check whether the file extension is supported. • Make sure that the file replays normally on This file is invalid. the computer’s video player. - Page 126 INFORMATION Problem Solution • Make sure that the file replays normally on Subtitles are not the computer’s video player. (Check for displayed. damaged files.) • Check if the video file has the same name as the subtitle file. • Make sure that the video and subtitle files are in the same folder.
-
Page 127: Specifications
SPECIFICATIONS SPECIFICATIONS MODELS PF1500 (PF1500-EU) Resolution (Pixel) 1920 (Horizontal) × 1080 (Vertical) Aspect Ratio 16:9 (Horizontal:Vertical) Panel size (mm) 11.896 Projection Wide : 0.91 m to 3.70 m (76.2 cm to 304.8 cm) Distance Tele : 0.91 m to 3.70 m (69.3 cm to 277.1 cm) - Page 128 SPECIFICATIONS Temperature Operation 0 °C to 40 °C Storage -20 °C to 60 °C Operation environment Relative humidity Operation 0 % to 80 % Storage 0 % to 85 % * Contents in this manual may be changed without prior notice due to upgrade of product functions.
- Page 129 SPECIFICATIONS Supported HDMI (PC) Modes Horizontal Vertical Frequency Resolution Frequency (kHz) (Hz) 640 x 480 31.469 59.94 800 x 600 37.879 60.31 1024 x 768 48.363 60.00 1152 x 864 54.348 60.053 1360 x 768 47.712 60.015 1280 x 1024 63.981 60.020 1920 x 1080 67.5 60.00 •...
- Page 130 SPECIFICATIONS Component Port Connecting Information Component ports on the Projector Video output ports on DVD player Signal Component 480i / 576i 480p / 576p 720p / 1080i 1080p (50 Hz / 60 Hz only)
- Page 131 In addition to the source code, all referred license terms, warranty disclaimers and copyright notices are available for download. LG Electronics will also provide open source code to you on CD-ROM for a charge covering the cost of performing such distribution (such as the cost of media, shipping, and handling) upon email request to opensource@lge.com.