Table of Contents
Advertisement
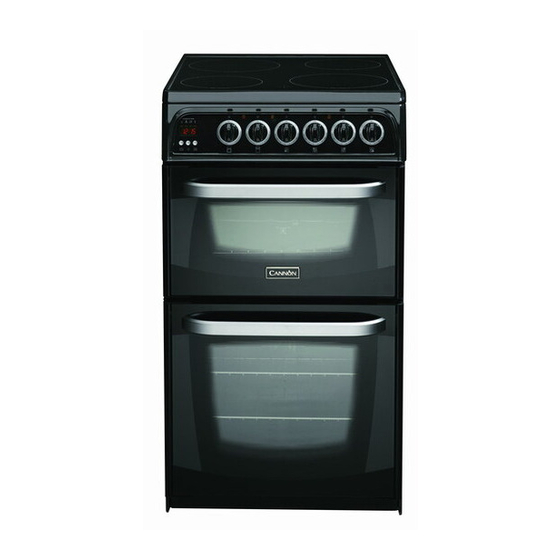
The Art of Cooking
Instructions for Installation and Use
50cm Free Standing Electric Cooker
Before installation fill in the product details on the back cover this book.
You must read the instructions prior to installing and using the appliance and
Coniston
Keswick
C50EKW
C50EKB
C50EKX
C50EKS
C50ECW
C50ECX
C50ECK
C50ECS
To the Installer
The information can be found on the rating plate.
To the User
then retain them for future reference.
Advertisement
Table of Contents

Related Manuals for Cannon 50cm Free Standing Electric Cooker C50ECK


Summary of Contents for Cannon 50cm Free Standing Electric Cooker C50ECK
- Page 1 The Art of Cooking Instructions for Installation and Use 50cm Free Standing Electric Cooker Before installation fill in the product details on the back cover this book. The information can be found on the rating plate. You must read the instructions prior to installing and using the appliance and Coniston Keswick C50EKW...
-
Page 2: Table Of Contents
Contents Introduction Installation Safety Information Features Control Panel Ceramic hob Use of hotplates Hotplates General Information Notes Choosing Your Utensils Grilling Top Oven - Conventional Cooking Oven Temperature Charts - Baking Oven Temperature Charts - Meat Main Oven - Fan Cooking Using the Main Oven for Other Functions Care and Cleaning Cooking Results Not Satisfactory? -
Page 3: Introduction
Introduction Your new appliance is guaranteed* and will give lasting service. This guarantee is only applicable if the appliance has been installed in accordance with the installation instructions detailed in this booklet. To help make best use of your cooking equipment, please read this booklet carefully. The cooker is designed specifically for domestic use and responsibility will not be accepted for use in any other installation. -
Page 4: Installation
Installation WARNING – THIS APPLIANCE MUST BE EARTHED. Electrical connection Electric cookers come without a power supply cable. The cooker is designed to operate on an electricity supply which conforms to the electrical data shown on the Rating Plate. The cooker can be connected to the mains only after removing the back panel of the cooker itself with a screwdriver. - Page 5 Installation Siting the Cooker 150 mm 150 mm Moving the Cooker The height of the cooker can be adjusted by means of adjustable feet in the plinth (900mm - 915mm). Adjust the feet by tilting the cooker from the side. Then install the product into position.
-
Page 6: Safety Information
Safety Information When used properly your appliance is completely safe but as with any electrical product there are certain PLEASE READ THE PRECAUTIONS BELOW BEFORE USING YOUR APPLIANCE. Always Remove all packing from inside the oven and grill compartments before switching on for the first time. Understand the controls prior to using the appliance. - Page 7 Safety Information Never Never line the interior of the oven with foil as this may cause the appliance to overheat. Never leave children unsupervised where a cooking appliance is installed as all surfaces will be hot during and after its use. Do not allow children or persons who are not familiar with the appliance to use it, without supervision.
-
Page 8: Features
Features 1800W 1200W Hob Hot Indicators GRILL/MEAT PAN WITH REMOVABLE HANDLE AND WIRE FOOD SUPPORT GRILL DOOR SWITCH GRILL TOP OVEN/ GRILL DOOR REMOVABLE INNER GLASS DOOR NOTE: To keep the controls cool when the appliance is used, a flow of air may be blown from beneath the control panel. -
Page 9: Control Panel
Control Panel TOP OVEN/GRILL MAIN OVEN THERMOSTAT INDICATOR INDICATOR LIGHT LIGHT ELECTRONIC TIMER* MAIN LEFT OVEN FRONT OVEN/ GRILL PLATE Control Knobs The knobs for the hotplates can be rotated in either direction to provide variable heat control, the Main Oven knob can only be rotated clockwise from the Off position. -
Page 10: Ceramic Hob
Ceramic Hob Under no circumstances should the hob be used with aluminium foil in contact with the hob surface as damage can occur. The following boiling plates are located beneath the decorative circular patterned cooking areas:- The cooking areas change colour when heated (become red) indicating which heating element is switched on. The cooking area returns to its original colour when the heating element is switched Off. -
Page 11: Hotplates General Information Notes
Hotplates General Information Notes CONTROL SETTINGS GUIDE This is provided only as a guide – settings also depend on the type of pan used and the quality of food. Set. Radiant Burner 12 For frying. Safety 1. Use a deep pan, large enough to completely cover the appropriate heating area. 2. - Page 12 Hotplates General Information Notes PANS SHOULD Not be concave (bowed in) Not be convex (bowed out) Not be rimmed Not be deeply ridged THE BEST COMBINATIONS This table is a general guide to the types of pan suitable for different types of hobs and cookers.
- Page 13 Hotplates General Information Notes Do Not Do not cook directly on the hob surface without a cooking utensil, as this will result in damage to the surface of the hob. Do not use the hob as a worktop surface as damage may occur to the smooth surface of the hob. Do not drag or slide utensils on the hob surface, as this will cause scratches in the surface of the hob.
-
Page 14: Choosing Your Utensils
Choosing Your Utensils Do not use utensils with rough bases. Do not use lightweight utensils with thin, distorted or uneven bases. Do not use lightweight enamelled steel utensils. Do not use cast iron utensils. Do not use utensils with recessed, scrolled or ridged bases. use a utensil which has a base concavity greater than l mm as this will reduce the performance of the hob. -
Page 15: Grilling
Grilling CAUTION: ACCESSIBLE PARTS WILL BECOME HOT WHEN THE GRILL To operate the grill proceed as follows: Open the grill door. Pre-heat the grill on setting 6 for approximately 5 minutes (see chart on guide to grilling). Fix the grill pan handle securely in position. See below. Food which only requires browning should be placed directly on/in the grill pan in the grill pan runner, or on the floor of the grill compartment. -
Page 16: Top Oven - Conventional Cooking
Top Oven - Conventional Cooking The heat for conventional cooking in the top oven is provided by the grill element and the element under the floor of the oven. It is ideal for the slow cooking of cheaper cuts of meat in casseroles etc. -
Page 17: Oven Temperature Charts - Baking
Oven Temperature Charts - Baking Not e: If s of t mar gar ine is us ed f or cake making, t emper at ur es r ecommended by t he manuf act ur er s s hould be f ollowed. Temper at ur es r ecommended in t his char t r ef er t o cakes made wit h block mar gar ine only. -
Page 18: Oven Temperature Charts - Meat
Oven Temperature Charts - Meat... -
Page 19: Main Oven - Fan Cooking
Main Oven - Fan Cooking This control switches on the main oven. To select Fan Cooking - Turn thecontrol clockwise and select any temperature between 100°C and Max. As the control is turned the fan will start.The main oven light will immediately come on. -
Page 20: Using The Main Oven For Other Functions
Using the Main Oven for Other Functions ‘S’ SLOW Setting This is used for slow cooking, keeping food warm and warming plates for short periods. Extra care should be taken when warming bone china, as it may be damaged in a hot oven. DO NOT place food or plates directly on the oven floor as this could damage both the oven lining and the plates which are being warmed. -
Page 21: Care And Cleaning
Care and Cleaning To reduce the amount of cleaning always ensure that the hob and cooking utensils are clean and dry Ceramic hob before use. Regular use of cleaner conditioner is recommended for proper care and protection of the hob surface. Apply conditioner before using the hob for the first time. It contains a mild cleaning agent, so that subsequent applications may clean off soil and apply a protective film at the same time. - Page 22 Care and Cleaning CLEANING Take particular care not to damage the inner surface of the door inner glass that iscoated with a heat reflective layer. Do not use scouring pads, or abrasive powder,which will scratch the THE DOORS glass. Ensure that the glass panel is not subjected to any sharpmechanical blows. Stubborn stains can be removed by using a fine steel wool soap pad.
-
Page 23: Cooking Results Not Satisfactory
Cooking Results Not Satisfactory? Problem Grilling Uneven cooking front to back Fat splattering Oven Baking Uneven rising of cake Sinking of cakes Over/Under cooking Fast/Slow cooking Uneven cooking of cakes Uneven rising of cake Food is taking too long to cook Disposal of your product To minimise the risk of injury to children please dispose of your product carefully and safely. -
Page 24: Something Wrong With Your Cooker
Something Wrong with your Cooker? Before contacting your nearest Service Centre/Installer, check the problem guide below; there may be nothing wrong with your cooker. Problem Slight odour or small amount of smoke when using the cooker for the first time. Nothing Works Oven temperature seems too high or too low. -
Page 25: Electronic Timer
Electronic timer (only for C50EK...) The electronic timer displays the time and the timer function with countdown. To set Note: This may be set while the oven is switched off or while it is switched on. the clock 1. Press the start to flash. - Page 26 Electronic timer (only for C50EC...) To set Note: This may be set while the oven is switched off or while it is switched on. the clock 1. Press the start to flash. 2. Use the “+” and “-” buttons to adjust the hour value. 3.
-
Page 27: Technical Characteristics
Technical Characteristics Top Oven ENERGY LABEL - Top Oven Directive 2002/40/EC on the label of electric ovens Norm EN 50304 Declared energy consumption for Natural convection Class Main Oven ENERGY LABEL - Main Oven Directive 2002/40/EC on the label of electric ovens Norm EN 50304 Declared energy consumption for Natural convection Class Voltage and Frequency... -
Page 28: Key Contacts
Over 1200 trained specialists, directly employed by us, ensure that you can have complete confidence in (Open 8 to 8 Mon - Fri, 8 to 6 Sat, 10 to 4 Sun & Bank Holidays) Note: Our operators will require the following information: Indesit Company UK LTD Key Contacts After Sales Service...