Table of Contents
Advertisement
Available languages
Available languages
Quick Links
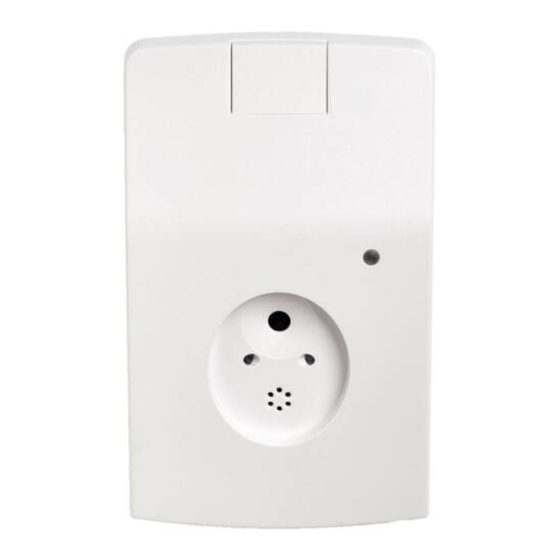
GS960AM Acoustic Glass Break Detector with
Antimasking Installation Sheet
EN DE SV
1
(1)
(4)
(5)
(6)
4
(1)
(3)
(5)
6
ON
1 2 3
(1)
(2)
© 2018 UTC Fire & Security Americas Corporation, Inc.
(2)
(3)
(2)
(4)
(6)
(7)
(2)
(3)
2
3
5
(1)
(3)
(5)
7
(2)
(1)
1 / 14
(1)
(2)
(3)
(2)
(4)
(6)
(3)
P/N 422-6368-ML • REV E • ISS 03DEC18
(4)
Advertisement
Table of Contents

Related Manuals for Interlogix GS960AM


Summary of Contents for Interlogix GS960AM
- Page 1 GS960AM Acoustic Glass Break Detector with Antimasking Installation Sheet EN DE SV 1 2 3 © 2018 UTC Fire & Security Americas Corporation, Inc. P/N 422-6368-ML • REV E • ISS 03DEC18 1 / 14...
-
Page 2: En: Installation Sheet
Low power supply voltage or self-test fail – signalled by Description FAULT relay GS960AM is an acoustic glass break detector giving an alarm • Masking – signalled by INTRUSION and FAULT relay when glass is smashed at intruder attempts through windows, •... -
Page 3: Installation
- Distance between the glass and the detector should be EOL resistor board, which allows you to easily integrate 1 to 9 m. GS960AM into an existing Advisor Advanced system without the hassle of adding EOL resistors. - Detector should be installed min. 50 cm from a corner. - Page 4 Timeout optimal position. Both the GS960AM detector and GS960-TR tester are equipped with a timeout feature. The GS960AM will stop the Testing and calibrating DRC mode and the GS960-TR will switch off power if no activity has happened within 3 to 4 minutes.
-
Page 5: Specifications
Anti-masking Specifications Type (thickness) of protected glass: To test the anti-masking system, follow these steps: Minimum Float (4 mm) Put the power on. Seal microphone completely with elastic Maximum Laminated P4 (4 + 4 mm) material like plasticine, chewing gum or isolation tape. 40 ×... - Page 6 Für die Installation in den meisten Räumlichkeiten, wie Büros, des Melders, mittels eines Relais eine Meldung generiert. ist die Anwendung dieser Spezialwerkzeuge, für die Installation Der GS960AM ist nach EN 50131-2-7-1: 2012, Grad 3, des Melders nicht notwendig. In Räumlichkeiten mit zertifiziert.
-
Page 7: Dip-Schalterfunktionen
Hinweis: angebracht sind, montiert werden. (einsteckbare EOL-Widerstandsplatine) kann die Anschaltung • Vermeiden Sie die Montage des Melders in Ventilatoren des GS960AM in einem bestehenden Advisor Advanced nähe. System einfach ohne EOL-Einzelwiderstände erfolgen. • Vermeiden Sie große schallreflektierende Hindernisse in der Nähe des Melders. - Page 8 Melders nicht notwendig. Das Gerät kommuniziert mit dem • (VSG) — stellen Sie die Melder akustisch. Testen Sie nie den GS960AM ohne Deckel. Verbundsicherheitsglas Sorgen Sie dafür, dass der Melder stets fest angebracht ist. Empfindlichkeit des Melders für die Zone 1 (4–9 m), unabhängig von der gemessenen Entfernung des Melders...
-
Page 9: Fehlerbehebung
Anzahl von Impulsen von 1 bis 3 angezeigt. Im Fall, dass Selbsttest das Signal zu schwach oder zu stark für die Berechnung Der Melder verfügt über eine Selbsttestfunktion, die die der DRC ist, (der Melder ist zu nah zum oder zu weit vom wichtigen für die Erkennung des Glasbruchsignals zu überwachenden Objekt montiert), wird DRC-Reichweite verantwortlichen Teile, durchgehend überwacht. -
Page 10: Technische Daten
EN 50131-2-7-1: 2012/A1:2013, Grad 2; VdS 2332, Klasse B Beskrivning Zertifizierung VdS: G118505 GS960AM är en akustisk glaskross detektor som ger larm när Zubehör GS960-RB einsteckbare EOL- glas krossas vid ett inbrotts försök på t ex fönster, dörrar med Widerstandsplatine glas samt glaspartier. - Page 11 Öppna upp detektorn GS960AM är utrustad med AM funktion med ett separat relä som ger larm vid sabotage av mikrofon och övertäckning. För att öppna detektorn, följ dessa steg: GS960AM testad av VdS enligt EN 50131-2-7-1:2012, Grad 3. Skjut locket uppåt (Figur 3, punkt 1) Figur 1: Detektor (1) Lock för skruv...
- Page 12 (störningar) i omgivningen. Vid normal ljudnivå ställ in Utför aldrig testerna på GS960AM med locket av. Se till att lock detektorn på zon 1* (4–9 m). och sockel är korrekt monterat.
- Page 13 Självtest Digital Room Compensation proceduren Förbered den akustiska detektorn för DRC genom att ställa in Detektorn övervakar kontinuerligt samtliga kritiska D/N-ingången (om den används) i DAG-läge: D/N-linjen ska komponenter som har avgörande betydelse för att detektering lämnas öppen eller låg. av glaskross skall fungera.
-
Page 14: Information Om Regler Och Föreskrifter
Zon 2 = 2–4 m Zon 3 = 1–2 m Kontaktuppgifter Matningsspänning 7 till 30 V, DC www.utcfireandsecurity.com eller www.interlogix.com Max. rippel 2 Vpp vid 12 V, 4 Vpp vid 24 V Kundsupport finns på www.utcfssecurityproducts.se Lågspänningslarm Felsignal vid < 7 V Strömförbrukning, max...