Table of Contents
Advertisement
Available languages
Available languages
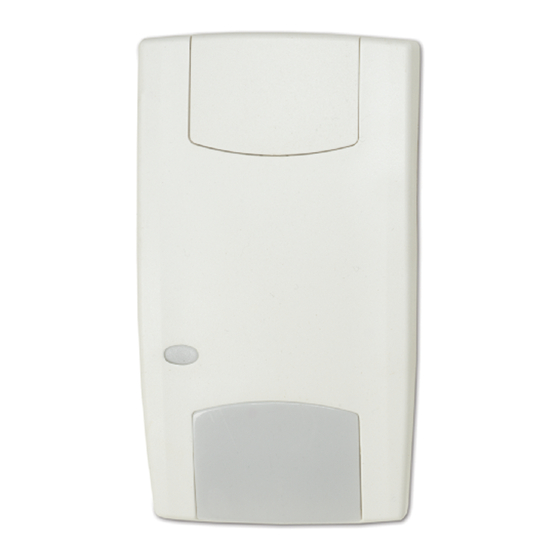
EV1116 Series PIR Detector Installation Sheet
EN DA DE ES
FI
FR
1
3
© 2013 UTC Fire & Security Americas Corporation, Inc.
All rights reserved.
IT
NL NO PL PT SV
2
4
16 m range (52 ft. 6 in.)
10 m (32 ft. 9 in.)
8 m (26 ft. 2 in.)
6 m (19 ft. 8 in.)
4 m (13 ft. 1 in.)
2 m (6 ft. 6 in.)
0 m
2 m (6 ft. 6 in.)
4 m (13 ft. 1 in.)
6 m (19 ft. 8 in.)
8 m (26 ft. 2 in.)
10 m (32 ft. 9 in.)
(optimum) 2.4 m
(7 ft. 10 in.)
1.2 m (3 ft. 11 in.)
4 m (13 ft. 1 in.)
Note:
For UL compliant installations please note an undercrawl
zone of 3 feet at minimum mounting height and 5 feet at
maximum mounting height.
1 / 32
P/N 146251999-4 (ML) • REV D • ISS 12MAR13
(1)
(2)
(3)
16
.0 m
(52 ft. 6 in.)
Advertisement
Table of Contents

Related Manuals for Interlogix EV1116 Series


Summary of Contents for Interlogix EV1116 Series
- Page 1 EV1116 Series PIR Detector Installation Sheet EN DA DE ES NL NO PL PT SV 16 m range (52 ft. 6 in.) 10 m (32 ft. 9 in.) 8 m (26 ft. 2 in.) 6 m (19 ft. 8 in.) 4 m (13 ft.
- Page 2 EV1116 EV1116AM 2 / 32 P/N 146251999-4 (ML) • REV D • ISS 12MAR13...
-
Page 3: En: Installation Sheet
EN: Installation Sheet Figure 7 legend Introduction Item Description Standard connection (factory default) The EV1116 series includes the EV1116 and EV1116AM PIR motion sensors. They have a patented mirror, pyro and signal Dual loop connection processing technology. Control panel Note: EV1116AM has not been evaluated by UL. -
Page 4: Jumper Settings
Note: Using the pry-off tamper has not been evaluated by • The detector is in Night mode (system armed) when the D/N input is connected to GND (terminal 1). • The detector is in Walk Test Off mode (LEDs are disabled) Wire the detector (see Figures 3 and 7). -
Page 5: Led Indication
SW 5: Setting LEDs EV1116 EV1116AM On: Enables both LEDs on the detector at all times (factory Pry-off tamper (not Optional On-board (Yes) default). evaluated by UL/cUL) Off: Puts both LEDs under the control of the Walk Test and AM relay characteristic —... - Page 6 Til loftsmontering med 90 graders anvendelse benyttes SB01-svingmonteringskonsol. Contact information Luk frontlågen. www.utcfireandsecurity.com or www.interlogix.com Isæt skruen og anbring dækpladen. For customer support, see www.utcfssecurityproducts.eu Til EN 50131 Grade 3-installationer må monteringsposition B ikke anvendes. DA: Installationsvejledning Jumper-indstillinger Se jumpernes placeringer i detektoren i figur 5.
- Page 7 • Nulstiller alarmhukommelsen Lav spænding Åben (alarm) Anvend korrekt • Styrer AM-relæfunktionen i tilstand NAT sammen med spænding SW1. PIR- Åben (alarm) Automatisk efter 3 sek. WT-input styrer LED-funktionen sammen med D/N-input. indbrudsalarm Når detektoren er i dagtilstand og gangtest er til, kan PIR/AM Rød Alarmr...
-
Page 8: Lovgivningsmæssig Information
Entfernen Sie die Abdeckungen und bringen Sie bei Bedarf die Aufkleber an (Abb. 6 zeigt ein Beispiel). Kontaktinformation Verwenden Sie für Deckenmontagen, bei denen eine www.utcfireandsecurity.com eller www.interlogix.com Überwachung von 90° erforderlich ist, den Befestigungssatz für Wand- und Deckenmontagen (SB01). For kundesupport se www.utcfssecurityproducts.dk Schließen Sie die Abdeckung. -
Page 9: Led-Anzeige
J6: Polaritätseinstellung der Steuerspannung (CV) SW 2: AM-Empfindlichkeit Ein (Werkseinstellung): Ein: Wählt eine höhere Stufe der Abdeckungsempfindlichkeit aus. AM-Relais reagiert innerhalb von 6 Sekunden. • Der Melder befindet sich im Tagbetrieb (System unscharf), Aus: Wählt die Standard-Abdeckungsempfindlichkeit aus. AM- wenn der D/N-Eingang mit GND (Anschlussklemme 1) Relais reagiert innerhalb von 12 Sekunden (Werkseinstellung). - Page 10 Website: www.recyclethis.info. Gehtest durch. Kontaktinformation Ständig an Normales Blinken (1 Hz) www.utcfireandsecurity.com oder www.interlogix.com Schnelles Blinken (4 Hz) Kontaktinformationen für den Kundendienst finden Sie unter * Hängt von der Einstellung des DIP-Schalters SW4 ab. www.utcfssecurityproducts.de Technische Daten ES: Hoja de instalación...
-
Page 11: Configuración De Puentes
han de colocarse en las posiciones B o C (figura 3). Para J6: configuración de polaridad del voltaje de control (VC) instalar un tamper de pared, utilice la posición A o C. Activado (opción predeterminada): Nota: el uso del tamper de pared no ha sido evaluado •... -
Page 12: Indicación Led
INTERRUPTOR 2: sensibilidad de AM PIR/AM Restablecimiento Activado: selecciona un nivel más alto de sensibilidad de AM. El relé de AM reacciona a los 6 segundos. Desactivado: selecciona la sensibilidad estándar de AM. El relé de AM reacciona a los 12 segundos (predeterminado de fábrica). -
Page 13: Información De Contacto
(katso kuva 5). Lisätietoja on kohdassa “Oikosulkupalan www.recyclethis.info. asetukset” sivulla 14. Información de contacto Poista peittopalat ja lisää tarrat tarvittaessa (ks. esimerkki kuvasta 6). www.utcfireandsecurity.com o www.interlogix.com Kattoasennuksessa, jossa tarvitaan 90 asteen Para acceder al servicio técnico, consulte kattavuusalue, tulee käyttää SB01-asennusjalkaa. www.utcfssecurityproducts.es Sulje kansi. - Page 14 Oikosulkupalan asetukset DIP-kytkimen asetukset Kuvassa 5 esitetään Ilmaisimen oikosulkupalojen (jumperien) Tehdasasetus: sijainnit. J1: Tilanvalinta jumpperi Huomioi: Kaksoisverho toiminto on käytettävissä EV1116- SW 1: Milloin AM- (antimask) tai TF (tekninen vika) -tila ilmaisimen versiosta 1.13 alkaen ja EV1116AM-ilmaisimen aktivoidaan versiosta 1.21 alkaen. On (päällä): Aktivoi AM- tai TF-tilan vain kun järjestelmä...
- Page 15 (muisti) www.recyclethis.info. AM-hälytys Avoin* Avoin Katso DIP- Yhteystiedot (hälytys) (hälytys) kytkin 3 AM-nollauksen Vaihda yötilaan www.utcfireandsecurity.com tai www.interlogix.com jälkeen Tietoja asiakastuesta on osoitteessa Tekninen vika Avoin Tee onnistunut www.utcfssecurityproducts.fi (hälytys) kävelytesti Jatkuvasti päällä Vilkkuu normaalisti (1 Hz) FR: Fiche d'installation Vilkkuu nopeasti (4 Hz) * Riippuu DIP-kytkimen SW4 asetuksesta.
- Page 16 Installation du détecteur : Utilisez le test à distance (RT) pour tester le détecteur à partir de la centrale. Le détecteur active le relais d’alarme si le Soulevez le couvercle et retirez la vis (voir fig. 2 , résultat du test est positif et le relais AM si le résultat du test étape 1).
-
Page 17: Indication Du Voyant
SW 2 : Sensibilité d’anti-masque IRP/AM Réinitialisation Position ON : Augmente la sensibilité d’anti-masque. Le relais AM réagit en moins de 6 secondes. Position OFF : Sélectionne la sensibilité d’anti-masque standard. Le relais AM réagit en moins de 12 secondes (configuration usine par défaut). -
Page 18: It: Istruzioni Per L'installazione
(vedere la figura 5). Per ulteriori informazioni Informations de contact vedere “Impostazioni dei ponticelli” più sotto. www.utcfireandsecurity.com ou www.interlogix.com Rimuovere le maschere e applicare gli adesivi secondo necessità (per un esempio vedere la figura 6). Pour contacter l'assistance clientèle, voir www.utcfssecurityproducts.fr/mail_support.htm... -
Page 19: Indicatori Led
On: Modalità Doppia tenda. In questa modalità un ulteriore La memoria allarme viene azzerata facendo passare il livello di processo è applicato per fornire un aumento della rilevatore in modalità Notte. stabilità in presenza di rischio di falsi allarmi. Il Doppia-tenda è Impostazioni dei commutatori DIP-switch utilizzato per ridurre i falsi allarmi. - Page 20 Per ulteriori informazioni vedere: Sempre acceso Lampeggio normale (1 Hz) www.recyclethis.info. Lampeggio veloce (4 Hz) Informazioni di contatto * Dipende dall'impostazione del DIP switch SW4. www.utcfireandsecurity.com o www.interlogix.com Specifiche Per l'assistenza clienti, vedere www.utcfssecurityproducts.it EV1116 EV1116AM Rilevatore PIR + AM...
- Page 21 J6: Polariteitsinstelling van de regelspanning (CV) Item Beschrijving Aan (standaardinstelling): Antimaskering Dag/nacht • De detector bevindt zich in de mode Dag (systeem uitgeschakeld) wanneer de D/N-ingang is aangesloten op Rtest Test op afstand GND (aansluiting 1) • De detector bevindt zich in de mode Nacht (systeem Ga als volgt te werk om de detector te installeren: ingeschakeld) wanneer de D/N-ingang is aangesloten op Neem het afdekplaatje uit en verwijder de schroef eronder...
-
Page 22: Led-Indicatie
SW 2: AM-gevoeligheid PIR/AM Alarm- AM-relais Opnieuw relais instellen Aan: Een hogere AM-gevoeligheid selecteren. AM-relais reageert binnen 6 seconden. Uit: De standaard AM-gevoeligheid selecteren. AM-relais reageert binnen 12 seconden (fabrieksstandaard). Na AM-reset Overschakelen SW 3: De AM/TF-uitgang resetten naar Nacht- modus Het systeem zal alleen een AM-alarm resetten als is Technische... - Page 23 90-graders dekning. Lukk dekselet. Contactgegevens Sett inn skruen og sett innlegget på plass. www.utcfireandsecurity.com of www.interlogix.com Monteringsstilling B må ikke brukes for EN 50131 Grad 3- Voor klantenondersteuning, zie www.utcfssecurityproducts.nl monteringer. Jumperinnstillinger NO: Installasjonsark Se figur 5 for plasseringer av jumpere i detektoren.
- Page 24 • Styrer AM-reléfunksjonen under NATT-modus sammen PIR- Åpen (alarm) Automatisk etter 3 sek. med SW1. innbruddsalarm WT-inngangen styrer LED-funksjonen sammen med D/N- inngangen. PIR/AM Rød Alarm- Tilbakestilles relé relé Når detektoren er i Dag-modus og Gåtest på-modus, kan Oppstart Lukket Lukket Automatisk etter LEDene på...
- Page 25 Zdjąć przesłony i w razie potrzeby dodać naklejki Kontaktinformasjon (przykład: rys. 6). W przypadku montażu do sufitu, gdzie wymaga się www.utcfireandsecurity.com eller www.interlogix.com obszaru pokrycia o kącie 90°, zastosować wspornik For kundestøtte, se www.utcfssecurityproducts.no obrotowy SB01. Zamknąć pokrywę.
-
Page 26: Dane Techniczne
• Czujka działa w trybie Test czujki włączony (diody LED są zacznie szybko migać. Jeśli system pracuje w trybie Noc, żółta włączone), kiedy wejście WT jest podłączone do styku dioda LED zgaśnie, a system zostanie wyzerowany (domyślne +12 V (styk 2). ustawienie fabryczne). -
Page 27: Informacje Prawne
A ou C. Nota: a utilização da tamper de remoção não foi avaliada Informacje kontaktowe pela UL. www.utcfireandsecurity.com lub www.interlogix.com Ligue os fios eléctricos do detector (consulte as Figuras 3 Informacje na temat pomocy technicznej można znaleźć na e 7). stronie www.utcfssecurityproducts.pl Instalações UL:... -
Page 28: Definições Do Jumper
Seleccione as configurações desejadas do jumper e dos • O detector está no modo Noite (sistema armado) quando DIP switches (consulte a Figura 5). Consulte “Definições a entrada D/N está ligada a GND (terminal 1). do jumper” abaixo para obter mais informações. •... -
Page 29: Indicação Led
SW 4: assinalar a saída AM ou TF EV1116 EV1116AM Nota: este DIP switch não é utilizado com a versão AMZ de Potência de entrada 9 a 15 VDC (12 V nominal) Para instalações UL 10 a 15 VDC (12 V nominal) detectores. - Page 30 SB01. consulte: www.recyclethis.info. Stäng luckan. Informação de contacto Sätt i skruven och sätt på täckluckan. www.utcfireandsecurity.com ou www.interlogix.com Använd inte monteringsplats B för installationer av typ EN 50131 Grade 3. Para assistência ao cliente, consulte www.utcfssecurityproducts.eu Inställning av byglar Se figur 5 för byglarnas placering i detektorn.
- Page 31 • Detektorn är i nattläge (systemet är tillkopplat) när D/N- Av: Återställer AM- eller TF-statusen efter ett PIR-larm om ingången är ansluten till +12 V systemet är i dag- eller gångtestläge. Den gula LED:en blinkar • Detektorn är i läget Gångtestläge av (LED:erna är snabbt.
-
Page 32: Information Om Regler Och Föreskrifter
Lämna in produkten till din lokala återförsäljare då du köper ny utrustning eller kassera den i enlighet med de lokala föreskrifterna för avfallshantering. För mer information, besök: www.recyclethis.info Kontaktinformation www.utcfireandsecurity.com eller www.interlogix.com Kundsupport finns på www.utcfssecurityproducts.se 32 / 32 P/N 146251999-4 (ML) • REV D • ISS 12MAR13...