Henny Penny KFC Velocity Series PXE-100 Operation Manual
Hide thumbs
Also See for KFC Velocity Series PXE-100:
- Operator's manual (80 pages) ,
- Kit instructions (21 pages) ,
- Service manual (168 pages)

Related Manuals for Henny Penny KFC Velocity Series PXE-100


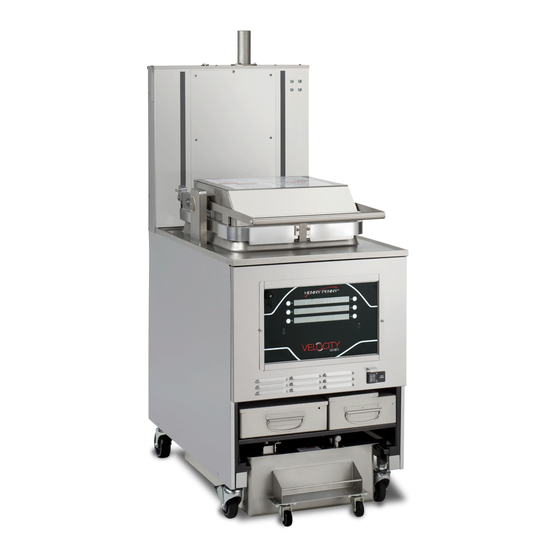
Summary of Contents for Henny Penny KFC Velocity Series PXE-100
- Page 1 OPERATION MANUAL K K F F C C V V e e l l o o c c i i t t y y S S e e r r i i e e s s ™ ™ P P r r e e s s s s u u r r e e PXE-100 FM05-078I...
- Page 3 Table of Contents Safety and Compliance....................v Chapter 1 Overview ......................1 1.1 Technical Support ....................1 1.2 Dimensions and Clearance ..................1 1.3 Operating Specifications..................1 1.4 Data Plate Location ....................2 Chapter 2 Startup ......................3 2.1 Unpacking the Appliance ..................3 2.1.1 Unloading the Appliance...................4 2.1.2 Installing Counterweights..................4 2.1.3 Finish Unpacking the Appliance ................5 2.2 Selecting The Location ...................5...
- Page 4 5.2 Heating Times .....................29 5.3 Lid Operation .......................30 5.3.1 Closing the Lid....................31 5.3.2 Opening the Lid .....................31 5.4 Product Racking Recommendations..............32 5.5 Pressure Frying ....................33 5.6 Quick Filtering......................34 5.7 Auto Top Off (ATO)....................34 5.8 Automix.......................35 Chapter 6 Maintenance ....................37 6.1 Regular Maintenance Schedule ................37 6.2 Wipe Mode ......................38 6.3 General Cleaning - Daily..................38 6.3.1 Daily Filter .....................38...
- Page 5 6.10 Clean-Out Mode....................55 6.10.1 Setting the Clean-Out Mode Type..............56 6.10.2 Clean-Out Menu Overview................56 6.10.3 Access Clean-Out Mode ................57 6.10.4 Perform the Clean-Out Preparation ...............57 6.10.5 Perform the Cold-Soak Clean-Out ..............57 6.10.6 Perform the Heated Clean-Out ..............58 6.10.7 Drain the Water....................58 6.10.8 Rinse the Vat With Clean Water..............59 6.10.9 Purge the Oil Lines..................59 6.10.10 Wipe the Vat ....................59...
- Page 6 List of Tables Table 1-1 Dimensions and Clearance..................1 Table 1-2 Operation Specifications..................2 Table 5-1 Temperature and Timing..................30 Table 5-2 Product Racking Recommendations..............33 Table 6-1 Regular Maintenance Schedule .................37 Table 7-1 Info Mode Menu Function ..................66 Table 7-2 Special Program Menu Function ................70 Table 7-3 Filter Settings ....................73 Table 8-1 Troubleshooting Guide ..................89 Table 8-2 Error Codes......................90...
- Page 7 S S a a f f e e t t y y a a n n d d C C o o m m p p l l i i a a n n c c e e Henny Penny fryers have many safety features incorporated. However, the only way to ensure safe operation is to fully understand the proper installation, operation, and maintenance procedures.
- Page 8 These are the original version controlled Henny Penny instructions for Velocity Pressure Electric (PXE) model 100 (PXE 100). This manual is available on the Henny Penny Public website (www.hennypenny.com). Read these instructions completely prior to installation and operation of this appliance to ensure compliance to all required installation, operation and safety standards.
- Page 9 This appliance is not intended for use by persons (including children) with reduced physical, sensory or mental capabilities, or lack of experience and knowledge, unless they have been given supervision or instruction concerning use of the appliance by a person responsible for their safety. Children should be supervised to ensure that they do not play with the appliance.
- Page 10 viii...
- Page 11 1 1 . . 1 1 T T e e c c h h n n i i c c a a l l S S u u p p p p o o r r t t Call your local service provider or distributor first. For additional help, call or e-mail Henny Penny (HP) Technical Support at: • Inside the U.S.: 1-800-417-8405 or technicalservices@hennypenny.com.
- Page 12 T T a a b b l l e e 1 1 - - 2 2 O O p p e e r r a a t t i i o o n n S S p p e e c c i i f f i i c c a a t t i i o o n n s s P P r r e e s s s s u u r r e e Operating pressure 12.0 psi...
- Page 13 C C h h a a p p t t e e r r 2 2 S S t t a a r r t t u u p p • Any shipping damage should be noted in the presence of the delivery agent and signed prior to his or her departure.
- Page 14 2 2 . . 1 1 . . 1 1 U U n n l l o o a a d d i i n n g g t t h h e e A A p p p p l l i i a a n n c c e e T T h h e e f f o o l l l l o o w w i i n n g g s s t t e e p p s s r r e e q q u u i i r r e e s s a a t t w w o o p p e e r r s s o o n n l l i i f f t t t t o o p p r r e e v v e e n n t t i i n n j j u u r r y y o o r r d d a a m m a a g g e e t t o o t t h h e e a a p p p p l l i i a a n n c c e e .
- Page 15 1 1 . . Remove the top and rear panel covers to access the counterbalance weight carriage assembly. 2 2 . . Insert first through sixth counterweight segments into the counterbalance weight carriage assembly. 3 3 . . Remove the two bolts marked A to release the counterbalance weight carriage assembly.
- Page 16 by a straight line operation, i.e. raw in one side and finish out the other side. Order assembly can be moved away with only a slight loss of efficiency. To properly service the fryer, 24 inches (60.96 cm) of clearance is needed on all sides of the fryer including access for servicing by removing a side panel.
- Page 17 A separate disconnect switch meeting over-voltage category III conditions with proper capacity fuses or breakers must be installed at a convenient location between the fryer and the power source. It should be an insulated copper conductor rated for 600 volts and 90° C. For runs longer than 50 feet (15.24 m), use the next larger wire size. 2 2 .
- Page 18 2 2 . . 7 7 D D r r a a i i n n P P a a n n A A s s s s e e m m b b l l y y • During assembly be sure to apply oil to all O-rings to lubricate and to help prevent tears and oil loss.
- Page 19 8 8 . . Place the crumb catcher into the drain pan so the legs straddle the filter screen. 9 9 . . Place the lid onto drain pan. 1 1 0 0 . . Push the drain pan into place and lock it into place using the locking latch.
- Page 20 2 2 . . 8 8 I I n n i i t t i i a a l l O O i i l l F F i i l l l l Read all the Warnings and Notices, and then proceed to 2.8.1 Purge the Oil Lines , page •...
- Page 21 Select 6. FILL from the menu. The fill pot (vat) menu displays. 5 5 ) ) Press and hold PUMP (hold). Oil pumps in to the vat. 6 6 ) ) Release the PUMP (hold) button when lines are purged. 7 7 ) ) Wipe out the vat with a clean disposable towel.
- Page 22 2 2 . . 8 8 . . 2 2 M M a a n n u u a a l l l l y y F F i i l l l l t t h h e e V V a a t t The vat has 2 level indicator lines inscribed on the rear wall.
- Page 23 2 2 . . 9 9 F F i i l l l l t t h h e e F F r r e e s s h h O O i i l l T T a a n n k k The fresh oil tank automatically tops off the oil in the vat when it senses the vat’s oil level is low.
- Page 24 loading them on to the units. This ensures product (cook) menu items are current. It also makes menu item updates across many units quick and easy for operators. The following steps explain the process for loading the software file. I I N N F F O O : Sometimes a pre-loaded USB drive is shipped with the unit per customer request.
- Page 25 C C h h a a p p t t e e r r 3 3 O O p p e e r r a a t t i i o o n n T T R R A A I I N N I I N N G G : Watch a short video explaining the Startup Sequence.
- Page 26 Item No. Description Function Steam-Stack and • The Steam-Stack houses the dead-weight. It Safety Release Valve releases steam when the vat is pressurized above 12 PSI, which is optimal for cooking. • The Safety Release Valve functions as a safety and actives when pressure rises above 14 PSI.
- Page 27 Item No. Description Function Carrier Slides A multi tray carrier, which holds up to 8 head of pro- duct, slides on to the arms and is raised and lowered in to the vat of oil as the lid is raised and lowered. The lid seals the vat during the cook cycle.
- Page 28 3 3 . . 2 2 C C o o n n t t r r o o l l s s a a n n d d I I n n d d i i c c a a t t o o r r s s This section provides an overview of the control board.
- Page 29 3 3 . . 3 3 A A c c t t i i o o n n B B u u t t t t o o n n s s The functions of the action buttons can vary based on the nature of the currently displayed setting: •...
- Page 30 M M e e n n u u ( ( s s c c r r e e e e n n ) ) 1 1 M M e e n n u u ( ( s s c c r r e e e e n n ) ) 2 2 3 3 .
- Page 31 3 3 . . 7 7 . . 1 1 4 4 + + T T i i t t l l e e O O p p t t i i o o n n The 4+TITLE option displays up to four cook items along with the title of the menu. •...
- Page 33 4 4 . . 1 1 W W . . A A . . S S . . S S . . H H . . W.A.S.S.H. is an acronym that Henny Penny uses to describe the environmental elements that breaks down oil prematurely, shortening the useful life of the oil, which drives up the cost of ownership.
- Page 34 4 4 . . 2 2 B B o o i i l l - - O O v v e e r r P P r r e e v v e e n n t t i i o o n n The following rules are provided to prevent personal injury to the operator and damage to the appliance.
- Page 35 Filtering prolongs the life of the oil, the unit as well as improves product quality. There are various ways to filter the oil. As an example, a quick filter automatically runs between cook cycles to clean the oil and remove debris from the vat. A daily filter is run at the end of the day to thoroughly clean the unit.
- Page 36 1 1 . . Select 1. QUICK FILTER. A confirm prompt displays. If the operator selects: • NO x, the display returns to the previous menu. • √ YES, the drain opens automatically and the oil begins filtering. After a few moments, the drain closes and the oil returns to the vat.
- Page 37 the probe is now air cooling. If by the end of the initial -Draining- step, the control has not detected sufficient temperature cooling on the main temperature probe, the control activates a display that graphically represents a blocked drain, and displays the messages DRAIN BLOCKED?, CLEAR THE DRAIN.
- Page 38 1 1 . . Press 3. POLISH. A confirm prompt displays. If the operator selects: • NO x, the display returns to the previous menu. • √ YES, the drain opens automatically and the oil begins draining. Downward pointing arrows display indicating the vat is draining.
- Page 39 C C h h a a p p t t e e r r 5 5 C C o o o o k k i i n n g g Start here with a short video explaining the automated startup T T R R A A I I N N I I N N G G : sequence.
- Page 40 T T a a b b l l e e 5 5 - - 1 1 T T e e m m p p e e r r a a t t u u r r e e a a n n d d T T i i m m i i n n g g Function Minutes Temperature...
- Page 41 5 5 . . 3 3 . . 1 1 C C l l o o s s i i n n g g t t h h e e L L i i d d There are two mechanical lid latches. The front lid latch just keeps the lid in the down position.
- Page 42 1 1 . . Gently raise the lid handle until it stops. 2 2 . . Push the lid handle back until it stops. 3 3 . . Lower the lid handle. 4 4 . . Push the lid handle back. 5 5 .
- Page 43 T T a a b b l l e e 5 5 - - 2 2 P P r r o o d d u u c c t t R R a a c c k k i i n n g g R R e e c c o o m m m m e e n n d d a a t t i i o o n n s s G G e e n n e e r r a a l l M M a a r r k k e e t t 2 2 H H e e a a d d B B a a g g s s •...
- Page 44 Pull the lid handle forward and push down in to the locked position. 9 9 ) ) Press the start button. 1 1 0 0 ) ) At the end of the cycle, pressure begins venting automatically as an alarm 1 1 1 1 ) ) sounds and the display shows DONE.
- Page 45 I I N N F F O O : Be very careful and D D O O N N O O T T overfill the vat with oil. 1. Press and hold the menu button until *MAIN* appears on the display. 2.
- Page 47 C C h h a a p p t t e e r r 6 6 M M a a i i n n t t e e n n a a n n c c e e The following cleaning procedures ensures the fryer is sanitary while keeping product quality high and downtime to a minimum.
- Page 48 Procedure Frequency Perform Clean-Out Mode Monthly - Refer to 6.10 Clean-Out Mode , page 55 6.7 Cleaning Deadweight Clean the deadweight assembly. Monthly - Refer to - Monthly , page 43 6.3.5 Clean the Drain Replace 5 drain pan o-rings Quarterly - Refer to Pan , page 41 Replace 3 ATO reservoir o-rings...
- Page 49 and cooking debris in the bottom of the vat(s). A quick filter runs after every cook cycle to keep the oil clean and debris to a minimum; however, a daily filter allows for a more thorough cleaning of the oil, vat, drain pan and a filter change. Perform a daily filter cycle.
- Page 50 To empty the condensation pan, do the following: 1 1 . . Slide the condensation pan completely out of the appliance. 2 2 . . Empty the water in to a sink with an oil trap. 3 3 . . Clean the tank with warm soapy water, and then rinse and dry thoroughly.
- Page 51 6 6 . . 4 4 C C l l e e a a n n t t h h e e C C a a s s t t o o r r W W h h e e e e l l s s - - W W e e e e k k l l y y Spray Henny Penny biodegradable, food safe, foaming degreaser (part no.12226) on castor wheels at least once a week as part of the normal cleaning routine.
- Page 52 2. Spray food grade foaming degreaser on lid cam filler strip. I I N N F F O O : Or Henny Penny’s biodegradable, food safe, foaming degreaser (part no.12226). 3. Pull the lid locking arm (cams) forward in to the lock position.
- Page 53 6 6 . . 7 7 C C l l e e a a n n i i n n g g D D e e a a d d w w e e i i g g h h t t - - M M o o n n t t h h l l y y The deadweight is key in building pressure within the vat to pressure cook product.
- Page 54 1. Loosen the 3 thumb screws that secure the steam stack to the top of the fryer. 2. Pull the steam stack out of the fryer revealing the deadweight. 3. Clean out the steam stack and ensure any obstructions are removed. 4.
- Page 55 . . Henny Penny recommends replacing the lid gasket if blackened, hardened or brittle and every 12 months as part of I I N N F F O O : the fryer's maintenance schedule.
- Page 56 E E n n g g a a g g e e d d T T i i l l t t S S t t o o p p D D i i s s e e n n g g a a g g e e d d T T i i l l t t S S t t o o p p Place both hands under the front corners of the fryer lid and lift up to tilt the lid 3 3 ) ) back.
- Page 57 Ensure the gasket channel is free of cooked on oil and/or debris. 5 5 ) ) Use a clean dry towel to dry the bottom of the lid and gasket channel. 6 6 ) ) Clean the rim (top) of the vat where the lid gasket contacts and seals. 7 7 ) ) 6 6 .
- Page 58 NOTICE approved grease trap. Never pour oil down a public sanitation drain. Henny Penny recommends using an automated bulk oil disposal system, or a manually operated Oil Disposal Shuttle (ODS) to drain degraded oil from the vat and transport it to an approved oil disposal storage container.
- Page 59 6 6 . . 9 9 . . 2 2 . . 1 1 A A c c c c e e s s s s t t h h e e D D i i s s p p o o s s e e M M e e n n u u U U s s e e P P P P E E .
- Page 60 Transport the ODS to an approved oil storage container and empty. 7 7 ) ) Repeat steps 5 through 7, making multiple trips until the vat is empty. 8 8 ) ) 6 6 . . 9 9 . . 2 2 . . 3 3 P P u u r r g g e e t t h h e e F F i i t t t t i i n n g g s s Degraded oil remains inside the lines, valves and fittings.
- Page 61 6 6 . . 9 9 . . 3 3 R R e e a a r r B B u u l l k k O O i i l l D D i i s s p p o o s s a a l l This section explains the bulk oil process for draining and disposing of oil.
- Page 62 Use a cloth or paper towel to wipe the remaining oil down the vat drain and 3 3 ) ) clean the vat surface. When done, press the n n e e x x t t ► ► button. A dispose, pump oil to waste tank 4 4 ) ) message displays.
- Page 63 6 6 . . 9 9 . . 4 4 F F r r o o n n t t B B u u l l k k O O i i l l D D i i s s p p o o s s a a l l This section explains the bulk oil process for draining and disposing of oil.
- Page 64 If necessary, press the P P U U M M P P button again to ensure the lines, valves and 2 2 ) ) fittings are purged. 6 6 . . 9 9 . . 4 4 . . 5 5 W W i i p p e e O O u u t t t t h h e e V V a a t t To ensure degraded oil does not mix with new oil, do the following: Put on Personal Protective Equipment (PPE).
- Page 65 Manually fill the vat, by pouring oil from a container, to the lower limit line with 5 5 ) ) new oil. Power on the unit and return to normal operation. 6 6 ) ) 6 6 . . 9 9 . . 4 4 . . 8 8 F F i i l l l l t t h h e e V V a a t t f f r r o o m m B B u u l l k k Fill the vat with new oil by doing the following: Press the n n e e x x t t ►...
- Page 66 • Do not use steel wool, or other abrasive cleaners or cleaners/sanitizer containing chlorine, bromine, iodine or ammonia chemicals, as these deteriorate the stainless steel material and shorten the life of the unit. • Do not use a water jet (pressure sprayer) to clean the unit, or component damage may result.
- Page 67 M M e e n n u u ( ( s s c c r r e e e e n n ) ) 1 1 M M e e n n u u ( ( s s c c r r e e e e n n ) ) 2 2 M M e e n n u u ( ( s s c c r r e e e e n n ) ) 3 3 M M e e n n u u ( ( s s c c r r e e e e n n ) ) 4 4 6 6 .
- Page 68 Use a scrub brush/pad on the vat walls to loosen any crumbs or debris. 3 3 ) ) Carefully clean the elements with a thin scrub brush. 4 4 ) ) Scrub the underside of the lid. 5 5 ) ) Remove and clean the lid gasket.
- Page 69 Proceed to 6.10.8 Rinse the Vat With Clean Water , page 7 7 ) ) 6 6 . . 1 1 0 0 . . 8 8 R R i i n n s s e e t t h h e e V V a a t t W W i i t t h h C C l l e e a a n n W W a a t t e e r r During this procedure when the drain is open, all the water, cooking debris, and cleaner exits the bottom of the unit.
- Page 70 Press the ▼ ▼ O O P P E E N N D D R R A A I I N N button. 2 2 ) ) Use a clean towel to wipe the sides and bottom of the pot. Guide all the 3 3 ) ) remaining water and debris down the drain.
- Page 71 C C h h a a p p t t e e r r 7 7 P P r r o o g g r r a a m m m m i i n n g g 7 7 . . 1 1 P P r r o o g g r r a a m m M M e e n n u u From the MAIN menu, refer to 3.5 Main Menu , page 19, select 4.
- Page 72 • Screen 5: Ins Del Clr 5 5 . . Press the number buttons, 1 through 0, to select an option. 6 6 . . Press the “ “ ” ” button to confirm completion. 7 7 . . Press the right-arrow button. LINK ID displays.
- Page 73 1 1 6 6 . . Press the number buttons to set the temperature. 1 1 7 7 . . Press the right-arrow button. TEMP 2 displays. 1 1 8 8 . . Press the number buttons to set the temperature.
- Page 74 Full heat is the amount of time the heat is applied full force (thermostatically) at the start of the cook cycle, before the control switches over to PC (pulsed control) heating. 2 2 7 7 . . Press the number buttons to set the time.
- Page 75 • ERASE ALL - Allows operators to delete all pre-programmed menus and add operator specific menu items. Refer to 7.2 Product Programming Menu , page 7 7 . . 3 3 . . 1 1 C C o o p p y y M M e e n n u u I I t t e e m m s s Use this feature to copy (replicate) any product (Px) in to any other product (Py).
- Page 76 4 4 . . Press the √ √ Y Y E E S S button. The confirmation screen displays. 5 5 . . Press the Y Y E E S S button. The left-side product is copied in to the right-side product position.
- Page 77 Menu Item Function CPU Info Displays live temperature reading for the CPU (controller), software ver- (Information) sion, and software part number. Temperatures Displays live readings for main oil, level probe, and the bottom of vat temperature. (Digital) Inputs- • ✓ - Signal present •...
- Page 78 Menu Item Function Fryer Outputs • * - On • - - Off • Pri - Primary Contactor • Ht - Heat (regulating) Contactor • Pr - Pressure Solenoid • BSV - Bulk Supply Valve (optional) Drain Valve • Par - Partially open (Control) Status •...
- Page 79 Menu Item Function (Information) • ✓ - Memory OK (MEM INFO) • X - Memory problem USB Drive Sta- If installed, displays the status and size of the USB flash drive as: tus (USB INFO) • ✓ - Flash Drive OK •...
- Page 80 7 7 . . 5 5 S S p p e e c c i i a a l l P P r r o o g g r r a a m m m m i i n n g g Starting with v1.60 , initializing operations performed in Special I I N N F F O O : Program mode no longer reset the product settings and cook...
- Page 81 Menu Display Name Function SP-7 MELT CYCLE Press the plus or minus button to select either the SO- LID or LIQUID melt mode heating cycle. SP-8 START-UP POLISH Press the plus or minus button to select either YES or ENABLED? NO to specify whether an automatic polish operation should be performed as part of the normal morning startup process.
- Page 82 Menu Display Name Function • NONE - Dispose by draining into a disposal cart or shuttle. • REAR HOSE - Dispose by pumping through the rear plumbing connection. • FRONT HOSE - Dispose by pumping through the front hose connection by pressing and holding the button.
- Page 83 Menu Display Name Function SP-23 CLEAN-OUT TEMP • If Heated mode is selected in the SP-22 menu, operators may select a temperature between 40°F – 195°F with which to heat the water. Higher temperatures require Personal Protective Equipment (PPE) to prevent burns. •...
- Page 84 Program Display Description Code • The Start-up Mix and the Cook Mode Auto Mix operations are specialized versions of the Quick Filter, and share some of the Quick Filter programmable parameters. For example, both of the Mix operations use the Quick Filter’s Max Pump Time setting. •...
- Page 85 Program Display Description Code accumulating up toward 100% – at which point the next auto-filter is activated if Mixed mode. I I N N F F O O : The control defaults to Global Mode filtering, with the global Filter After X Cooks parameter set to 1.
- Page 86 Program Display Description Code 2 2 . . Press “” to accept the new value. 3 3 . . Press “X” to return to default or previous setting. FC-5 QUICK FILTER: FILTER: At the end of the Drop cycle, controls how far DRAIN POSITION the drain closes to a partially open position.
- Page 87 Program Display Description Code 2 2 . . Press “” to accept the new value. 3 3 . . Press “X” to return to default or previous setting. D D a a i i l l y y F F i i l l t t e e r r S S e e t t t t i i n n g g s s I I N N F F O O : •...
- Page 88 Program Display Description Code completely, press NO and the pump at- tempts to fill further. 1 1 . . Enter a new value by using the product numbers. 2 2 . . Press “” to accept the new value. 3 3 . . Press “X” to return to default or previous setting.
- Page 89 Program Display Description Code 1 1 . . Enter a new value by using the product numbers. 2 2 . . Press “” to accept the new value. 3 3 . . Press “X” to return to default or previous setting.
- Page 90 Program Display Description Code 3 3 . . Press “X” to return to default or previous setting. A A u u t t o o T T o o p p O O f f f f S S e e t t t t i i n n g g s s I I N N F F O O : If X pulses of oil have not brought the level up, the control assumes that the oil tank is empty—that no oil is being pumped into the pot—and displays FILL OIL TANK.
- Page 91 Program Display Description Code 1 1 . . Enter a new value by using the product numbers. 2 2 . . Press “” to accept the new value. 3 3 . . Press “X” to return to default or previous setting.
- Page 92 Program Display Description Code 2 2 . . Press “” to accept the new value. 3 3 . . Press “X” to return to default or previous setting. Phase 2 of the morning startup procedure is to execute the Start-up Mix operation: drop all of the oil into the drain pan, filter it for a short time, and pump it back into the vat.
- Page 93 Program Display Description Code 3 3 . . Press “X” to return to default or previous setting. FC-27 START-UP MIX: FILTER: TIME This setting specifies how long the oil should be circulated during the FILTER phase of the Start-up Mix. 1 1 .
- Page 94 Filter powder should be added to the drain pan in order for the Polish operation to be most effective. FC-32 START-UP POLISH: Henny Penny recommends enabling the ENABLED? Start-up Polish to prolong the life of the oil. This adds time to the Start-up process.
- Page 95 Program Display Description Code Press the + or - button to select either YES or NO. FC-35 COOK MODE AUTO MIX: Controls the time duration of the draining of DROP OIL: TIME the pot. 1 1 . . Enter a new value by using the product numbers.
- Page 96 Program Display Description Code 3 3 . . Press “X” to return to default or previous setting. FC-39 COOK MODE AUTO MIX: DE- The purpose of the Cook Mode Auto Mix op- SIRED BOTTOM TEMP eration is to attempt to keep the bottom of the pot hot enough that crumbs don’t stick.
- Page 97 Program Display Description Code D D i i s s p p o o s s e e S S e e t t t t i i n n g g s s FC-43 DISPOSE: DROP OIL: DRAIN This setting specifies the drain opening to be OPENING used when draining the oil to a disposal cart, shuttle, or bucket for disposal.
- Page 99 C C h h a a p p t t e e r r 8 8 T T r r o o u u b b l l e e s s h h o o o o t t i i n n g g 8 8 .
- Page 100 Problem Cause Correction Foaming or boiling Some customers choose not Product with excessive ice crystals over. to use oil stabilizers which should be dipped once quickly then can cause foaming and boil- removed from the fryer to allow ice over. crystals to melt and excessive water to evaporate.
- Page 101 Error Cause Correction E-6A MAIN Temperature probe Turn the switch to off position, then turn the switch TEMP failure. back to on. If the error persists call for service. PROBE FAILED (Open Circuit) E-6B MAIN TEMP PROBE FAILED (Shorted) E-10 (A High limit tripped.
- Page 102 Error Cause Correction VALVE ERROR E-18A LE- The oil level probe Call for service. VEL SEN- has failed. FAILED (Open Circuit) E-18B LE- VEL SEN- FAILED (Shorted) E-19 PRO- Call for service. TECTION PROBE FAILED E-41P-1- System data lost. Call for service. LOST Both the RAM copy and stored copy of...
- Page 103 Error Cause Correction E-47 ANA- Problem reading the Call for service. LOG SYS- A-to-D Analog to Di- TEM OR gital converter 12 VOLT inputs. FAILED Failure of the CPU Call for service. E-48 IN- PUT SYS- board. ERROR E-54C Fault on the CPU Call for service.
- Page 104 Error Cause Correction NOT DE- TECTED E-84D Cannot open lid - Pin Call for service. PRES- is stuck and has not SURE PIN dropped down. STUCK Can open lid - wire Call for service. OR NOT may be discon- CONNEC- nected or monitoring switch failed.
- Page 105 C C h h a a p p t t e e r r 9 9 A A n n n n u u a a l l I I n n s s p p e e c c t t i i o o n n C C h h e e c c k k l l i i s s t t Give this form to the technician performing the fryer’s annual inspection.
- Page 106 Remove the safety relief valve. Clean, inspect and reassemble, and then install after com- pleting step 14. . Remove the solenoid valve. Clean, inspect and reassemble, and then install after com- pleting step 14. . Remove all pressure system tubing, and then clean, inspect, replace as necessary and reas- semble.
- Page 107 Test oil filtration system for function and leaks. Check that all six heating circuits have similar 29.* amp draw. . L L a a b b e e l l s s Verify all labels are in place and legible on fryer.
- Page 108 T T a a b b l l e e 9 9 - - 2 2 D D a a t t e e o o f f I I n n s s p p e e c c t t i i o o n n a a n n d d S S i i g g n n a a t t u u r r e e s s D D A A T T E E O O F F I I N N S S P P E E C C T T I I O O N N A A N N D D S S I I G G N N A A T T U U R R E E S S M M M M / / D D D D / / Y Y Y Y : S S i i g g n n a a t t u u r r e e o o f f I I n n s s p p e e c c t t i i n n g g T T e e c c h h n n i i c c i i a a n n :...
- Page 111 blank page...
- Page 112 H H e e n n n n y y P P e e n n n n y y C C o o r r p p o o r r a a t t i i o o n n P P .