Table of Contents
Advertisement
USER'S MANUAL
Model No. PETL40507.0
Serial No.
Write the serial number in the space
above for future reference.
Serial
Number
Decal
QUESTIONS?
As a manufacturer, we are commit-
ted to providing complete customer
satisfaction. If you have questions,
or if there are missing parts,
please contact us at the numbers
or addresses listed below:
Call: 08457 089 009
Outside UK: 0 (44) 113 3877133
Fax: 0 (44) 113 3877125
E-mail: csuk@iconeurope.com
Write:
ICON Health & Fitness, Ltd.
Unit 4
Revie Road Industrial Estate
Revie Road, Beeston
Leeds, LS11 8JG
UK
CAUTION
Read all precautions and instruc-
tions in this manual before using
this equipment. Save this manual
for future reference.
Advertisement
Table of Contents

Related Manuals for Pro-Form PF 3.6 PETL40507.0


Summary of Contents for Pro-Form PF 3.6 PETL40507.0
- Page 1 USER’S MANUAL Model No. PETL40507.0 Serial No. Write the serial number in the space above for future reference. Serial Number Decal QUESTIONS? As a manufacturer, we are commit- ted to providing complete customer satisfaction. If you have questions, or if there are missing parts, please contact us at the numbers or addresses listed below: Call: 08457 089 009...
-
Page 2: Table Of Contents
TABLE OF CONTENTS WARNING DECAL PLACEMENT ............. .2 IMPORTANT PRECAUTIONS . -
Page 3: Important Precautions
IMPORTANT PRECAUTIONS WARNING: To reduce the risk of serious injury, read all important precautions and in- structions in this manual and all warnings on your treadmill before using your treadmill. ICON as- sumes no responsibility for personal injury or property damage sustained by or through the use of this product. - Page 4 20. Do not attempt to raise, lower, or move the DANGER: Always unplug the power treadmill until it is properly assembled. (See cord immediately after use, before cleaning the ASSEMBLY on page 6, and HOW TO FOLD treadmill, and before performing the mainte- AND MOVE THE TREADMILL on page 20.) nance and adjustment procedures described in You must be able to safely lift 45 lbs.
-
Page 5: Before You Begin
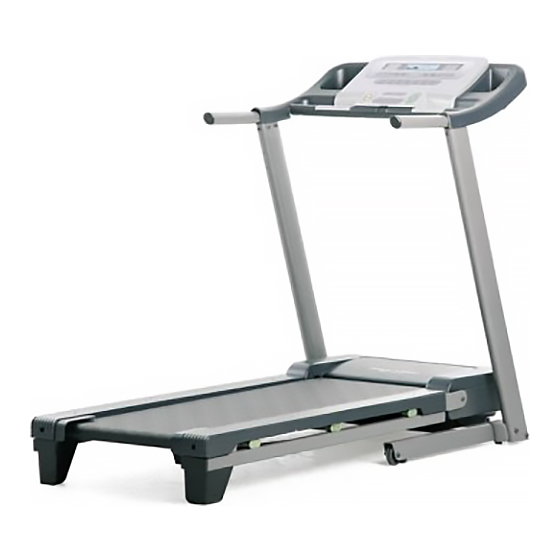
BEFORE YOU BEGIN Thank you for selecting the revolutionary PROFORM ® ing this manual, please see the front cover of this man- PF 3.6 treadmill. The PF 3.6 treadmill offers an impres- ual. To help us assist you, note the product model num- sive array of features designed to make your workouts ber and serial number before contacting us (see the at home more enjoyable and effective. -
Page 6: Assembly
ASSEMBLY Assembly requires two persons. Set the treadmill in a cleared area and remove all packing materials. Do not dispose of the packing materials until assembly is completed. Note: The underside of the treadmill walking belt is coated with high-performance lubricant. During shipping, a small amount of lubricant may be transferred to the top of the walking belt or the shipping carton. - Page 7 2. With the help of a second person, carefully tip the treadmill onto its left side. Partially fold the Frame (48) so that the treadmill is more stable; do not fully fold the Frame yet. Hole Cut the tie securing the Upright Wire (77) to the Base (85).
- Page 8 4. Identify the Right Upright (78) and the Right Upright Spacer (80), which are marked with stickers. Insert the Upright Wire (77) through the Right Upright Spacer as shown. See the inset drawing. Tie the wire tie in the Right Upright (78) securely around the end of the Upright Wire (77).
- Page 9 6. With the help of a second person, carefully tip the treadmill onto its right side. Partially fold the Frame (48) so the treadmill is more stable; do not fully fold the Frame yet. Attach a Base Pad (81) to the Base (85) in the location shown with a Base Pad Spacer (104) and an M4.2 x 25mm Screw (2).
- Page 10 9. Identify the Right Handrail (90), which has a large hole in the location shown. Hold the Right Console Handrail near the Console (87). Wire Next, insert the tie on the console wire into the large hole in the Right Handrail (90) and out of the top as shown.
- Page 11 11. Have a second person hold the console assem- bly near the Right Upright (78). Remove the long Console Assembly tie from the Upright Wire (77) and the tie from the console wire. Connect the Upright Wire (77) to the console wire.
- Page 12 13. Raise the Frame (not shown) to the position shown. Have a second person hold the Frame until step 15 is completed. Identify the Latch Assembly (72). Make sure that the sleeve has been slid over the indicated hole Sleeve and that the Latch Knob (74) is locked into the hole.
-
Page 13: Operation And Adjustment
OPERATION AND ADJUSTMENT THE PRE-LUBRICATED WALKING BELT Your treadmill features a walking belt coated with high-performance lubricant. IMPORTANT: Never apply sili- cone spray or other substances to the walking belt or the walking platform. Such substances will deterio- rate the walking belt and cause excessive wear. HOW TO PLUG IN THE POWER CORD This product must be earthed. - Page 14 CONSOLE DIAGRAM Clip FEATURES OF THE CONSOLE To use the manual mode of the console, follow the steps beginning on page 15. To use a classic work- out, see page 17. To use a weight loss workout, see The treadmill console offers an impressive array of features designed to make your workouts more effec- page 18.
- Page 15 HOW TO TURN ON THE POWER HOW TO USE THE MANUAL MODE IMPORTANT: If the treadmill has been exposed to 1. Insert the key into the console. cold temperatures, allow it to warm to room tem- perature before turning on the power. If you do not See HOW TO TURN ON THE POWER to the left.
- Page 16 5. Follow your progress with the displays. 6. Measure your heart rate if desired. The track—When the Before using the manual mode is se- handgrip pulse lected, a track represent- sensor, remove ing 400 meters will ap- the sheets of clear pear in the matrix.
- Page 17 HOW TO USE A CLASSIC WORKOUT The height of the flashing segment indicates the speed setting for the current segment. At the end of 1. Insert the key into the console. each segment, a series of tones will sound and the next segment of the profile will begin to flash.
- Page 18 HOW TO USE A WEIGHT LOSS WORKOUT current segment. At the end of each segment, a se- ries of tones will sound and the next segment of the 1. Insert the key into the console. profile will begin to flash. If a different speed or in- cline setting is programmed for the next segment, See HOW TO TURN ON THE POWER on the speed or incline setting will flash in the display...
- Page 19 THE INFORMATION MODE The upper display will show the total number of hours The console features an information mode that keeps the treadmill has been used. track of the total distance that the walking belt has moved and the total number of hours that the treadmill has been used.
-
Page 20: How To Fold And Move The Treadmill
HOW TO FOLD AND MOVE THE TREADMILL HOW TO FOLD THE TREADMILL FOR STORAGE Before folding the treadmill, adjust the incline to the lowest position. If you do not do this, you may damage the treadmill when you fold it. Remove the key and unplug the power cord. - Page 21 HOW TO LOWER THE TREADMILL FOR USE 1. Hold the upper end of the treadmill with your right hand. Pull the latch knob to the left and hold it. It may be necessary to push the frame forward as you pull the knob to the left.
-
Page 22: Troubleshooting
TROUBLESHOOTING Most treadmill problems can be solved by following the simple steps below. Find the symptom that applies, and follow the steps listed. If further assistance is needed, please see the front cover of this manual. PROBLEM: The power does not turn on SOLUTION: a. - Page 23 Locate the Reed Switch (54) and the Magnet (42) on the left side of the Pulley (44). Turn the Pulley until the Magnet is aligned with the Reed Switch. 1/8 in. Make sure that the gap between the Magnet and the Reed Switch is about 1/8 in.
- Page 24 PROBLEM: The walking belt is off-center or slips when walked on SOLUTION: a. If the walking belt is off-center, first remove the key and UNPLUG THE POWER CORD. If the walking belt has shifted to the left, use the hex key to turn the left rear roller bolt clockwise 1/2 of a turn;...
-
Page 25: Exercise Guidelines
EXERCISE GUIDELINES Burning Fat—To burn fat effectively, you must exer- WARNING: cise at a low intensity level for a sustained period of Before beginning this time. During the first few minutes of exercise, your or any exercise program, consult your physi- body uses carbohydrate calories for energy. -
Page 26: Part List
PART LIST—Model No. PETL40507.0 R0907B To locate the parts listed below, see the EXPLODED DRAWING near the end of this manual. Key No. Qty. Description Key No. Qty. Description M4.2 x 19mm Screw Left Foot M4.2 x 25mm Screw Right Foot M4 x 20mm Screw Hood M10 x 50mm Bolt... - Page 27 Key No. Qty. Description Key No. Qty. Description Hex Key M3 x 13mm Key Screw Lift Frame/Base Ground Wire Clamp Frame Endcap Left Top Pulse Plate Base Pad Spacer Left Bottom Pulse Plate 4mm Hex Key Rigth Top Pulse Plate 5mm Hex Key Right Bottom Pulse Plate Filter...
-
Page 28: Exploded Drawing
EXPLODED DRAWING A—Model No. PETL40507.0 R0907B... - Page 29 EXPLODED DRAWING B—Model No. PETL40507.0 R0907B...
- Page 30 EXPLODED DRAWING C—Model No. PETL40507.0 R0907B...
- Page 31 EXPLODED DRAWING D—Model No. PETL40507.0 R0907B...
-
Page 32: Ordering Replacement Parts
ORDERING REPLACEMENT PARTS To order replacement parts, please see the front cover of this manual. To help us assist you, be prepared to pro- vide the following information when contacting us: • the model number and the serial number of the product (see the front cover of this manual) •...