Table of Contents
Advertisement
Quick Links
Advertisement
Table of Contents

Related Manuals for Night Owl X Series 16CH


Summary of Contents for Night Owl X Series 16CH
- Page 1 Easy 1-2-3 Setup *Phone not included X Series 16CH...
-
Page 2: Table Of Contents
Contents Chapter 1: FCC Radiation Norm ............6 Chapter 2: Package Contents ..............7 Chapter 3: System Requirements ............8 Chapter 4: Safety Instructions ..............9 Chapter 5: Troubleshooting ..............11 Chapter 6: DVR Components ............... 13 6.1 Back Panel of DVR ..............13 6.2 Front Panel of DVR .............. - Page 3 Contents 14.2.1 Date/Time Menu ............30 14.2.2 DST Menu ..............32 14.3 Display Menu ............... 32 14.3.1 Display Menu ............33 14.3.1.1 Mask Screen ..........34 14.3.1.2 Color Screen ..........35 14.3.1.3 Time/Name Screen ........37 14.3.2 Auto Seq Menu ............38 14.4 Record Menu ................
- Page 4 Contents 15.2.3 Port Menu ..............55 15.2.4 Sub-Stream Menu ............. 56 15.3 COMM Menu ................ 57 15.3.1 DDNS Menu .............. 57 15.3.2 E-Mail Menu .............. 58 15.3.3 UPnP Menu ............... 59 15.4 PTZ Menu ................60 Chapter 16: Record Search Menu ............61 Chapter 17: Converting Files to AVI .............
- Page 5 24.2 DVR Login ................92 24.3 Using Nightowl View ............93 24.4 Using Control Management Software (CMS-Nightowl View) 100 Chapter 25: Night Owl Pro Mobile Application ........114 Chapter 26: Specifications of DVR ............. 121 Chapter 27: Information Log ............... 122 Chapter 28: Warranty .................
-
Page 6: Chapter 1: Fcc Radiation Norm
Chapter 1: FCC Radiation Norm This equipment has been tested and found to comply with limits for Class B digital devices pursuant to Part 15 of Federal Communications Commission (FCC) rules. FCC Compliance Statement These limits are designed to provide reasonable protection against frequency interference in residential installation. -
Page 7: Chapter 2: Package Contents
1 x Remote Control (batteries included) 1 x 6 ft. HDMI Cable 1 x Driver CD 3 x Night Owl Security Stickers 2 x Quick Setup Guides 1 x RJ45 Cable (Ethernet) 1 x DVR Power Adapter 1 x Mouse... -
Page 8: Chapter 3: System Requirements
Chapter 3: System Requirements Please be sure the computer that you will use with the DVR Security Kit complies with the following specifications: ® ® ® ® XP, Windows Vista, Windows 7 and Windows 8 Windows ® OS X 10.6 and Above ®... -
Page 9: Chapter 4: Safety Instructions
Chapter 4: DVR Safety Instructions Contents • Use the provided power adapter. Do not use this product with a power source that applies more than the specified voltage. • Never insert metal into the DVR case or its openings. ... - Page 10 Chapter 4: DVR Safety Instructions • Do not attempt to remove the top cover. If you observe any abnormal operation, unplug the DVR immediately and contact technical support. Do not attempt to open the DVR to diagnose the cause of the problem. (WARNING: You may be subjected to severe electrical shock if you remove the cover of the DVR.) •...
-
Page 11: Chapter 5: Troubleshooting
Chapter 5: Troubleshooting If a problem occurs, you may be able to easily correct it yourself. The following table describes the most common problems and their solutions. Please refer to the table before calling Night Owl Technical Support. - Page 12 Chapter 5: Troubleshooting...
-
Page 13: Chapter 6: Dvr Components
Chapter 6: DVR Components 6.1 Back Panel of DVR 16 Video Inputs Power HDMI Network 2 USB E-SATA 2 Audio 1 Video (10) Output Ready Ports Backup Inputs Output 1 VGA Output Alarm Inputs (TV/Monitor) Compatible 1 Audio Output... -
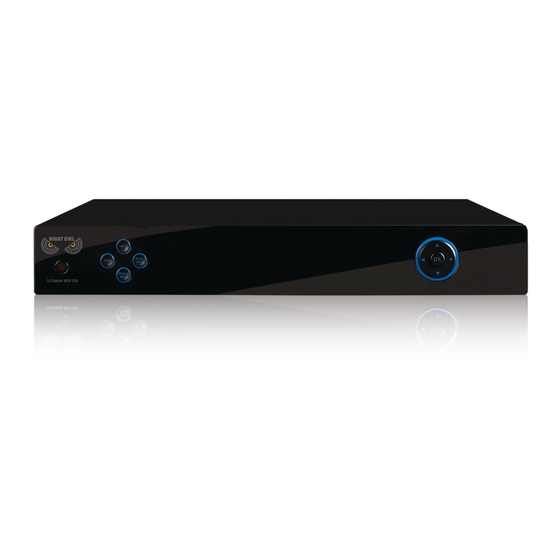
Page 14: Front Panel Of Dvr
Chapter 6: DVR Components 6.2 Front Panel of DVR... -
Page 15: Mouse
Chapter 6: DVR Components 6.3 Mouse You can use a mouse instead of the remote control to navigate through your DVR’s menus. Connect the included mouse to the USB port on the back of the DVR. Use the mouse buttons to perform the following: ... -
Page 16: Remote
Chapter 6: DVR Components 6.4 Remote Control Use the remote control to navigate through the DVR’s menus. NOTE: PTZ cameras are not included with security system kits. -
Page 17: Chapter 7: Dvr Installation
Chapter 6: DVR Components Chapter 7: DVR Installation 7.1 Connecting the Power Supply 1. Plug the included power adapter cable into the back of the DVR. 2. Plug the other end of the power adapter cable into an available wall outlet (or, if you are using an uninterruptable power supply, plug the adapter cable into one of its output sockets). -
Page 18: Connecting The Dvr To A Tv Or Monitor
Chapter 7: DVR Installation 7.2 Connecting the DVR to a TV or Monitor Using the supplied HDMI connector: 1. Connect the HDMI connector to the back of the DVR’s HDMI port. 2. Connect the other end of the cable to an available HDMI input on your TV or monitor. -
Page 19: Chapter 8: Camera Installation
Chapter 6: DVR Components Chapter 8: Camera Installation 8.1 Connecting Cameras to the DVR 1. Your DVR system comes with one 60-ft. coaxial cable per camera. Connect each cable to a camera using the BNC connectors (yellow connector) and the DC connectors (red connector). 2. -
Page 20: Mounting The Cameras
Chapter 8: Camera Installation 8.2 Mounting the Cameras 1. Choose a location: Decide where you would like to mount the camera. 2. Indicate screw positions: Mark three holes on the surface where you plan to mount the camera, using the holes in the camera base as a guide. -
Page 21: Chapter 9: Dvr Start-Up
Chapter 9: DVR Start-up 9.1 System Initialization After you plug in the power adapter, the DVR will automatically start up and display the Night Owl logo on your TV while initializing. After initialization, your screen will display the Startup Wizard. -
Page 22: On-Screen Display
Chapter 9: DVR Start-up 9.2 On-Screen Display The on-screen display will show the following information: • Date & Time: Displays the date and time on the system. • Channel Title/Number: Displays the channel name, which you can set in the Camera Menu. -
Page 23: Chapter 10: Startup Wizard
Chapter 10: Startup Wizard Use the Startup Wizard to enter the security system s basic settings, network settings, record settings, and HDD settings. The Startup Wizard will open when the DVR is powered on. Refer to the Startup Guide for step-by-step instructions on using the Startup Wizard. -
Page 24: Chapter 11: Login Screen
Chapter 11: Login Screen Before you can access any menus, you must log in. Remote ID: This number should match the number in parentheses • to the right of the field. User Name: Enter the user name you created in the Startup •... -
Page 25: Chapter 12: Main Menu
Chapter 12: Main Menu Opens the menu interface. Allows you to check one channel at a time to enlarge the selected channel to a full-screen view. Allows you to enter into Quad-screen view. Allows you to enter into Octad-screen view. -
Page 26: Chapter 13: Menu Icons
Chapter 13: Menu Icons When you open the Main Menu you will see a line of icons at the top of the screen. Each icon represents a different menu. The menu names are listed below. Basic Menu Advanced Menu Record Search Menu... -
Page 27: Chapter 14: Basic Menu
Chapter 14: Basic Menu Basic Menu Use the Basic Menu to access the System, Date/Time, Display, Record, and User menus. Be sure to Apply all changes you make in the menus. If you do not apply the changes, they will not be saved. You can also select the Default button on any page to restore the DVR’s default settings. -
Page 28: System Menu
Chapter 14: Basic Menu 14.1 System Menu The System Menu allows you to change the language, output resolution, logout time, and turn the Startup Wizard on/off. It is recommended that you leave the Device Name and Remote ID fields at their default values. To access the System Menu, select the Basic button, and then select System from the list on the left side of the screen. -
Page 29: Date/Time Menu
Chapter 14: Basic Menu Please refer to your TV/monitor manual to see which resolution works best. • Language: Set the language to English, French, or Spanish. • Logout Time: This will allow the DVR to logout the user that is signed into the DVR after a certain amount of time. -
Page 30: Date/Time Menu
Chapter 14: Basic Menu 14.2 Date/Time Menu You should set the date and time when first setting up your system. You can also configure Daylight Saving Time (DST) settings. To access the Date/Time Menu, select the Basic button, and then select Date/Time from the list on the left side of the screen. - Page 31 Chapter 14: Basic Menu Keep in mind that if you have already manually changed the date/time. Auto Update: Select this box if you would like the DVR to • automatically update the date/time. Keep in mind that this feature will only work if the network settings have been configured properly.
-
Page 32: Dst Menu
Chapter 14: Basic Menu 14.2.2 DST Menu Use the DST Menu to configure Daylight Saving Time settings. To access the DST Menu, select the Basic button, select Date/Time from the list on the left side of the screen, and then select DST. •... -
Page 33: Display Menu
Chapter 14: Basic Menu 14.3.1 Display Menu Use the Display Menu to configure channel name, channel masking, color, and time/name settings. To access the Display Menu, select the Basic button and then select Display from the list on the left side of the screen. •... -
Page 34: Mask Screen
Chapter 14: Basic Menu 14.3.1.1 Mask Screen Use the Mask Screen to block out certain areas of a channel screen. To access the Mask Screen, select the Basic button, and then select Display from the list on the left side of the screen. Select the Settings button in the Mask column. -
Page 35: Color Screen
Chapter 14: Basic Menu 14.3.1.2 Color Screen Use the Color Screen to adjust the colors of a channel that is being recorded. To access the Color Screen, select the Basic button and then select Display from the list on the left side of the screen. Select the Settings button in the Color column. - Page 36 Chapter 14: Basic Menu • Contrast: Adjusts the contrast of the colors. You can adjust the contrast from 0 to 63. • Saturation: Adjusts the dominance of the hue colors. You can Adjust this from 0 to 63. • If you want to return to the original settings, select Default. •...
-
Page 37: Time/Name Screen
Chapter 14: Basic Menu 14.3.1.3 Time/Name Screen The Time/Name Screen is used to show/remove the date/time and a channel name displayed on the screen. To access the Time/Name Screen, select the Basic button and then select Display from the list on the left side of the screen. Select the Settings button in the Time/Name column. -
Page 38: Auto Seq Menu
Chapter 14: Basic Menu 14.3.2 Auto SEQ Menu Use the Auto SEQ Menu to adjust the channels and time that will be displayed when you start the auto sequence. To access the Auto SEQ Menu, select the Basic button, select Display from the list on the left side of the screen, and then select Auto SEQ. -
Page 39: Record Menu
Chapter 14: Basic Menu 14.4.1 Record Menu Use the Record Menu to enable recording, set audio preferences, and specify how you would like to record on each channel. To access the Record Menu’s basic functions, select the Basic button, select Record from the list on the left side of the screen, and then select Basic. -
Page 40: Bit Rate Menu
Chapter 14: Basic Menu 14.4.2 Bit Rate Menu The Bit Rate Menu allows you to set the quality of the recorded video. To access the Bit Rate Menu, select the Basic button, select Record from the list on the left side of the screen, and then select Bit Rate. •... -
Page 41: Resolution
Chapter 14: Basic Menu 14.4.3 Resolution Choose between 960H (960x480), WHD1 (960x240), D1 (704x480), HD1 (704x240), WCIF (480x240) or CIF (352x240) resolutions to record videos To help maximize the DVR’s hard drive space, use the lowest resolution. 960H Resolution (960x480 pixels): •... -
Page 42: Schedule Menu
Chapter 14: Basic Menu 14.4.4 Schedule Menu The Schedule Menu allows you to schedule recordings. To access the Schedule Menu, select the Basic button, select Record from the list on the left side of the screen, and then select Schedule. •... -
Page 43: User Menu
Chapter 14: Basic Menu 14.5 User Menu The User Menu allows you to add users and permissions for those users. To access the User Menu, select the Basic button, then select User . • User Name: Displays the names that you assign to users. To make changes to a user, double-click on the user’s name. -
Page 44: User Management Menu
Chapter 14: Basic Menu 14.5.1 User Management Menu Basic Tab The User Management Menu allows you to add users and assign permission to those users. To access the User Management Menu’s Basic Tab, select the Basic button, select User , and then select Add User or double-click an existing user. •... - Page 45 Chapter 14: Basic Menu • Limit Access to One Computer Only: Check this box to limit who can access the system. • Hardware Address of Computer: Displays the hardware address of the computer that the access was limited to.
-
Page 46: Chapter 15: Advanced Menu
Chapter 15: Advanced Menu Advanced Menu Use this menu to access the Alarm, Network, Comm, and PTZ menus. Be sure to Apply all changes made to the menus. If you do not apply the changes, they will not be saved. You can select the Default button on any page to restore the DVR’s original settings. -
Page 47: Alarm Menu
Chapter 15: Advanced Menu 15.1 Alarm Menu 15.1.1 Motion Menu The Motion Menu allows you to configure the motion settings on your DVR. To access the Motion Menu, select the Advanced button, select Alarm from the list on the left side of the screen, and then select Motion. •... -
Page 48: Area Screen
Chapter 15: Advanced Menu 15.1.1.1 Area Screen The Area Screen allows you to see areas that will and will not detect motion. To access the Area Screen, select the Advanced button, select Alarm from the list on the left side of the screen, and then select Motion. Select Settings in the Area column for the channel you are customizing. -
Page 49: Schedule Screen
Chapter 15: Advanced Menu 15.1.1.2 Schedule Screen The Schedule Screen allows you to choose when to record. To access the Motion Menu’s Schedule Screen, select the Advanced button, select Alarm from the list on the left side of the screen, and then Motion. -
Page 50: Trigger Screen
Chapter 15: Advanced Menu 15.1.1.3 Trigger Screen The Trigger Screen allows you see what has triggered an alarm. To access the Trigger Screen, select the Advanced button, select Alarm from the list on the left side of the screen, and then select Motion. Select Settings in the Trigger column for the channel you are configuring. -
Page 51: Video Loss Menu
Chapter 15: Advanced Menu 15.1.2 Video Loss Menu The Video Loss Menu allows you to configure the video loss settings on your DVR. To access the Video Loss Menu, select the Advanced button, select Alarm from the list on the left side of the screen, and then select Video Loss. •... -
Page 52: Others Menu
Chapter 15: Advanced Menu 15.1.3 Others Menu The Others Menu allows you to configure the settings on your DVR for different alarm features. To access the Others Menu, select the Advanced button, select Alarm from the list on the left side of the screen, and then select Others. •... -
Page 53: Network Menu
Chapter 15: Advanced Menu 15.2 Network Menu 15.2.1 LAN Menu The LAN Menu allows you to configure the IP address for your DVR. Make sure that the DVR is plugged directly into your internet router. To access the LAN Menu, select the Advanced button, select Network from the list on the left side of the screen, and then select LAN. -
Page 54: Pppoe Menu
Chapter 15: Advanced Menu 15.2.2 PPPoE Menu The PPPoE Menu allows you to configure the DVR using broadband dial- up network access. To access the PPPoE Menu, select the Advanced button, select Network from the list on the left side of the screen, and then select PPPoE. •... -
Page 55: Port Menu
Chapter 15: Advanced Menu 15.2.3 Port Menu The Port Menu allows you to view your DVR through the Internet, software, and mobile phones. To access the Port Menu, select the Advanced button, select Network from the list on the left side of the screen, and then select Port. •... -
Page 56: Sub-Stream Menu
Chapter 15: Advanced Menu 15.2.4 Sub-Stream Menu The Sub-Stream Menu allows you to configure the network settings. To access the Sub-Stream Menu, select the Advanced button, select Network from the list on the left side of the screen, then select Sub-Stream. -
Page 57: Comm Menu
DDNS: This should be set to Enable if you are using a DDNS service. • Server: This should be set to NightOwl when using Night Owl’s free domain name service. • Host Name: This should be set to the domain name that you created during DDNS registration. -
Page 58: E-Mail Menu
Chapter 15: Advanced Menu 15.3.2 E-Mail Menu The E-Mail Menu allows you to configure email alert settings. To access the E-Mail Menu, select the Advanced button, select COMM, and then select E-Mail from the list on the left side of the screen. •... -
Page 59: Upnp Menu
Chapter 15: Advanced Menu 15.3.3 UPnP Menu The UPnP Menu allows you to enable the UPnP (Universal Plug and Play) setting of the DVR. To access the UPnP Menu, select the Advanced button, select COMM, and then select UPnP from the list on the left side of the screen. •... -
Page 60: Ptz Menu
Refer to your PTZ camera’s instruction manual for further details. PTZ camera is not included. Please keep in mind the Protocol and Baud Rate settings are configured specific to your camera. Night Owl cameras must be set to Pelco-D and 9600. -
Page 61: Chapter 16: Record Search Menu
Chapter 16: Record Search Menu Record Search Menu Use this menu to find, play back, and back up recorded video. Be sure to Apply all changes made to the menus. If you do not apply the changes, they will not be saved. You can also select the Default button on any page to restore the DVR’s original settings. - Page 62 Chapter 16: Record Search Menu The Calendar lets you select the dates of recorded video you wish to play back. To access the Record Search Menu, select the Record Search button. The Calendar appears on the left. Calendar • Left / Right Arrows: Switch between months and years. •...
- Page 63 Chapter 16: Record Search Menu The File List shows a list of recordings. To access the Record Search Menu, select the Record Search button. The File List is on the right. File List • CH: Indicates the channel that was recorded. •...
- Page 64 Chapter 16: Record Search Menu When you play back a recorded file, a number of controls are available. Use the Calendar, File List, and Playback button to playback recorded files. The playback screen has the following buttons: Rewinds the recorded video. Pauses/plays the recorded video.
-
Page 65: Chapter 17: Converting Files To Avi
Chapter 17: Converting Files to AVI Chapter 16: Record Search Menu Converting the .246 files to AVI format allows you to play back the recorded files on most multimedia players. AVI conversion involves selecting a file and then converting. • Download and install the AVI Generator from www.NightOwlSP.com. -
Page 66: Chapter 18: Disk Management Menu
Chapter 18: Disk Management Menu Disk Management Menu The Disk Management menu allows you to view and manage recordings on your DVR’s hard disk drive, eSATA(external hard drive) USB storage device. To access the Disk Management menu, select the Disk Management button. - Page 67 Chapter 18: Disk Management Menu Chapter 16: Record Search Menu eSATA and USB Storage Devices • USB Storage: Displays the total/free capacity of the USB Storage device.. • eSATA: Displays the total/free capacity of the external SATA storage device. Please keep in mind that your eSATA storage device can only be used to backup previously recorded files that have been stored on your DVRs internal HD.
-
Page 68: Chapter 19: Information Menu
Chapter 19: Information Menu Information Menu Use this menu to access the Device, Network, Online, and Record Information menus. Be sure to Apply all changes made to the menus. If you do not apply the changes, they will not be saved. You can also select the Default button on any page to restore the DVR’s original settings. -
Page 69: Device Menu
Chapter 19: Information Menu 19.1 Device Menu The Device Menu allows you to view the MAC Address, serial number and the firmware version of your DVR. To access the Device Menu, select the Information button and then select Device. • Device Name: The DVR’s name. -
Page 70: Network Menu
Chapter 19: Information Menu 19.2.1 LAN Menu The LAN Menu allows you to information about your Local Area Network (LAN). To access the LAN Menu, select the Information button, select Network, and then select LAN. • Network Status: Indicates whether the DVR is properly connected to the internet. -
Page 71: Pppoe Menu
Chapter 19: Information Menu 19.2.2 PPPoE Menu The PPPoE (Point-to-Point Protocol over Ethernet) Menu allows you to view information about your network. To access the PPPoE Menu, select the Information button, select Network, and then select PPPoE. • Network Status: Shows whether the DVR is properly connected to the internet. -
Page 72: Online Menu
Chapter 19: Information Menu 19.3 Online Menu The Online Menu allows you to view the computers that are currently connected to the DVR. To access the Online Menu, select the Information button and then select Online. • User Name: The name of the computer that is accessing the DVR. •... -
Page 73: Record Menu
Chapter 19: Information Menu 19.4 Record Menu The Record Menu allows you to view the configured recording resolution of the DVR. To access the Record Menu, select the Information button and then select Record. • CH: Indicates the channel. • Resolution: Shows the recording resolution of each channel. -
Page 74: Chapter 20: Maintenance Menu
Chapter 20: Maintenance Menu Maintenance Menu Use this menu to access the Basic Maintenance Settings and Settings menus. Be sure to Apply all changes made to the menus. If you do not apply the changes, they will not be saved. You can also select the Default button on any page to restore the DVR’s original settings. -
Page 75: Basic Menu
Chapter 20: Maintenance Menu 20.1 Basic Menu The Basic Menu allows you to perform firmware upgrades and maintain the DVR’s performance. To access the Basic Menu, select the Maintenance button and then select Basic. • Auto Maintain: Allows you to choose when you would like your system to automatically reboot. -
Page 76: Firmware Upgrade
Chapter 20: Maintenance Menu 20.1.1 Firmware Upgrade Your system will periodically need a firmware upgrade to ensure optimal performance. Visit www.NightOwlSP.com to see if upgrades are available for your system. To upgrade firmware: Download and save the latest firmware upgrade for your system from www.NightOwlSP.com to your desktop. -
Page 77: Settings Menu
Chapter 20: Maintenance Menu 20.2 Settings Menu The Settings Menu allows you to import or export the DVR’s settings. To access the Settings Menu, select the Maintenance button and then select Settings. • Export Settings: Allows you to copy all of the settings on the DVR to a flash drive. -
Page 78: Chapter 21: Remote Access
Chapter 21: Remote Access This chapter will show you how to connect your DVR to the internet. You will learn how to properly connect your DVR to your router/modem and set up port configurations, internet configurations, Mobile configurations, and DDNS registration. You will need to have the following in order to be able to successfully connect the DVR to the internet. -
Page 79: Connection Of Dvr And Router/Modem
Chapter 21: Remote Access 21.1 Connecting the DVR and Router/Modem Use this section to learn how to connect the DVR to your router/modem. 1. Make sure that your DVR is connected to a power outlet. 2. Connect the DVR directly to the router through an open Ethernet port with the included Ethernet cable. -
Page 80: Windows - Based Network Configuration
Chapter 21: Remote Access ® 21.2 Windows – based Network Configuration In this section you will determine basic information about your network Make sure that the DVR is properly connected to the router/modem and ® that you have a computer works with Windows operating systems connected to the same router. - Page 81 Chapter 21: Remote Access 3. Find the IPv4 Address (it may be named “IP Address” in some versions of Windows). Write down this number. 4. Change the last three digits to 150. You will need this new number in a later step. (Example: Say you wrote down the IP Address 192.168.0.104.
- Page 82 Chapter 21: Remote Access Changing the Network Settings on the DVR For the following steps, use the information that you just wrote down. To access the LAN Menu, select the Advanced button, select Network from the list on the left side of the screen, and then LAN. •...
-
Page 83: Apple (Mac) Network Configuration
Chapter 21: Remote Access 21.3 Apple (Mac) Network Configuration Follow the steps in this section to configure remote access for an Apple Macintosh computer. Make sure that the DVR is properly connected to the router/modem and that you have a Macintosh computer connected to the same router/modem. Follow these steps to determine basic information about your network: 1. - Page 84 Chapter 21: Remote Access Use the information that you just wrote down for the next steps. To access the LAN Menu select Advanced button, select Network from the list on the left side of the screen, and then select the LAN tab. •...
- Page 85 Chapter 21: Remote Access After you have configured the Network Settings, you will need to forward the necessary ports to be able to view the DVR over the Internet from anywhere in the world. Refer to your router’s documentation to see how port forwarding works for that device.
- Page 86 Chapter 21: Remote Access Chapter 22: Port Forwarding 5. You will need to enter a new port forwarding entry for each port that your DVR uses: Media Port (9000), Web Port (2051). Repeat the steps below for each entry. 6. When entering the port numbers and IP address into your router’s port forwarding section, you will need to do away with the leading zeros (e.g., 09000 becomes 9000, 192.168.000.150 becomes 192.168.0.150, and so on).
-
Page 87: Chapter 22: Port Forwarding
Chapter 22: Port Forwarding 22.1 Checking the Ports After Port Forwarding Once you have forwarded the necessary ports on your router, you should check to make sure they have been correctly forwarded. 1. Go to http://www.yougetsignal.com/tools/open-ports/. 2. Type in port 9000 and select the Check button to see if the port tests as open or closed. -
Page 88: Chapter 23: Ddns Registration
Chapter 23: DDNS Registration 23.1 Registering a Free Domain Name (DDNS) This option allows you to set up a free website address that will point back to the DVR regardless of whether the IP Address changes. If you do not have a static IP Address, you should use this option. - Page 89 Chapter 23: DDNS Registration 4. Create a domain name. 5. If the domain name that you have chosen is available, you will see a window that tells you that your domain was successfully created. (If the domain name is taken, try again until you find an available name.) Write this information in the Information Log at the end of the manual.
-
Page 90: Adding Your New Domain Name To Your Dvr
Chapter 23: DDNS Registrations 23.2 Adding your New Domain Name to your DVR Use the DDNS Menu to configure DDNS setup after you have registered for a free domain name. To access the DDNS Menu, select the Advanced button, select COMM, and then select DDNS from the list on the left side of the screen. -
Page 91: Chapter 24: Internet Viewing
Chapter 24: Internet Viewing Use the Nightowl View or Control Management Software to access your DVR remotely over the Internet or within your local area network. Make sure that you have completed the steps in Chapters 21 and 22 of this manual before trying to access the DVR using this software. -
Page 92: Dvr Login
Chapter 24: Internet Viewing 24.2 DVR Login • User Name: Type in the user name that you created in the Password Menu of the DVR. • Password: Enter the password that was assigned to the User. • Language: If you would like the information to be displayed in another language, you can change it to English, French, or Spanish. -
Page 93: Using Nightowl View
Chapter 24: Internet Viewing 24.3 Using Internet Explorer You can use Internet Explorer to access one or more DVRs, It allows you to view live and recorded video over the Internet. Channel Information The channel names, date, and time will be indicated on every channel in real time. - Page 94 Chapter 24: Internet Viewing Play Control • Takes a snapshot of the video. • Starts/stops recording on all channels. • Stops/plays the live video feed. • Enables Main-Stream on all channels. This requires a fast network for transmission. • Enables Sub-Stream on all channels. This requires a normal network for transmission and is the default for all channels.
- Page 95 Chapter 24: Internet Viewing PTZ Control These control settings can only be used for cameras that have Pan, Tilt, and Zoom features. (A PTZ camera is not included.) Arrows: Move the camera manually in the direction of the arrow. Allows you to clean the camera lens if your camera has a wiper function.
- Page 96 Chapter 24: Internet Viewing Playback This screen lets you search, play back, and back up recorded videos. To access this menu, select the Playback button from the Menu Bar. • Calendar: Shows days with recordings in bold numbers. Select a date to view a file list.
- Page 97 Chapter 24: Internet Viewing Playback (continued) Use the bottom control panel for various video controls. Plays the video. Pauses the video. Stops the video. Slows down the video. Speeds up the video. Shows each frame during playback. Captures an image. Allows you to configure the timeline to show hours.
- Page 98 Chapter 24: Internet Viewing Backup This screen allows you to back up files to your computer. To access this screen, select the Playback tab from the Menu Bar and then select the Record List button on the left side of the screen. •...
- Page 99 Chapter 24: Internet Viewing Remote Setting This screen allows you to access all of the DVR setting menus. To access the Remote Setting screen, select the Remote Setting button from the Menu Bar. • Information: Refer to Chapter 19 of this guide for details. •...
-
Page 100: Using Control Management Software (Cms-Nightowl View)
Chapter 24: Internet Viewing 24.4 Using Control Management Software (CMS – Nightowl View) You can use the CMS software to access one or more DVRs remotely over the Internet or within your local area network. Make sure that you have completed the Remote Access chapter of this manual before trying to access the DVR using this software. - Page 101 Type: Choose between Local and Server. Local allows you to configure DVRs. Server allows you to enter a server address. For example, the Night Owl DDNS Server. • Server: This will be left blank if you chose Local. If you chose Server you will need to enter the name of the server, such as Night Owl Server.
- Page 102 Chapter 24: Internet Viewing Device List This menu shows all DVRs that have been added to the CMS. Device List: Lists all DVRs that have been added to the CMS. Allows you to refresh devices. Allows you to add groups. Allows you to delete devices.
- Page 103 Chapter 24: Internet Viewing Device Tab To add a device you must first add a group by selecting the plus (+) sign in the navigation pane. Next, right-click your mouse on the group that you would like to add the device to, and then select Add a Device. Once you have selected Add a Device you will need to configure the settings: •...
- Page 104 Chapter 24: Internet Viewing Channel Group Tab To configure a Channel Group, select the plus (+) sign in the navigation pane. 1. Make sure that your DVRs are properly added to the software. 2. Give the Channel Group a name (e.g. Front Doors). 3.
- Page 105 Chapter 24: Internet Viewing Patrol Tab To configure a patrol group you must select the plus (+) sign in the navigation pane. This allows the Channel Groups to rotate. 1. Make sure that you have created Channel Groups. 2. Give the Patrol Group a name. 3.
- Page 106 Chapter 24: Internet Viewing Panel Options You can view live video on the DVRs, play back recorded video, and configure the setting of the DVRs. Allows you to view the channels live. Allows you to play back recorded videos. Allows you to set the location for saved files. Allows you configure all of the settings on the DVRs.
- Page 107 Chapter 24: Internet Viewing Live View While viewing live video, you can change the viewing options, capture images, turn audio on/off, configure the color of the channels, and control a PTZ camera. Play Control Allows you to change the way that the channels are displayed.
- Page 108 Chapter 24: Internet Viewing PTZ Control Allows you to move the camera manually in the direction of the arrows. Focuses the camera. Allows you to adjust the type of lens to get the best picture in different lighting conditions. Zooms the camera in and out.
- Page 109 Chapter 24: Internet Viewing Live View Color Settings Adjusts the color of the image by changing the levels of red, green, blue, and yellow. Adjusts the brightness of the image. Adjusts the contrast of the colors. Adjusts the dominance of the hues.
- Page 110 Chapter 24: Internet Viewing Playback This screen allows you to search, play back, and back up recorded videos. You must select the DVR from the Device List to view the recorded videos. Calendar: Shows the days with recordings in bold numbers. Select a date to view a file list.
- Page 111 Chapter 24: Internet Viewing System Setting This screen allows you set the location that the files will saved to. • System: Allows you set the location the image captures will saved • Record: Allows you set the location the videos will saved to. •...
- Page 112 Chapter 24: Internet Viewing Remote Setting This screen allows you to access the DVR setting menus. You must select the DVR from the Device List to view the settings. • Information: Refer to Chapter 19 for details on configuration. • Date/Time: Refer to Chapter 14.2 for details on configuration.
- Page 113 Chapter 24: Internet Viewing Event This screen displays a list of all of the activity of the DVR. • Log Type: Allows you to choose the operation log or the alarm log. • Operation Type: Shows the type of action that occurred in the DVR (e.g., logging in or opening a video).
-
Page 114: Chapter 25: Night Owl Pro Mobile Application
Chapter 25: Night Owl Pro Mobile Application The Night Owl Pro mobile application (available online) lets you access your DVR remotely using a tablet or Smartphone. Search for Night Owl Pro from your Apple or Android device and download the fre e application. - Page 115 Chapter 25: Night Owl Pro Mobile Application Device Page This page allows you to add, edit, and delete devices. Make sure that you have completed Chapters 21 and 22 of this manual before trying to access the DVR using this application.
- Page 116 This QR code is for reference ONLY. Your security system will generate a unique QR code onscreen for you to scan with the Night Owl Pro app. Do NOT scan this printed QR code.
- Page 117 Chapter 25: Night Owl Pro Mobile Application Live View Live View lets you perform different functions during live viewing on a mobile device. You can view up to 16 channels on one screen. Displays all of the configured devices. Select a device to enable live viewing.
- Page 118 Chapter 25: Night Owl Pro Mobile Application Playback The Playback screen lets you control several playback operations from your mobile device. • Remote Playback: Allows you to search and play back DVR recordings remotely. • Event Playback: Allows you to view all of the recordings that were trigged by an alarm.
- Page 119 Chapter 25: Night Owl Pro Mobile Application Settings This screen allows you to configure the settings of a device. • Information: Refer to Chapter 19 for details on configuration. • Date/Time: Refer to Chapter 14.2 for details on configuration. •...
- Page 120 Chapter 25: Night Owl Pro Mobile Application More This screen allows you to view help functions, configure push notifications, and set the permissions. • System: Allows you to change the speed of a PTZ camera when it rotates, set a permission for the application to work only in WiFi networks, and save snapshots taken during live view to a photo album on your phone.
-
Page 121: Chapter 26: Specifications Of Dvr
# of Users – Software 4 Simultaneously D1 @ 704 x 480 Record Resolution Mobile Platform Model # HD1 @ 704 x 240 Night Owl CIF @ 352 x 240 Mobile Phone / Tablet PC ® / iPad ® ® 4.3 and above... -
Page 122: Chapter 27: Information Log
Chapter 25: Night Owl Pro Mobile Application Chapter 27: Information Log Be sure to write down all of the important information below and place it in a secure location. General DVR Information: • Admin Password: • User Password: • Mac Address: •... -
Page 123: Chapter 28: Warranty
Product is defective, the Purchaser must return the Product at Purchaser’s cost (no CODs) to the address below, with the original proof of purchase receipt. In its sole discretion, Night Owl will either repair or replace the Product at no additional cost to the Purchaser. Any replacement Product (or parts) will be covered by the same warranty as the original Product through the expiration date of the original warranty period. - Page 124 Product. In no event shall Night Owl be liable for any special or consequential damages arising from the use of the Product or arising from the malfunctioning or non-functioning of the Product, or for any delay in the performance of this warranty due to any cause beyond its control.
- Page 125 Disclaimer Certain uses, publication and/or distribution of video/audio recordings from security cameras and/or audio devices are prohibited or restricted by federal, state and local laws. When enabling and/or using audio recording features with your hidden security camera, be sure to comply with the laws in your country, state and locality.
- Page 126 CUSTOMER SUPPORT ONLINE 24/7 Product Support How-To Videos Manuals Firmware Updates etc. www.NightOwlSP.com EMAIL Technical Support Technical Issues Warranty Replacement Email: Support NightOwlSP.com Sales Support Accessory Sales Sales Related Questions Email: Sales @NightOwlSP.com PHONE (Now in English & Spanish) Technical Support 1-866-390-1303 24/7 365 Days a Year Sales Support 1-866-390- 1303 choose...