
Related Manuals for Night Owl AHD SERIES


Summary of Contents for Night Owl AHD SERIES
-
Page 1: User Manual
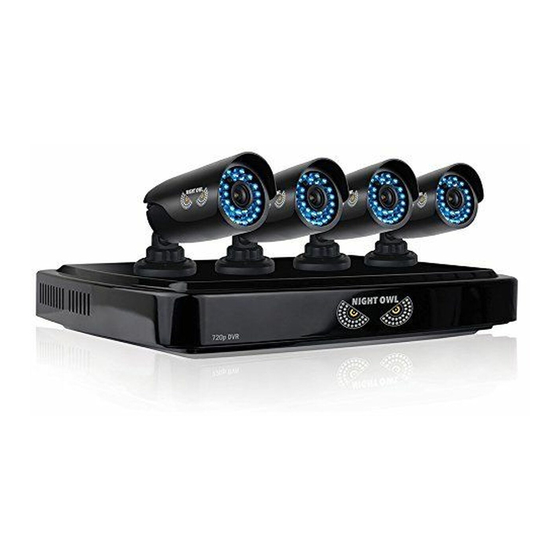
USER MANUAL AHD SERIES 4/8 CHANNEL For more information on this product visit www.NightOwlSP.com... -
Page 2: Table Of Contents
5.1. Connecting to TV ..............5.2. Power ................... Chapter 6: GETTING STARTED ............6.1. Startup Wizard ..............6.2. Night Owl HD Mobile App ..........6.3. Displays and Icons .............. 6.3.1. Login Screen .............. 6.3.2. Live View (All Channels) ........... 6.3.3. Live View (Single Channel) ........ - Page 3 TABLE OF CONTENTS a. Output ................. b. Privacy Zone .............. 7.1.2. Network ..............a. Main ................b. Substream ..............c. Email ................d. Email Schedule ............e. DDNS ................7.1.3. Alarm ................a. Motion ................. 7.2. Cameras Menu ..............7.2.1. Settings ..............
- Page 4 TABLE OF CONTENTS c. NTP ................7.5.2. Users ................7.5.3. Info ................7.5.4. Log ................7.6. Advanced Menu ..............7.6.1. Maintain ................ 7.6.2. Events ................7.6.3. Auto Upgrade ............... Chapter 8: REMOTE ACCESS ............8.1. System Requirements ............8.2. Setup ..................
-
Page 5: Chapter 1: Fcc Warnings
CHAPTER 1: FCC WARNINGS This equipment has been tested and found to comply with limits for Class B digital devices pursuant to Part 15 of Federal Communication Commission (FCC) rules. FCC Compliance Statement These limits are designed to provide reasonable protection against frequency interference in residential installation. -
Page 6: Chapter 2: Safety Instructions
CHAPTER 2: SAFETY INSTRUCTIONS • Use the provided power adapter. Do not use this product with a power source that applies more than the specified voltage. • Never insert metal into the DVR case or its openings. Inserting metal into the DVR case may cause electric shock. •... - Page 7 CHAPTER 2: SAFETY INSTRUCTIONS • Do not attempt to remove the top cover. If you observe any abnormal operation, unplug the DVR immediately and contact technical support. Do not attempt to open the DVR to diagnose the cause of the problem. •...
-
Page 8: Chapter 3: Specifications
1 x DC 12V/2A DVR Power Adapter • Camera Power Splitters* • 3 x Night Owl Security Stickers • *Cameras, additional cables, power adapters and splitters only included in certain security kits. Check the product packaging for detailed kit contents. -
Page 9: Dvr Diagram
CHAPTER 3: SPECIFICATIONS 3.2.1. DVR Diagrams 720p DVR FRONT VIEW HDMI Output Power RJ-45 (Ethernet) Port Audio Output VGA Output Audio Inputs Video Inputs USB Ports RS-485 (PTZ) Port REAR VIEW Images used are for reference only. Your product may slightly vary. For more information on this product visit www.NightOwlSP.com... -
Page 10: Camera Diagram
CHAPTER 3: SPECIFICATIONS 3.2.2. Camera Diagram Wide Angle HD Lens 720p Resolution Infrared (IR) LEDs Base Power/Video Cables CAMERA For more information on this product visit www.NightOwlSP.com... -
Page 11: Mouse And Remote Diagrams
CHAPTER 3: SPECIFICATIONS 3.2.3. Mouse and Remote Diagram Scroll Wheel Left/Select Button Right/Menu Button MOUSE Left/Select: choose a field or button on screen. Right/Menu: when in Live View click to display the bottom menu bar. When in a menu window, right click to exit the menu. For more information on this product visit www.NightOwlSP.com... - Page 12 CHAPTER 3: SPECIFICATIONS REM-AHD Menu MENU Select Down Quad View Mute AUDIO/ MUTE SEARCH Play Fast Forward Rewind Stopped Record Pause Battery Compartment REMOTE For more information on this product visit www.NightOwlSP.com...
-
Page 13: Chapter 4: Camera Installation
CHAPTER 4: CAMERA INSTALLATION 4.1. Video/Audio* 1. Locate an included 60 foot camera cable. 2. Connect a camera to one end of the cable by matching the BNC connectors (yellow) and DC power connectors (red). Video/Power Cable Camera * Audio enabled cameras will have a white RCA connector to transmit audio signal (Optional) 3. -
Page 14: Power
CHAPTER 4: CAMERA INSTALLATION 4.2. Power* 1. Locate an included power splitter. 2. Connect the power splitter to the remaining DC power connectors (red) of the cables. Camera Splitter 3. Plug the power splitter into the labeled camera power supply, then plug the camera power supply into an available wall outlet or UPS. -
Page 15: Mounting
CHAPTER 4: CAMERA INSTALLATION Plug into outlet 4.3. Mounting the Cameras 1. Locate a camera and choose a location where you would like to mount the camera. 2. Indicate screw positions by marking three holes on the surface where you plan to mount the camera, using the holes in the camera base as a guide. -
Page 16: Chapter 5: Dvr Installation
CHAPTER 5: DVR INSTALLATION 3. Using a drill bit slightly smaller than the included screw anchors, drill into the mounting surface using the guide marks you placed in the previous step. 4. Insert the screw anchors. 5. Line up the camera base holes with the screw anchors. Holding the base in place, insert screws and tighten until secure. -
Page 17: Power
CHAPTER 5: DVR INSTALLATION 2. Plug one end of the cable into the HDMI port on the back of the DVR. 3. Connect the other end of the cable to an available HDMI input on your TV or monitor. Monitor 4. - Page 18 CHAPTER 5: DVR INSTALLATION DVR Power Adapter 2. Plug the included power adapter cable into the back of the DVR. 3. Plug the other end of the power adapter cable into an available wall outlet. If you are using an uninterruptable power supply (UPS), plug the adapter cable into one of its output sockets.
-
Page 19: Chapter 6: Getting Started
Video Out (V-OUT) port on the back of the DVR. 6.1. Startup Wizard When your DVR is powered on it will display the Night Owl logo while initializing. After initialization, you will be prompted to use the Startup Wizard. Follow the on-screen instructions to: For more information on this product visit www.NightOwlSP.com... -
Page 20: Night Owl Hd Mobile App
Night Owl mobile app for viewing • 6.2. Night Owl HD Mobile App The Night Owl HD mobile app lets you access your DVR remotely with live viewing from your tablet or smartphone. Download our free app at the App or Play store! For more information about the Night Owl HD app please visit us at www.NightOwlSP.com... -
Page 21: Displays And Icons
CHAPTER 6: GETTING STARTED 6.3. Displays and Icons The following sections will describe the 3 main screens you will access for login, playback and recording, and configuration. 6.3.1. Login Screen Any time you want to configure or adjust your system settings you will be required to log in. -
Page 22: Live View (All Channels)
CHAPTER 6: GETTING STARTED 6.3.2. Live View (All Channels) Live View is the default screen you will see when viewing all channels on your DVR. Right-click anywhere on-screen to bring up the icon menu to change viewing options or access the main menu. Rearrange the channel order by dragging individual channels to other locations in on-screen layout. -
Page 23: Live View (Single Channel)
CHAPTER 6: GETTING STARTED 8. Auto Sequence: start/stop the slideshow sequence of each channel. 9. Volume: mute or adjust the system volume. 10. PTZ: open up the Pan, Tilt, Zoom (PTZ) menu. 11. Picture-in-Picture 1: view channel 1 with an inset window showing another channel. -
Page 24: Menu Screen
CHAPTER 6: GETTING STARTED 6.3.4. Menu Screen Access the main menu by right-clicking anywhere while in Live View and then selecting the menu icon. At the menus you will be able to access settings and parameters for all aspects of your DVR system. 1. -
Page 25: Chapter 7: Menus And Settings
CHAPTER 7: MENUS AND SETTINGS Your DVR control management system (CMS) will provide you access to various settings and parameters to fine-tune your DVR and camera outputs. If you are a new user, we recommend leaving all default settings for optimal performance. If you are an expert user or interested in customizing your DVR system, we encourage you to familiarize yourself with this chapter before changing or adjusting any settings. -
Page 26: General Menu
CHAPTER 7: MENUS AND SETTINGS 7.1. General Menu The general menu will allow you to access display, network, and alarm settings for your DVR system. 7.1.1. Display a. Output: adjust the display resolution on your TV or monitor. Video Output: the default LIVE-OUT setting. View Setup: choose between Dynamic and Static options. -
Page 27: Privacy Zone
CHAPTER 7: MENUS AND SETTINGS Mode to either a Single, Quad, or Nine channel display. Sequence View: set the channel order when viewing the channels are displayed in the sequential mode. Sequence Time: adjust the duration each channel is displayed during a sequential view. -
Page 28: Network
CHAPTER 7: MENUS AND SETTINGS line. Select, drag, and resize each area with the mouse to mask areas on camera that you do not want visible while recording or monitoring. Once the area(s) are selected, right-click to return to the menu. 7.1.2. -
Page 29: Substream
CHAPTER 7: MENUS AND SETTINGS PPPOE: for broadband dial-up network users only. You will need to contact your ISP to retrieve the values needed to complete this type of connection. DHCP: the most common network connection type. These values will be gathered automatically from your ISP when connected. Static: modify these values if you are using a static IP address. -
Page 30: Email
CHAPTER 7: MENUS AND SETTINGS Video: Enable or Disable video for the selected channel. FPS: increase or decrease the frames per second of the streaming video depending on your connection speed. A higher FPS will result in more data transfer but smoother video. A lower FPS will eliminate most lag but at the expense of video quality. -
Page 31: Email Schedule
CHAPTER 7: MENUS AND SETTINGS SSL: Enable or Disable to send encrypted email alerts. SMTP Port: the access point for your email determined by your email service. SMTP Server: this is the mail server address of your email provider. This information is determined by your email provider. Sender: the email address that will send email alerts. -
Page 32: Ddns
DDNS: Enable or Disable DDNS service to view your DVR from a computer. Server: set to the NIGHTOWL server when using the Night Owl free domain name server. Domain: set to the domain name you created when registering your DDNS. -
Page 33: Cameras Menu
CHAPTER 7: MENUS AND SETTINGS Channel: select the channel you want to configure a motion alarm for. Enable: activate motion alarms. Sensitivity: adjust the level of motion detection. A lower setting will require more movement in the camera range to begin recording. Buzzer: toggle between ON and OFF to enable an audible alert from the DVR. -
Page 34: Settings
CHAPTER 7: MENUS AND SETTINGS 7.2.1. Settings Channel: select the channel you want to configure a camera for. Channel Name: create a name for the selected channel; this name will be displayed on-screen. Position: change the position of this channel while viewing multiple in Live View. -
Page 35: General
CHAPTER 7: MENUS AND SETTINGS 7.3.1. General Search and playback all recorded video from this menu. Choose your desired date and times from the options below, then click Play to view recorded video. Right-click to exit back to the menu screen. Channel: select the channel you would like to playback footage from. -
Page 36: Events
CHAPTER 7: MENUS AND SETTINGS 1. Calendar: indicate the date to playback video. 2. Channel Selection: choose the channels to display on-screen. 3. Full Screen: hides the Calendar and Channel Selection panels. 4. Rewind: rewinds the recorded video. 5. Next: goes to the next recorded event. 6. -
Page 37: Settings
CHAPTER 7: MENUS AND SETTINGS Date: select the date to search for event footage. Time: choose a start and end time that the event happened. Channel: pick the channel(s) with the desired video. Type: select from All, Normal, or Motion video. Quick Backup: check the tick boxes to the left of the found video clip(s) and click this button to save that video to the HDD. -
Page 38: Basic
CHAPTER 7: MENUS AND SETTINGS a. Basic: turn channel recording capabilities on or off. Channel: select the channel you would like to configure. Record: Enable or Disable recording capabilities for this channel. Pre-Record: Enable or Disable pre-recording for this channel. Pre-recording is the amount of video captured prior to an alarm is triggered. -
Page 39: Mainstream
CHAPTER 7: MENUS AND SETTINGS c. Mainstream: configure or adjust the video settings to best optimize for your connection. Resolution: choose between WD1 (960 x 576), WHD1 (960 x 288), WCIF (480 x 240), or 720P (1280 x 720) resolutions based on your TV or monitor capabilities. -
Page 40: Ptz
CHAPTER 7: MENUS AND SETTINGS Select: if multiple drives are installed, choose the HDD you would like to customize. Overwrite: by default, the Auto setting will overwrite the earliest footage once the HDD is full. Choose one of the other options to overwrite footage at the end of the desired time duration, starting with the earliest data. -
Page 41: System Menu
CHAPTER 7: MENUS AND SETTINGS Channel: choose the channel with a PTZ-enabled camera. Protocol: select Pelco-D or Pelco-P depending on the camera protocol. Both the DVR and camera should be set to the same setting. Baudrate: indicate the frequency of communication to the PTZ camera. -
Page 42: Settings
CHAPTER 7: MENUS AND SETTINGS a. Settings: basic system configuration. Date: manually set the date and time. Date Format: choose the display format for the date. Time Format: select between a 12Hour or 24Hour display. Language: pick between ENGLISH or SPANISH language preferences. -
Page 43: Ntp
CHAPTER 7: MENUS AND SETTINGS DST: Enable or Disable the Daylight Savings Time feature. Time Offset: choose the amount of time (1Hour or 2Hours) to offset if DST is enabled. Daylight Saving Time: indicate whether you would like this feature to be applied the week of or an exact date. - Page 44 CHAPTER 7: MENUS AND SETTINGS Edit: select an existing user from the list to change the User Name, Enable or Disable password access, or create a new Password. Permission: select a new user profile (e.g. user1) and press the Permission button to select which menus, settings, and playback/recording functions are available to that specific user and on which channels.
-
Page 45: Info
CHAPTER 7: MENUS AND SETTINGS 7.5.3. Info View your DVR system information and specifications at a glance. Device ID: create a unique device ID number if you are using multiple DVRs. Device Name: create a unique device name for easy reference. Device Type: product model number. - Page 46 CHAPTER 7: MENUS AND SETTINGS Log Type: select the type of event log that you would like to Search for. Each choice corresponds to an action or event that was triggered and noted within the system. For example, System logs are recorded when the DVR time is synced with NTP (if enabled) or if the system is turned on or off.
-
Page 47: Advanced Menu
CHAPTER 7: MENUS AND SETTINGS 7.6. Advanced Menu Configure additional settings related to maintenance, disk space, and upgrades. 7.6.1. Maintain Adjust settings related to default user access and reboot schedules. Default User: choose a user to default at the login screen at startup. Auto Reboot: Enable or Disable a schedule reboot. -
Page 48: Events
CHAPTER 7: MENUS AND SETTINGS 7.6.2. Events Configure notification settings for other triggered events not related to motion detection. Event Type: choose the type of event you would like to create a notification for. Disk Full means you will receive a notification if the HDD is full. -
Page 49: Auto Upgrade
CHAPTER 7: MENUS AND SETTINGS 7.6.3. Auto Upgrade Control settings for auto upgrades of the DVR software. Auto Upgrade: Enable or Disable the auto upgrade feature. Check For Updates: check this tick box to periodically check for updated software versions. Detect: click this button to query your DVR and notify you if you are current or need to be updated. -
Page 50: Chapter 8: Remote Access
CHAPTER 8: REMOTE ACCESS This chapter will show you how to connect your DVR to the Internet. You will learn how to properly connect your DVR to your router/modem and setup port, Internet, and mobile configurations along DDNS registration. 8.1. System Requirements You will need to have the following in order to be able to successfully connect the DVR to the Internet. -
Page 51: Network Configuration
CHAPTER 8: REMOTE ACCESS 8.3. Network Configuration 8.3.1. Windows Operating Systems ® Make sure that the DVR is properly connected to the router/modem and that you have a computer that works with Windows and connected to the same router. Follow these steps to determine the basic information about your network: 1. - Page 52 CHAPTER 8: REMOTE ACCESS 4. Find “Default Gateway” in the same section and write this number down as well e.g. 192.168.1.1. You will need to enter this in the DVR network settings. For the following steps, use the information that you just wrote down. To access the network settings on your DVR, go to the General Menu, then to Network >...
- Page 53 CHAPTER 8: REMOTE ACCESS 2. Confirm that the Subnet Mask is set to 255.255.255.000. 3. Enter the “Default Gateway” number from the prior section into the Gateway field. Again you will need to add placeholder zeros in any sections that do not contain three digits e.g. 192.168.1.1 192.168.001.001.
-
Page 54: Mac ® Operating System
CHAPTER 8: REMOTE ACCESS 8.3.2. Mac Operating Systems ® Make sure that the DVR is properly connected to the router/modem. Follow these steps to determine basic information about your network: 1. Select the Airport icon on your computer screen and choose the “Open Network Preferences”... - Page 55 CHAPTER 8: REMOTE ACCESS 6. Make note of the IP address listed for router. You will need to enter this into the DVR network settings. For the following steps, use the information that you just wrote down. To access the network settings on your DVR, go to the General Menu, then to Network >...
- Page 56 CHAPTER 8: REMOTE ACCESS 2. Confirm that the Subnet Mask is set to 255.255.255.000. 3. Enter the “Default Gateway” number from the prior section into the Gateway field. Again you will need to add placeholder zeros in any sections that do not contain three digits e.g. 192.168.1.1 192.168.001.001.
-
Page 57: Port Forwarding
CHAPTER 8: REMOTE ACCESS 8.3.3. Port Configuration After you have configured the network settings, you will need to forward the necessary ports to be able to view the DVR over the Internet. Refer to your router’s documentation to see how port forwarding works for your device. - Page 58 CHAPTER 8: REMOTE ACCESS particular router may be different than the below but the same principles will apply: Application Name: create a unique name for your DVR system. • Public Port: select the port to forward: Media Port (9000), Web •...
-
Page 59: Ddns Registration
CHAPTER 8: REMOTE ACCESS 8.3.4. DDNS Registration This option allows you to set up a free website address that will point back to the DVR, regardless of whether or not the IP address changes. If you do not have a static IP address, you should use this option. Follow the steps below to register a free domain name/DDNS. -
Page 60: Adding The Ddns To Your Dvr
CHAPTER 8: REMOTE ACCESS 4. Create a domain name. 5. If the domain name that you have chosen is available, you will see a window that tells you that your domain was successfully created. If the domain name is taken, try again until you find an available name. 8.3.5. -
Page 61: Internet Viewing
Once you have configured your DDNS you are ready to view your camera online from your computer or laptop. Visit us at www.NightOwlSP.com and download the Internet Viewing or Night Owl HD app manual for more information! For more information on this product visit www.NightOwlSP.com... -
Page 62: Chapter 9: Glossary
CHAPTER 9: GLOSSARY DDNS: Dynamic Domain Naming System. Method for automatically updating hostnames, address, or other information like a URL on a given name server. DHCP: Dynamic Host Configuration Protocol. A network protocol that allows a server to automatically assign a device and IP address. FPS: Frames Per Second. -
Page 63: Chapter 10: Warranty
Product is defective, the Purchaser must return the Product at Purchaser’s cost (no CODs) to the address below, with the original proof of purchase receipt. In its sole discretion, Night Owl will either repair or replace the Product at no additional cost to the Purchaser. - Page 64 Any and all claims or statements, whether written or verbal, by salespeople, retailers, dealers or distributors to the contrary are not authorized by Night Owl, and do not affect this provision of this warranty. For more information on this product visit www.NightOwlSP.com...
- Page 65 CHAPTER 10: WARRANTY Returns Under this Warranty In order to obtain service, please make sure that you have registered your product on-line no later than thirty (30) days after purchase at www.NightOwlSP.com in the warranty registration section or in any other manner described in the instruction.
-
Page 66: Chapter 11: Troubleshooting
CHAPTER 11: TROUBLESHOOTING If a problem occurs, you may be able to easily correct it yourself. The following table describes the most common problems and their solutions. Please refer to the table before calling Night Owl Technical Support. Error Possible Causes Solutions 1. - Page 67 CHAPTER 11: TROUBLESHOOTING Error Possible Causes Solutions Power off the system (disconnect power cable). Firmly connect a USB mouse to Mouse not detected by System needs to be the USB Mouse port on the front panel system. reset. of the system. Reconnect the power cable to the DC 19V port on the real panel.
-
Page 68: Chapter 12: Customer Support
CHAPTER 12: CUSTOMER SUPPORT Before you return to the store, we might be able to save you a trip: ONLINE www.NightOwlSP.com • 24/7 Product Support • How-To Videos • Manuals • Firmware Updates etc. • EMAIL Technical Support : support@NightOwlSP.com •... -
Page 69: Chapter 13: User Information
CHAPTER 13: USER INFORMATION Be sure to write down all the important information below and place it in a secure location. General DVR Information Admin Password: • User Password: • Mac Address: • Serial Number: • Internet Login Information Internal IP Address: •...