
Related Manuals for Sony HXR-MC50U


Summary of Contents for Sony HXR-MC50U
- Page 1 4-191-793-11(1) Digital HD Video Camera Recorder HXR-MC50U/MC50N Operating Guide Before operating the unit, please read this manual thoroughly, and retain it for future reference. 2010 Sony Corporation ...
-
Page 2: Read This First
Read this first Supplied items Using the camcorder Do not hold the camcorder by the following The numbers in ( ) are the supplied parts, and also do not hold the camcorder by quantity. the jack covers. AC Adaptor (1) ... - Page 3 OFF during take off and landing of an all the data stored on it and the data will be airplane (HXR-MC50U). irrecoverable. Save your important data on your PC etc. Menu items, LCD panel, viewfinder and Before starting to record, test the recording ...
- Page 4 [SHOOTING SET] category) set to [HD We recommend using genuine Sony accessories. FX]. Save them on a Blu-ray Disc or using an Genuine Sony accessories may not be available external media (p. 67, 70). in some countries/regions. Notes on battery pack/AC Adaptor...
-
Page 5: Notes On Use
Confirm the model name on the bottom of your camcorder. The main differences in specification of this series are as follows: HXR-MC50U: GPS-compatible HXR-MC50N: GPS-incompatible Notes on use Do not do any of the following. Otherwise, the ... -
Page 6: Operation Flow
Operation flow Getting started (p. 11) Prepare the power source and memory card. Recording movies and photos (p. 23) Recording movies p. 24 Changing the recording mode (p. 30) Expected recording time (MEDIA INFO, p. 98) Shooting photos p. 26 Playing movies and photos Playback on the camcorder ... -
Page 7: Table Of Contents
Table of contents Read this first ..................2 Notes on use . - Page 8 Using the GPS function (HXR-MC50U) ........
- Page 9 Creating an AVCHD disc ............... . . 67 Creating a standard definition image quality (STD) disc that can be played on ordinary DVD players .
- Page 10 About GPS (HXR-MC50U) ........
-
Page 11: Getting Started
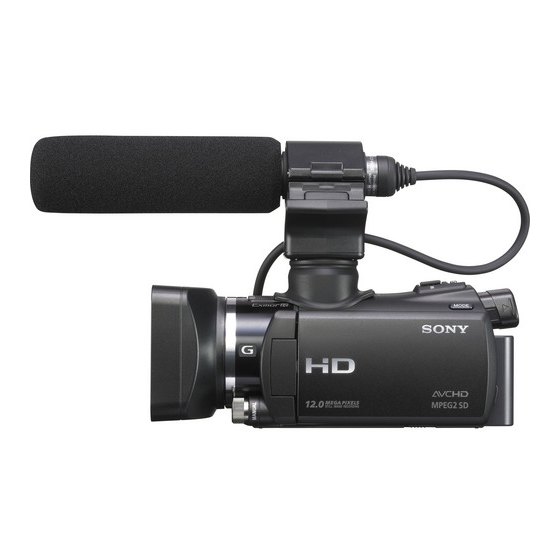
Getting started Step 1: Attaching the supplied microphone and the lens hood Attaching the microphone holder The cover of the fixing lever The fixing lever Turn up the cover of the fixing lever of the microphone holder. Make sure that the fixing lever is turned fully counterclockwise. ... -
Page 12: Attach The Microphone To The Microphone Holder
Fix the microphone holder by turning the fixing lever clockwise until it clicks. If the microphone holder is turned, orient it in the direction shown in the illustration. Return the cover of the fixing lever to its original position. ... -
Page 13: Attaching The Lens Hood
Unlock the stopper of the microphone holder and open the cover. Align the convex part of the microphone with the concave part of the holder, then place the microphone into the holder. Close the cover and lock the stopper securely. Be sure to align the ... - Page 14 Notes Do not touch the lens or the lens cover when you attach the lens hood. The attached lens hood may interfere with flash operation. When you record photos with the lens hood (MENU) [Show others] [FLASH MODE] (under attached, touch [PHOTO SETTINGS] category) ...
-
Page 15: Step 2: Charging The Battery Pack
Step 2: Charging the battery pack Battery pack /CHG (flash/charge) lamp DC IN jack DC plug Power cord (Mains lead) Adaptor To the wall outlet (wall socket) You can charge the “InfoLITHIUM” battery pack (V series) after attaching it to your camcorder. - Page 16 The /CHG (flash/charge) lamp lights up and charging starts. The /CHG (flash/charge) lamp turns off when the battery pack is fully charged. When the battery is charged, disconnect the AC Adaptor from the DC IN jack of your camcorder. Tips ...
- Page 17 Notes on the battery pack When you remove the battery pack or disconnect the AC Adaptor, replace the viewfinder, close the LCD screen and make sure that the (Movie)/ (Photo) lamps (p. 23), the access lamp (p. 22) are turned off.
-
Page 18: Step 3: Turning The Power On, And Setting The Date And Time
Step 3: Turning the power on, and setting the date and time Open the LCD screen of your camcorder. Your camcorder is turned on and the lens cover is opened. To turn on your camcorder when the LCD screen is open, press POWER. ... -
Page 19: Changing The Language Setting
AREA ADJ] set to [ON] (p. 57). The clock may not be adjusted to the correct time automatically, depending on the country/region selected for your camcorder. In this case, set [AUTO CLOCK ADJ] and [AUTO AREA ADJ] to [OFF] (HXR-MC50U). To turn off the power Close the LCD screen. -
Page 20: Step 4: Preparing The Recording Media
Step 4: Preparing the recording media The recording media that can be used are displayed on the screen of your camcorder as the following icons. Memory Internal memory card In the default setting, both movies and photos are recorded on the internal memory. You can perform recording, playback and editing operations on the selected medium. -
Page 21: Inserting A Memory Card
To check the recording media settings In either movie recording mode or photo recording mode, the media icon of the selected recording media is displayed at the top right corner of the screen. Recording media icon Inserting a memory card ... - Page 22 Open the cover, and insert the memory card with the notched edge in the direction as illustrated until it clicks. Close the cover after inserting the memory card. Note direction of notched corner. Access lamp The [Create a new Image Database File.] screen may appear if you insert a new memory card.
-
Page 23: Recording/Playback
Recording/Playback Recording In the default setting, movies are recorded with high definition image quality (HD) on the internal memory. Tips To change the recording media, see page 20. Fasten the grip belt. Open the LCD screen of your camcorder. Your camcorder is turned on and the lens cover is opened. -
Page 24: Recording Movies
Recording movies Press START/STOP to start recording. You can start recording also by touching in the bottom left of LCD screen. START/STOP button [STBY] [REC] To stop recording, press START/STOP again. You can stop recording also by touching in the bottom left of LCD screen. ... - Page 25 Data code during recording The recording date, time and condition , and coordinates (HXR-MC50U) are recorded automatically on the recording media. They are not displayed during recording. However, you can check them as [DATA CODE] during playback. To display them, touch (MENU) ...
-
Page 26: Shooting Photos
Shooting photos In the default setting, photos are recorded on the internal memory. Tips To change the recording media, see page 20. Press MODE to turn on the (Photo) lamp. The LCD screen display switches for photo recording mode, and the screen aspect ratio becomes 4:3. - Page 27 If white circular spots appear on photos This is caused by particles (dust, pollen, etc.) floating close to the lens. When they are accentuated by the camcorder’s flash, they appear as white circular spots. To reduce the white circular spots, light the room and shoot the subject without a flash. Subject Particles (dust, pollen, etc.) in...
-
Page 28: Useful Functions For Recording Movies And Photos
Useful functions for recording movies and photos You can magnify images up to 10 times using optical zooming, unless [ STEADYSHOT] is set to [ACTIVE]. Zooming Tips You can set [ DIGITAL ZOOM] (p. 92) if you You can magnify images up to 14 times the ... -
Page 29: Selecting High Definition Image Quality (Hd) Or Standard Image
Camera-shake detection Notes Above settings are reset to the default settings (Walk), (Tripod) when INTELLIGENT AUTO is set to ON. The camcorder detects whether camera- shake occurs or not, and makes the Selecting high definition image optimum compensation. quality (HD) or standard image ... -
Page 30: Selecting The Recording Mode
movies are recorded with AVCHD 1440 Selecting the recording mode 1080/60i format. Movies are recorded with MPEG-2 format when the standard image You can select a recording mode to record quality (STD) is selected. the high definition image quality (HD) You can select the following high definition ... -
Page 31: Capturing Smiles Automatically (Smile Shutter)
Touch the face with the double-lined frame When [ REC MODE] is set to [HD FX], you cannot use the Smile Shutter function. again to cancel. Tips Notes You can select the subject that has priority The face you touched may not be detected, ... -
Page 32: Recording High Quality Photos During Movie Recording (Dual Rec)
To enjoy the 5.1ch surround sound of the movies recorded with high definition image quality (HD) in 5.1ch sound, you need an AVCHD format device compatible with 5.1ch surround. When you connect your camcorder with an HDMI cable (sold separately), the sound of high definition image quality (HD) movies recorded in 5.1ch sound is automatically output in 5.1ch sound. -
Page 33: Controlling The Image Settings Manually With The Manual Dial
LCD screen, but the image will be normal when the SHUTTER SPEED priority mode. When recorded. you shoot a moving subject at a higher shutter speed, it appears as if frozen on the image. At a lower shutter speed, the subject appears as if Controlling the image settings it flowing. - Page 34 [Show others] [OTHER REC SET] (under [SHOOTING SET] category) [DIAL SETTING]. Even if you open the IRIS wider (a smaller F-stop) than F3.4 when you set the zoom lever to the W (Wide angle) side, the IRIS is reset to F3.4 as you move the zoom lever to the T (Telephoto) side.
-
Page 35: Playback On The Camcorder
Playback on the camcorder In the default setting, movies and photos that are recorded on the internal memory are played. Tips To change the recording media, see page 20. Open the LCD screen of your camcorder. Your camcorder is turned on and the lens cover is opened. To turn on your camcorder when the LCD screen is already open, press POWER (p. - Page 36 INDEX] (under [PLAYBACK] category). The recording date, time, and shooting conditions , and coordinates (HXR-MC50U) are recorded automatically during recording. This information is not displayed during recording, but you can display (MENU) [Show others] [PLAYBACK SET] (under it during playback by touching [PLAYBACK] category) ...
- Page 37 Viewing photos Your camcorder displays the selected photo. To start/stop slide Previous show Next To the VISUAL INDEX OPTION MENU screen Tips When viewing photos recorded on the memory card, (playback folder) appears on the screen. ...
-
Page 38: Useful Functions For Playing Movies And Photos
Useful functions for playing movies and photos IMAGES] (under [PLAYBACK] category) [DATE INDEX]. On the Film Roll Index/Face Index screen, you Searching for desired images by can display the Date Index by touching the date date (Date Index) in the upper right corner of the screen. -
Page 39: Searching For Desired Scene By Face (Face Index)
Tips Notes You can also display the Film Roll Index by Faces may not be detected depending on (MENU) [Show others] touching recording conditions. [VIEW IMAGES] (under [PLAYBACK] Example: People wearing glasses or hats, or who category) ... - Page 40 re-selected. To stop Highlight Playback If you change [MUSIC] after you select To pause, touch [THEME], the music will be selected To stop, touch automatically for the theme from next time. To change the settings for Highlight To save a scenario for Highlight Playback Playback After touching [ HIGHLIGHT], touch...
-
Page 41: Using Pb Zoom With Photos
To erase all scenarios, touch (MENU) [Show others] [ SCENARIO ERASE] [EDIT] category) [ERASE ALL] (under [YES] [YES] You can erase also by touching (OPTION) during Highlight Scenario Playback or on the scenario selection screen. To change music files You can transfer music files from audio CDs ... -
Page 42: Playing Back A Series Of Photos (Slide Show)
Playing back a series of photos (Slide show) Touch on the photo playback screen. The slide show begins from the selected photo. To stop the slide show Touch To restart the slide show Touch again. Notes You cannot operate playback zoom during slide ... -
Page 43: Playing Images On A Tv
Playing images on a TV Connection methods and the image If you touch [HINT], you can see tips for the connection or change the settings of quality (high definition (HD) or standard your camcorder. definition (STD)) viewed on the TV screen differ depending on what type of TV is connected, and the connectors used. - Page 44 Types of connection cables between When connecting to your TV via a VCR your camcorder and TV Connect your camcorder to the LINE IN input on the VCR using the A/V connecting cable. Set Connecting to a high definition TV the input selector on the VCR to LINE (VIDEO Component A/V Cable (supplied) 1, VIDEO 2, etc.).
-
Page 45: Using "Bravia" Sync
TV input jacks is as depiction of subtle textures and colors. follows: HDMI component S VIDEO video By connecting Sony’s Photo TV HD- HDMI (High Definition Multimedia Interface) compatible devices using an HDMI cable ... -
Page 46: Making Good Use Of Your Camcorder
Making good use of your camcorder Deleting movies and photos Touch and display the mark You can free media space by deleting on the movies or photos to be movies and photos from recording media. deleted. Notes You cannot restore images once they are ... -
Page 47: Protecting Recorded Movies And Photos (Protect)
Protecting recorded movies and photos (Protect) Touch to select the recording Protect movies and photos to avoid deleting date of the desired movies/photos, then them by mistake. touch Touch the image on the LCD screen to Tips confirm the image. -
Page 48: Dividing A Movie
Dividing a movie disappears. (MENU) [Show Touch To protect all the movies and photos others] [ DIVIDE] (under recorded on the same day at one time [EDIT] category). Notes You cannot select [ PRT. by date] for still ... -
Page 49: Capturing A Photo From A Movie
Capturing a photo from a movie dividing movies on the memory card. A slight difference may occur from the point (MENU) [Show Touch where you touch and the actual dividing others] [PHOTO CAPTURE] point, as your camcorder selects the dividing point based on about half-second increments. -
Page 50: Dubbing/Copying Movies And Photos From The Internal Memory
Dubbing/copying movies and photos from the internal memory to memory Touch card Notes Dubbing movies The image size is fixed depending on the image quality of the movie: You can dub movies recorded on the 2.1M] with high definition image quality ... -
Page 51: Copying Photos
[YES] Touch the type of dubbing. Touch [DUB by select]: To select movies and [DUB by date]: To dub all movies of a specified date Tips DUB ALL]: To dub the high To check the dubbed movies after dubbing is ... -
Page 52: Using The Playlist Of Movies
Using the Playlist of movies The Playlist is a list showing thumbnails of the movies that you have selected. Select the photo to be copied. The original movies are not changed even [COPY by select]: Touch the photo to if you edit or erase the movies added to the be copied, and mark with . -
Page 53: Playing The Playlist
ADD by date]. The recording dates of movies are displayed on the screen. Touch the movie you want to play back. Touch to select the recording The Playlist is played back from the date of the desired movie, then touch selected movie to the end, then the screen returns to the Playlist screen. -
Page 54: Using The Gps Function (Hxr-Mc50U)
Using the GPS function (HXR-MC50U) To change the order within the Playlist What is GPS? Touch (MENU) [Show others] The GPS (Global Positioning System) is a [PLAYLIST EDIT] (under system that calculates geographical location [EDIT] category). from highly accurate US space satellites. -
Page 55: Setting The Gps Function
The GPS switch is set to ON in the default Setting the GPS function setting. Movies and photos will be recorded with location information. When your Set the GPS switch to ON ( appears on camcorder cannot acquire the location the LCD screen). -
Page 56: Searching For A Desired Scene By Recording Location (Map Index)
camcorder can acquire the current location You can also display the current location by (MENU) [Show others] touching information. YOUR LOCATION] (under [OTHERS] category). Touch YOUR LOCATION) on the recording screen. Searching for a desired scene by recording location (Map Index) Where movies and photos were recorded is marked on a map. -
Page 57: Displaying The Coordinate Information (Coordinates)
[ MAP]. Touch the image marker where You can also search for the thumbnail of you recorded the movies and the movie or photo you want to play by photos to be played back. touching in step 3. The recording location of the movie or photo will be displayed at the center of the map. - Page 58 (MENU) [Show Touch others] [CLOCK/ LANG] (under [GENERAL SET] category) [AUTO CLOCK ADJ]/[AUTO AREA ADJ]. Touch a desired setting Notes You must set the date and time on your camcorder before using your camcorder (p. 18). There may be discrepancies of a few seconds ...
-
Page 59: Saving Movies And Photos With A Computer
Saving movies and photos with a computer Preparing a computer (Windows) You can perform following operations using Intel Core Duo 1.66 GHz or faster, or Intel “PMB (Picture Motion Browser). ” Core 2 Duo 1.66 GHz or faster (Intel Core Importing images to a computer ... -
Page 60: Step 2 Installing The Supplied Software "Pmb
not assured if the OS has been upgraded or in a computer before installing the software. multi-boot environment. 64-bit editions and Starter (Edition) are not Place the supplied CD-ROM in supported. Windows Image Mastering API the disc drive of your computer. (IMAPI) Ver.2.0 or newer is required to use disc creation function, etc. - Page 61 : Starts “PMB. ” : Displays “PMB Help. ” The [USB SELECT] screen appears on : Displays “PMB Launcher. ” the camcorder screen automatically. “PMB Launcher” enables you to start “PMB” or other software, or to open Touch [ USB CONNECT] on web sites.
-
Page 62: Starting Pmb (Picture Motion Browser)
Starting PMB (Picture Motion Browser) Double-click the “PMB” short-cut icon on Notes Access from the computer using the supplied the computer screen. software “PMB. ” Do not modify the files or folders on the camcorder from the computer. The image files may be destroyed or may not be played back. -
Page 63: Selecting The Method For Creating A Disc (Computer)
(HD) disc is created. You can play a high definition image quality (HD) disc on AVCHD format playback devices, such as a Sony Blu-ray disc player and a PlayStation 3. You cannot play the disc on ordinary DVD players. - Page 64 Discs you can use with “PMB” You can use 12 cm discs of following type with “PMB. ” For Blu-ray disc, see page 67. Disc type Features DVD-R/DVD+R/DVD+R DL Unrewritable DVD-RW/DVD+RW Rewritable Notes Always maintain your PlayStation 3 to use the latest version of the PlayStation 3 system software.
-
Page 65: Creating A Disc With One Touch (One Touch Disc Burn)
Creating a disc with one touch (One Touch Disc Burn) Movies and photos recorded on your camcorder that have not yet been saved with One Touch Disc Burn function can be saved on a disc automatically. Movies and photos are saved on a disc with their recorded image quality. -
Page 66: Importing Movies And Photos To A Computer
Importing movies and photos to a computer Movies and photos recorded on your camcorder can be imported to a computer. Turn on the computer beforehand. Notes Connect your camcorder to the wall outlet (wall socket) using the supplied AC Adaptor for this operation (p. -
Page 67: Creating An Avchd Disc
Creating an AVCHD disc You can create an AVCHD disc by putting appears. To add movies to the previously selected together high definition image quality ones, select the movies in the main (HD) movies previously imported to your window and drag and drop onto the computer (p. -
Page 68: Ordinary Dvd Players
Creating a standard definition image quality (STD) disc that can be played on ordinary DVD players You can create a standard definition image quality (STD) disc by selecting movies Place an unused Blu-ray disc in the disc previously imported to your computer ... - Page 69 appears. Capturing photos from a movie To add movies to the previously selected You can save a frame of a movie as a photo ones, select the movies in the main file. window and drag and drop onto the Double-click the movie to be edited on window for selecting movies.
-
Page 70: Saving Images With An External Device
Saving images with an external device Saving images in external media (DIRECT COPY) If the external media has the AC power cable, connect it to the You can save movies and photos on external wall outlet (wall socket). media (USB storage device), such as an external hard disk drive. - Page 71 Touch [Play without copying.] in step 5 After the operation is completed, above. touch on the camcorder The VISUAL INDEX screen of the screen. external media is displayed. Touch (MENU) [Show others] [MOVIE DUB] (when selecting movies)/[PHOTO COPY] (when ...
-
Page 72: Creating A Disc With A Dvd Writer, Recorder
[Settings]. your camcorder are described here. Select the method that suits your disc player. Notes The Date Index and Map Index (HXR-MC50U) Notes of photos cannot be displayed. Prepare a DVD disc such as a DVD-R, for ... -
Page 73: Creating A Disc With The Dedicated Dvd Writer, Dvdirect Express
Creating a disc with the dedicated Ordinary DVD device DVD writer, DVDirect Express Player DVD player You can create a disc or play back the Computer that can play DVDs, etc. images on a created disc by using the dedicated DVD writer, DVDirect Express (sold separately). - Page 74 When converting high definition (HD) movies to standard definition (STD) movies, Insert an unused disc into the and creating a disc DVD writer, and close the disc When dubbing images in the memory card tray. Touch [DISC BURN OPTION] in step 4. The [DISC BURN] screen appears on ...
-
Page 75: Creating A High Definition Image Quality (Hd) Disc With
(mains lead) to the DC IN jack of compatible with high definition image your camcorder and the wall outlet (wall quality (HD) movies, such as a Sony DVD socket) (p. 16). writer. Refer also to the instruction manuals Turn on your camcorder, and connect supplied with the device to be connected. -
Page 76: Creating A Standard Definition Image Quality (Std) Disc With
Touch the recording media that socket) using the supplied AC Adaptor for this contains the images on the operation (p. 16). camcorder screen. Sony DVD writer may not be available in some countries/regions. USB CONNECT]: Internal Always maintain the firmware of the Sony ... - Page 77 Sony DVD writer may not be available in some A/V Remote Connector countries/regions. High definition image quality (HD) movies will be dubbed with standard definition image quality (STD). A/V connecting cable (supplied) Connect the A/V connecting cable to the input jack of another device.
- Page 78 Start playback on your camcorder, and record it on the recording device. Refer to the instruction manuals supplied with your recording device for details. When dubbing is finished, stop the recording device, and then your camcorder. Notes Since dubbing is performed via analog data ...
-
Page 79: Customizing Your Camcorder
Customizing your camcorder Using menus Using the menus, you can perform useful functions and change various settings. If you make good use of menu operations, you can enjoy using your camcorder. The camcorder has various menu items under each of eight menu categories. MANUAL SETTINGS (Items to adjust for scene condition) ... -
Page 80: Using My Menu
Notes You may not be able to set some menu items, depending on the recording or playback conditions. Grayed out menu items or settings are not available. Tips Depending on the menu items being changed, your camcorder switches between playback mode and ... -
Page 81: Option Menu
Using the OPTION MENU The OPTION MENU appears just like the pop-up window that appears when you right-click the mouse on a computer. When is displayed at bottom-right of the screen, you can use the OPTION MENU. You touch , and the menu items you can change in the context appear. -
Page 82: Menu Lists
Menu lists (MANUAL SETTINGS) category FLASH LEVEL SCENE SELECTION REDEYE REDUC FADER FILE NO. WHITE BAL. (PLAYBACK) category SPOT MTR/FCS VISUAL INDEX SPOT METER VIEW IMAGES SPOT FOCUS DATE INDEX EXPOSURE FOCUS TELE MACRO FILM ROLL AE SHIFT FACE WB SHIFT PLAYLIST GOLF SHOT HIGHLIGHT... - Page 83 CALIBRATION USB CONNECT CTRL FOR HDMI DISC BURN REC LAMP TV CONNECT Guide REMOTE CTRL MUSIC TOOL EMPTY MUSIC HXR-MC50U DOWNLOAD MUSIC BATTERY INFO (MANAGE MEDIA) category MEDIA SETTINGS MOVIE MEDIA SET PHOTO MEDIA SET MEDIA INFO MEDIA FORMAT INT. MEMORY MEMORY CARD REPAIR IMG.DB F.
-
Page 84: Manual Settings (Items To Adjust For Scene Condition)
MANUAL SETTINGS (Items to adjust for scene PORTRAIT (Soft portrait) condition) Brings out the subject such as people or flowers while See “Using menus” (p. 79) on the operation. creating a soft background. The default settings are marked with . SPOTLIGHT**( ) SCENE SELECTION Prevents people’s faces from... - Page 85 WHITE FADER INDOOR () Fades in/out with the white effect. The white balance is appropriately adjusted for the following recording conditions: Indoors At party scenes or studios where the lighting conditions change quickly Under video lamps in a studio, or under sodium lamps or incandescent-like color BLACK FADER lamps...
- Page 86 from inside the house, or vice versa, you need touch [AUTO]. to redo the [ONE PUSH] procedure to readjust Notes the white balance. [EXPOSURE] is automatically set to [MANUAL]. SPOT MTR/FCS (Spot meter/ focus) SPOT FOCUS You can adjust the brightness and focus You can select and adjust the focal point to for the selected subject simultaneously.
- Page 87 select this function also when you want to TELE MACRO focus on a certain subject intentionally. This is useful to shoot small subjects, such as flowers or insects. You can blur out backgrounds and the subject stands out clearer. OFF Touch (nearby subject)/ (distant...
- Page 88 You can also adjust manually by using the The point when START/STOP is pressed. MANUAL dial (p. 33). The impact sound WB SHIFT (White Balance Shift) You can adjust the white balance manually. 2-second recorded interval OFF Adjusts the white balance automatically. The loudest sound detected during one second before START/STOP is pressed is assumed to be ON (...
-
Page 89: Shooting Set (Items For Customized Shooting)
SHOOTING SET (Items for customized shooting) SMTH SLW REC (Smooth slow rec) See “Using menus” (p. 79) on the operation. The default settings are marked with . Fast moving subjects and actions, which cannot be captured under the ordinary shooting conditions, can be shot in smooth moving slow-motion for about 3 seconds. - Page 90 when using a tripod (sold separately), then dim light. the image becomes natural. OFF The LOW LUX function is not used. ACTIVE Provides a more powerful SteadyShot effect. ON ( ) STANDARD The LOW LUX function is used. Provides the SteadyShot effect under relatively stable recording conditions.
- Page 91 PRIORITY SETTING SMILE SENSITIVITY Selects the priority subject for the face Sets the smile detection sensitivity using the detection or the smile shutter. Smile Shutter function. Adjusts focus/color/exposure automatically HIGH for the selected faces. Detects even a slight smile. AUTO ...
- Page 92 AUDIO MODE Does not adjust the exposure for backlit You can change the recording sound subjects. format. 5.1ch SURROUND ( DIAL SETTING Records sound in 5.1ch surround. You can select an item you want to set to 2ch STEREO ( the MANUAL dial.
-
Page 93: Photo Settings (Items For Recording Photos)
PHOTO SETTINGS (Items for recording photos) x.v.Color-compliant TV. See “Using menus” (p. 79) on the operation. If the movie recorded with this function [ON] is The default settings are marked with . played back on a non-x.v.Color-compliant TV, the color may not be reproduced correctly. X.V.COLOR] cannot be set to [ON]: SELF-TIMER ... - Page 94 The flash is not flashed in movie recording STEADYSHOT mode. If the lens hood is attached, it may interfere You can compensate for camera shake. with flash operation. When you record photos Set [ STEADYSHOT] to [OFF] ( using the flash, remove the lens hood.
-
Page 95: Playback (Items For Playback)
DATE INDEX another one, the file number is assigned in See page 38. sequence. RESET MAP (HXR-MC50U) Assigns file numbers in sequence, following See page 54. the largest file number existing on the recording medium. FILM ROLL When the memory card is replaced with See page 38. - Page 96 The indicator toggles through the following HXR-MC50U sequences as you press DATA CODE on the Wireless Remote Commander: [DATE/TIME] DATE/TIME [CAMERA DATA] [COORDINATES] (HXR-MC50U) [OFF] (no indication). Depending on the recording media condition, bars [--:--:--] appear. Date ...
-
Page 97: Edit (Items For Editing)
OTHERS EDIT (Items for other settings) (Items for editing) See “Using menus” (p. 79) on the operation. See “Using menus” (p. 79) on the operation. The default settings are marked with . DELETE YOUR LOCATION (HXR- See page 46. MC50U) SCENARIO ERASE See page 54. -
Page 98: Manage Media (Items For Recording Media)
MANAGE MEDIA (Items for recording media) the memory card from your camcorder (The See “Using menus” (p. 79) on the operation. access lamp is lit or flashing while formatting memory card.). MEDIA SETTINGS To prevent data on the internal See page 20. memory from being recovered [EMPTY] allows you to write unintelligible MEDIA INFO... -
Page 99: General Set (Other Setup Items)
GENERAL SET (Other setup items) REPAIR IMG.DB F. See “Using menus” (p. 79) on the operation. The default settings are marked with . See page 108, 112. SOUND/DISP SET VOLUME You can adjust the volume of playback sound by touching ... - Page 100 movies and photos. The recorded movies to the camcorder body, the setting becomes [NORMAL] automatically. and photos are played back as following illustrations. Tips This adjustment does not affect the recorded 16:9 images in any way. Select this to view your movies on a 16:9 (wide) TV.
- Page 101 Refer to the world time difference on page 118. 720p Outputs the 720p signal. AUTO CLOCK ADJ (Auto clock 480p adjustment) (HXR-MC50U) Outputs the 480p signal. See page 57. AUTO AREA ADJ (Auto area STD CONTENTS adjustment) (HXR-MC50U) Set the output image resolution recorded with standard definition image quality (STD).
- Page 102 REMOTE CTRL (Remote control) Sets the DST SET. ON Select this when you use the supplied Wireless LANGUAGE SET Remote Commander (p. 133). You can select the language to be used on the LCD screen. Select this when you do not use supplied Wireless Remote Commander.
-
Page 103: Additional Information
Turn off your camcorder and in order to investigate the problem. However, leave it for a while in a cool place. your Sony dealer will neither copy nor retain The temperature of your camcorder is your data. ... - Page 104 disconnect the AC Adaptor from the wall Remove any obstructions between the outlet (wall socket) and contact your Sony Wireless Remote Commander and the remote dealer or local authorized Sony service facility. sensor. The battery pack may be damaged.
- Page 105 The indicated time may not be correct viewfinder when the LCD panel is open depending on the environment of use. (p. 19). The battery pack is quickly discharged. Memory card The ambient temperature is too high or low. This is not a malfunction.
- Page 106 extremely high. Turn off your camcorder and The actual recording time for movies is leave it for a while in a cool place. less than the expected recording time of The temperature of your camcorder is the recording media. extremely low.
- Page 107 SteadyShot does not function. [LCD BL LEVEL] cannot be adjusted. Set [ STEADYSHOT] to [ACTIVE] or You cannot adjust [LCD BL LEVEL] when: [STANDARD], [ STEADYSHOT] to [ON] The LCD panel is closed on your camcorder (p. 89, 94). with the LCD screen facing out.
- Page 108 This may damage your image data and Playing back images stored on displayed. memory card on other devices is indicated on an image on the VISUAL INDEX screen. Images cannot be played back or the The image data base file may be damaged. memory card is not recognized.
- Page 109 (p. 76). Images are not output from the HDMI OUT jack, if copyright protection signals are GPS (HXR-MC50U) recorded in the images. When you are using the S VIDEO plug, make sure the red and white plugs of the A/V The camcorder is not receiving a GPS connecting cable are connected (p.
-
Page 110: Self-Diagnosis Display/Warning Indicators
If the problem persists even after you have tried to fix a couple of times, contact Cannot use Because of following settings your Sony dealer or local authorized Sony [IRIS] and NightShot service facility. In this case, contact your [SHUTTER... - Page 111 (Warning indicator pertaining to (Warning indicator pertaining to incompatible memory card) battery pack temperature) Incompatible memory card is inserted (p. 21). The battery pack temperature is high. Change the battery pack or place it in a cool place. ...
- Page 112 Tips There is no HD movie management You may hear a melody when some warning information. Create new information? indicators appear on the screen. You cannot record or play back movies because no high definition image quality (HD) Description of warning messages movie management information exists.
- Page 113 This memory card may not be able to record or play images correctly. Use a memory card recommended for your camcorder (p. 21). Contact your Sony dealer or local authorized Sony service facility. Do not eject the memory card during writing. Data may be damaged.
-
Page 114: Recording Time Of Movies/Number Of Recordable Photos
High definition image quality (HD) in h (hour) and m NP-FV70 (minute) (supplied) NP-FV100 Recording mode Recording time HXR-MC50N HXR-MC50U [HD FX] 6 h 5 m Top: When the LCD screen is opened [HD FH] 7 h 45 m 7 h 40 m... -
Page 115: Expected Number Of Recordable Photos
Tips (unit: minute) You can record movies of a maximum of 3,999 STD 9M (HQ) 5.1ch STD 9M (HQ) 2ch scenes with high definition image quality (HD), and 9,999 scenes with standard definition image (100) (105) quality (STD). 16GB The maximum continuous recording time of ... - Page 116 Notes The unique pixel array of Sony’s ClearVid and the image processing system allow still image resolution equivalent to the sizes described. Tips The following list shows the bit rate, pixels and aspect ratio of each recording mode (movie + audio, etc.).
-
Page 117: Using Your Camcorder Abroad
Using your camcorder abroad Power supply System Used in You can use your camcorder in any Australia, Austria, Belgium, countries/regions using the AC Adaptor China, Czech Republic, Denmark, Finland, Germany, supplied with your camcorder within the Holland, Hong Kong, Hungary, AC 100 V to 240 V, 50 Hz/60 Hz range. - Page 118 LANG] (under [GENERAL SET] category) [AREA SET] and [DST SET]/[SUMMERTIME] (p. 101). HXR-MC50U When [AUTO CLOCK ADJ] and [AUTO AREA ADJ] are set to [ON], the clock is set to the local time automatically by the GPS function (p. 101).
-
Page 119: Maintenance And Precautions
1080i specification or the 720p specification using efficient data About GPS (HXR-MC50U) compression coding technology. The The GPS (Global Positioning System) is a MPEG-4 AVC/H.264 format is adopted to system that calculates geographical location compress video data, and the Dolby Digital from highly accurate US space satellites. - Page 120 In tunnels, indoors or under the shade of the on-board announcement. buildings. Use GPS in accordance with the regulations Between tall buildings or at narrow streets of the country or region where the camcorder surrounded by buildings. is used.
-
Page 121: About The Memory Card
IGN France on the combination of the memory card and Germany memory card compliant product you use. Die Grundlagendaten wurden mit Damaged or lost data may occur in the Genehmigung der zustaendigen Behoerden following cases (the data will not be entnommen. -
Page 122: About The "Infolithium" Battery Pack
for Camera File system” universal standard What is an “InfoLITHIUM” battery pack? established by the JEITA (Japan Electronics An “InfoLITHIUM” battery pack is a and Information Technology Industries lithium-ion battery pack that has functions Association). for communicating information related to On your camcorder, you cannot play back ... -
Page 123: About X.v.color
The battery pack is also consumed when your x.v.Color is a more familiar term for the xvYCC camcorder is in recording standby or playback standard proposed by Sony, and is a trademark pause. of Sony. Have spare battery packs ready for 2 or 3 times ... - Page 124 If the battery electrolytic liquid has leaked: Do not exert excessive pressure on the LCD Consult your local authorized Sony service screen, as it may cause uneven color and other facility. damage. Wash off any liquid that may have contacted If your camcorder is used in a cold place, a ...
- Page 125 On charging the pre-installed rechargeable battery Your camcorder has a pre-installed rechargeable battery to retain the date, time, and other settings even when the LCD screen is closed. The pre- installed rechargeable battery is always charged while your camcorder is connected to the wall ...
-
Page 126: Specifications
HD: MPEG-4 AVC/H.264 AVCHD format 1/30 second) compatible 0 lx (lux) (NIGHTSHOT is set to [ON]) STD: MPEG-2 PS The unique pixel array of Sony’s ClearVid Audio recording system: and the image processing system allow Dolby Digital 2ch/5.1ch still image resolution equivalent to the Dolby Digital 5.1 Creator... - Page 127 104 °F) Corporation. Storage temperature: –20 C to + 60 C (-4 °F to “x.v.Color” is a trademark of Sony Corporation. +140 °F) “BRAVIA” is a trademark of Sony Corporation. Dimensions (approx.): 48 81 mm (1 15/16 ...
- Page 128 be the trademarks or registered trademarks of Notes on the License their respective companies. Furthermore, ANY USE OF THIS PRODUCT OTHER are not mentioned in each case in this manual. THAN CONSUMER PERSONAL USE IN ANY MANNER THAT COMPLIES WITH THE MPEG-2 STANDARD FOR ENCODING VIDEO INFORMATION FOR PACKAGED MEDIA IS EXPRESSLY PROHIBITED WITHOUT A...
- Page 129 URL to download it. When downloading the source code, select HXR-MC50 as the model for your camcorder. http://www.sony.net/Products/Linux/ We would prefer you do not contact us about the contents of source code. Read “license2.pdf ” in the “License” folder on the CD-ROM.
-
Page 130: Quick Reference
Quick reference Screen indicators Upper right Upper left Center Upper right Indicator Meaning Recording image quality (HD/STD) and recording mode (FX/FH/HQ/LP) (30) Recording/playback/ editing media (20) Counter (hour:minute: 0:00:00 Bottom second) (36) Upper left Estimated recording [00min] remaining time (24) Indicator Meaning FADER (84) -
Page 131: Parts And Controls
Parts and controls Figures in ( ) are reference pages. Indicator Meaning IRIS (33) CONVERSION LENS (90) INTELLIGENT AUTO (28) OPTION button (81) VIEW IMAGES button (35) Slide show button (42) YOUR LOCATION button (55) Data file name (37) 101-0005 Protected image (47) ... - Page 132 separately) is connected, it takes precedence over the built-in microphone (p. 31). Built-in microphone (31) Flash Lens (G lens) MIC (PLUG IN POWER) jack (headphones) jack The marks of the lens hood Remote sensor/Infrared port Point the Wireless Remote Commander (p.
- Page 133 Eyecup DATA CODE button (95) Displays the date and time, camera setting Viewfinder (25) data, or coordinates (HXR-MC50U) of the Viewfinder lens adjustment lever (25) recorded images when you press this button Battery pack (15) during playback.
- Page 134 Remote Commander may not function properly. In this case, replace the battery with Notes a Sony CR2025 lithium battery. Use of another Remove the insulation sheet before using the battery may present a risk of fire or explosion.
-
Page 135: Index
Index Computer system ......59 FLASH MODE ......94 Symbols CONVERSION LENS ....90 FOCUS .........86 1080i/480i ........101 COORDINATES......57 Format ..........98 16:9 ..........100 Copy ..........51 Fully charged .......15 4:3 ..........100 Copying a disc ......69 FX ..........30 480i ..........101 Creating a disc ......63, 72 5.1ch surround recording ..31 Creating a standard definition GENERAL SET ......99... - Page 136 MEDIA SETTINGS ....20 Playing AVCHD disc....67 SNOW ..........84 Memory card .......21 Playlist ..........52 Software ........60 “Memory Stick” media ..21, 121 PLAYLIST EDIT ......52 SOUND/DISP SET .....99 “Memory Stick PRO-HG Duo” PMB (Picture Motion Browser) Specifications ......126 media ..........122 ..........59, 62 SPOT FOCUS ......86 “Memory Stick PRO Duo”...
- Page 137 Windows ........59 x.v.Color ......92, 123 YOUR LOCATION ....55 Zoom ........28, 41...
- Page 139 Printed on 70% or more recycled paper using VOC (Volatile Organic Compound)-free vegetable oil based ink. Printed in Japan...