
Related Manuals for Sony HXR-MC2500


Summary of Contents for Sony HXR-MC2500
- Page 1 4-549-534-11(1) Solid-State Memory Table of Contents Camcorder Getting Started Recording Operating Guide Playback Editing Using the Menu Connecting with another device Troubleshooting Additional Information HXR-MC2500...
-
Page 2: Read This First
Read this first On the LCD screen and lens Before operating this unit, please read this manual thoroughly, and retain it for future • A menu item that is grayed out is not reference. available under the current recording or playback conditions. - Page 3 On the temperature of your camcorder be notable in displays having high motion resolution.) and battery pack – Horizontal lines appear on the LCD screen Your camcorder has a protective function during recording under fluorescent lights, that disables recording or playback if the sodium lamps or mercury lamps.
- Page 4 Read this first (Continued) About the operation of the camcorder You can operate the camcorder using the V/v/B/b/SET button (p. 61). About this manual • The on-screen displays in each local language are used for illustrating the operating procedures. Change the screen language before using your camcorder if necessary (p.
-
Page 5: Identifying Parts And Controls
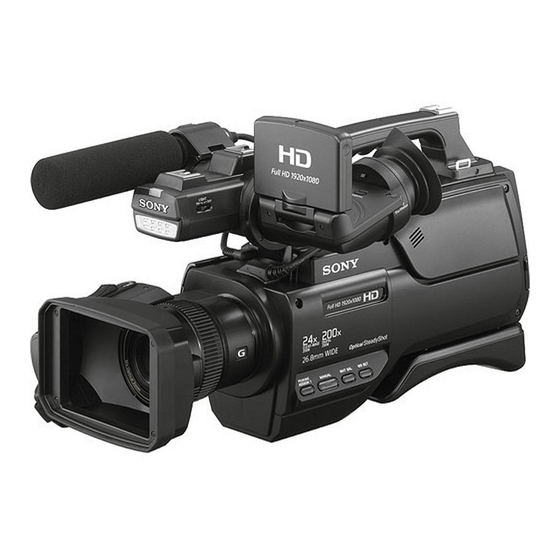
Identifying parts and controls Body The numbers in ( ) are reference pages. A Microphone B MIC jack (PLUG IN POWER) (70) (N mark) • Touch an NFC-enabled smartphone to the mark to establish a connection with the camcorder. • Near Field Communication (NFC) is an international standard for short-range wireless communication technology. - Page 6 Identifying parts and controls (Continued) A Light switch Attaching the lens hood B Multi Interface shoe (67) Align the marks on the lens hood to C Video light (38) those on the camcorder, and turn the lens hood in the direction of the D Accessory shoe arrow 2 until it is locked.
- Page 7 Removing the lens hood • Turn the lens hood cover in the direction of the arrow as illustrated while pressing the lever on the lens hood cover. z Tips • If you attach or remove a 62 mm (2 1/2 in.) PL filter or MC protector, remove the lens hood.
- Page 8 Identifying parts and controls (Continued) A REMOTE jack (USB) jack (mini-AB) (Output only) The REMOTE jack is used for M AUDIO OUT/VIDEO OUT jack (81) controlling the playback of video devices and peripherals connected to it. To attach a shoulder strap (Headphone) jack Attach a shoulder strap (sold separately) to C Cable holder...
- Page 9 A Viewfinder (21) B Eye sensor (74) C Lens hood release lever (7) D Eyecup (21) E Viewfinder lens adjustment lever (21) F Hook for the Shoulder belt Attach the Shoulder belt (sold separately). G BATT (battery) RELEASE button (18) H Battery pack (17) I CHG (charge) lamp (17) J DC IN jack (17)
- Page 10 Identifying parts and controls (Continued) A LCD screen (21) B V/v/B/b/SET buttons C THUMBNAIL button (48) D MENU button E Manual ring (33)
-
Page 11: Screen Indicators
Screen indicators Indicator Meaning Center Upper right Playback indicator (48) Upper left Processing Relay recording Upper right Indicator Meaning Bottom 0min Estimated remaining recording time Upper left Recording/playback media Indicator Meaning 00:00:00:00 Time code 100% Remaining battery (hour:minute:second: INTELLIGENT AUTO frame) (face detection/scene Bottom... - Page 12 Screen indicators (Continued) Indicator Meaning MI SHOE VIDEO LIGHT (67) REC LEVEL MODE (69) MIC SELECT (70) z Tips • Indicators may look different or appear at different positions. Data code during recording The recording date, time and condition are recorded automatically on the recording media.
-
Page 13: Table Of Contents
Table of Contents Read this first ...................2 Identifying parts and controls ..............5 Body...................... 5 Screen indicators ..................11 Getting Started Step 1: Checking supplied accessories ..........16 Step 2: Charging the battery pack ............17 Step 3: Turning on the camcorder and setting the date and time ..19 Setting the date and time .............. - Page 14 Table of Contents (Continued) Using a smartphone as a remote controller ........41 Connecting without using the NFC function (Android)......42 Connecting without using the NFC function (iPhone/iPad) ....43 Setting time data ................. 44 Reviewing the most recently recorded scene (LAST SCENE REVIEW)...............
- Page 15 (NETWORK SET) menu ..............76 Settings for the Wi-Fi function (CTRL W/SMARTPHONE, etc.) (OTHERS) menu ................77 Settings while recording or other basic settings (AREA SET/BEEP, etc.) Connecting with another device Saving images on an external media device ..........79 Creating a standard definition image quality (DV) disc with a recorder, etc.....................81 Troubleshooting Troubleshooting ..................83...
-
Page 16: Getting Started
When the unit is used with a PC connection, download device drivers, plug- Rechargeable battery pack (NP-F570) (1) ins, and application software, where applicable, from the Sony Professional products web site. Sony Professional products web site homepage: Eyecup (1) (p. 21) U.S.A. -
Page 17: Step 2: Charging The Battery Pack
Step 2: Charging the battery pack You can charge the “InfoLITHIUM” battery pack (L series) with the supplied Connect the AC Adaptor and AC Adaptor. power cord from the camcorder to an outlet. b Notes • You can use a large capacity battery pack, NP- 970 (sold separately), with your camcorder. - Page 18 Step 2: Charging the battery pack (Continued) Using an outside power source To store the battery pack You can use the AC Adaptor to obtain the If the battery pack is not in use for a while, AC power. While you are using the AC run down the battery and store it (p.
-
Page 19: Step 3: Turning On The Camcorder And Setting The Date And Time
Step 3: Turning on the camcorder and setting the date and time Turning on the camcorder Setting the date and time Slide the ON/STANDBY switch to Set the date and time when you use your camcorder for the first time. (ON) while pressing the green button. - Page 20 Step 3: Turning on the camcorder and setting the date and time (Continued) Set [SUMMERTIME], [Y] (year), [M] (month), [D] (day), hour and minute, by pressing the V/v/B/b button, then press the SET button. The clock starts. • Set [SUMMERTIME] to [ON] to move the time forward 1 hour.
-
Page 21: Step 4: Adjusting The Lcd Screen And Viewfinder
Step 4: Adjusting the LCD screen and viewfinder When the picture in the viewfinder is Using the LCD screen hard to see The LCD screen can be rotated in the range If you cannot see the picture in the as illustrated below, allowing a person other viewfinder clearly under bright than the camera operator to see the image. -
Page 22: Step 5: Preparing The Recording Media
Step 5: Preparing the recording media Types of memory cards you can use in format screen appears, do not perform the format. All the data recorded will be lost. your camcorder Capacity (operation Open the cover, and insert the verified) memory card with the notched edge “Memory Stick PRO in the direction as illustrated until it... -
Page 23: Recording
Recording Recording LCD screen REC START/STOP button (on the handle) REC START/STOP button Recording movies Your camcorder records movies on a memory card and the internal memory. The factory setting of recording movies is AVCHD. Do the following steps to record movies. Press the latches on both sides of the lens cap and remove it. - Page 24 Recording (Continued) Slide the ON/STANDBY switch to (ON) while pressing the green button. Press either of the REC START/STOP button. The recording lamps light up during recording. To stop the movie recording, press the REC START/STOP button again. b Notes •...
-
Page 25: Changing The Setting Of The Rec Start/Stop Button And Handle Rec Start/Stop Button
To continue recording, from a memory card to the internal memory (Relay recording) Insert a memory card, so the camcorder switches to the internal memory just before space on the memory card runs out, and continues recording in the internal memory automatically without pausing. - Page 26 Recording (Continued) To change the setting Press MENU t select (REC/OUT SET) t [REC SET] t [REC BUTTON SET] with the V/v/B/b/SET button. REC BUTTON SET Button and recording media REC BUTTON: Recording in both the memory card and the internal memory HANDLE REC BUTTON: starts and stops at the same time when either REC START/STOP button is pressed.
-
Page 27: Adjusting The Zoom
z Tips Adjusting the zoom • When focusing, the minimum distance required between the camcorder and the subject is about 1 cm (about 13/32 in.) for wide angle and about 80 cm (about 2 5/8 feet) for telephoto. • The focus may not be adjusted at certain zoom positions if the subject is within 80 cm (about 2 5/8 feet) from your camcorder. -
Page 28: Adjusting The Focus
Adjusting the focus You can adjust the focus manually for different recording conditions. Assign the focus function to the Use this function in the following cases. Manual ring A (p. 33). – To record a subject behind a window covered with raindrops. -
Page 29: Using The Focus Magnifier
Using the Focus magnifier Press the MENU button D. The selected area on the LCD screen is magnified and displayed. It is easier to confirm the focus setting during manual Select (CAMERA SET) t focusing. [FACE DETECTION] t [ON] or [FOCUS MAGNIFIER] is assigned to the [OFF] with the V/v/B/b/SET button ASSIGN 2 button (p. - Page 30 Adjusting the focus (Continued) • You may not be able to get the proper effect in some recording environments. If this happens, set [FACE DETECTION] to [OFF]. z Tips • You can assign this function to an ASSIGN button (p. 46). •...
-
Page 31: Changing The Recording Setting
Changing the recording setting • Scanning system Selecting the recording format i: interlace p: progressive You can select the recording format (bit- rate, image size, frame rate, scanning If you select [1080/60i ] (NTSC model) system). The default setting is as follows: or [1080/50i ] (PAL model), for NTSC model: 1080/60i... - Page 32 Changing the recording setting (Continued) Canceling the DV MODE Select (REC/OUT SET) t 1 Press the MENU button. [REC SET] t [DV MODE] t (REC/OUT SET) t [REC 2 Select [YES] with the V/v/B/b/SET SET] t [CANCEL DV MODE] t button.
-
Page 33: Assigning Frequently-Used Menu Items To The Manual Ring
Assigning frequently-used menu items to the Manual ring It is useful to assign a frequently used menu Select [RESET] to reset the items adjusted item to the Manual ring. You can control manually to the default settings. the item by rotating the Manual ring. Press and hold the MANUAL button B down for a few seconds. -
Page 34: Adjusting The Brightness
Adjusting the brightness You can adjust the image brightness by adjusting the iris, gain or shutter speed, or Rotate the Manual ring A to by adjusting the light volume In this adjust the value. section, using the Manual ring for adjusting The volume of the light increases the the brightness manually is mainly more that you open the aperture... -
Page 35: Adjusting The Shutter Speed
Turn the Manual ring A to adjust the value. NTSC model: You can select from 1/8 to 1/10000 (1/6 - 1/10000 when shooting with 24p) PAL model: You can select from 1/6 to 1/10000 Gain value The denominator of the set shutter speed appears on the LCD screen. -
Page 36: Adjusting The Exposure
Adjusting the color Adjusting the brightness (Continued) tone Adjusting the exposure Adjusting the white balance AUTO ( MANUAL (all) 1 When all of iris, gain and shutter speed are set manually. 2 When the last setting of the exposure is set to AUTO, and any item in 1 is set to AUTO. - Page 37 To save the adjusted white balance Automatic Preset value in memory A or B (5500K*/n/ 1 Press the WHT BAL button A repeatedly until A( A) or B( Memory B Memory A appears on the LCD screen. 2 Press the WB SET button B. *Example when you set [WB TEMP SET] 3 Frame a white object such as a piece of to 5500K.
-
Page 38: Useful Functions
Useful functions b Notes Recording movies in dim places • The color temperature varies slightly depending (Video light) on the temperature of the white LED. Adjust the white balance of the camera manually before Slide the LIGHT switch to ON. recording. -
Page 39: What You Can Do With The Wi-Fi Function Of The Camcorder
Setting Recording conditions Press the V/v/B/b/SET button A Shoots fireworks with to select [AUTO/MANUAL], Fireworks* optimal exposure. [INTELLIGENT AUTO], or [SCENE ([FIREWORKS]) SELECTION], and press the SET Shoots distant subjects button. Landscape* clearly. This setting also ([LANDSCAPE]) prevents your camcorder from focusing on any glass or mesh in windows b Notes... -
Page 40: Downloading "Content Browser Mobile
Useful functions (Continued) Using a smartphone as a remote controller Search for “Content Browser Mobile” in (One-touch remote (NFC)) the App Store, then install it. • You need iOS 7.0 or later. • You cannot use the NFC One-touch when you use iOS. -
Page 41: Using A Smartphone As A Remote Controller
Using a smartphone as a remote Touch the smartphone on the controller camcorder. The smartphone connects to the You can control some of the camcorder's camcorder, “Content Browser Mobile” movie shooting functions remotely with a is activated and [CTRL W/ smartphone. -
Page 42: Connecting Without Using The Nfc Function (Android)
Useful functions (Continued) Connecting without using the Operate the camcorder by the NFC function (Android) smartphone. Select [Settings] on your smartphone, then select [Wi-Fi] Setting button and the SSID (displayed on the camcorder). Iris, Focus, and Zoom buttons Movie start/stop button b Notes •... -
Page 43: Connecting Without Using The Nfc Function (Iphone/Ipad)
Connecting without using the Confirm connection to the SSID NFC function (iPhone/iPad) displayed on the camcorder. Select [Settings] on the iPhone or iPad, then select [Wi-Fi] and the SSID (displayed on the camcorder). z Tips • The next time that you want to connect to the camcorder, select the camcorder in the device list in the Connect menu, and select [Connect]. -
Page 44: Setting Time Data
Useful functions (Continued) 2 Press the V/v/B/b button, select [PRESET], then press the SET button. Confirm connection to the SSID displayed on the camcorder. 3 Press the V/v/B/b button, select the first two digits, then press the SET button. You can set the time code within the following range. -
Page 45: Reviewing The Most Recently Recorded Scene (Last Scene Review)
Reviewing the most recently Right after you stop recording, recorded scene (LAST SCENE press the ASSIGN button you assigned in step 1. REVIEW) The camcorder plays from the top to the You can review the most recently recorded end of the most recently recorded scene, scene on the LCD screen. -
Page 46: Assigning The Functions To The Assign Buttons
Assigning the functions to the ASSIGN buttons Some functions can be assigned to the ASSIGN buttons for use. You can assign a single function to any one of the ASSIGN 1 to 2 buttons. See “Menu items” (p. 63) on the function of each item. - Page 47 Press the MENU button B. Select (OTHERS) t [ASSIGN BUTTON] with the V/v/B/b/SET button A. Press the V/v/B/b/SET button A, select the ASSIGN button that you want to set, then press the SET button. Press the V/v/B/b button A, select the function that you want to assign, then press the SET button.
-
Page 48: Playback
Playback Playback THUMBNAIL button Playing back movies Open the LCD panel. - Page 49 Press the THUMBNAIL button. The thumbnail screen appears after a few seconds. Recording media Playback mode Previous Thumbnail (movie) Next Current movie data (p. 49) • When you assign [DISPLAY] to the ASSIGN 1/ ASSIGN 2 button, you can turn on or off the date and time display on the thumbnails by pressing the ASSIGN button you set.
- Page 50 Playback (Continued) Stop Next Previous Slow/Fast forward Slow/Fast reverse Play/Pause b Notes • Movie files recorded in DV mode can only be played back when the camcorder is set to DV mode. z Tips • When playback from the selected movie reaches the last movie, the screen returns to the thumbnail screen. •...
-
Page 51: Changing/Checking The Settings In Your Camcorder
Changing/checking the settings in your camcorder Press the ASSIGN button you’ve assigned this function. The screen indicators turn on (displayed) and off (not displayed) as you press the button. In the recording mode, the screen changes in the order, detailed display t simple display t no display with each press of the button. - Page 52 Changing/checking the settings in your camcorder (Continued) A White balance will appear during the playback of movies recorded with [MANU WB TEMP]. B Shutter speed C Iris D Gain E Exposure appears during playback of the movie recorded with the iris, gain or shutter speed automatically adjusted.
-
Page 53: Connecting A Monitor Or A Tv
Connecting a monitor or a TV Playback image quality depends on the type of monitor or TV, or the jacks used to make the connection. Monitor/TV To BNC jack BNC Cable (sold separately) To AUDIO IN jack RCA Cable (sold separately) To HDMI input jack HDMI Cable (sold separately) - Page 54 No output b Notes • It is recommended that you use an authorized cable with HDMI logo or a Sony HDMI cable. • Images are not output from the HDMI OUT jack of your camcorder, if copyright protection signals are recorded in the movies.
- Page 55 • This camcorder is not compatible with “BRAVIA” sync. z Tips • HDMI (High-Definition Multimedia Interface) is an interface for transferring uncompressed digital audio and video signals between a TV and a connected device. By connecting a cable from the camcorder’s HDMI OUT jack to your TV, you can enjoy high image quality video and digital audio.
-
Page 56: Editing
Editing Protecting movies (Protect) b Notes Protect movies to avoid deleting them by • You cannot protect standard image quality (DV) mistake. movies. Press the MENU button when the thumbnail screen is displayed. Press the V/v/B/b/SET buttons to select (EDIT) t [PROTECT]. Press the V/v/B/b buttons to select a movie to be protected, then press the SET button. -
Page 57: Dividing A Movie
Dividing a movie • Movies recorded in standard image quality (DV) You can divide a movie at a designated cannot be divided. point. Press the MENU button while playing back a movie. Press the V/v/B/b/SET buttons to select (EDIT) t [DIVIDE]. Press the V/v/B/b buttons to select X at the point where you want to divide, then press the SET... -
Page 58: Deleting Movies
Deleting movies You can free media space by deleting • Press the REC START/STOP button to preview the selected movie. To return to the movies from recording media. thumbnail screen, press the V/v/B/b buttons to select and press the SET button. b Notes •... -
Page 59: Formatting The Recording Media
Formatting the Deleting all data from recording media the memory card and internal memory Formatting deletes all data from the recording media to recover recordable free If a memory card and the internal memory space. is used repeatedly, garbage data accumulate b Notes which may prevent the image data from being written at the fixed speed. -
Page 60: Repairing The Image Database File
Repairing the image Deleting all data from the memory card and internal memory database file (Continued) This function checks the database information and the consistency of movies on the recording media, and repairs if any Press the SET button to select inconsistencies found. -
Page 61: Using The Menu
Using the Menu Operating the menu You can change various settings or make detailed adjustments using the menu items Press the V/v/B/b/SET buttons A displayed on the LCD screen. to select the desired menu. CAMERA SET (p. 65) REC/OUT SET (p. 68) AUDIO SET (p. - Page 62 Operating the menu (Continued) Press the V/v/B/b buttons to select the desired setting, then press the SET button. Press the MENU button to hide the menu screen. To return to the previous screen, select RETURN]. b Notes • The available menu items vary depending on the context of your camcorder during recording or playback.
-
Page 63: Menu Items
Menu items The function and setting value of each menu item are as follows. The default settings are marked with B. (REC/OUT SET) (p. 68) (CAMERA SET) (p. 65) REC SET REC FORMAT RING SETTING BFOCUS, ZOOM, AVCHD GAIN, IRIS, NTSC model SHUTTER SPEED, 1080/60p PS,... -
Page 64: Audio Set
Menu items (Continued) MEDIA SELECT BINTERNAL PEAKING ON/OFF MEMORY, MEMORY BOFF, ON CARD COLOR VIDEO OUT HDMI RESOLUTION BWHITE, RED, NTSC model YELLOW 1080p/480i, 720p/ LEVEL 480i, B1080i/480i, HIGH, BMIDDLE, 480p, 480i PAL model MARKER ON/OFF 1080p/576i, 720p/ BOFF, ON 576i, 1080i/576i, CENTER 576p, 576i... -
Page 65: (Camera Set) Menu
AREA SET B FOCUS BOFF, ON SUMMERTIME LANGUAGE ZOOM BEEP BOFF, ON GAIN REC LAMP BON, OFF SONY LOGO LAMP BON, OFF IRIS MEDIA FORMAT INTERNAL MEMORY, SHUTTER SPEED MEMORY CARD AE SHIFT REPAIR IMAGE DB INTERNAL MEMORY, FILE MEMORY CARD,... - Page 66 Press the MENU button t select (CAMERA SET) with the V/v/B/b/SET button. AE SHIFT STEADYSHOT ON/OFF You can set the camera shake reduction when shooting. B OFF B STANDARD ( Does not use the AE SHIFT function. Uses the camera shake reduction when shooting under relatively stable conditions.
- Page 67 TONE MI SHOE VIDEO LIGHT B OFF You can set how the video light operates Does not output audio tone signals. (sold separately). B POWER LINK Outputs audio tone signals (1 kHz: full bit The video light turns on/off when the -20dB (NTSC model), -18dB (PAL camcorder is turned on/off.
-
Page 68: (Rec/Out Set) Menu
(REC/OUT SET) menu Recording settings, input and output VIDEO OUT settings (REC SET/VIDEO OUT, etc.) HDMI RESOLUSION The default settings are marked with B. You can select the resolution of the output See page 61 for details on selecting signal from the HDMI jacks. menu items. -
Page 69: (Audio Set) Menu
(AUDIO SET) menu Settings for the audio recording (AVCHD AUDIO FORMAT, etc.) WIDE CONVERT You can select a down convert type when The default settings are marked with B. you down-covert video signal. See page 61 for details on selecting Use this function for outputting DV movies menu items. -
Page 70: (Display Set) Menu
(DISPLAY SET) Press the MENU button t select (AUDIO SET) with the V/v/B/b/SET menu buttons. Display settings (MARKER/DISPLAY OUTPUT, etc.) b Notes • When using a shoe microphone, the setting is The default settings are marked with B. NORMAL. See page 61 for details on selecting menu items. - Page 71 z Tips ZEBRA • You can focus more easily using this function in combination with the expanded focus function You can display a zebra pattern as a guide (p. 29). for adjusting brightness. • You can assign [ON/OFF] to an ASSIGN button ON/OFF (p.
-
Page 72: Audio Level Display
Press the MENU button t select (DISPLAY SET) with the V/v/B/b/SET button. CAMERA DATA DISPLAY GUIDEFRAME display the iris, gain and Does not shutter speed settings B OFF Does not display the guide frame. B ON Constantly displays the iris, gain and shutter speed settings on the LCD screen. -
Page 73: Zoom Display
– With a frame rate of 50 selected in [REC FORMAT], when the shutter speed is 1/ Does not display the audio level meters. 50, the shutter angle is 360 degrees. z Tips – With a frame rate of 25 selected in [REC •... -
Page 74: (Tc/Ub Set) Menu
(TC/UB SET) menu Press the MENU button t select (DISPLAY SET) with the V/v/B/b/ Time code settings (TC PRESET/UB SET buttons. PRESET/TC FORMAT, etc.) The default settings are marked with B. VF COLOR TEMP. See page 61 for details on selecting menu items. - Page 75 z Tips UB TIME REC Drop frame B OFF Time code is based on 30 frames per second; however, gaps in the actual time occur during Does not save the actual time in the user extended periods of recording as the actual frame bit code.
-
Page 76: (Network Set) Menu
(NETWORK SET) menu Settings for the Wi-Fi function (CTRL W/ Screen items Functions SMARTPHONE, etc.) 1 Switch Characters switch between character alphabetical letters, numerals The default settings are marked with B. type and symbols. See page 61 for details on selecting Characters are displayed in the menu items. -
Page 77: (Others) Menu
SONY LOGO LAMP to the local time. B ON SUMMERTIME Turns on the SONY logo lamp. You can change this setting without Turns off the SONY logo lamp. stopping the clock. Set to [ON] to move the time forward 1 hour. - Page 78 Press the MENU button t select (OTHERS) with the V/v/B/b/SET buttons. USB LUN SET You can improve compatibility with external devices by limiting the functions of the USB connection. B MULTI Set to [MULTI] in normal conditions. SINGLE Set to [SINGLE] if you are unable to connect using the [MULTI] setting.
-
Page 79: Connecting With Another Device
• Operation is not assured with every device satisfying requirements for operating. • For details on available external media devices, go to the Sony support website in your country/ region. Continued ,... - Page 80 Saving images on an external media device (Continued) You can make menu settings of the external media device such as deleting images. Select [INTERNAL MEMORY] or Press the MENU button and select the [MEMORY CARD] that contains (EDIT) menu. the images you want to save. Images that have not yet been saved on an external media device are saved on the connected media device at this time.
-
Page 81: Creating A Standard Definition Image Quality (Dv) Disc With A Recorder, Etc
Creating a standard definition image quality (DV) disc with a recorder, etc. You can copy images on your camcorder onto a disc or video cassette, by connecting Connect your camcorder to the your camcorder to a disc recorder with the recording device (a disc recorder, A/V connecting cable (sold separately). - Page 82 Creating a standard definition image quality (DV) disc with a recorder, etc. (Continued) • If the recorder has PIN jacks, a BNC to PIN adapter is required.
-
Page 83: Troubleshooting
3 Select (OTHERS) t INITIALIZE. This operation will reset the date, time and area settings. 4 Consult your Sony dealer or local authorized Sony service facility. • Power sources/LCD screen···p. 83 • Internal memory/Memory card···p. 84 • Recording···p. 84 •... - Page 84 Troubleshooting (Continued) The battery pack discharges too quickly. • Ambient temperature is too high or low, or the battery pack has not been charged enough. This is not a malfunction. • Fully charge the battery again. If the problem persists, the battery may be worn-out. Replace it with a new one (p.
- Page 85 The imaging field looks different. • The imaging field may look different depending on the condition of your camcorder. This is not a malfunction. The actual recording time for movies is less than the estimated recording time of the recording media. •...
- Page 86 Troubleshooting (Continued) Tiny spots in white, red, blue, or green appear on the LCD screen. • This phenomenon appears when using a slow shutter speed (p. 35). This is not a malfunction. The subjects passing by the frame very fast appear crooked. •...
- Page 87 “---” is displayed on the LCD screen. • Bars will be displayed for the camera data of the movies recorded with [COLOR BAR] set to [ON]. appears on the LCD screen. • This appears when you play back movies recorded with 5.1ch surround sound. 5.1ch surround sound is down-mixed to 2ch stereo and played back on your camcorder.
- Page 88 Troubleshooting (Continued) Sound cannot be added to the recording media after recording. • You cannot add sound to the recording media after recording in your camcorder. Copy cannot be done correctly using the HDMI cable. • You cannot copy movies using the HDMI cable. Connecting to a computer The computer does not recognize the camcorder.
-
Page 89: Warning Indicators And Messages
If the problem battery level of video light) persists even after you have tried a couple of times, contact your Sony dealer or local • The remaining battery level is low. authorized Sony service facility. (Warning indicator pertaining to... - Page 90 Warning indicators and messages (Continued) - (Warning indicator (Warning indicator pertaining to pertaining to the write-protect of the memory card formatting)* memory card)* • The memory card is damaged. • The write-protect switch is set to lock • The memory card is not formatted position on the memory card.
- Page 91 Description of warning messages Buffer overflow. Writing to the media was not completed in time. If messages appear on the LCD screen or in • You have performed recording and the viewfinder, follow the instructions. erasing operations repeatedly, or a memory card that has been formatted Recording media by other device is used.
- Page 92 • Use a memory card recommended for selected. your camcorder (p. 22). • You can select only 100 images at one • Contact your Sony dealer. time for: – Deleting movies Do not eject the memory card during – Protecting movies, or releasing the writing.
-
Page 93: Additional Information
Additional Information Recording time of movies Estimated time of recording and Estimated recording time of playback with each battery pack movies Approximate time available when you use a Internal memory fully charged battery pack. High definition image quality (HD) Recording time When [AVCHD AUDIO FORMAT] is set (unit: minute) to [LINEAR PCM]... -
Page 94: Memory Card
Rate) format to automatically adjust image 64 GB 280 (280) quality to suit the recording scene. This • When using Sony memory card. technology causes fluctuations in the recording time of the media. Movies containing quickly b Notes moving and complex images are recorded at a higher bit-rate, and this reduces the overall •... -
Page 95: Using Your Camcorder Abroad
Using your camcorder abroad Power supply You can use your camcorder in any country/region using the AC Adaptor supplied with your camcorder within the AC 100 V to 240 V, 50 Hz/60 Hz range. Viewing on TV Countries /regions that require NTSC color system Bahama Islands, Bolivia, Canada, Central America, Chile, Colombia, Ecuador,... -
Page 96: File/Folder Structure On The Recording Media
File/folder structure on the recording media The file/folder structure is shown below. You do not usually need to acknowledge the file/ folder structure, when recording/playing back movies and still images on the camcorder. * “Memory Stick PRO Duo” media **SD memory card, SDHC memory card, SDXC memory card A Image management files •... -
Page 97: Maintenance And Precautions
Maintenance and precautions About the AVCHD format About the memory card • A memory card formatted by a computer What is the AVCHD format? (Windows OS/Mac OS) does not have guaranteed compatibility with your camcorder. The AVCHD format is a high definition •... -
Page 98: About The "Infolithium" Battery Pack
Maintenance and precautions (Continued) About the “Memory Stick” media About the “InfoLITHIUM” battery pack Recording Types of “Memory Stick” media /Playback Your camcorder operates only with an “Memory Stick Duo” media “InfoLITHIUM” L series battery pack of a (with MagicGate) large capacity, such as NP-F570. - Page 99 About battery life • Make sure to turn off the camcorder when you are not recording or playing back. The battery • Battery capacity decreases over time and pack is also consumed when your camcorder is through repeated use. If decreased usage time in recording standby or playback pause.
-
Page 100: About Handling Of Your Camcorder
Moisture may condense when you bring your casing, unplug your camcorder and have it camcorder from a cold place into a warm place (or checked by a Sony dealer before operating it vice versa) or when you use your camcorder in a any further. - Page 101 How to avoid moisture condensation Care and storage of the lens When you bring your camcorder from a cold place • Wipe the surface of the lens clean with a soft into a warm place, put your camcorder in a plastic cloth in the following instances: bag and seal it tightly.
-
Page 102: Specifications
Specifications Maintenance and precautions (Continued) Note on disposal/transfer of the System camcorder Video signal NTSC color, EIA standards Even if you perform [DELETE] or [MEDIA FORMAT], data on the internal recording media HDTV 1080/60i, 1080/60p, 720/60p may not be completely erased. When you transfer specification (models with the NTSC the camcorder, it is recommended that you color system) - Page 103 Input/output connectors Lens Lens Mount: Fixed VIDEO OUT jack Zoom Ratio: 12x (optical), servo/ BNC connector manual 1 Vp-p, 75 Ω (ohms) unbalanced, sync Focal Length: f=2.9 - 34.8 mm negative equivalent to f=26.8 - 321.6 mm on AUDIO OUT jacks 35 mm lens(16:9) Pin connectors equivalent to f=32.8 - 393.6 mm on...
- Page 104 Specifications (Continued) Wireless LAN Dimensions (approx.) Camcorder body only, including the Supported standard projecting parts: IEEE 802.11 b/g/n 265.0 mm × 235.0 mm × 455.0 mm Frequency (10 1/2 in. × 9 3/8 in. × 18 in.) (w/h/d) 2.4 GHz With the accessories (lens hood, lens Supported security protocols cap, microphone, eyecup), excluding...
- Page 105 Sony Corporation. • “InfoLITHIUM” is a trademark of Sony Corporation. • “BRAVIA” is a trademark of Sony Corporation. • Blu-ray Disc™ and Blu-ray™ are trademarks of the Blu-ray Disc Association. • Dolby and the double-D symbol are trademarks of Dolby Laboratories.
- Page 106 HXR- MC2500 as the model for your camcorder. THIS PRODUCT IS LICENSED UNDER THE http://www.sony.net/Products/Linux/ AVC PATENT PORTFOLIO LICENSE FOR We would prefer you do not contact us about the THE PERSONAL USE OF A CONSUMER OR contents of source code.
-
Page 107: Index
Additional Information Index DISPLAY OUTPUT .... 74 DISPLAY SET menu... 70 AC Adaptor......17 LANGUAGE ......77 DIVIDE ........ 57 AE SHIFT.......66, 85 Last Scene Review ....45 DOWN CONVERT TYPE AGC LIMIT......65 LCD BRIGHT ......73 ..........68 AIRPLANE MODE....76 Lens ........5, 101 DV MODE ...... - Page 108 WB PRESET......37 SIMUL/RELAY REC WB TEMP SET ....65 ..........25 White balance ...... 36 Simultaneous recording ..25 Wide angle ......27 SONY LOGO LAMP...77 Wi-Fi ........39 Specifications .....102 SSID/PW RESET ....76 STEADY SHOT....66 ZEBRA ......71, 85 SUMMERTIME....77 Zoom ........
- Page 112 © 2014 Sony Corporation Printed in China...