Table of Contents
Advertisement
Quick Links
Operating and Assembly Instructions
Please read and save these instructions. Read carefully before attempting to assemble, install, operate or maintain the product described. Protect yourself and
others by observing all safety information. Failure to comply with instructions could result in personal injury and/or property damage! Retain instructions for
future reference.
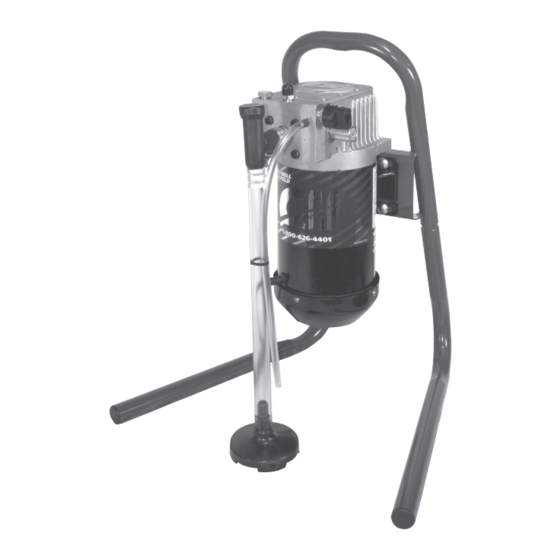
Airless
Paint Sprayers
For questions, parts and accessories: 1-800-626-4401
Models PS250B and PS250E
Models PS240C and PS240F
Models PS230B, PS231B, PS260E, PS261C,
and PS260F
IN424701AV 5/10
© 2010 Campbell Hausfeld/Scott Fetzer
For parts, product & service information
visit www.chpower.com
Advertisement
Table of Contents

Related Manuals for Campbell Hausfeld PS250B


Summary of Contents for Campbell Hausfeld PS250B
- Page 1 Failure to comply with instructions could result in personal injury and/or property damage! Retain instructions for future reference. Airless Paint Sprayers For questions, parts and accessories: 1-800-626-4401 Models PS250B and PS250E Models PS240C and PS240F Models PS230B, PS231B, PS260E, PS261C, and PS260F IN424701AV 5/10 ©...
-
Page 2: Table Of Contents
Operating Instructions and Assembly Instructions Airless Paint Sprayers Description Table of Contents Airless paint sprayers are capable of spraying a wide variety Description ........2 of latex, oil-based, and alkyd paints, as well as stains, Application Chart . -
Page 3: Safety Guidelines
Operating Instructions and Assembly Instructions Airless Paint Sprayers Safety Guidelines GENErAl SAFETy 1. SAVE THESE ImPOrTANT SAFETy INSTrUCTIONS INSTRUCTIONS - To Grounding SAvE ThESE INSTrUCTIONS reduce the risks of fire MANUAL TEST RESET This manual contains information or explosion, electrical that is very important to know shock, and injury to and understand. - Page 4 3000 psi (20 500 kPa). Use only 3000 psi (20 500 kPa). Campbell Hausfeld replacement ● Always engage the trigger lock parts rated at 3000 psi (20 500 kPa) when not spraying. Verify the or higher.
- Page 5 Operating Instructions and Assembly Instructions Airless Paint Sprayers excess of those specified by the Before servicing or resting: Do not spray acids, corrosive materials, manufacturer. 1. Turn the Prime/Spray Control to the toxic chemicals, fertilizers or pesticides. PRIME position. ● Do not use the hose as a strength using these materials could result in member to pull or lift the death or serious injury.
-
Page 6: Assembly Instructions
Operating Instructions and Assembly Instructions Airless Paint Sprayers Assembly Instructions Pump Assembly TOOlS rEqUIrED: Hose Prime/Spray 3/4 in. or Adjustable Wrench Adapter Valve 5/8 in. or Adjustable Wrench Outlet Valve Housing ASSEmbly 1. Open packaging and check contents. Inlet 2. Remove the equipment and all parts Valve from the carton. - Page 7 Operating Instructions and Assembly Instructions Airless Paint Sprayers Preparation (Continued) Starting Instructions DO NOT ATTACh ThE SUCTION ASSEmbly UNTIl INSTrUCTED TO DO SO IN STEP 3. 1. Remove inlet valve cap and with your smallest finger, push on inlet valve stem to ensure it moves freely. 2.
-
Page 8: Spraying Instructions
Operating Instructions and Assembly Instructions Airless Paint Sprayers Preparation (Continued) the paint due to air exposure. Follow paint manufacturers’ recommendations 10. After completing the flush/testing on thinning paint. process, purge the pump of fluid. 12. When pure paint appears from 11. - Page 9 Operating Instructions and Assembly Instructions Airless Paint Sprayers Spraying Instructions hOw TO ChANGE SPrAy TIPS (Continued) It may be necessary to change spray tips during a paint job. Follow these steps INTErmITTENT USE for safe, easy tip changes. If you are spraying and decide to stop for several minutes, lock the spray 1.
-
Page 10: Cleanup
Operating Instructions and Assembly Instructions Airless Paint Sprayers Cleanup Temporary Cleanup ClEANUP FOr OvErNIGhT STOrAGE NOTE: Cleaning and maintenance of the pump are the most important steps you can take to ensure proper operation and a long life for your airless paint sprayer. - Page 11 Operating Instructions and Assembly Instructions Airless Paint Sprayers ClEANUP FOr ChANGING PAINTS Cleaning Pump Or TEmPOrAry STOrAGE FOr mOrE ThAN ONE NIGhT wEAr All NECESSAry SAFETy GEAr NECESSAry TOOlS / mATErIAlS: • Pliers • Rag • Gloves • Two (2) buckets •...
- Page 12 Operating Instructions and Assembly Instructions Airless Paint Sprayers ClEANUP FOr ChANGING PAINTS Cleaning hose and Gun Or TEmPOrAry STOrAGE FOr mOrE ThAN ONE NIGhT (Continued) Allow the to continue cleaning fluid circulating for approximately 10 minutes. 7. Turn pressure to HIGH (completely clockwise).
- Page 13 Operating Instructions and Assembly Instructions Airless Paint Sprayers Finishing Touches/Shutdown ClEANUP FOr ChANGING PAINTS Or TEmPOrAry STOrAGE FOr mOrE ThAN ONE NIGhT (Continued) 17. Make sure prime/spray control is in SPRAY position to reduce dribbling. 18. Turn pressure to LOW (completely counterclockwise).
-
Page 14: Storage
Operating Instructions and Assembly Instructions Airless Paint Sprayers water based Paint Storage ShOrT TErm (lESS ThAN ONE wEEk) wEAr All NECESSAry SAFETy GEAr NECESSAry TOOlS / mATErIAlS: Pump • Pump Protector Solution Protector • Plastic Wrap wASTE bUCkET • 3/4 in. or Adjustable Wrench PUmP PrOTECTION SOlUTION... -
Page 15: Spray Gun Maintenance
Operating Instructions and Assembly Instructions Airless Paint Sprayers Spray Gun maintenance TIP SEAl AND wAShEr pump damage may Occasionally, you will need to replace occur if these the silver seal and clear washer located instructions are not followed. inside the tip base. Before performing 1. -
Page 16: Maintenance Chart
Operating Instructions and Assembly Instructions Airless Paint Sprayers maintenance Chart maintenance User Item Check replace Serviceable? Detail Notes Before each use Product safety As required See parts listing for location of product safety labels and related part numbers. labels Trigger adjustment Before each use See trigger lock warning under Spray Gun Maintenance. -
Page 17: Specifications
Operating Instructions and Assembly Instructions Airless Paint Sprayers Specifications Operating Pressure model A - D Power model E & F Power Safety Features ratings ratings 0-3000 psi 115 Volts AC 220 - 240 Volts AC Spray gun trigger lock 60 Hz 50 Hz Spray gun trigger guard 8.5 Amps... -
Page 18: Replacement Parts
Your local Service center or call 1-800-626-4401 Please provide following information: Address parts correspondence to: - Model number Campbell Hausfeld - Serial number (if any) Attn: customer Service - Part descriptions and number as shown in parts list 100 Production Drive Harrison, OH 45030 U.S.A. - Page 19 Your local Service center or call 1-800-626-4401 Please provide following information: Address parts correspondence to: - Model number Campbell Hausfeld - Serial number (if any) Attn: customer Service - Part descriptions and number as shown in parts list 100 Production Drive Harrison, OH 45030 U.S.A.
- Page 20 Your local Service center or call 1-800-626-4401 Please provide following information: Address parts correspondence to: - Model number Campbell Hausfeld - Serial number (if any) Attn: customer Service - Part descriptions and number as shown in parts list 100 Production Drive Harrison, OH 45030 U.S.A.
-
Page 21: Troubleshooting
Operating Instructions and Assembly Instructions Troubleshooting Chart Symptom Possible Cause(s) Corrective Action Motor hums and does not run 1. Unit under pressure 1. Turn Prime/Spray Control to prime position 2. Equipment has been dropped 2. Take to authorized service center to have motor assembly which caused motor to become realigned. - Page 22 Operating Instructions and Assembly Instructions Troubleshooting Chart (Continued) Symptom Possible Cause(s) Corrective Action Pump primes and builds 21. Clogged gun filter 21. Replace with new filter. Do not attempt to clean gun filters. pressure, however, the Also, refer to Maintenance section equipment does not spray or 22 Clogged Spray Tip 22.
-
Page 23: "Force Feeding" Pump
Operating Instructions and Assembly Instructions Airless Paint Sprayers “Force Feeding” Pump To remove trash that has been caught in the valves, the unit can be force fed. With pump on and prime/spray knob turned to “prime” position, pour the appropriate solvent into the suction tube and then fold hose as shown opposite. -
Page 24: Warranty
ANY INCIDENTAL, INDIRECT, OR CONSEQUENTIAL LOSS, DAMAGE , OR EXPENSE THAT MAY RESULT FROM ANY DEFECT, FAILURE, OR MALFUNCTION OF THE CAMPBELL HAUSFELD PRODUCT. Some states do not allow the exclusion or limitation of incidental or consequential damages, so the above limitation or exclusion may not apply to you.