Table of Contents
Advertisement
Quick Links
OWNERS &
INSTALLATION
LISTINGS AND CODE APPROVALS
These gas appliances have been tested in
accordance with AS4553-2000, NZS 5262
and have been certifi ed by the Australian
Gas Association for installation and
operation as described in these Installation
and Operating Instructions.
Your unit should be serviced annually
by an authorised service person.
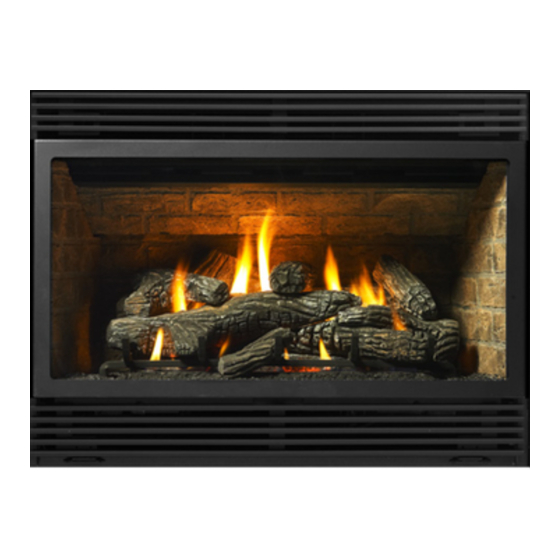
PG36D Gas Log Fireplace
WARNING:
Improper installation, adjustment, alteration,
service or maintenance can cause injury or
property damage. Refer to this manual. For
assistance or additional information consult
an authorised installer, service agency or
the gas supplier.
FOR YOUR SAFETY
Do not store or use gasoline or other
fl ammable vapours and liquids in the vicinity
of this or any other appliance.
Installation and service must be performed
by an authorised installer, service agency or
the gas supplier.
PLEASE KEEP THESE INSTRUCTIONS
FOR FUTURE REFERENCE
918-650c
Models: PG36D-NG2 / LPG2
PG36D-NG3 / LPG3
FOR YOUR SAFETY
What to do if you smell gas:
Do not try to light any
appliance
Do not touch any electrical
switch: do not use any
phone in your building.
Immediately call your gas
supplier from a neighbour's
phone. Follow the gas
supplier's instructions.
If you cannot reach your
gas supplier, call the fi re
department.
01/09/14
Advertisement
Table of Contents

Related Manuals for Regency FireGenie PG36D


Summary of Contents for Regency FireGenie PG36D
- Page 1 OWNERS & INSTALLATION PG36D Gas Log Fireplace Models: PG36D-NG2 / LPG2 PG36D-NG3 / LPG3 WARNING: FOR YOUR SAFETY Improper installation, adjustment, alteration, What to do if you smell gas: service or maintenance can cause injury or Do not try to light any property damage.
- Page 2 As it also bears our own mark, it promises to provide you with economy, comfort and security for many trouble free years to follow. Please take a moment now to acquaint yourself with these instructions ® and the many features of your Regency Fireplace. 33"(838mm) 36"...
-
Page 3: Table Of Contents
Premium Flush Front Installation .........25 Standard Wiring ............28 Wiring Diagram with Premium Flush Front Option ..29 Remote Control ............30 Operating Instructions ..........30 Lighting Instructions.............30 Resetting The Unit ............30 Shutdown Instructions ..........30 First Fire ..............30 ® Regency PG36D Gas Log Fireplace... -
Page 4: Data Badge
DATA BADGE The label is located on the front inside base of the DATA BADGE NOTE: Regency ® units are This is a copy of the label that accompanies each PG36D Gas Fireplace. We have printed a copy unit, visible when the bottom louvre is open. -
Page 5: Installation
(wood, paper, cardboard, coal, etc.) manufacturer. be used in this appliance. 15) The appliance area must be kept clear and free of combustible materials, (gases and other fl ammable vapours and liquids). ® Regency PG36D Gas Log Fireplace... -
Page 6: Clearances
5) This appliance is Listed for bedroom installations when used with a Listed Millivolt Thermostat. Some areas may have further WARNING requirements, check local codes before Fire hazard is an extreme risk installation. if clearances are not adhered to. ® Regency PG36D Gas Log Fireplace... - Page 7 INSTALLATION Note: A non-combustible mantel may be installed at a lower height if the framing is made of metal studs covered with a non-combustible board. ® Regency PG36D Gas Log Fireplace...
-
Page 8: Mantel Leg Clearances
32" (813mm) to the ceiling. option, a fi nishing trim (962mm cover) needs to be installed to cover the spacers. Maintain a physical gap between lining and spacers 2-5mm. (5mm clearance to framing each side). ® Regency PG36D Gas Log Fireplace... -
Page 9: Unit Assembly Prior To Installation
Each Co Axial Flue gas appliance must use it's own separate fl ue system. Common fl ue * For "C" screw position the top facing support systems are prohibited. is reversed. ® Regency PG36D Gas Log Fireplace... -
Page 10: Exterior Flue Termination Locations
(IV) A fl ue terminal of this type shall not be located under a roofed area unless the roofed area is fully open on at least two sides and a free fl ow of air at the appliance is achieved. ® Regency PG36D Gas Log Fireplace... -
Page 11: Flueing
Flex installations. ® 3) If you are installing the PG36D into a Regency Mantel Kit, use the minimum horizontal vent height (centre-line of 1029mm). Remember to include the mantel base in your calculations and to maintain the 32mm clearance (38mm with Flex) to the underside of the mantel top. -
Page 12: Simpson Dura-Vent Flueing
229mm + 229mm 108mm - 146mm 152mm + 229mm Simpson Dura-Vent Co-Axial Flue GS SIMPSON DURA-VENT FLUEING COMPONENTS LIST All Simpson Dura-Vent components are available directly from Regency ® Part # Description Part # Description Part # Description Horiz. Termination Kit includes: 90 902B 48"... -
Page 13: Flueing Arrangements - Horizontal Terminations
6-7/8" (175mm) outer diameter A fl ue guard should be used whenever the termination is lower than the specifi ed minimum or as per local codes. Note: Regency ® Co Axial Flue System (Flex) is only approved for horizontal terminations. - Page 14 INSTALLATION FLUEING ARRANGEMENTS - HORIZONTAL TERMINATIONS SIMPSON DURA-VENT DIRECT FLUE GS SYSTEM and REGENCY ® CO AXIAL FLUE SYSTEM (FLEX) The diagram below shows examples of horizontal termination arrangements using two 90 elbows (two 45 elbows equal one 90 elbow).
-
Page 15: Flueing Arrangements - Vertical Terminations
Firestops are required at each fl oor level and whenever passing through a wall. • Maintain clearances to combustibles. Note: Must use optional rigid pipe adaptor when using Simpson Dura-Vent pipe (Part # 510-994). ® Regency PG36D Gas Log Fireplace... - Page 16 • Flue must be supported at offsets • Firestops are required at each fl oor level and whenever passing through a wall. • Maintain clearances to combustibles as listed in section "Clearances." Diagram 3 ® Regency PG36D Gas Log Fireplace...
-
Page 17: Horizontal Terminations
fl ue pipe to the fl ue termination, slide the Note: Apply sealant "Mill-Pac" to inner pipe Wall Thimble (Part # 620-926) over the fl ue and high temperature silicone sealant Diagram 5 pipe. to outer pipe on every twist-lock joint. ® Regency PG36D Gas Log Fireplace... -
Page 18: Vertical Terminations
fl oor or ceiling of every level. To install the Firestop spacer in a fl at ceiling or wall, cut a 10 inch square hole. Frame the hole Diagram 5 as shown in Diagram 3 and install the fi restop. ® Regency PG36D Gas Log Fireplace... -
Page 19: Conversion From Ng To Lpg Kit #513-968
14) Carefully pull out the control box from underneath the fi rebox. Note: The control box is held in place with velcro. Burner Orifi ce Pull out the pilot hood by hand. Pilot Hood ® Regency PG36D Gas Log Fireplace... - Page 20 Electric Modulator Jumper Location After carrying out all adjustments, block the setting screws with paint, taking care not to obstruct the breather orifi ce of the pressure. Put back the modulator plastic cap. Jumper ® Regency PG36D Gas Log Fireplace...
-
Page 21: Gas Line Installation
fl ex Flue System: Simpson Dura-Vent Direct Note: To properly check gas pressure, connector. (If you are using rigid pipe, ensure Flue System or Regency ® Direct both inlet and manifold pressures that the valve can be removed for servicing.) -
Page 22: Optional Brick Panels
- do not force into position. 2) Sprinkle the vermiculite all over the top of the base brick panel. 3) Place the Log 02-75 on the rear log support pins with the fl at side to the back. 02-75 ® Regency PG36D Gas Log Fireplace... - Page 23 6) Position Log 02-54 across the cutouts in Logs 02-51 and 02-53. The notch in the bottom right end fi tting against the 5th grate 02-51 tab. 02-54 Place embers in these 3 locations on the burner tray. Log indentation ® Regency PG36D Gas Log Fireplace...
-
Page 24: Standard Flush Door
3. base of the fi rebox) to the louver using 3 screws. Diagram 1 Diagram 3 To remove the fl ush door, reverse the above steps. 4) Tuck wires away and close bottom louver. ® Regency PG36D Gas Log Fireplace... -
Page 25: Premium Flush Front Installation
9) Lift the module off of the velcro from the base of the fi rebox and pull out slightly. 10) Disconnect the wire harness on the module that is connected to the valve. Manual Control Switch Bracket ® Regency PG36D Gas Log Fireplace... - Page 26 14) Place the wire grommet back into the thermodisc cover with the 2 female ends of the wires inside the cover as shown. 19) Remove the left side bottom hinge bracket by undoing the 2 screws. ® Regency PG36D Gas Log Fireplace...
- Page 27 28) Align the bottom louver mounting tab with hinges on the left and right side and secure using 2 screws on each side. 22) Connect new wire harness to the module and to the valve. Module Valve ® Regency PG36D Gas Log Fireplace...
- Page 28 NOTE - PG36 UNITS ONLY: For the wire cover to fi t in place on the PG36 the top half of the wire cover will need to be broken off by bending back and forth. Bend Here ® Regency PG36D Gas Log Fireplace...
-
Page 29: Standard Wiring
This appliance is equipped with a three pronged (grounding) plug for your protection against shock hazard and should be plugged directly into a properly grounded three-prong receptacle. Do not cut or remove the grounding prong from this plug. ® Regency PG36D Gas Log Fireplace... -
Page 30: Wiring Diagram With Premium Flush Front Option
INSTALLATION WIRING WITH PREMIUM FLUSH FRONT OPTION ® Regency PG36D Gas Log Fireplace... -
Page 31: Remote Control
OPERATING INSTRUCTIONS FIRST FIRE REMOTE CONTROL LIGHTING INSTRUCTIONS Use the Regency ® Remote Control Kit approved The FIRST FIRE in your heater is part of the for this unit. Use of other systems may void paint curing process. To ensure that the paint 1) Plug the power cord into a power outlet. -
Page 32: Operating Instructions
Listed below are some examples. All are normal operating sounds and should not be considered NOTE: If you have an incorrect fl ame pattern, as defects in your appliance. ® contact your Regency dealer for further SUMMARY OF instructions. Blower:... -
Page 33: Copy Of The Lighting Plate Instructions
OPERATING INSTRUCTIONS COPY OF THE LIGHTING PLATE INSTRUCTIONS WARNING: DO NOT SPRAY AEROSOLS IN THE VICINITY OF THIS APPLIANCE WHILE IN OPERATION. ® Regency PG36D Gas Log Fireplace... -
Page 34: Maintenance
Wall Straps, NOT BE PLACED ON OR NEAR heat resistant paint (not with wall paint). or plumbers' tape for rigidity. THE APPLIANCE. Regency ® uses StoveBright Paint - Metallic Black #6309. DO NOT USE THIS APPLIANCE... -
Page 35: Gold Or Brass Louvres & Trim
5/8" fl at glass gasket for the Bay Front (Part # 936-243) and a tadpole glass gasket for the Flush Front (Part # 936-155). DOOR GLASS Your Regency ® fi replace is supplied with high temperature, 5 mm Neoceram ceramic glass that will withstand the highest heat that your unit will produce. -
Page 36: Removing Valve Tray
8) Remove the 10 Philips screws which secure the valve tray assembly. 13) To replace the burner tray assembly reverse these instructions. 14) Check for any gas leaks. 15) Check for proper fl ame appearance and glow on logs. ® Regency PG36D Gas Log Fireplace... -
Page 37: Fan Replacement
Ground Wire Connector 9) Pull out the fan. 10) Reverse steps to install new fan. 5) Remove the electric cover by undoing the 2 screws, pull out the grommet and the harness. Electric Cover ® Regency PG36D Gas Log Fireplace... -
Page 38: Manual Control Switch Replacement
6) Pull out the ECS box by carefully lifting it up off the velcro. 13) Put the ECS box back in place under the fi rebox. 14) Reverse steps 5 to 1. ECS Box ® Regency PG36D Gas Log Fireplace... -
Page 39: Parts List
910-935 Manual Control Switch *Note: The Control Box Cable wires for the FG38 come separately: 910-502, 910-505, 910-506, 910-507, 910-509 The Control Box Cable wires for the IG35 come separately: 910-530, 910-504, 910-528 ® Regency PG36D Gas Log Fireplace... -
Page 40: Main Assembly
34) * Brick Panel - Left 35) * Brick Panel - Right 902-600 Base Brick Panel 511-031 Brick Clip (each) 918-650 Manual 516-969 Conversion Kit - NG to LPG *Not available as a replacement part. ® Regency PG36D Gas Log Fireplace... -
Page 41: Burner Assembly & Log Set
Middle Right Log 94) * Front Left Log 95) * Center Left Log 96) * Center Right Log 97) * Front Bottom Log 98) * Middle Left Log *Not available as a replacement part. ® Regency PG36D Gas Log Fireplace... -
Page 42: Bay Front Assembly
Bay Front Trim (Set) - Gold 120) * Glass Retainer Bracket 113) * Bay Front Trim-Gold-Bottom 121) 780-932 Bay Front Screen 114) * Bay Front Trim-Gold-Top ® 160) 948-216 Regency Logo Plate *Not available as a replacement part. ® Regency PG36D Gas Log Fireplace... -
Page 43: Flush Front Assembly
Flush Louver Assy-Top 139) * Flush Louver Assy-Btm 157) * Finishing Trim Left 158) * Finishing Trim Top 159) * Finishing Trim Right ® 161) 948-216 Regency Logo Plate *Not available as a replacement part. ® Regency PG36D Gas Log Fireplace... -
Page 44: Premium Flush Front Assembly
PREMIUM FLUSH FRONT ASSEMBLY Part # Description 516-916 Premium Flush Front - Black 516-948 Wiring 180) * Top Louver 181) * Bottom Louver 182) * Thermodisc Mounting Bracket 183) * Spacers *Not available as a replacement part. ® Regency PG36D Gas Log Fireplace... - Page 45 NOTES ___________________________________________________ ___________________________________________________ ___________________________________________________ ___________________________________________________ ___________________________________________________ ___________________________________________________ ___________________________________________________ ___________________________________________________ ___________________________________________________ ___________________________________________________ ___________________________________________________ ___________________________________________________ ® Regency PG36D Gas Log Fireplace...
- Page 46 NOTES ___________________________________________________ ___________________________________________________ ___________________________________________________ ___________________________________________________ ___________________________________________________ ___________________________________________________ ___________________________________________________ ___________________________________________________ ___________________________________________________ ___________________________________________________ ___________________________________________________ ___________________________________________________ ® Regency PG36D Gas Log Fireplace...
-
Page 47: Warranty
Regency Fireplace Products, shall in no event be liable for any special, indirect consequential damages of any nature whatsoever which are in excess of the original purchase price of the product. Any alteration to the unit which causes sooting or carboning that results in damage to the exterior facia is not the responsibility of Regency Fireplace Products,. - Page 48 ® Register your Regency warranty online www.regency-fi re.com.au Reasons to register your product online today! • View and modify a list of all your registered products. • Request automatic email notifi cation of new product updates. • Stay informed about the current promotions, events, and special offers on related products.