
Related Manuals for Gigaset E390 HX


Summary of Contents for Gigaset E390 HX
- Page 1 E390 Information on the phone system: Detailed and up-to-date operating guide for your Gigaset phone www.gigaset.com/manuals Documentation relating to your base/router...
- Page 2 You can use your handset with several different DECT bases. On a Gigaset base Connect your HX handset to a Gigaset base and use the many features with the quality you would expect from Gigaset. If your Gigaset base is IP-compatible, you can also make broadband calls using your HX handset with the highest voice quality (HDSP).
-
Page 3: Table Of Contents
Contents Contents Overview ................5 Safety precautions . - Page 4 Contents Additional information Regarding the telephone system, if the handset is connected to a Gigaset base: User guide for your Gigaset telephone Regarding the telephone system, if the handset is connected to another base/router: Documentation regarding your base/your router All Gigaset user guides are in PDF format: www.gigaset.com/manuals...
-
Page 5: Overview
Overview Overview 4 Display keys ( p. 13) Various functions, depending on the operating situation 5 End call key / On/off key End call; Cancel function; one Press briefly level back Back to idle mode; Press and Switch the handset on/off hold 6 Hash key / Lock key Lock/unlock the keypad;... - Page 6 Illustration in the user guide Illustration in the user guide Warnings, which if not heeded, can result in injury to persons or damage to devices. Important information regarding function and appropriate handling or functions that could generate costs. Prerequisite for being able to carry out the following action. Additional helpful information.
-
Page 7: Safety Precautions
Use only rechargeable batteries that correspond to the specification (see list of permitted batteries www.gigaset.com/service). Never use a conventional (non-rechargeable) battery or other battery types as this could result in significant health risks and personal injury. Rechargeable batteries, which are noticeably damaged, must be replaced. -
Page 8: Getting Started
Getting started Getting started Contents of the package • One handset • One battery cover • Two batteries • One charging cradle including power adapter • One user guide The charging cradle is designed for use in closed, dry rooms within a temperature range of +5°C to +45°C. - Page 9 Getting started Setting up the handset for use The display is protected by a plastic film. Please remove the protective film! Inserting the batteries Only use rechargeable batteries, as this could otherwise result in significant health risks and personal injury. For example, the outer casing of the batteries could be destroyed or the batteries could explode.
- Page 10 OK . . . an available base is sought . . . if required: enter system PIN (default setting on Gigaset bases: 0000) Once registration is complete, the handset returns to idle status. The internal number of the handset appears in the display, e. g. INT 1. If not, repeat the procedure.
- Page 11 If the product is connected to the Internet via an IP base station or router, it will automatically connect to the Gigaset support server sending regular product specific information. This information will for example be used for firmware updates or to provide internet services.
-
Page 12: Using The Telephone
Getting to know your telephone Using the telephone Getting to know your telephone Switch the handset on/off ¤ Switching on: When the handset is switched off, press and hold the End call key ¤ Switch off: When the handset is in idle status, press and hold the End call key If you place a deactivated handset into the charging cradle, it will automatically activate itself. - Page 13 Getting to know your telephone In submenus, selection and entry fields Confirm a function During a conversation Open the directory Mute the microphone Initiate an internal consultation call Adjust the loudspeaker volume for receiver and handsfree mode Extra-loud function During a call or when listening to a message, make the volume for the handset or the loudspeaker very loud.
- Page 14 Getting to know your telephone Menu guidance The functions of your telephone are displayed in a menu that consists of several levels. Selecting/confirming functions Confirm selection using OK or press the centre of the control key One menu level back using Back Change to idle status Press and hold...
- Page 15 Getting to know your telephone Entering text Input position ¤ to select an entry field. The cursor flashes in the Example active entry field, the title and the text entered turn orange New Entry and are shown in large font. ¤...
-
Page 16: Making Calls
Cancel dialling: Press the End call key On an IP-capable Gigaset base The connection is selected via the send connection (line) set for the handset. To use another line: ¤ press and hold the Talk key . - Page 17 Making calls Managing entries in the redial list ¤ Briefly press the Talk key . . . the redial list opens . . . use to select an entry Options . . . possible options: Copy an entry to the directory: Copy to Directory Copy the number to the display: ¤...
- Page 18 Making calls During a conversation Handsfree mode Activating/deactivating handsfree mode during a call, when establishing a connection and when listening to the answer machine (where the system has a local answer machine): ¤ Press the handsfree key Placing the handset in the charging cradle during a call: ¤...
-
Page 19: Local Answer Machine
Local answer machine Local answer machine (only on Gigaset bases with local answer machine) Switching the answer machine on/off ¤ . . . use to select Answer Machine Activation . . . to select an answer machine (if there are several) Change . -
Page 20: Directories
Local handset directory Directories Local handset directory The local directory is unique to the handset. However, it is possible to send entries to other handsets. Information about online directories on IP-capable bases and central directories on CAT-iq bases user guide of the base. Opening the directory ¤... - Page 21 Local handset directory Creating an entry ¤ <New Entry> . . . use to switch Example between the entry fields New Entry Name: ¤ . . . use to enter the first and/or last name First Name Numbers: ¤ Robert| Tel.1 - Type .
- Page 22 Local handset directory Deleting entries Delete the selected entry: ¤ . . . use to select an entry Options Delete entry ¤ Delete all entries: Options Delete all Setting the order of the directory entries Directory entries can be sorted by first name or surname. ¤...
- Page 23 Local handset directory Copying an entry/directory The sending and receiving handset must both be registered to the same base station. The other handset and the base station are able to send and receive directory entries. An external call interrupts the transfer. Sounds are not transferred.
-
Page 24: Base Directory
Base directory Base directory (depending on the base) If the DECT base (on a CAT-iq router for example) provides a separate directory, it can also be displayed and edited on the handset. ¤ . . . Use to select Contacts Base Directory OK . -
Page 25: Call Lists
The telephone saves different types of calls (missed, accepted and outgoing calls) in lists. The base/router to which the handset is registered provides information on call numbers. Detailed information can be found at www.gigaset.com/compatibility. List entry The following information is displayed in the list entries:: Example •... -
Page 26: Message Lists
As soon as a new message arrives, an advisory tone will sound. The Message key also flashes (if activated). Activation from the handset is only possible on Gigaset bases. use the web interface as required for CAT-iq routers. Information user guide of the base/router. - Page 27 The message list contains an entry for every answer machine assigned to the handset, e.g. for the local Back answer machine on a Gigaset base/CAT-iq router (if available) or for a network mailbox. Activating/deactivating Message key flashing Receipt of new messages is displayed by a flashing message key on the handset. This type of alert can be activated/deactivated for each message type.
-
Page 28: Additional Functions
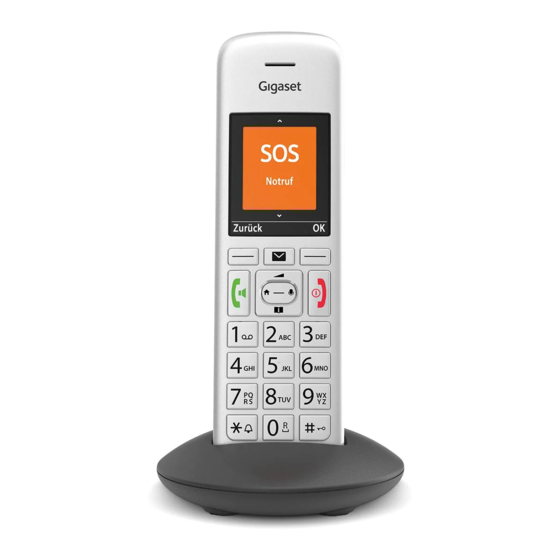
Additional information Regarding the telephone system, if the handset is connected to a Gigaset base: User guide for your Gigaset telephone Regarding the telephone system, if the handset is connected to another base/router:... - Page 29 You may require an up-to-date firmware version for your base. Details regarding the functionality of the handset on various bases and routers can be found at www.gigaset.com/compatibility. Cancelling an emergency call If you have triggered an emergency call by mistake, you can cancel it.
- Page 30 Emergency call Setting up emergency call In order to be able to use the function you must • save the emergency numbers and • activate the emergency function. The police, ambulance service or fire service must not be used for an emergency call. Storing emergency numbers ¤...
-
Page 31: Calendar
Calendar Calendar You can remind yourself of up to 30 appointments. June 2021 In the calendar, the current day is outlined in white; on days with appointments, the numbers are displayed in colour. When a day Mo Tu We Th Fr Sa Su is selected, it will be outlined in colour. - Page 32 Calendar Notification of appointments/anniversaries Anniversaries are transferred from the directory and displayed as an appointment. An appointment/anniversary is displayed in idle status and the selected ringtone plays for 60 seconds as a notification. Acknowledge and stop the reminder: Press the display key OFF Respond with SMS: Press the display key SMS .
-
Page 33: Timer
Timer Timer Setting the timer (countdown) ¤ . . . use to select Additional Features Timer . . . then ¤ Enable/disable: Activation: . . . use to select On or Off ¤ Set the duration: Duration . . . use to enter the hours and minutes for the timer Min.: 00:01 (one minute);... -
Page 34: Baby Monitor
Baby monitor Alarm An alarm is shown on the display and indicated by the selected ringtone melody. The alarm sounds for 60 seconds. If no key is pressed, the alarm is repeated after 5 minutes. After the second repetition, the alarm call is deactivated for 24 hours. During a call, the alarm is only indicated by a short tone. - Page 35 Baby monitor Activating and setting the baby monitor ¤ Baby Monitor activated . . . use to select Additional Features Baby Monitor OK . . . then Switch on/off: ¤ 07:15 Activation: . . . use to select On or Off INT 1 Enter destination: ¤...
-
Page 36: Eco Dect
ECO DECT ECO DECT (depending on the base) The device range is set to maximum as default. This guarantees the best connection between the handset and the base station. In idle status, the handset will not function (as it is not transmitting). -
Page 37: Protection Against Unwanted Calls
Audio Settings Ringtones (Handset) Anon. Calls Silent Edit ( = activated) . . . the call is only signalled on the display For all handsets (only on some Gigaset bases) ¤ . . . use to select Settings Telephony Anonymous... - Page 38 Protection against unwanted calls Black list (only on some Gigaset bases: www.gigaset.com/compatibility) When the black list function is activated, calls from black list numbers are not indicated or are only indicated in the display. These settings apply to all registered handsets.
-
Page 39: Sms (Text Messages)
If sending SMS messages to an SMS mailbox: add the mailbox ID to the end of the number. ¤ Send: Send For further information regarding this feature, please refer to the detailed user guide of the base station by visiting www.gigaset.com/manuals Availability and operation of the functions may differ on your telephone. -
Page 40: Setting The Handset
Setting the handset Setting the handset Changing the language ¤ . . . use to select Settings Language . . . use select language Select ( = selected) If the handset has been set to an incomprehensible language: ¤ Press the keys slowly one after the other . - Page 41 Setting the handset Display of info services as screensaver (only on a Gigaset GO-Box 100 or other Gigaset-IP base) Info Services are activated via the web configurator. The telephone is connected to the Internet. Example: Enable weather service as screensaver Enable info services as screensaver: ¤...
- Page 42 Setting the handset Colour scheme You can choose from a range of colour combinations for the display. ¤ . . . use to select Settings Display Colour Schemes . . . use to select the desired colour scheme Select ( = selected) Display backlight The display backlight always illuminates when the handset is taken out of the base station/...
- Page 43 Setting the handset Earpiece and handsfree profile Select a profile for the earpiece and handsfree mode in order to adapt the telephone as much as possible to the surroundings. Check which is the most comfortable profile for you and your caller.
- Page 44 Setting the handset Switching the ringtone off for the current call ¤ Press Silence or the End call key Switching the alert tone (beep) on/off Switch on an alert tone (beep) instead of the ringtone: ¤ Press and hold the star key Press Beep within 3 seconds .
- Page 45 Setting the handset Fast access to numbers and functions Assigning a number to digit keys (quick dial) It is possible to assign a number from the directory to the keys A number has not been assigned to the digit key. ¤...
- Page 46 Setting the handset Possible functions: Alarm Clock, Redial, Handset Directory . . . More functions are available in More Functions... The availability of functions depends on the base. Starting a function With the telephone in idle status: Briefly press . . . the assigned function is executed Changing the name of a connection (line) (only on a CAT-iq router) ¤...
- Page 47 The handset supports firmware updating via the DECT radio link to the base/router (SUOTA = Software Update Over The Air). The base/router to which the handset is registered must also support this function www.gigaset.com/compatibility) The phone checks whether new firmware is available for the handset. If it is, a message is displayed.
-
Page 48: Appendix
Please have your proof of purchase ready when calling. Please note that if the Gigaset product is not sold by authorised dealers in the national territory the product may not be fully compatible with the national telephone network. It is clearly specified on the box near the CE mark for which country/countries the equipment has been developed. - Page 49 In the case of new devices and their components exhibiting defects resulting from manufacturing and/or material faults within 24 months of purchase, Gigaset Communications shall, at its own option and free of charge, either replace the device with another device reflecting the current state of the art, or repair the said device.
-
Page 50: Manufacturer's Advice
Data protection We at Gigaset take the protection of our customers’ data very seriously. It is precisely for this reason that we are ensuring all our products feature "Privacy by Design" as standard. All information we collect is used to make our products as good as possible. - Page 51 Manufacturer’s advice Environment Environmental management system Gigaset Communications GmbH is certified pursuant to the international standards ISO 14001 and ISO 9001. ISO 14001 (Environment): Certified since September 2007 by TÜV SÜD Management Service GmbH. ISO 9001 (Quality): Certified since 17/02/1994 by TÜV SÜD Management Service GmbH.
-
Page 52: Technical Data
Capacity: 750 mAh Handset operating times/charging times The operating time of your Gigaset depends on the capacity of the battery, its age and the way it is used. (All times are maximum possible times.) Standby time (hours) 320 / 190 * Talktime (hours) Operating time with 1.5 hours of calls per day (hours) - Page 53 Technical data Power adapter Manufacturer Salom Electric (Xiamen) Co. Ltd. Commercial registration number: 91350200612003878C 31 Building, Huli Industrial District, Xiamen, Fujian 361006, P.R. China Salcomp (Shenzen) Co. Ltd. Commercial registration number: 91440300618932635P Salcomp Road, Furond Industrial Area, Xinqiao, Shajing, Baoan District, Shenzen 518125 China Model identifier C705 / C710 Input voltage...
-
Page 54: Display Icons
Display icons Display icons The following icons are displayed depending on the settings and the operating status of your telephone. Icons in the status bar Icon Meaning Icon Meaning Signal strength (No Radiation off ) Keypad lock activated 1% -100% "Do not disturb"... - Page 55 Display icons Display icons to indicate . . . Icon Meaning Icon Meaning External call Reminder for appointment Internal call Reminder for anniversary Establishing a call (outgoing call) Alarm call Connection established Countdown timer No connection established/ Answer machine is recording connection terminated (only for a system with a local answer machine)
-
Page 56: Index
Index Index ......37 Call protection Call, anonymous ..27 . - Page 57 Index Display ..27 activating/deactivating new message ....... 42 Handset backlight .
- Page 58 Index Keys ......5, 12 control key ......5, 13 .
- Page 59 Index ......15 Upper/lower case ... 26 Viewing network mailbox message .
- Page 60 Issued by Gigaset Communications GmbH Frankenstr. 2a, D-46395 Bocholt © Gigaset Communications GmbH 2021 Subject to availability. All rights reserved. Rights of modification reserved. www.gigaset.com...