
Related Manuals for Gigaset E49h


Summary of Contents for Gigaset E49h
- Page 1 Congratulations By purchasing a Gigaset, you have chosen a brand that is fully committed to sustainability. This product’s packaging is eco-friendly! To learn more, visit www.gigaset.com.
-
Page 3: The Handset At A Glance
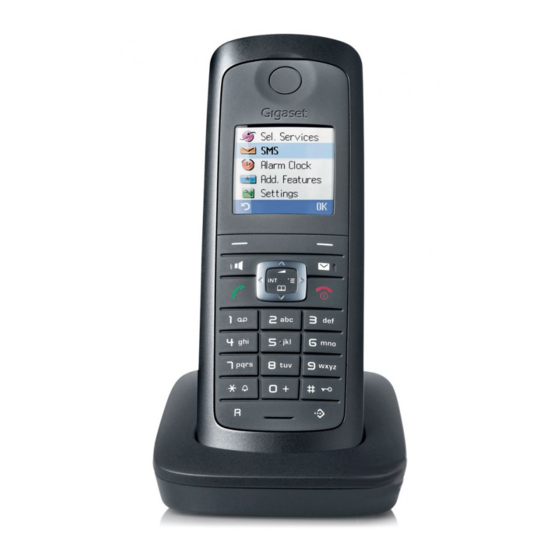
The handset at a glance The handset at a glance 1 Display in idle status 2 Charge status of the batteries = e V U (flat to full) flashes: batteries almost flat e V U flashes: batteries charging ¢ 3 Display keys ( page 15) 4 Message key Access to calls and message lists;... -
Page 4: Table Of Contents
Contents Contents The handset at a glance ..........1 Safety precautions . - Page 5 Contents Handset settings ..........27 Quick access to functions .
-
Page 6: Safety Precautions
Do not use your phone in environments with a potential explosion hazard (e.g. paint shops). ƒ If you give your Gigaset to someone else, make sure you also give them the user guide. Please remove faulty base stations from use or have them repaired by our Service, as they could interfere with other wireless services. -
Page 7: First Steps
First steps First steps Check the pack contents one Gigaset E49H handset one charging cradle one mains adapter for the charging cradle two batteries one battery cover one belt clip one lock ring one rubber cover for the headset socket... -
Page 8: Setting Up The Charging Cradle
Please note: Never expose the telephone to the influence of heat sources, direct sunlight or other electrical devices. Protect your Gigaset from moisture, dust, corrosive liquids and vapours. Connecting the charging cradle ¤ Connect the flat plug of the mains adapter 1. -
Page 9: Setting Up The Handset For Use
Warning ¢ Only use the rechargeable batteries ( page 36) recommended by Gigaset Communications GmbH. Never use conventional (non-rechargeable) batteries, as this could result in significant health risks and damage to property. For exam- ple, the outer casing of the batteries could be destroyed or the batteries could explode. -
Page 10: Charging Cradle
First steps ¤ Insert the rubber cover supplied for the headset socket to guarantee the unit is still splashproof. If you need to re-open the battery cover, for instance to replace the batteries, pro- ceed as follows: ¤ Turn the lock ring or belt clip anti- clockwise to the end stop (approx. -
Page 11: Registering The Handset
First steps Registering the handset You must initiate handset registration on the handset (1) and on the base station (2). 1)On the handset Please register flashes on the display. Please register ¤ Press on the right side of the control key to display the main menu. - Page 12 First steps First battery charge and discharge The correct charge status can only be displayed once the battery is first fully charged and discharged. ¤ Place the handset in the charging cradle for six hours. ¤ Once the battery is fully charged, remove the hand- set from the charging cradle and do not put it back again...
- Page 13 First steps Setting the date and time Set the date and time so that the correct date and time can be assigned to incoming calls, and so that the alarm can be used. ¤ If you have not yet set the date and Time §Time§...
-
Page 14: Connecting The Headset
After removing the rubber cover, you can connect a headset to the underside of your telephone with the 2.5 mm jack connector. See the relevant product page at www.gigaset.com for information on recommended headsets. After using the headset, always replace the rubber cover. -
Page 15: What Would You Like To Do Next
First steps What would you like to do next? Now you have successfully started your Gigaset, you will probably want to adapt it to your personal requirements. Use the following guide to quickly locate the most important subjects. If you are unfamiliar with menu-driven devices such as other Gigaset telephones ¢... -
Page 16: Using The Phone
Using the phone Using the phone Control key In the description below, the side of the control key (up, down, right, left) that you have to press in the different oper- ating situations is marked in black, e.g. v for "press right on the control key". -
Page 17: Display Keys
Using the phone Display keys The functions of the display keys change depending on the particular operating sit- uation. Example: 1 Current display key functions are shown in the bottom display line. 2 Display keys The most important display keys are: §§§Options§§... -
Page 18: Activating/Deactivating The Handset
Using the phone To access a function, i.e. to open the corresponding submenu (next menu level): ¤ Navigate to the function using the control key q. Press the display key §OK§ Submenus The functions in the submenus are displayed as lists. To access a function: ¤... -
Page 19: Illustration In The User Guide
Using the phone Illustration in the user guide The operating steps are shown in abbreviated form. Example The illustration: ¢ ¢ Ð Date/Time means: ¤ In idle status, press on the right side of the control key to display the main menu. î... -
Page 20: Menu Tree
Menu tree Menu tree Instead of scrolling to locate a menu function, you can select a function more quickly by opening the menu and keying in a digit combination (or shortcut). Example: v 5 2 2 for "Set ring tone for external calls". With the telephone in idle status, press v (open main menu): î... -
Page 21: Making Calls
Making calls Making calls Accepting a call The handset indicates an incoming call in three ways: by ringing, by a display on the Making an external call screen and by the flashing handsfree key External calls are calls using the public You can accept the call by: ¤... -
Page 22: Handsfree Talking
Making calls Handsfree talking Making internal calls In handsfree mode, instead of holding the Internal calls to other handsets registered to handset to your ear you can put it down, for the same base station are free of charge. example on the table in front of you. This Calling a specific handset allows others to participate in the call. -
Page 23: Using The Directory And Lists
Using the directory and lists Using the directory and Storing a number in the directory ¢ New Entry lists ¤ Change multiple line input: Number The options are: Enter the number. Directory Name Call-by-call list Enter name. Last number redial list Shortcut SMS list Select key for shortcut. - Page 24 Using the directory and lists Dialling with the directory/call-by- Delete List Delete all entries in the directory/call-by- call list ¢ call list. s / C s (select entry) Copy List Press the talk key. The number is Send complete list to a handset ¢...
-
Page 25: Last Number Redial List
Using the directory and lists Copying a displayed number to the Managing entries in the last directory number redial list Numbers displayed in a list, e.g. the calls list Press the key briefly. or the last number redial list, or during a call Select entry. -
Page 26: Using The Network Mailbox
§Save§ Press the display key. Press and hold (idle status). The setting for fast access applies to all Gigaset E49H handsets. Calling the network mailbox Press and hold. You are con- nected directly to the network mailbox. Press handsfree key d if required. -
Page 27: Eco Dect
You are helping to protect the environment intervals and then switched off. with your Gigaset. During a call, the wake-up call is only sig- nalled by a short tone. Reducing energy consumption... - Page 28 Using a handset as a room monitor If you accept an incoming call, the room Level monitor is suspended for the duration of the Set noise level sensitivity (Low or High). ¤ call, but the function remains activated. §Save§ Press to save the settings.
-
Page 29: Handset Settings
Handset settings Handset settings Starting a function With the handset in idle status, press the dis- Your handset is preconfigured, but you can play key briefly. change the settings to suit your individual The function menu is opened. requirements. Changing the display Quick access to functions language The display keys have a function preset by... -
Page 30: Setting The Screen Picture
Handset settings Setting the screen picture Setting the display lighting You can display a screen picture (picture or Depending on whether or not the handset is digital clock) when the handset is in idle sta- in the charging cradle, you can activate or tus. -
Page 31: Changing The Handsfree/Handset Volume
Handset settings Changing the handsfree/ Settings for individual functions handset volume Set the volume and melody depending on the type of signalling required. ¢ You can set the loudspeaker volume for Ringer Settings handsfree talking to five different levels and Select setting, e.g. -
Page 32: Activating/Deactivating Advisory Tones
Handset settings ¢ Activating/deactivating the alert Advisory Tones ¤ tone Change multiple line input: Key Tones In place of the ring tone you can activate an Select On or Off. alert tone. When you receive a call, you will hear a short tone ("Beep") instead of the ring Confirm. -
Page 33: Service (Customer Care)
Service Hotline: 1850 777 277 (6.6561 Ct./Call) Please note that if the Gigaset product is not sold by authorised dealers in the national territory the product may not be fully compatible with the national telephone network. It is clearly spec- ified on the box near the CE mark for which country/countries the equipment has been devel- oped. -
Page 34: Questions And Answers
Handset does not ring. manufacturing and/or material faults The ring tone is deactivated. ¥ ¢ within 24 months of purchase, Gigaset Activate the ring tone ( page 29). Communications shall, at its own option The other caller cannot hear you. -
Page 35: Guarantee Certificate
Guarantee manufacturing and/or material faults default becoming evident. within 24 months of purchase, Gigaset Ownership of devices or components Communications shall, at its own option replaced by and returned to Gigaset... -
Page 36: Environment
European Union. For procurement, distribution, use, service and Products sold in the Republic of Ireland disposal, are already evaluated during prod- the Guarantee is issued by Gigaset Com- uct and process design. munications UK Limited, Quatro House, Further information on environmentally Lyon Way, Camberley, Surrey, GU16 7ER. -
Page 37: Appendix
Appendix Ecological energy consumption Appendix ¢ The use of ECO DECT ( page 25) saves energy and is an active contribution towards Care protecting the environment. Disposal Wipe the base station and handset with a damp cloth (do not use solvent) or an antis- Batteries should not be disposed of in gen- tatic cloth. -
Page 38: Specifications
"Abc" mode to "123" and from "123" to "abc" development, the list of recommended bat- and from "abc" to "Abc" (upper case: teries in the FAQ section of the Gigaset Cus- 1st letter upper case, all others lower case). tomer Care pages is regularly updated: Press the hash key # before entering the www.gigaset.com/service... -
Page 39: Accessories
Mounting the charging cradle to the wall Accessories Ordering Gigaset products You can order Gigaset products from your specialist retailer. Only use original accessories. This will avoid possible health risks and damage to property, and also ensure that all the relevant regulations are complied with. -
Page 40: Index
Index Index Changing ....destination number ....display language . - Page 41 Index ......ECO DECT Icon ......
- Page 42 Index ..........Mains adapter Screen picture .
- Page 43 Index...