Viessmann Vitocrossal 200 Service Instructions For Contractors
Gas condensing boiler with matrix cylinder burner
Hide thumbs
Also See for Vitocrossal 200:
- Service instructions manual (96 pages) ,
- Service instructions for contractors (84 pages) ,
- Instructions manual (72 pages)
Table of Contents

Related Manuals for Viessmann Vitocrossal 200


Summary of Contents for Viessmann Vitocrossal 200
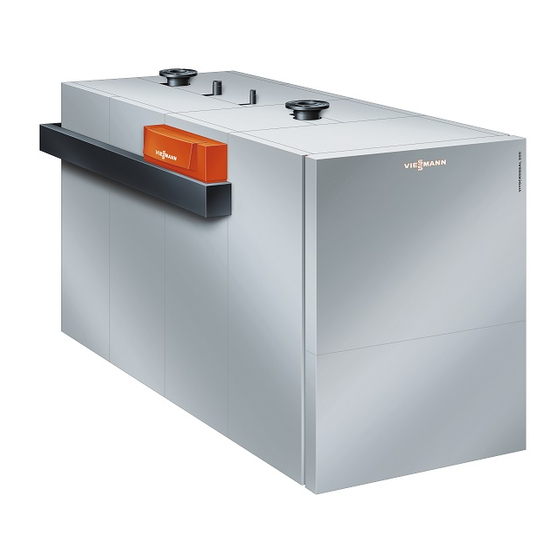
- Page 1 VIESMANN Service instructions for contractors Vitocrossal 200 Type CM2, 400 to 620 kW Gas condensing boiler with MatriX cylinder burner For applicability, see the last page VITOCROSSAL 200 Please keep safe. 5683 757 GB 9/2012...
- Page 2 Safety instructions Safety instructions Please follow these safety instructions closely to prevent accidents and mate- rial losses. Safety instructions explained ■ The system must be commissioned by the system installer or a qualified per- Danger son authorised by the installer. This symbol warns against the ■...
- Page 3 Replace faulty components only ■ Shut off the electricity supply to with original Viessmann spare the building from a safe place parts. (outside the building). If you smell flue gas Danger Flue gas can lead to life-threat- ening poisoning.
- Page 4 Installing non-author- ised components and making non-approved modifications or conversions can compromise safety and may invalidate our warranty. For replacements, use only orig- inal spare parts supplied or approved by Viessmann.
-
Page 5: Table Of Contents
Index Index Commissioning, inspection, maintenance Steps - commissioning, inspection and maintenance.......... Further details regarding the individual steps............Air pressure switch.................... 38 Burner control unit..................... 40 Troubleshooting Fault display......................47 Fault codes......................48 Faults without fault display................... 54 Burner control unit flow chart................55 Connection diagrams Burner control unit connection diagram.............. - Page 6 Index Index (cont.) Keyword index....................84...
-
Page 7: Commissioning, Inspection, Maintenance
Commissioning, inspection, maintenance Steps - commissioning, inspection and maintenance For further information regarding the individual steps, see the page indicated Commissioning steps Inspection steps Maintenance steps Page • 1. Checking the high limit safety cut-out setting..... • 2. Filling the heating system with water and venting..•... - Page 8 Commissioning, inspection, maintenance Steps - commissioning, inspection and… (cont.) Commissioning steps Inspection steps Maintenance steps Page • • 23. Checking the burner gauze assembly......31 • • 24. Checking the ignition electrodes and ionisation electrode................32 • • 25. Cleaning the burner............33 •...
-
Page 9: Further Details Regarding The Individual Steps
Commissioning, inspection, maintenance Further details regarding the individual steps Checking the high limit safety cut-out setting The high limit safety cut-out is preset to 110 °C. If this temperature needs to be changed, this can only be done by swap- ping the coding card. -
Page 10: Checking The Gas Type
Commissioning, inspection, maintenance Further details regarding the individual steps (cont.) Checking the gas type 1. Check the gas type and Wobbe index 2. In the delivered condition, the burner (Wo) with your gas supply utility. is set up for natural gas E. If required, ■... -
Page 11: Converting To Lpg P
Commissioning, inspection, maintenance Further details regarding the individual steps (cont.) 08. Secure the gas train (without restric- 13. Start the burner (see page 13). tor C and without rubber cork gas- Danger ket D) with inserted O-ring B to Escaping gas leads to a risk of flange E;... - Page 12 Commissioning, inspection, maintenance Further details regarding the individual steps (cont.) 07. Position O-ring B, LPG restrictor 12. Check all fittings for tightness. C and rubber cork gasket D. Danger Escaping gas leads to a risk Note of explosion. Bevel on the LPG restrictor must Check all fittings for gas face the gas train.
-
Page 13: Commissioning The System
Commissioning, inspection, maintenance Further details regarding the individual steps (cont.) 7. Press button S E to switch to the Status Service operating display. 8. Press button R G. The system will be restarted. Note Each time the system is restarted, the setting parameters will be shown. - Page 14 Commissioning, inspection, maintenance Further details regarding the individual steps (cont.) 6. Turn on system ON/OFF switch B at the control unit. Note The burner will start with a delay of approx. 3 min. If fault indicator A on the control unit illuminates and display C on the burner control unit flashes, initially reset the system.
-
Page 15: Reducing Operational Output (If Necessary)
Commissioning, inspection, maintenance Further details regarding the individual steps (cont.) 8. Check the function of the neutralising 9. Check all gaskets and plugs, and system (if installed), including the retighten if necessary. hydraulic seal in the siphon. Note Neutralising system operating We recommend you check all con- instructions nections on the heating water side for... -
Page 16: Checking Static Pressure And Supply Pressure
Commissioning, inspection, maintenance Further details regarding the individual steps (cont.) Checking static pressure and supply pressure Supply pressure 1. Start the burner. Note For commissioning, see page 13. Switch the burner to maximum heat- ing output. For this, activate the emis- sions test switch at the control unit. - Page 17 Commissioning, inspection, maintenance Further details regarding the individual steps (cont.) Supply pressure (flow pressure) Action Natural gas Less than 15 Less than 20 mbar Make no adjustments. Notify your gas supply mbar utility or LPG supplier. 15 to 18 mbar 20 to 42.5 mbar Please note: The boiler may only be operat- ed temporarily with these settings (emergen-...
-
Page 18: Checking The Rotary Damper Setting
Commissioning, inspection, maintenance Further details regarding the individual steps (cont.) Checking the rotary damper setting 1. Open the gas shut-off valve. 3. Check whether compensation cable A has been connected between the 2. Check the position of the rotary gas train and distributor pipe. damper in burner idle mode. -
Page 19: Checking The Co 2 Content
Commissioning, inspection, maintenance Further details regarding the individual steps (cont.) 5. Check the position of the rotary Rated Rated Rotary damper during the start-up phase. heating heat input damper Rotary damper windows B must be output setting almost closed for approx. 5 s. During this time, scale ring D is at the fol- (50/30 °C) lowing settings:... - Page 20 Commissioning, inspection, maintenance Further details regarding the individual steps (cont.) 3. Simultaneously hold down S E and ■ Under Status: "P" (= controlled stop) D for longer than 2 s. ■ Under Service: Modulation level in Display C will then show the follow- % ("100"...
- Page 21 Commissioning, inspection, maintenance Further details regarding the individual steps (cont.) test at lower heating output D until the service indicator 1. Press has decremented to "0" (lower heat- ing output). 2. Check the CO content at the flue pipe.
-
Page 22: Checking The Flue Gas Temperature 14. Displaying The Ionisation Current
Commissioning, inspection, maintenance Further details regarding the individual steps (cont.) Rated heating Rated heat input Permissible CO content output (50/30 °C) Natural gas E LPG P and LL in kW in kW in kW in % in % 8.5 ±0.2 10.1 ±0.2 Note 4. -
Page 23: Shutting Down The System
Commissioning, inspection, maintenance Further details regarding the individual steps (cont.) 07. Read the ionisation current. 10. Press until "5" is shown under Service. Note The ionisation current should be at 11. Press S. "5" will be displayed under least 3 µA for approx. 2 to 3 s after Status. - Page 24 Commissioning, inspection, maintenance Further details regarding the individual steps (cont.) 2. To remove the front panels, and also later the front top panel and side panel (on the hinged side of the boiler door), remove the M 5 screw on the top front panel.
- Page 25 Commissioning, inspection, maintenance Further details regarding the individual steps (cont.) 3. Unhook the bottom of the front panel from the side panels using the clips. 4. To remove the side panel and top panel, remove the M 6 screw (one per panel) on the top rail and on the bot- tom support.
-
Page 26: Opening The Boiler Door
Commissioning, inspection, maintenance Further details regarding the individual steps (cont.) 5. Disconnect power cable with plug fÖ. Then disconnect the burner 3A/3B cables with plugs §A/§B, aGA/ aGB, fÖ/aBH, fA and gD in addition to plug aVG from the burner control unit and pull out of the burner cas- ing. -
Page 27: Cleaning The Combustion Chamber And Heating Surfaces
Commissioning, inspection, maintenance Further details regarding the individual steps (cont.) Cleaning the combustion chamber and heating surfaces Thoroughly clean the combustion cham- ■ Remove coatings and surface disco- ber and heating surfaces with a water louration (yellow-brown) with slightly jet. acidic, chloride-free cleaning agents based on phosphoric acid (e.g. -
Page 28: Checking All Connections On The Heating Water Side For Leaks
Commissioning, inspection, maintenance Further details regarding the individual steps (cont.) Checking all connections on the heating water side for leaks Danger Note There is a risk of injury when Also check the connections to control working on pressurised compo- equipment and to the minimum pressure nents. - Page 29 If necessary, clean the condensate drain pipe again. 6. Clean the neutralising system (if installed) in accordance with the manufacturer's instructions. Neutralising system operating instructions Note You can obtain the neutralising agent from Viessmann quoting part no. 9521 702.
-
Page 30: Checking For Tightness On The Flue Side
Commissioning, inspection, maintenance Further details regarding the individual steps (cont.) Checking for tightness on the flue side 1. Check flue gas collector A and the boiler shell for tightness. Danger Escaping flue gas can cause health problems. Check gaskets on the flue gas collector and adjust, if required. -
Page 31: Checking The Condensate Drain And The Neutralising System (If Installed)
Commissioning, inspection, maintenance Further details regarding the individual steps (cont.) Checking the condensate drain and the neutralising system (if installed) Add water to the combustion chamber. Note The water must flow from the conden- sate drain pipe without back pressure. If necessary, clean the condensate drain pipe again. -
Page 32: Checking The Ignition Electrodes And Ionisation Electrode
Commissioning, inspection, maintenance Further details regarding the individual steps (cont.) Please note For cleaning the combustion Contamination on the burner chamber and flues, see boiler gauze assembly can result in the service instructions. system not working properly. When replacing the burner gauze Please note assembly it is important that The combustion chamber may... -
Page 33: Cleaning The Burner
Commissioning, inspection, maintenance Further details regarding the individual steps (cont.) Cleaning the burner 3. Remove Venturi mixing pipe D with gas train A and gas supply pipe B, and pull out connecting cables. 4. Pull out connecting cables a-Ö and a-ÖA from fan E and remove the fan. -
Page 34: Making The Electrical Burner Connection
Commissioning, inspection, maintenance Further details regarding the individual steps (cont.) 4. Close the boiler door and tighten the Danger screws on the boiler door evenly and Escaping gas leads to a risk of diagonally. explosion. Torque: 40 Nm. Check the fitting and gasket between the fan housing and the 5. -
Page 35: Checking Both Gas Train Valves Automatically For Gas Tightness
Commissioning, inspection, maintenance Further details regarding the individual steps (cont.) Checking both gas train valves automatically for gas tightness The burner control unit automatically In either case, the gas train must be checks the valves for tightness when the replaced. burner is started. -
Page 36: Checking The Water Quality
Commissioning, inspection, maintenance Further details regarding the individual steps (cont.) Checking the water quality Enter the amount of top-up water, the water hardness and the pH value in the tables. For water quality requirements, see page 75. Meter read- Fill and top- Total water Total hardness pH value Date... -
Page 37: Checking The Mixer For Ease Of Operation And Leaks
Commissioning, inspection, maintenance Further details regarding the individual steps (cont.) 2. If the pre-charge pressure of the 3. Top up with water until the charge expansion vessel is lower than the pressure is 0.1 to 0.2 bar higher than static system pressure, recharge with the pre-charge pressure of the nitrogen until the pre-charge pres- expansion vessel when the system... -
Page 38: Air Pressure Switch
Air pressure switch Air pressure switch Fan pressure monitoring function (LDW1) The fault shutdown is shown with fault indicators "F F5" and "F F7" on the burner control unit display (see page 40) and can be reset by pressing reset button B. Rated Rated Setting value... - Page 39 Air pressure switch Air pressure switch (cont.) Combustion chamber pressure monitoring function (LDW2) Rated Rated Setting value heating heat in- LDW2 output (50/30 °C) in kW in kW in mbar 5 ↑ To monitor the combustion chamber pressure, the switching threshold of air pressure switch 2 (LDW2) is monitored in all operating phases (except during safety and stabilising time).
-
Page 40: Burner Control Unit
Burner control unit Burner control unit Display and programming unit A display and programming unit is integrated into the burner control unit. The display indicates the relevant operating conditions, the service and parameter conditions as well as all fault and error messages. The display comprises four elements of Status Service... - Page 41 Burner control unit Burner control unit (cont.) Idle state check Status Service System tests Status Service Fan ramp-up Status Service Valve and/or relay test Status Service Pre-purge Status Service Pre-ignition Ignition Status Service Safety time Flame established Flame stabilisation Status Service...
- Page 42 Burner control unit Burner control unit (cont.) Operation with flame Status Service Status Service Reheat Post-purge Status Service Maintenance program No air pressure Status Service Maintenance program No gas pressure or mains undervoltage Status Service Forced ventilation when no flame was recognised Safety shutdown Status Service due to flame tear-off...
- Page 43 Burner control unit Burner control unit (cont.) Information display/configuration display The information display and the configuration display are activated from the operating display. The menu selection is activated by pressing key S for longer than 2 s. You can scroll through the menu points with / . A menu point is selected by pressing S again and will be displayed under Service.
- Page 44 Burner control unit Burner control unit (cont.) Configurations: Menu Description point Changeover from the operat- ing display of the burner con- trol unit phase to other process information Configuration of control func- tion operating parameters Menu point "5" is used to display the following process information: Sub-menu item Process information Units/scale...
- Page 45 Burner control unit Burner control unit (cont.) Menu point "6" is used to change the following operating parameters: Sub- Parameter Units/scale Delivered condi- menu tion item Maximum operational out- % of rated output 100 % Gas type 0 = NG (natural gas) 1 = LPG (liquid gas) Not assigned —...
- Page 46 Burner control unit Burner control unit (cont.) Resetting operating parameters to their delivered condition To reset all operating parameters to their until "0" is shown under Service. delivered condition, press the following keys: 5. S "1" is shown under Status and "dEL"...
-
Page 47: Troubleshooting
Troubleshooting Fault display Fault display The fault display is activated automatically if the burner control unit switches to a fault state. The most recent fault will then be displayed. The fault LED is also illuminated in the case of a non-lockout fault or flashes together with the fault code in the case of a lockout fault. -
Page 48: Fault Codes
Troubleshooting Fault display (cont.) 6. / to scroll through the fault until "3" is shown under Service. codes. 5. S "1" is shown under Status and To clear the fault memory from the oper- "dEL" under Service. ating display, press the following keys: 6. - Page 49 Troubleshooting Fault codes (cont.) Displayed System characteris- Cause Measures fault code tics F 83 Burner control unit in Sensor drift, flue Check lead and sensors a fault state gas temperature (A and B), replace sensor sensor (A or B), if required burner control unit F 88 Burner control unit in...
- Page 50 Troubleshooting Fault codes (cont.) Displayed System characteris- Cause Measures fault code tics F E2 Shortage of gas to Gas valve does not Replace the gas train gas pressure switch open; gas valve 2; valve leak test leaking; gas pres- sure switch 2 faul- F E4 Burner shuts down Multiple detection...
- Page 51 Troubleshooting Fault codes (cont.) Displayed System characteris- Cause Measures fault code tics F F2 Burner control unit in Excessive boiler Wait until temperature a fault state; system water temperature falls below the permiss. cools down boiler water temperature; reset burner control unit F F3 Ionisation flame mon- Gas train not gas-...
- Page 52 Troubleshooting Fault codes (cont.) Displayed System characteris- Cause Measures fault code tics F F4 Flame does not build Gas train does not Check connecting cable; during the safety open check gas train and re- time, no signal cap- place if required tured by the ionisa- tion flame monitor F F4...
- Page 53 Troubleshooting Fault codes (cont.) Displayed System characteris- Cause Measures fault code tics F F8 Flame tears off dur- Combustion char- Adjust burner (see from ing operation acteristics not ide- page 19) F F9 Fan not running; fan Fan faulty; cables Check cables;...
-
Page 54: Faults Without Fault Display
Troubleshooting Fault codes (cont.) Internal system fault Internal system faults are created if a perfect program sequence can no longer be guaranteed. Display System characteris- Cause Measures tics F E5, F EC, Fault around burner Internal system Reset burner control unit. F Ed, F EE, control unit fault and EMC... -
Page 55: Burner Control Unit Flow Chart
Burner control unit flow chart Burner control unit flow chart... - Page 56 Burner control unit flow chart Burner control unit flow chart (cont.) State description: Phase Display Description Duration System "A" System start 10 s start Fan ramp-up, system start max. 20 s Forced ventilation, system start 20 s Valve test "P" Fan ramp-up for valve test max.
-
Page 57: Connection Diagrams
Connection diagrams Burner control unit connection diagram A Burner control unit VUC 310 K Gas pressure switch 2 H Fan motor with PWM control and L Air pressure switch 1 feedback M Gas pressure switch 1... - Page 58 Connection diagrams Burner control unit connection diagram (cont.) N Air pressure switch 2 R Boiler water temperature sensor 2 P Flue gas temperature sensor 2 S Boiler water temperature sensor 1 Q Flue gas temperature sensor 1 T Display and programming unit...
- Page 59 Connection diagrams Burner control unit connection diagram (cont.) A Burner control unit VUC 310 D Servomotor for rotary damper B Flame monitoring via an ionisation E Ignition unit current F Fuel valve BV1 C Vitotronic control unit G Fuel valve BV2...
- Page 60 Connection diagrams Burner control unit connection diagram (cont.) X Plug 150, STB-STB H1 Hours run meter, modulation H2 Fault message F1 Backup fuse F2 Backup fuse S1 ON/OFF switch...
-
Page 61: Connection Diagram For Mains Filter Unit
Connection diagrams Connection diagram for mains filter unit a-Ö Mains filter To the fan Contactor fÖ Power supply 230 V~/50 Hz Flue gas temperature sensor fÖ/aBH Control unit Boiler water temperature sen- Flue gas damper to a-Ö burner control unit Air pressure switch 2... - Page 62 Connection diagrams Connection diagram for mains filter unit (cont.) Note The power cable must be protected. The maximum fuse rating is 16 A. Make the power supply (230 V~/50 Hz) via a permanent connection.
-
Page 63: Component Overview
Component overview Component overview A Burner frame G Gas pressure switch B Air pressure switch 1 H Rotary damper with servomotor C Air pressure switch 2 K Venturi mixing pipe D Display and programming unit L Gas fan E Gas train M Burner gauze assembly F Gas supply pipe N Ignition electrodes... - Page 64 Component overview Component overview (cont.) O Ionisation electrode R Burner control unit P Ignition unit S Mains filter unit with contactor...
-
Page 65: Control Unit
Control unit Adjusting codes at the control unit Vitotronic service instructions... -
Page 66: Parts Lists
Parts lists Ordering parts The following information is required: Standard parts are available from your ■ Serial no. (see type plate A) local supplier. ■ Assembly (from this parts list) ■ Position number of the individual part within the assembly (from this parts list) -
Page 67: Overview Of The Assemblies
Parts lists Overview of the assemblies 0001 0003 0002 Type plate Unnumbered Burner assembly (see page 71) 0001 Boiler body assembly 0002 Thermal insulation For burner serial no. see burner type plate A (see assembly 0003 Cable kit assembly page 73) (see page 70) -
Page 68: Boiler Body Assembly
Parts lists Overview of the assemblies (cont.) Not shown 0006 Touch-up paint stick, Vitosilver 0003 Fixing elements 0007 Installation instructions 0004 Decorative strip 0008 Service instructions 0005 Touch-up spray paint, Vitosilver Boiler body assembly 0001 Flue gas cover with gasket 0006 Boiler door 0002 Stench trap 0007 Bolts 12 H11 x 85 x 80... -
Page 69: Thermal Insulation Assembly
Parts lists Thermal insulation assembly 0001 Front l.h. side panel 0018 Top panel, centre 0002 Front r.h. side panel 0019 Top panel, front 0003 Side panel, centre 0020 Top panel, left back 0004 Side panel, control unit 0021 Top panel, right back 0005 Side panel 0022 Thermal insulation mat, front 0006 Back l.h. -
Page 70: Cable Kit Assembly
Parts lists Thermal insulation assembly (cont.) 0017 0020 0019 0021 0028 0030 0018 0029 0006 0024 0003 0010 0027 0016 0009 0026 0025 0024 0013 0008 0012 0001 0011 0004 0023 0024 0015 0022 0008 0031 0014 0007 0003 0005 0002 Cable kit assembly 0001 Connecting lead for boiler water... -
Page 71: Burner Assembly
Parts lists Cable kit assembly (cont.) 0001 0002 0003 0004 0005 0006 Burner assembly 0001 Burner frame 0005 Ignition electrodes with O-rings 0002 Small and fixing parts (wearing part) 0003 Burner gauze assembly (wearing 0006 Ignition cable part) 0007 Ignition transformer 0004 Burner gauze assembly gasket 0008 Ionisation electrode with O-ring (wearing part) - Page 72 Parts lists Burner assembly (cont.) 0009 Ionisation cable 0025 Mains filter unit 0010 Burner control unit 0026 Contactor 0011 Programming unit 0027 Flange gasket (wearing part) 0012 Coding card 0028 Installation instructions 0013 Servomotor 0029 Service instructions 0014 Gas fan 0030 Connecting cable gF for ignition 0015 Gas fan gasket (wearing part) transformer...
- Page 73 Parts lists Burner assembly (cont.) 0037 0036 0025 0026 0007 0010 0011 0003 0012 0004 0006 0027 0005 0001 0008 0015 0009 0024 0014 0030 0031 0021 0032 0023 0033 0019 0034 0020 0035 0022 0018 0013 0002 0016 0029 0028 0017...
-
Page 74: Report
Report Report Setting and test values Commission- Maintenance/ Service Static pressure mbar Supply pressure (flow pressure) = for natural gas E mbar = for natural gas LL mbar = for LPG P mbar Tick gas type Carbon dioxide content CO ■... - Page 75 Water quality requirements Note The manufacturer's warranty excludes Adherence to the following requirements damage due to corrosion and scaling. is a warranty condition. Prevention of damage due to scaling Prevent excessive scale build-up (calcium carbonate) on the heating surfaces. For heating systems with operating temperatures up to 100 °C, the directive VDI 2035-1 "Prevention of heating system damage –...
- Page 76 Water quality requirements (cont.) ■ In systems > 50 kW, install a water ■ In multi boiler systems, start all boilers meter to record the volume of the fill simultaneously to prevent the entire and top-up water. Enter the volume of limescale deposit settling in the heat the fill water and the water hardness transfer area of just one boiler.
- Page 77 Water quality requirements (cont.) Prevention of damage due to corrosion on the water side The corrosion resistance of ferrous Sealed unvented systems – e.g. those materials on the heating water side of equipped with an expansion vessel – heating systems and boilers depends on offer good protection against the ingress the absence of oxygen in the heating of airborne oxygen into the system, if...
- Page 78 Water quality requirements (cont.) Where chemicals are used as part of the corrosion protection, we recommend that the manufacturer of the chemicals issues a certificate of suitability of the additives with regard to the boiler mate- rials and the materials of the other heat- ing system components.
-
Page 79: Specification
Specification Specification Gas boiler, category II 2ELL3P Rated boiler heating output = 50/30 °C 80(100 )-400 100(125 )-500 124(155 )-620 = 80/60 °C 74(93 )-370 92(115 )-460 115(144 )-575 Rated heat input 76(95 )-381 95(119 )-474 119(148 )-593 CE designation CE-0085BQ0021 Connection values Relative to the max. - Page 80 Specification Specification (cont.) Gas restrictor dimensions (natural gas E and LPG P) Rated heating Rated heat input Dim. a output (50/30 °C) Natural gas E LPG P (G31) (G20) in kW in kW in mm in mm 17.8 13.0 21.5 14.8 24.2 17.2...
-
Page 81: Certificates
The product characteristics determined as system values for the product Vitocrossal 200, type CM2, as part of EC type testing according to the Efficiency Directive can be used to assess the energy consumption of heating and ventilation equipment to DIN V 4701-10, as specified by the EnEV [Germany] (see specification table). -
Page 82: Declaration Of Conformity For Boiler >400 Kw
2009/142/EC The product characteristics determined as system values for the product Vitocrossal 200, type CM2 (see specification table), can be utilised to assess the energy consumption of heating and ventilation equipment to DIN V 4701-10 which is specified by the EnEV [Germany]. -
Page 83: Manufacturer's Certificate
We, Viessmann Werke GmbH & Co KG, D-35107 Allendorf, confirm that the following product meets the following conditions specified by the 1st German Immissions Order (BImSchV): Vitocrossal 200, type CM2, 400 to 620 (370 to 575) kW with MatriX cylinder burner ■ NO limits according to paragraph 6 (1). - Page 84 Keyword index Keyword index Conversion to Air pressure switch ■ LPG P..........11 ■ Combustion chamber pressure moni- Converting to toring (LDW2).........39 ■ Natural gas LL........10 ■ Fan pressure monitoring (LDW1)...38 Diagnosis table........48 Boiler door Display and programming unit ■ Opening..........26 ■...
- Page 85 Keyword index Keyword index (cont.) Siphon, filling with water......9 Neutralising system......31 Specification........79 Static pressure check......16 Supply pressure check.......16 Parts lists...........66 System ■ Commissioning.......13 ■ Filling with water and venting...9 Reducing operational output....15 ■ Shutting down.........23 Reducing the operational output..45 Report..........74 Resetting operating parameters..46 Water quality Restrictor installation (for LPG P)..11...
- Page 88 Applicability Serial No.: 7592253 7591767 7485714 7511573 7511574 7511575 Viessmann Werke GmbH&Co KG Viessmann Limited D-35107 Allendorf Hortonwood 30, Telford Telephone: +49 6452 70-0 Shropshire, TF1 7YP, GB Fax: +49 6452 70-2780 Telephone: +44 1952 675000 www.viessmann.com Fax: +44 1952 675040...