Moffat Waldorf 800 Series Installation And Operation Manual
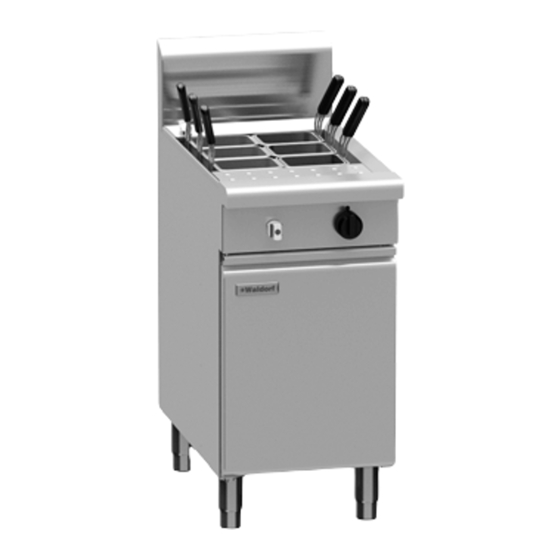
Electric pasta cooker
Hide thumbs
Also See for Waldorf 800 Series:
- Installation and operation manual (36 pages) ,
- Installation and operation manual (34 pages) ,
- Installation and operation manual (26 pages)
Table of Contents
Advertisement
Quick Links
Advertisement
Table of Contents

Related Manuals for Moffat Waldorf 800 Series


Summary of Contents for Moffat Waldorf 800 Series
- Page 1 I n s t a l l a t i o n a n d O p e r a t i o n M a n u a l Electric Pasta Cooker PC8140E PCL8 14 0 E PCB8140E PCLB8140E PC8140E- 7 P C L 8 1 4 0 E - 7 PCB8140E-7...
- Page 2 The reproduction or copying of any part of this manual by any means whatsoever is strictly forbidden unless authorized previously in writing by the manufacturer. In line with policy to continually develop and improve its products, Moffat Ltd. reserves the right to change the specifications and design without prior notice.
-
Page 3: Table Of Contents
Contents PC(L)(B)8140E ELECTRIC PASTA COOKER - (Single Tank - 40 Ltr) Introduction .................... 2 Specifications ..................3 Model Numbers Covered in this Specification General Optional Accessories Electrical Supply Requirements Electrical Connection Water Supply Requirements Dimensions ....................4 Installation ....................5 Installation Requirements Unpacking Location... -
Page 4: Introduction
Introduction We are confident that you will be delighted with your WALDORF Electric Pasta Cooker and it will become a most valued appliance in your commercial kitchen. To ensure you receive the utmost benefit from your new WALDORF Appliance, there are two important things you can do. -
Page 5: Specifications
Specifications Model Numbers Covered in this Specification PC[1]8140E PASTA COOKER (10.5 kW). PC[1]8140E-7 PASTA COOKER (7.0 kW). NOTE: [1]: - Model Options; - Standard. - Low Back. - Bold Front. - Low Back & Bold Front. General A commercial heavy duty, electric, high performance Pasta Cooker designed for cooking in a commercial high production output site. -
Page 6: Dimensions
Dimensions PC(1)8140E-Pasta Cooker... -
Page 7: Installation
Installation Installation Requirements NOTE: It is most important that this appliance is installed correctly and that operation is correct before use. Installation shall comply with local, electrical health and safety requirements. Waldorf Electric Pasta Cookers are designed to provide years of satisfactory service and correct installation is essential to achieve the best performance, efficiency and trouble-free operation. -
Page 8: Assembly
Installation Assembly This model is delivered completely assembled. Ensure that the adjustable feet are securely attached. NOTE: This appliance is fitted with adjustable feet to enable the appliance to be positioned securely and level. This should be carried out on completion of the electrical connection. -
Page 9: Drainage Connection
Installation Drainage Connection The water is drained from the appliance by means of a valve located behind the front access door. A waste water tundish must be fitted below the appliance drain outlet. This should be a minimum of 127mm (5”) major diameter. -
Page 10: Operation
Operation Operation Guide AUTIO N This appliance is for professional use and is only to be used by qualified persons. Only qualified service persons are to carry out installation and servicing operations. Components having adjustments protected (e.g. paint sealed) manufacturer should not be adjusted by the user / operator. -
Page 11: Before Use
Operation Before Use WARNING: REAT CARE MUST BE TAKEN BY THE OPERATOR TO USE THE PASTA COOKER SAFELY TO GUARD AGAINST THE RISK OF INJURY AND FIRE DO NOT LEAVE THE PASTA COOKER UNATTENDED DURING OPERATION DO NOT OVER FILL THE WATER IN THE PASTA COOKER ABOVE THE UPPER FILL LEVEL MARK ... -
Page 12: Operating The Pasta Cooker
Operation Operating the Pasta Cooker AUTIO N Do NOT turn ‘On’ the element if the tank is empty (No Water). Ensure that the tank is filled to the correct level before turning ‘On’ the element. Ensure that the pasta cooker tank is full of water to the upper fill mark. Check that the electrical supply is turned ‘On’... -
Page 13: Cleaning And Maintenance
Cleaning and Maintenance General WARNING: DO NOT USE FLAMMIBLE SOLVENTS AND CLEANING AIDS ON OR IN CLOSE PROXIMITY TO THE PASTA COOKER HOT. WHILST THE COOKER IS STILL AUTIO N Always turn off the electrical supply at the mains supply before cleaning. This appliance is not water proof. -
Page 14: After Each Use
Cleaning and Maintenance Locking Slide locked position Locking Slide unlocked position Fig 3 Fig 4 After Each Use WARNING: OT WATER WILL SCALD DO NOT RUSH THIS JOB Clean the interior of the pan regularly after each use. Do not use wire brushes on the pan. Clean using a mild detergent and a hot water solution using soft cloth or a soft bristled brush. -
Page 15: Weekly Cleaning
Cleaning and Maintenance Weekly Cleaning WARNING: O NOT ATTEMPT TO MOVE THE ASTA OOKER WHILST THE COOKER IS FULL OF WATER EFORE ATTEMPTING TO MOVE THE ASTA OOKER ENSURE THAT ALL THE WATER HAS BEEN DRAINED FROM THE TANK EFER TO THE INFORMATION ON THE PREVIOUS PAGE ON HOW TO DRAIN THE WATER FROM THE ASTA OOKER... -
Page 16: Fault Finding
Fault Finding This section provides an easy reference guide to the more common problems that may occur during the operation of your equipment. The fault finding guide in this section is intended to help you correct, or at least accurately diagnose problems with your equipment. Although this section covers the most common problems reported, you may encounter a problem not covered in this section. -
Page 17: Wiring Schematic
Wiring Schematic PC8140E Pasta Cooker ELEMENTS 2.3KW each (PC8140-7) 3.5KW each (PC8140) Electrical Supply Requirements Standard Ex-Factory Model Convertible to: PC8140E 10.5 kW 3P+N+E, L1=L2=L3 = 15A @ 240V 1P+N+E, 44A @ 240V PC8140E-7 7.0 kW 1P+N+E, 30A @ 240V 3P+N+E, L1=L2=L3 = 10A @ 240V... -
Page 18: Replacement Parts List
Replacement Parts List Replacement Parts List IMPORTANT: Only genuine authorized replacement parts should be used for the servicing and repair of this appliance. The instructions supplied with the parts should be followed when replacing components. For further information and servicing instructions, contact your nearest authorized service branch (contact details are as shown on the reverse of the front cover of this manual).