Edimax EW-7206APg User Manual
Wireless lan access point
Hide thumbs
Also See for EW-7206APg:
- User manual (47 pages) ,
- Quick install manual (16 pages) ,
- Quick installation manual (12 pages)
Table of Contents
Advertisement
Advertisement
Table of Contents

Related Manuals for Edimax EW-7206APg


Summary of Contents for Edimax EW-7206APg
- Page 1 Wireless LAN Access Point EW-7206APg / EW-7206PDg User’s Manual...
-
Page 2: Table Of Contents
Chapter 1Introduction 1.1 Package Contents ... 3 1.2 Features ... 3 1.3 Specifications ... 3 1.4 Physical Description ... 4 Chapter 2Wireless LAN Access Point Connection Chapter 3 Wireless LAN Access Point Configuration 3.1 Getting Started ... 6 3.2 Configuring the Access Point ... 10 3.2.1 Status and Information ... -
Page 3: Chapter 1Introduction
Frequency Band: 2.400~2.4835GHz (Industrial Scientific Medical Band) Modulation: CCK@11/5.5Mbps, DQPSK@2Mbps and DBPSK@1Mbps Radio Technology: Direct Sequence Spread Spectrum (DSSS) Antenna: External detachable dipole antenna (with RP-SMA connector), 2dBi for EW-7206Apg and 4dBi for Connectors: 10/100Mbps RJ-45 x 1 Power: 12VDC, 0.4A... -
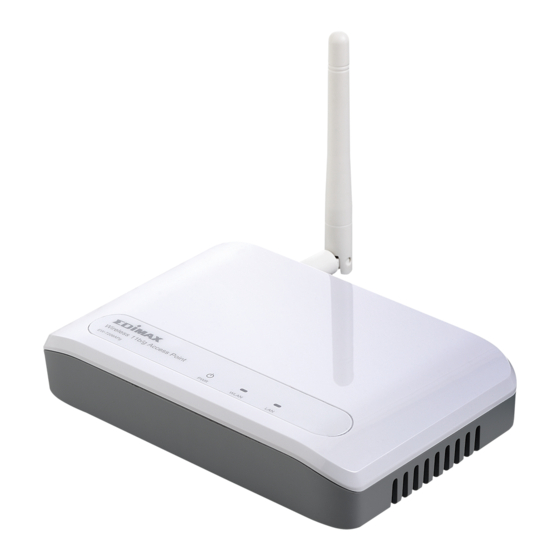
Page 4: Physical Description
(Warning: Your settings will be deleted and replaced with the factory default settings). Status Power is supplied. No Power. Flash Antenna is transmitting or receiving data. Antenna is not transmitting or receiving data. A valid link is established. Flash It is transmitting or receiving data. No link is established. EW-7206APg EW-7206PDg Description... -
Page 5: Chapter 2Wireless Lan Access Point Connection
Chapter 2 Wireless LAN Access Point Connection Locate an optimum location for the Wireless LAN Access Point. The best location for your Access Point is usually at the center of your wireless network, with line of sight to all of your wireless Connect the Wireless LAN Access Point to your router, hub or switch. -
Page 6: Chapter 3 Wireless Lan Access Point Configuration
Chapter 3 Wireless LAN Access Point Configuration 3 . 1 G et t in g Sta rt e d This Access Point provides web-based configuration page allowing you to configure from wired or wireless stations. Follow the instructions below to do the configuration. From Wired Station 1. - Page 7 1b) Windows XP 1: Click the Start button and select Settings, then click Network Connections. The Network Connections window will appear. 2: Double-click Local Area Connection icon. The Local Area Connection window will appear. 3: Check your list of Network Components. You should see Internet Protocol [TCP/IP] on your list. Select it and click the Properties button.
-
Page 8: Configuration Via Windows Nt
1c) Windows 2000 Click the Start button and select Settings, then click Control Panel. The Control Panel window will appear. Double-click Network and Dial-up Connections icon. In the Network and Dial-up Connection window, double-click Local Area Connection icon. The Local Area Connection window will appear. -
Page 9: Configuration From Wireless Station
3. A screen will be popped up and request you to enter user name and password. The default user name and password is as follows. User Name: Admin Password: 1234 Enter the default user name and password, then press OK button directly. 4. -
Page 10: Configuring The Access Point
3 . 2 C o nf i gu r ing t he A cces s P o in t Every time when you have finished modifying a setting page and click “Apply” button, this page will pop-up. The settings have been successfully saved but will not take effect immediately. You have to restart the access point to make the new settings take effect. - Page 11 AP mode setting page: Station-Ad Hoc mode setting page: Station-Infrastructure mode setting page:...
- Page 12 AP Bridge-Point to Point mode setting page: AP Bridge-Point to Multi-Point mode setting page: AP Bridge-WDS mode setting page:...
- Page 13 Universal Repeater mode setting page:...
- Page 14 Parameter ESSID Band Channel Number MAC Address WLAN MAC Root AP SSID Set Security Associated Clients Wireless Site Survey Click Apply button at the bottom of the screen to save the above configurations. You can now configure other advance sections or start using the Access Point. The ESSID (up to 31 printable ASCII characters) is the unique name in a WLAN.
- Page 15 Set Security “Set Security” let you setup the wireless security for the data transmission between the bridged access points in “AP Bridge-Point to Point mode”, “AP Bridge-Point to Multi-Point mode” or “AP Bridge-WDS mode”. It provides “WEP 64bits”, “WEP 128bits”, “WPA (TKIP)”, “WPA2 (AES)” encryption methods. Parameter Encryption Key Format...
- Page 16 Active Wireless Client Table “Active Wireless Client Table” records the status of all active wireless stations that are connecting to the access point. You can lookup the MAC Address, Number of Transmitted Packets and Number of Received Packets of each active wireless client in this table. Parameter MAC Address Tx Packet...
-
Page 17: Advanced Setting
Wireless Site Survey When this access point is in “Station-Ad Hoc mode”, “Station-Infrastructure mode” or “Universal Repeater mode”, it should associate with an access point or wireless station and connect it to your wireless LAN. “Wireless Site Survey” searches for all available access points near by. You can select one access point listed in this table. - Page 18 Parameter Authentication Type Fragment Threshold RTS Threshold Beacon Interval Data Rate Preamble Type Broadcast ESSID IAPP 802.11g Protection Click Apply button at the bottom of the screen to save the above configurations. You can now configure other advance sections or start using the Access Point. There are two authentication types: “Open System”...
-
Page 19: Security
3 . 2 .4 S ec ur i t y This Access Point provides complete wireless LAN security functions, include WEP, IEEE 802.11x, IEEE 802.11x with WEP, WPA with pre-shared key and WPA with RADIUS. With these security functions, you can prevent your wireless LAN from illegal access. - Page 20 Parameter Key Length Key Format Default Tx Key Key 1 - Key 4 Click Apply button at the bottom of the screen to save the above configurations. You can now configure other advance sections or start using the Access Point. 802.1x only IEEE 802.1x is an authentication protocol.
- Page 21 Parameter RADIUS Server IP address The IP address of external RADIUS server. RADIUS Server Port RADIUS Server Password Click Apply button at the bottom of the screen to save the above configurations. You can now configure other advance sections or start using the Access Point. 802.1x WEP static key IEEE 802.1x is an authentication protocol.
- Page 22 WPA pre-shared key Wi-Fi Protected Access (WPA) is an advanced security standard. You can use a pre-shared key to authenticate wireless stations and encrypt data during communication. It uses TKIP or CCMP(AES) to change the encryption key frequently. So the encryption key is not easy to be broken by hackers. This can improve security very much.
- Page 23 WPA RADIUS Wi-Fi Protected Access (WPA) is an advanced security standard. You can use an external RADIUS server to authenticate wireless stations and provide the session key to encrypt data during communication. It uses TKIP or CCMP(AES) to change the encryption key frequently. This can improve security very much. You can use WPA RADIUS encryption in “AP mode”, “AP Bridge-WDS mode”...
-
Page 24: Mac Address Filtering
3 . 2 .5 MAC A dd re ss F i l t er in g This Access Point provides MAC Address Filtering, which prevents the unauthorized MAC Addresses from accessing your wireless network. Parameter Enable Wireless Access Control MAC Address Filtering Table Add MAC address into the table... -
Page 25: System Utility
3 . 2 .6 S ys t e m U t i l i t y From here, you can define the Access Point’s IP Address and Login Password and enable the Access Point to be a DHCP Server. You can change AP’s IP address to meet your network IP range so you can log in to set up page easily next time. - Page 26 D H C P Ser ve r S e t t in g DHCP Server will automatically give your LAN client an IP address. If the DHCP is not enabled then you’ll have to manually set your LAN client’s IP address. There is only one DHCP server allowed in one network. If you have a router or other DHCP server, please keep this feature disabled.
-
Page 27: Configuration Tool
3 . 2 .7 C o nf i gu rati o n T oo l The Configuration Tools screen allows you to save (Backup) the Access Point’s current configuration setting. Saving the configuration settings provides an added protection and convenience should problems occur with the Access Point and you have to reset to factory default. -
Page 28: Firmware Upgrade
3 . 2 .8 F i r mw are U p gr ad e This page allows you to upgrade the Access Point’s firmware. Parameter Firmware Upgrade Once you’ve selected the new firmware file, click Apply button at the bottom of the screen to start the upgrade process. -
Page 29: Reset
3 .2 .9 Re set You can reset the Access Point’s system should any problem exist. The reset function essentially Re-boots your Access Point’s system. Parameter Reset Description In the event that the system stops responding correctly or in some way stops functioning, you can perform a reset. -
Page 30: Chapter 4 Troubleshooting
Chapter 4 Troubleshooting This chapter provides solutions to problems usually encountered during the installation and operation of the Access Point. How to manually find your PC’s IP and MAC Address? 1) In Windows, open the Command Prompt program 2) Type ipconfig /all and Enter Your PC’s IP address is the one entitled IP address Your PC’s MAC Address is the one entitled Physical Address What is Ad-hoc?