Edimax EW-7206APg Quick Installation Manual
Hide thumbs
Also See for EW-7206APg:
- User manual (47 pages) ,
- Quick install manual (16 pages) ,
- Quick installation manual (10 pages)

Related Manuals for Edimax EW-7206APg


Summary of Contents for Edimax EW-7206APg
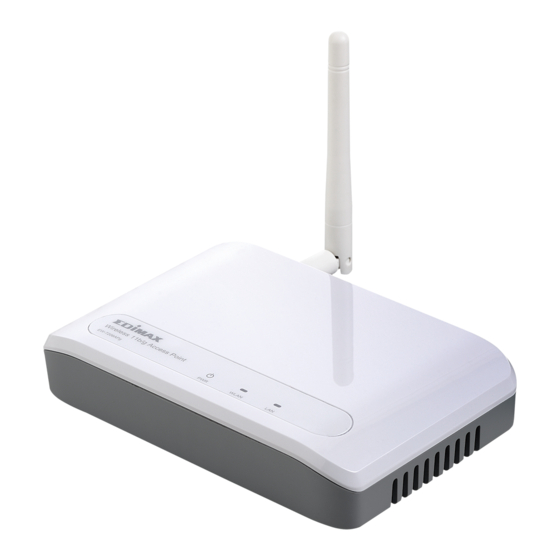
- Page 1 Edimax EW‐7206APg Wireless Access Point Quick Installation Guide 1 Edimax Technology (UK) Limited | Quick Installation Guide (EW‐7206APg) www.edimax.co.uk ...
- Page 2 Step 1: EW‐7206APg to the computer 1. Connect EW‐7206Apg directly to a computer with a LAN cable. 2. In the computer, click on Control Panel, Network Connection, Right‐click on Local Area Connection, go to it's Properties. 3. Select Internet Protocol (TCP/IP), click on Properties. 4. Select Use the Following IP Address, enter 192.168.2.2 and subnet mask is 255.255.255.0. 5. Click OK to save the setting. 2 Edimax Technology (UK) Limited | Quick Installation Guide (EW‐7206APg) www.edimax.co.uk ...
- Page 3 Step 2: Change the IP Address of EW‐7206APg (according to your router’s IP range) 1. Login to EW‐7206APg, open Internet Explorer, at the address bar, type 192.168.2.1 and press Enter. 2. Login admin/1234. 3. Click on System Utility, change Management IP to your router’s IP range. ‐ IP Address ‐ Subnet Mask ‐ Gateway Address is your router’s IP address. ‐ For example, use 192.168.2.50, 255.255.255.0, 192.168.2.1 4. Click Apply to save the setting. Wait for 10‐15 seconds, you will see the LED light on EW‐7206APg goes off and comes back on. 5. The EW‐7206APg setup page on 192.168.2.1 will be disconnected, because EW‐ 7206APg has new IP Address (192.168.2.50). 6. Close the Internet Explorer. 3 Edimax Technology (UK) Limited | Quick Installation Guide (EW‐7206APg) www.edimax.co.uk ...
-
Page 4: Step 3: Configure The Access Point
Step 3: Configure the Access Point 1. In the computer, click on Control Panel, Network Connection, Right‐click on Local Area Connection, go to it's Properties. 2. Select Internet Protocol (TCP/IP), click on Properties. 3. Select Obtain IP Address Automatically and click OK to save the setting. 4. Connect the computer to the router. 5. Connect EW‐7206APg with a LAN cable to the router. LAN cable LAN cable Router: EW‐7206APg: 192.168.2.1 192.168.2.50 4 Edimax Technology (UK) Limited | Quick Installation Guide (EW‐7206APg) www.edimax.co.uk ... - Page 5 6. Login to EW‐7206Apg. Open Internet Explorer, at the address bar, type the new IP address (192.168.2.50) and press Enter. 7. Login admin/1234. 8. Click on Basic Setting, select AP. You may change the ESSID. 9. Click Apply to save the setting. 10. Configure wireless security, click on Security, select WPA pre‐shared key. • Select WPA(TKIP) • Select Passphare • Enter your Pre‐Shared Key. (You will use this key to connect to EW‐7206APg wirelessly). 11. Click Apply to save the setting. 5 Edimax Technology (UK) Limited | Quick Installation Guide (EW‐7206APg) www.edimax.co.uk ...
- Page 6 12. Do a ping test to EW‐7206Apg (eg: 192.168.2.50), if you got Reply from Pinging, the configuration is completed and the Access Point is working. 13. To ping, click on Start>Run> type cmd and click OK. At the command prompt, type ‘ping 192.168.2.50’ and press Enter. 14. You can now connect wirelessly to EW‐7206APg access point with WPA wireless security. Connect wirelessly to EW‐7206APG 6 Edimax Technology (UK) Limited | Quick Installation Guide (EW‐7206APg) www.edimax.co.uk ...
- Page 7 Step 4: Connect to the access point with WPA Wireless Security To connect the computer to the EW‐7206APg with the WPA wireless security, please do the following: In Windows XP with Service Pack 2 A) If you use Windows to configure the wireless connection. 1) Go to Control Panel, click on Network Connection, Right‐click on Wireless Network Connection go to it's Properties. 7 Edimax Technology (UK) Limited | Quick Installation Guide (EW‐7206APg) www.edimax.co.uk ...
- Page 8 2) Click on Wireless Network tab. Delete all entries in Preferred Network and click OK to save the setting. 8 Edimax Technology (UK) Limited | Quick Installation Guide (EW‐7206APg) www.edimax.co.uk ...
- Page 9 3) In Network Connection again, Right‐click on Wireless Network Connection and click View Available Wireless Network. 4) You will find the access point detected in the network list. And it will show that it's a secure network. Select the access point and click Connect. When it prompts you for the WPA key, enter the WPA key to connect. 9 Edimax Technology (UK) Limited | Quick Installation Guide (EW‐7206APg) www.edimax.co.uk ...
- Page 10 B) If you use Edimax wireless adapter/card, please use the Utility to re‐connect the wireless connection with the WPA Pre‐shared Key. Note: Windows 2000 or Windows XP with Service Pack 1 doesn’t support WPA security. If you are using Windows 2000 or Windows XP with Service Pack 1, please contact us for guideline to use WEP security. In Windows Vista 1) Click on Start > Connect To. 10 Edimax Technology (UK) Limited | Quick Installation Guide (EW‐7206APg) www.edimax.co.uk ...
- Page 11 2) Select the access point and click Connect. It will show that it’s a Security‐enabled network. 3) When it prompts for the security key, key the Pre‐shared Key you have set in the access point and click Connect. 11 Edimax Technology (UK) Limited | Quick Installation Guide (EW‐7206APg) www.edimax.co.uk ...
- Page 12 4) Select Save this network and Save this connection automatically. Then, you will be connected. 12 Edimax Technology (UK) Limited | Quick Installation Guide (EW‐7206APg) www.edimax.co.uk ...