
Related Manuals for King Industrial KC-790FX


Summary of Contents for King Industrial KC-790FX
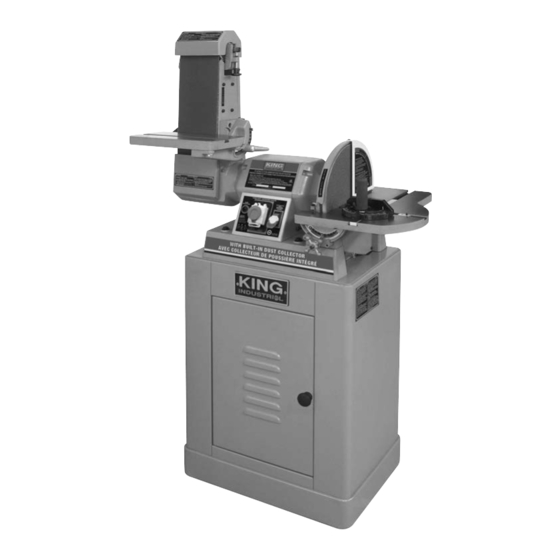
- Page 1 6” X 48” BELT & 12” DISC SANDERS Line Interruption MODEL: KC-790FX MODEL: KC-790FX-DC with built-in dust collector INSTRUCTION MANUAL COPYRIGHT © 2017 ALL RIGHTS RESERVED BY KING CANADA TOOLS INC.
-
Page 2: Warranty Information
WARRANTY INFORMATION 2-YEAR KING CANADA TOOLS LIMITED WARRANTY OFFERS A 2-YEAR LIMITED WARRANTY FOR THIS BELT AND DISC SANDER FOR NON-COMMERCIAL USE. PROOF OF PURCHASE Please keep your dated proof of purchase for warranty and servicing purposes. PARTS DIAGRAM & PARTS LISTS Refer to the Parts section of the King Canada web site for the most updated parts diagram and parts list. - Page 3 • alignment of moving parts WARNING! The Belt and Disc Sander with Built-in Dust Collector • binding of moving parts (model KC-790FX-DC) should not be used for any metal sanding operations. Hot metal and sparks generated by sanding metal will • broken parts increase the risk of serious fire and/or damage to the dust collector system.
- Page 4 WARNING! The Belt and Disc Sander with Built-in Dust Collector • Sand only one workpiece at a time. (model KC-790FX-DC) should not be used for any metal sanding operations. Hot metal and sparks generated by sanding metal will • Clear everything except the workpiece and related support devices increase the risk of serious fire and/or damage to the dust collector off the table before turning the sander on.
-
Page 5: Electrical Information
SOURCE. FAILURE TO COMPLY MAY RESULT IN SERIOUS INJURY! POWER SUPPLY- KC-790FX- 110V-220V, 13A/6.5A. Pre-wired 220V. WARNING: DO NOT USE A TWO-PRONG ADAPTOR(S) FOR KC-790FX-DC- 110V-220V, 15/7.5A (13A/6.5A + 2/1A). Pre-wired THEY ARE NOT IN ACCORDANCE WITH LOCAL CODES AND 220V. ORDINANCES. NEVER USE IN CANADA. -
Page 6: Turning The Sander On/Off
If the machine does not restart, wait an additional 5 minutes before attempting to restart Sander. TURNING THE BUILT-IN DUST COLLECTOR ON/OFF (KC-790FX-DC ONLY) The On/Off switch (B) Fig.4 is used to turn the built-in Dust Collector on and off. To turn the Dust Collector “On”, lift the switch upwards (On position), to turn the Dust Collector “Off”, push the switch downwards (Off... -
Page 7: Getting To Know Your Sander
15. T-slot centre point. 16. Disc table lock handle and scale. 17. Sanding belt dust inlet. 18. Sanding belt collection hose. 19. 4” dust chute (KC-790FX only). 20. Belt tension lever. 21. Dust Collector On/Off switch with removable safety key (KC-790FX-DC only). - Page 8 2. Lift the Belt and Disc sander (B) onto the top of the cabinet stand. 3. If you are assembling model KC-790FX-DC with the built-in dust collector onto the cabinet stand, make sure to pass the dust collector cord (C) into the small hole in the top of the cabinet stand as shown.
-
Page 9: Assembly And Adjustments
ASSEMBLY & ADJUSTMENTS INSTALLING SANDING BELT DUST COLLECTION HOSE 1. Position two wire clamps (A) Fig. 9 over both ends of the dust collection hose (B). 2. Slide one end of the dust collection hose over the sanding belt dust chute (C), tighten the wire clamp screw to secure it in place. - Page 10 ADJUSTMENTS ADJUSTING SANDING BELT TABLE AND 45º/90º BEVEL STOPS continued... To adjust the 45º & 90º bevel stops of the sanding belt table: 1. Loosen spring loaded handle (A) Fig.13 and raise the sanding belt table until the table is stopped by the 90º bevel stop screw (B). Retighten spring loaded handle. 2.
- Page 11 ADJUSTMENTS & OPERATION INSTALLING & ADJUSTING WORK STOP continued... 3. Assemble the work stop (A) Fig.17 and the work stop support (B) using the large nut (C) as shown, make sure the thin part of the work stop is closest to the sanding belt.
-
Page 12: Maintenance
MAINTENANCE REPLACING SANDING BELT The sanding belt should be replaced when it becomes worn out as follows: 1. Loosen the 2 lock knobs (A) Fig.19 which secure the upper belt safety guard (B), then lift and remove the upper belt safety guard. 2. -
Page 13: Troubleshooting
Figure 23 WARNING! The Belt and Disc Sander with Built-in Dust Collector (model KC-790FX-DC) should not be used for any metal sanding operations. Hot metal and sparks generated by sanding metal will increase the risk of serious fire and/or damage to the dust collector system. Metal sanding should be performed using a Metal Sander connected to a Metal Dust Collector.