
Related Manuals for England's Stove Works 30-NC


Summary of Contents for England's Stove Works 30-NC
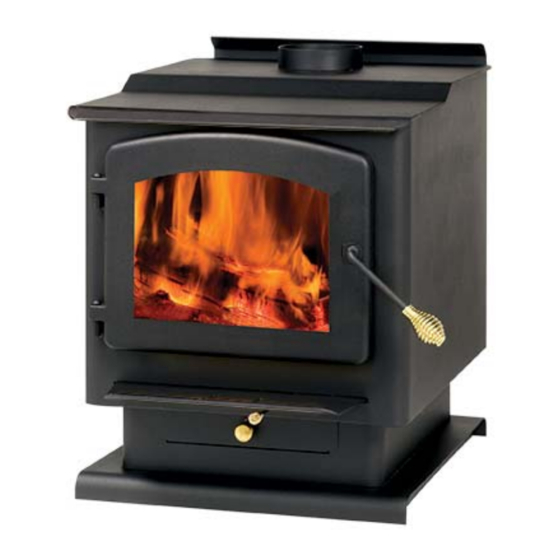
- Page 1 INSTALLATION & OPERATION MANUAL Wood Stove MODELS 30-NC / 50-SNC30 / 50-TNC30 Manufactured By: England’s Stove Works, Inc. PO Box 206 Monroe, VA 24574 Rev. 7/2016 SAVE THESE INSTRUCTIONS ...
-
Page 2: Table Of Contents
TABLE OF CONTENTS Introduction Questions • Precautionary Statements ... 3 • Hints and Tips ........ 21 • Welcome! ……………………….... 4 Parts and Options Installation • Parts & Options List ...... 23 • Before Installation ………….….. 5 • Legs & Pedestal Installation .... 24 • Correct Flue Size ………..... 6 Warranty • Flue System Guidelines .... 7 • Sample Tag.......... 25 • Floor & Wall Protection .... 10 • Warranty Details ......... 26 • Side Heat Shields ...... 12 • Warranty Registration Form .... 27 • ... -
Page 3: Precautionary Statements
INSTALLATION & OPERATION MANUAL MODEL NUMBERS: 30-NCP 50-SNC30P 50-TNC30P 30-NCL 50-SNC30L 50-TNC30L 30-NCG 50-SNC30G 50-TNC30G Thank you for purchasing this product from a fine line of heating equipment. We wish you many years of safe heating pleasure with your new heating appliance. Save These Instructions. - Page 4 Thank you for purchasing this fine product from England’s Stove Works! England's Stove Works was started, and is still owned by, a family that believes strongly in a "Do It Yourself" spirit – that’s one reason you found this product at your favorite “Do It Yourself” store.
-
Page 5: Before Installation
CAUTION If you have any doubt concerning your ability to complete your installation in a professional-like manner after reading these instructions, you should obtain the services of an installer who is versed in all aspects as to the correct and safe installation. Do not use temporary, makeshift compromises during installation. - Page 6 WHY THE CORRECT FLUE SIZE IS IMPORTANT: 6” “Draft” is the force that moves air from the appliance up through the chimney. The amount of draft in your chimney depends on the length of the chimney, local geography, nearby obstructions, and other factors.
- Page 7 FLUE SYSTEM Existing Flue System If you have chosen a freestanding unit, this stove is designed to connect to an existing flue system, such as masonry or a pre-manufactured Class A flue system. If you have a masonry flue system, the inner liner should be inspected carefully for cracks;...
- Page 8 Follow all venting system manufacturer’s INSTALLATION APPLICATIONS Illustration 1 installation requirements AND their required clearances. NOTE: Horizontal run not to exceed 6’. Total flue length should not exceed 25’. (Exterior) Wall Floor protection required: Supported Min. size 39” x 52.5”. Always check local codes for clearances, installation, etc. Lined with 18.0”...
- Page 9 INSTALLATION APPLICATIONS, Cont’d. Illustration 1b...
-
Page 10: Floor & Wall Protection
Pre-Manufactured Flue System: In the past few years pre-manufactured flue systems have become very popular, because this type system is easily installed and, when done correctly, is very safe. There are many pre-manufactured flue systems on the market, and when making your choice it should be U.L., B.O.C.A. - Page 11 Installation on a Combustible Floor If the appliance is to be installed on a combustible floor or a combustible floor covering, it must be installed on a 1” thick non-combustible millboard floor protector or a durable equivalent, with a “R” factor of at least “1.5” (English units) or equivalent. The pad must be installed beneath the unit, extending 16”...
-
Page 12: 3. Side Heat Shields
3. Side Heat Shields Side This accessory item comes Heat with the hardware (six (6) Shield mounting screws) necessary to install it on the rear of the stove. This is a two-piece heat Rear Heat shield, but is installed one Shield piece at a time. - Page 13 STANDARD (AC-16) BLOWER Install AC-16 Blower here, using the (4) supplied mounting screws ROOM AIR BLOWER: MODEL AC-16 120 VOLTS, 60Hz, 0.75 AMPS, 2900 RPM DANGER: RISK OF ELECTRIC SHOCK. DISCONNECT POWER BEFORE SERVICING UNIT. ALWAYS FOLLOW ALL CODES AND OWNER’S MANUALS! BLOWER MOTOR OPERATING INSTRUCTIONS: This unit is set up for installation of an optional 2-speed blower motor.
-
Page 14: Installation
FREESTANDING PLACEMENT AND INSTALLATION The first problem you may encounter is getting your stove into your home -- all of our stove products are well constructed, which makes them rather heavy. Three to four adults can normally handle a unit, but we still recommend using a handcart. Never attempt to handle a heating product alone!!! The door and brick can be temporarily removed to lighten the unit (refer to Brick Layout). -
Page 15: Mobile Home Installation
CHIMNEY REFER TO CHIMNEY AND CHIMNEY CONNECTOR MANUFACTURER’S INSTRUCTIONS WARNING: INSTALL VENT AT CLEARANCES SPECIFIED BY THE VENT MANUFACTURER CONTACT YOUR LOCAL BUILDING AUTHORITY FOR APPROVED METHODS OF INSTALLATION 3 Ft. min. from 1. This appliance requires a masonry or pre- Roof Penetration manufactured chimney listed to UL103HT sized correctly. -
Page 16: Operation
OPERATION Do not use a grate or elevate the fire. Build the wood fire directly on the bricks. When the stove is used for the first time, solvents in the paint will smoke off as the stove “cures.” WOOD – This heater is designed to burn natural wood only. -
Page 17: Glass Care
GLASS CARE REPLACE GLASS ONLY WITH HIGH-TEMPERATURE ROBAX PYROCERAM OF THE PROPER SIZE AND THICKNESS. The following use and safety tips should be observed: Inspect the glass regularly for cracks or breaks. If you detect a crack or a break, extinguish the fire immediately, and contact your dealer or Customer Service at (800) 245-6489 for replacement (or log on to www.englanderstoves.com... -
Page 18: Door Gasket
The following steps should be followed for replacement of the door gasket: Ensure the appliance is not in operation and is thoroughly cooled. Remove the old door gasket and clean the gasket channel. Using an approved high-temperature gasket cement, apply a thin coat in the bottom of the channel. -
Page 20: Creosote
CREOSOTE When wood is burned slowly, it produces tar and other organic vapors. These combine with moisture to form creosote. Creosote vapors condense in the relatively cool chimney flue of a slow-burning fire – as a result, creosote residue accumulates on the lining of the flue. If ignited, this creosote makes an extremely hot fire. - Page 21 IMPORTANT: HELPFUL HINTS AND TIPS WORTH REVIEWING What is the correct way to start a fire? You will need small pieces of dry wood (kindling) and paper. Use only newspaper or paper that has not been coated or that has had materials glued or applied to it. Never use coated or colored paper (such as advertising flyers).
- Page 22 Why is there always a large quantity of thick black smoke in the firebox? A large quantity of thick black smoke in the firebox is a possible indication that you have poor draft. Is it normal for soot to cover the glass at the beginning of a fire? ...
- Page 23 PARTS, ACCESSORIES AND OPTIONS LIST (Options and trim (i.e. brass and nickel) interchange for variety. Gold door and legs may also be ordered to replace existing door and pedestal or regular cast legs.) REPLACEMENT PARTS AC-G30 DOOR GLASS KIT WITH GASKET AC-GGK DOOR GLASS GASKET KIT (gasket only, no glass)
- Page 24 DIRECTIONS FOR INSTALLATION OF LEGS OR PEDESTAL: (Stove must be cooled and all ashes cleaned out) Remove bricks, disconnect flue, and turn stove on its back. * If you are replacing existing legs or pedestal, disconnect the existing legs or pedestal. To install legs: 1.
- Page 25 You may write your unit’s Manufacture Date and Serial Number in the space beside this sample tag, for future reference. This sample tag also shows the safety info. such as UL testing standard, etc. for your local officials, or anyone else who may need reference information.
- Page 26 Have this information on hand if you phone the factory or your dealer regarding this product. Retain for your files: Model Number __________________________ Date of Purchase ________________________ Date of Manufacture _________________ Serial #_____________________ LIMITED 5 YEAR WARRANTY FROM THE DATE OF PURCHASE TO THE ORIGINAL OWNER The manufacturer extends the following warranties: Five Year Period: Carbon steel and welded seams in the firebox are covered for 5 years against splitting.
- Page 27 WARRANTY REGISTRATION for England’s Stove Works Purchased by (Name) ______________________________________________ Address _________________________________________________________ City ________________________ State __________ Zip _________________ Telephone _______________________________________________________ Email Address ___________________________________________________ DEALER INFORMATION Purchased From (Dealer) ___________________________________________ Address _________________________________________________________ City ________________________ State __________ Zip _________________ UNIT INFORMATION (Please be sure to refer to sticker on back of manual or box to complete this section) Model Number _____________________ Purchase Date _________________ Purchase Price ____________________ Serial Number _____________________ Mfg.
- Page 29 WOOD - Meets the 2015 U.S. Environmental Protection Agency’s crib wood emission limits for wood heaters sold after May 15, 2015 PLEASE NOTE: EPA INFORMATION The following additions to your owner’s manual will enable you to achieve optimal emissions performance from your stove. Important safety tips are also included. ‐ Proper Installation – Please refer to the Installation section of your owner’s manual and follow the guidelines listed therein for safety and for optimal emissions performance. Additional information: Venting Introduction: Draft: Draft is the force which moves air from the appliance up through the chimney. The amount of draft in your chimney depends on the length of the chimney, local geography, nearby obstructions and other factors. Too much draft may cause excessive temperatures in the appliance and may damage the catalytic combustor. Inadequate draft may cause backpuffing into the room and ‘plugging’ of the chimney or the catalyst. Inadequate draft will cause the appliance to leak smoke into the room through appliance and chimney connector joints. An uncontrollable burn or excessive temperature indicates excessive draft. Please be mindful of installation location: Inversion and other air quality issues can arise in valleys or if unit is installed close to neighboring homes. This wood stove operates on a natural draft system, in which the chimney system pulls air through the stove. This unit must be installed in accordance with the following detailed descriptions of venting techniques; not installing the stove in accordance with the details listed here can result in poor stove ...
- Page 30 Venting Guidelines: ALWAYS install vent pipe in strict adherence to the instructions and clearances included with your venting system. • DO NOT connect this wood stove to a chimney flue which also serves another appliance. • DO NOT install a flue pipe damper or any other restrictive device in the exhaust venting system of this unit. • USE an approved wall thimble when passing through a wall and a ceiling support/fire stop when passing through a ceiling. • INSTALL three sheet metal screws at every chimney connector joint. • AVOID excessive horizontal runs and elbows, as both will reduce the draft of the venting system and will result in poor stove performance. • INSPECT your venting system often, to be certain it is clear of creosote, fly‐ash and other restrictions. • CLEAN the venting system as detailed in the maintenance section of this manual. • ADHERE to the 10‐3‐2 rule regarding chimney terminations. • INSTALL single wall chimney connector with the male end down to prevent creosote leakage. Follow double wall chimney connector manufacturer’s instructions regarding proper pipe installation. WARNING: Venting system surfaces get HOT, and can cause burns if touched. Noncombustible shielding or guards may be required The 10‐3‐2 Rule: The chimney system must terminate 3.0 ft above the point where it’s centerline passes through the roof AND the chimney must terminate 2.0 ft. above part of the dwelling within a 10 ft. radius of the chimney. ‐ Operation and Maintenance – Please refer to the ‘Operation’ (Operating Instructions) and Maintenance (including Ash Removal/Disposal) sections of your owner’s manual and follow the guidelines listed therein for safety and for optimal emissions performance. Additional Information: Following the instructions in your owner’s manual for Building a Fire will ensure a proper fire, as well as helping minimize visible emissions. ...
- Page 31 Season wood outdoors through the summer for at least 6 months before burning it. Properly seasoned wood is darker, has cracks in the end grain, and sounds hollow when smacked against another piece of wood. Store wood outdoors, stacked neatly off the ground with the top covered. Burn only dry, well‐seasoned wood that has been split properly. Start fires with newspaper and dry kindling as discussed earlier in the manual. Burn hot fires. To maintain proper airflow, regularly remove ashes from your wood‐burning appliance into a metal container with a cover and store outdoors. Moisture Meter Information Firewood is ready at 10‐25% moisture content. Newly‐cut logs can have a moisture content (MC) of 80% or more, depending on species. Since wood shrinks, and can also split, twist or otherwise change shape as it dries, most wood is dried before being used. Air drying, or ‘seasoning,’ is the most common method used for cord wood. In most parts of the United States, the minimum moisture content that can be generally obtained in air drying is about 12 to 15 percent. Most air‐dried material is usually closer to 20 percent moisture content when used To test your firewood, simply push the pins into the wood and wait for a reading. Remember, don't just stick the meter into the ends of your firewood. To get the most accurate reading, split the wood and test the center. The center of the log will contain the most moisture. How Far Should I Drive Non‐Insulated Pins into Wood? To full depth if possible. However, at moisture levels below 10%, it is usually sufficient to make good, positive contact with the wood. At higher levels of moisture and especially if you have a steep gradient, full penetration is a must. ...
- Page 32 ‐ WHAT FUELS NOT TO USE: CAUTION NEVER USE GASOLINE, GASOLINE‐TYPE LANTERN FUEL, KEROSENE, CHARCOAL LIGHTER FLUID, OR SIMILAR LIQUIDS TO START OR “FRESHEN UP” A FIRE IN THIS HEATER. KEEP ALL SUCH LIQUIDS WELL AWAY FROM THE HEATER WHILE IN USE. ADDITIONALLY, NEVER APPLY FIRE‐STARTER TO ANY HOT SURFACE OR EMBERS IN THE STOVE. DO NOT USE CHEMICALS OR FLUIDS TO START THE FIRE. DO NOT BURN FLAMMABLE FLUIDS SUCH AS GASOLINE, NAPHTHA OR ENGINE OIL. DO NOT BURN GARBAGE; LAWN CLIPPINGS OR YARD WASTE; MATERIALS CONTAINING RUBBER, INCLUDING TIRES; MATERIALS CONTAINING PLASTIC; WASTE PETROLEUM PRODUCTS, PAINT OR PAINT THINNERS, OR ASPHALT PRODUCTS; MATERIALS CONTAINING ASBESTOS; CONSTRUCTION OR DEMOLITION DEBRIS; RAILROAD TIES OR PRESSURE‐TREATED WOOD; MANURE OR ANIMAL REMAINS; SALT WATER DRIFTWOOD OR OTHER PREVIOUSLY SALT WATER SATURATED MATERIALS; UNSEASONED WOOD; PAPER PRODUCTS, CARDBOARD, PLYWOOD OR PARTICLEBOARD. THE PROHIBITION AGAINST BURNING THESE MATERIALS DOES NOT PROHIBIT THE USE OF FIRESTARTERS MADE FROM PAPER, CARDBOARD, SAWDUST, WAX AND SIMILAR SUBSTANCES FOR THE PURPOSE OF STARTING A FIRE IN AN AFFECTED WOOD HEATER. BURNING THESE MATERIALS MAY RESULT IN RELEASE OF TOXIC FUMES OR RENDER THE HEATER INEFFECTIVE AND CAUSE SMOKE. ‐ Safe Wood‐burning Practices Once your wood‐burning appliance is properly installed, follow these guidelines for safe operation: Keep all flammable household items—drapes, furniture, newspapers, and books—far away from the appliance. Start fires only with newspaper, dry kindling and all natural or organic fire starters. Never start a fire with gasoline, kerosene, or charcoal starter. Do not burn wet or green (unseasoned) logs. Do not use logs made from wax and sawdust in your wood stove – they are made for open hearth fireplaces. If you use manufactured logs, choose those made from 100 percent compressed sawdust. Build hot fires. For most appliances, a smoldering fire is not a safe or efficient fire. ...
- Page 33 Remember: “This wood heater needs periodic inspection and repair for proper operation. It is against federal regulations to operate this wood heater in a manner inconsistent with operating instructions in this manual.” More: Burner Tubes – To replace a tube, first be sure that you order the correct tube you need to replace. Then using a 5/16” socket or open end wrench, remove the screw located on the left side of the tube. Be sure to keep the screw. Push the tube to the right then remove the tube (pulling the tube back to the left after that side has been removed from the hole). To replace, reverse the above procedure…make sure to install the tubes in the correct order. (Front to Back) ‐ Smoke Detectors England’s Stove Works, Inc. highly recommends the use of smoke detectors in every room of the house. However, locating a smoke detector directly above this unit can result in nuisance alarms. CAUTION This unit is meant to operate only with door closed. Smoke spillage and an inefficient, lazy burn will result from attempting to operate the stove with the door open. Additionally, using prohibited fuels can create an unsafe situation and can also generate excess carbon monoxide. Carbon monoxide is an odorless, colorless gas which can be deadly. The use of a carbon monoxide detector is strongly recommended. ‐ Compliance: “This non‐catalytic wood heater meets the 2015 U.S. Environmental Protection Agency’s crib wood emission limits for wood heaters sold after May 15, 2015.” ‐ Tamper Warning: “This wood heater has a manufacturer‐set minimum low burn rate that must not be altered. It is against federal regulations to alter this setting or otherwise operate this wood heater in a manner inconsistent with operating instructions in this manual.” ‐ Warranty: See your Owner’s manual for a Warranty Registration instruction page, as well as instructions for warranty procedures. For parts, warranty replacement procedures may be found at our parts store site: www.store.heatredefined.com ...