Hunter Original Installation Manual
Historic 4 blade configuration
Hide thumbs
Also See for Original:
- Manual (48 pages) ,
- Instructions manual (14 pages) ,
- Installation and operation manual (16 pages)
Table of Contents
Advertisement
Quick Links
Advertisement
Table of Contents

Related Manuals for Hunter Original


Summary of Contents for Hunter Original
- Page 1 Installation Manual Historic 4 Blade Configuration (Page 9) Classic 5 Blade Configuration (Page 10) Model: 23845 White 23847 Chestnut Brown 23838 Black 23863 Black 51123 Matte Silver Fan weight ±2 lbs: 43.2 lbs (19.6 kg) ©2021 Hunter Fan Co. PG3977 r040521...
- Page 2 - To reduce the risk of personal injury, do not bend the blade attachment system when installing, balancing, or cleaning the fan. Never insert foreign objects between rotating fan blades. c.4 - To reduce the risk of fire, electrical shock, or motor damage, do not use a solid-state speed control with this fan. Use only Hunter speed controls.
- Page 3 We recommend that you pull everything out of the box and lay it out. We have grouped the drawn components below with the hardware you’ll need for those parts. The screws Hunter Pro Tip: below are drawn to scale to make it easier to identify what piece of hardware is needed to install each component.
- Page 4 A little more information on Angled Mounting: For optimum performance and appearance, a longer downrod should be used with your Hunter ceiling fan when installing on high or angled ceiling. If your ceiling is angled greater than 34° you will also need an Angled Mounting Kit.
-
Page 5: Hanging The Fan
1886 Installing the Ceiling Hardware Remove any existing bracket prior to installation. Only use the provided Hunter IMPORTANT ceiling bracket that came in your fan’s box. DO NOT USE LUBRICANT ON SCREWS Cross Brace Outlet Box Ceiling Do this first! Drill two (2) 11/64”... - Page 6 1886 Hanging the Fan IMPORTANT TO SECURELY HANG THE FAN, CAREFULLY FOLLOW THE STEPS ON PAGES 7 AND 8. BE SURE TO TIGHTEN THE HANGER PIPE INTO THE FAN AND THE HANGER BRACKET ONTO THE PIPE. TIGHTEN THE 2 SET SCREWS, AS DESCRIBED IN STEP 7, TO PREVENT THE FAN FROM FALLING.
-
Page 7: Wiring The Fan
Hunter Pro Tip: You are going to need these: Here is how to connect the wires: Push the bare metal ends of the wires together and slide a wire nut over... -
Page 8: Installing The Canopy
Your Original Hunter’s Unique Lubricating System The bearings in your Hunter Original Ceiling Fan are submerged in oil, which lubricates all bearing surfaces as the fan operates. We recommend periodically checking the oil to ensure the correct level is maintained. This unique lubrication system is one reason why your Hunter Original Ceiling Fan will last a lifetime. -
Page 9: Fan Blade Assembly
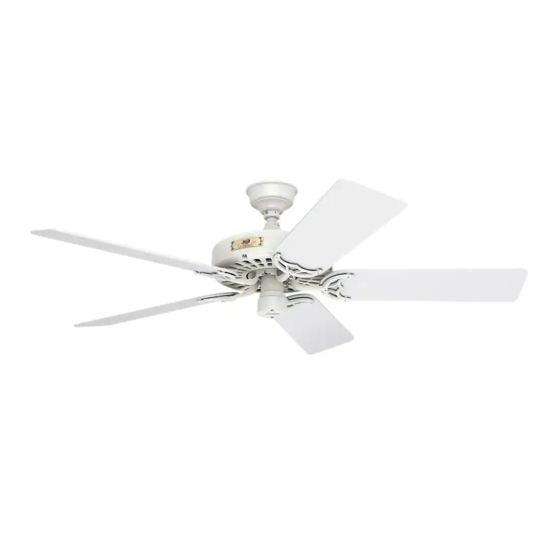
Choose how you want its story to unfold. For 135 years, the four bladed installation option has provided the historic look of the Original. Install it with five blades for a fresh take that’s still familiar. Fan Blade Assembly First lets construct the blades. - Page 10 Installing the Blades: HISTORIC 4 Blade Configuration 1886 Blade Mounting Screw HISTORIC Four Blade Configuration Blade Mounting Screw For four blades, use the inner row. For each blade, insert one blade mounting screw, found in the hardware bag, through the blade iron, and attach lightly to the fan.
- Page 11 Installing the Blades: CLASSIC 5 Blade Configuration 1886 Blade Mounting Screw CLASSIC Five Blade Configuration Blade Mounting Screw For five blades, use the outer row.For each blade, insert one blade mounting screw, found in the hardware bag, Outer Row through the blade iron, and attach for 5 Blades lightly to the fan.
-
Page 12: Fan Operation
1886 Fan Operation Attach the pull chain pendant to the fan pull chain. The fan pull chain controls power to the fan. The pull chain has four settings in sequence: High, Medium, Low, and Off. Pull the chain slowly to change settings. -
Page 13: Troubleshooting
United States; fans owned by someone other than the Hunter, at its sole discretion, may accept a gift receipt. To obtain service, contact Hunter Fan original purchaser; fans for which proof of purchase has not been established; fans purchased Company online or by phone.