
Related Manuals for Ricoh FAX 3310Le


Summary of Contents for Ricoh FAX 3310Le
- Page 1 FAX 3310Le Operating Instructions Basic Features Getting Started Faxing Registering Troubleshooting Read this manual carefully before you use this product and keep it handy for future reference.
- Page 2 For good copy quality, Ricoh recommends that you use genuine Ricoh toner. Ricoh shall not be responsible for any damage or expense that might result from the use of parts other than genuine Ricoh parts with your Ricoh office products.
-
Page 3: Table Of Contents
TABLE OF CONTENTS NOTICE ........................1 Safety Information ......................1 Safety During Operation ..................1 Important Safety Instructions ................3 Grounding ........................3 Positions of the R R CAUTION Label ..............4 ENERGY STAR Program ..................5 Energy Saving Modes ....................5 How to Read this Manual ..................8 Manuals for This Machine ..................9 Basic Features (this manual) ..................9 Advanced Features (on CD-ROM) ................9... - Page 4 Dialing ........................32 Entering Numbers Directly ..................32 Pause ........................33 Tone ........................33 Using Quick Dials..................... 33 Using Speed Dials....................34 Using Groups ......................35 When Specifying a Group with a Quick Dial............35 When Specifying a Group with the Group key............36 Reception Modes ....................
-
Page 5: Notice
NOTICE R CAUTION: Use of controls, adjustments or performance of procedures other than those specified herein may result in hazardous radiation exposure. Shielded interconnect cables must be employed with this equipment to ensure compliance with the pertinent RF emission limits governing this device. Direct (or indirect reflected) eye contact with the laser beam may cause serious eye damage. - Page 6 R WARNING: • Connect the power cord directly into a wall outlet and never use an ex- tension cord. • Disconnect the power plug (by pulling the plug, not the cable) if the power cable or plug becomes frayed or otherwise damaged. •...
-
Page 7: Important Safety Instructions
Important Safety Instructions Grounding In order to prevent potentially hazardous electrical shock, provide means of connecting to the protective grounding conductor in the building, wiring those grounding conductors of power cable and 3 pins plug. -
Page 8: Positions Of The R R Caution Label
Positions of the R R CAUTION Label This machine has a RCAUTION label at the position shown below. For safety, please follow the instructions and handle the machine as indicated. The inside of the machine becomes very hot. Do not touch the inside. Doing so could result in a burn. -
Page 9: Energy Star Program
ENERGY STAR Program As an ENERGY STAR Partner, we have determined that this machine model meets the ENERGY STAR Guidelines for energy efficiency. The ENERGY STAR Guidelines intend to establish an international energy-saving system for developing and introducing energy-efficient office equipment to deal with environmental is- sues, such as global warming. - Page 10 Even though the operation panel display goes out in Energy Saving mode, Indi- cators that flash or light during communication or reception still work. When the Receive File indicator lights, exit Energy Saving mode and take the appropriate action. Energy Saving Status How long before Power con-...
- Page 11 Limitation It is not possible to enter Energy Saving mode when an original is set. Recycled Paper In accordance with the ENERGY STAR Program, we recommend use of recycled paper which is environmentally friendly. Please contact your sales representa- tive for recommended paper.
-
Page 12: How To Read This Manual
How to Read this Manual Symbols The following set of symbols is used in this manual. R WARNING: This symbol indicates a potentially hazardous situation that might result in death or serious injury when you misuse the machine without following the in- structions under this symbol. -
Page 13: Manuals For This Machine
Manuals for This Machine Two Facsimile Reference manuals are provided, the Basic Features manual and the Advanced Features manual. Please refer to the manual that suits your needs. Basic Features (this manual) The Basic Features manual explains the most frequently used fax functions and operations. - Page 14 ❖ ❖ ❖ ❖ Chapter 7 Key Operator Settings Explains about functions the key operator handles . You can find out how to change the user parameter settings. ❖ ❖ ❖ ❖ Chapter 8 Solving Operation Problems Explains about things you should do when an Error Report is printed and power is turned off.
-
Page 15: Getting Started
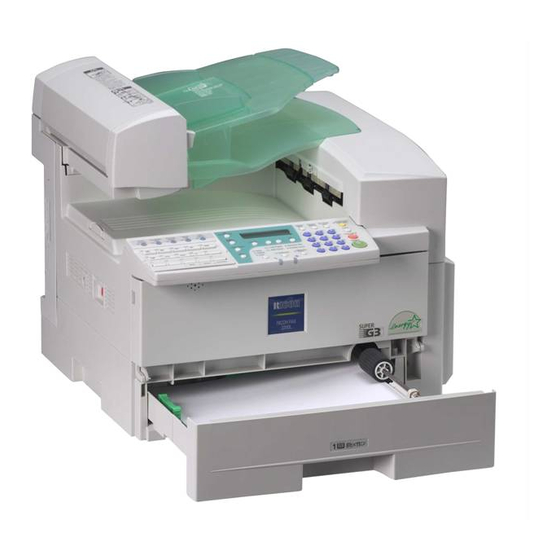
1. Getting Started Guide to Components Front View ZFWH220E ADF Cover Main Paper Tray Cover for the document feeder (ADF). Load paper here. Release Button Paper Tray Unit (Option) Push this button to open the document You can load more paper here. feeder. -
Page 16: Side View
Getting Started Original Tray Original guide Place originals here for sending a fax and Adjust the original guide to match the copying. size of the originals. Side View ZFWH230E Output tray guide G3 Line Connector Pull out and raise the end fence to sup- External Telephone Connector port large papers. -
Page 17: Control Panel
Control Panel Control Panel ZFWS030E User Function keys Add Toner indicator Each of these can be programmed for Blinks when toner is about to runout and rapid access to frequently used functions. lights continuously when toner has run out. ❖ ❖ ❖ ❖ Functions Programmed by Default Load Paper indicator Function Lights when a paper tray is empty or the... - Page 18 Getting Started { { { { On Hook Dial} } } } key Status Indicators Use to dial a number from the numeric These indicators keep you informed keypad without having to lift the hand- about the current status of the unit. set.
-
Page 19: Starting The Machine
Starting the Machine Starting the Machine ❒ Fax files programmed in memory To start the machine, turn on the power switch. will not be deleted while the op- tional memory card is installed. Note When you install the memory card ❒... -
Page 20: Reading The Display
Getting Started Reading the Display The machine status and instructions are shown on the display. Important ❒ Do not apply a strong shock or force of about 30N (about 6.8 lbf ) or more to the panel display. Otherwise, the display might be damaged. N = Newton lbf = weight pound Note... -
Page 21: Communication Display
Reading the Display ❖ ❖ ❖ ❖ Status Communication Display While the machine is communicating, the status is displayed. ❖ ❖ ❖ ❖ Display during Memory Transmission or Reception: The destination's name or fax number appears on the top of the LCD display. - Page 22 Getting Started...
-
Page 23: Faxing
2. Faxing Transmission Modes There are two types of transmission. A fax document is not stored in memory. ❖ ❖ ❖ ❖ Memory Transmission When a fax document is stored in memory, then transmission starts automatically. This makes it convenient when you would like to take documents back in a hurry. -
Page 24: Switching Between Memory Transmission And Immediate Transmission
Faxing Switching between Memory Transmission and Immediate Transmission Press the { { { { Memory Trans.} } } } key to switch between Memory Transmis- sion and Immediate Transmission. When the indicator of the { { { { Memory Trans.} } } } key is not lit, Immediate Transmission is selected. -
Page 25: Setting Originals
Setting Originals Setting Originals You can set your originals in the Doc- Note ument Feeder. ❒ When sending a fax, the image output at the other end depends on ❖ ❖ ❖ ❖ How to set A4, B5 JIS (Japanese the size and direction of paper "×... -
Page 26: Original Sizes Difficult To Detect
Faxing ❒ If an original jams, press the { { { { Clear/Stop} } } } key, and then remove Original Sizes Difficult to the original carefully. Detect ❒ If your original is bent or folded, flatten it before you set it. The machine finds it difficult to detect the size of the following kinds of orig- Reference... -
Page 27: Memory Transmission
Memory Transmission Memory Transmission ❒ The theoretical maximum number Memory Transmission is convenient because: of destinations you can enter with the number keys is 69, but this will • Fax documents can be scanned depend on the amount of memory much more quickly. - Page 28 Faxing D D D D Reference Dial. If you wish to send the same message to more than one desti- p.39 “Own Name/Fax Head- nation, press the { { { { OK} } } } key, and er/Own Fax Number” then dial another destination.
-
Page 29: Canceling A Memory Transmission
Canceling a Memory Transmission Canceling a Memory Transmission Before the Start Key is During Transmission Pressed Use this procedure to cancel a trans- mission after the original has been A A A A Press the { { { { Energy Saver / Clear Modes} } } } scanned. -
Page 30: While The Original Is Awaiting Transmission
Faxing C C C C A A A A Press the { { { { Job Information} } } } key, Display the file you want to de- lete. and confirm that "1. Cancel TX / RX" is displayed. Enter the file number with the number keys, or search using 0 or D D D D Press the { { { { OK} } } } key. -
Page 31: Immediate Transmission
Immediate Transmission Immediate Transmission B B B B Immediate Transmission is conven- Set your original. ient when: Reference • You wish to send a document im- mediately as it is scanning. p.21 “Setting Originals” C C C C • You wish to quickly check whether Select any scan settings you re- you have successfully connected quire. - Page 32 Faxing Reference p.39 “Own Name/Fax Head- er/Own Fax Number” After transmission the machine will return to standby display.
-
Page 33: Canceling An Immediate Transmission
Canceling an Immediate Transmission Canceling an Immediate Transmission Before the Start key is Pressed A A A A Press the { { { { Energy Saver / Clear Modes} } } } key. ZFWS150E Note ❒ When you have already set the original, you can also cancel the transmission by removing the original from the machine. -
Page 34: Scan Settings
Faxing Scan Settings ❖ ❖ ❖ ❖ Auto (8× × × × 3.85 lines/mm, 200× × × × 100dpi) You may wish to send many different and (8× × × × 7.7 lines/mm, 200× × × × 200dpi) types of fax messages. Some of these may be difficult to reproduce at the Select for originals containing nor- other end. -
Page 35: Original Type
Scan Settings A A A A A A A A Press the { { { { Resolution} } } } key to Press the { { { { Halftone} } } } key. switch between resolutions. The indicators above the key show the current selection. -
Page 36: Dialing
Faxing Dialing There are four main ways to dial a The digits appear on the display as number: you enter them. ❖ ❖ ❖ ❖ Entering Numbers Directly See p.32 “Entering Numbers Di- rectly” Note ❖ ❖ ❖ ❖ Using Quick Dials: ❒... -
Page 37: Pause
Dialing Note Tone ❒ If a memory file is awaiting trans- mission and the This function allows a machine con- "Exceeded the message is dis- nected to a pulse dialing line to send Max.Cannot Add" tone signals (for example if you want played when dialing with the number keys, you cannot dial any to use a special service on a tone dial-... -
Page 38: Using Speed Dials
Faxing B B B B Set your original and select any Using Speed Dials scan settings you require. You can specify destinations simply by pressing the { { { { Speed Dial} } } } key and a Speed Dial code (00 to 99). C C C C You must store the destination's fax Press the Quick Dial key in which... -
Page 39: Using Groups
Dialing C C C C The method for specifying Groups Press the { { { { Speed Dial} } } } key. differs according to the way they were programmed. • When programmed in a Quick Di- al: Press the Quick Dial key. •... -
Page 40: When Specifying A Group With The Group Key
Faxing B B B B C C C C Set your original and select any Press the User Function key pro- scan settings you require. grammed with the Group func- tion. C C C C Press the Quick Dial key in which D D D D the Group is programmed. -
Page 41: Reception Modes
Reception Modes Reception Modes ❒ Set a smaller number of rings The machine can treat incoming fax messages and telephone calls in three for the telephone answering ways. machine than for the fax ma- chine. ❖ ❖ ❖ ❖ Manual Receive ❒... - Page 42 Faxing E E E E Press the { { { { OK} } } } key. F F F F Press 0 0 0 0 or 1 1 1 1 until “ 5. Reception Mode “ is displayed. G G G G Press the { { { { OK} } } } key.
-
Page 43: Registering
3. Registering Own Name/Fax Header/Own Fax Number Make sure that all necessary settings Note are made before connecting your ma- ❒ In some areas, the Own Fax chine to the telephone line. Number is preprogrammed by your service representative, and ❖... - Page 44 Registering B B B B Press 0 0 0 0 or 1 1 1 1 until "2. Fax Fea- Note ❒ If you want to erase a character tures" is displayed. i n t h e n a m e , p r e s s t h e { { { { Clear/Stop} } } } key.
-
Page 45: Editing
Own Name/Fax Header/Own Fax Number P P P P Press the { { { { OK} } } } key. Editing The following procedure describes how to edit initial settings. A A A A Q Q Q Q Press the { { { { User Tools} } } } key. Enter your Own Fax Number. -
Page 46: Deleting
Registering F F F F B B B B Press 0 0 0 0 or 1 1 1 1 until "7. Fax Infor- Press 0 0 0 0 or 1 1 1 1 until " 2. Fax Fea- mation" is displayed. tures "... -
Page 47: Quick Dial
Quick Dial Quick Dial A A A A To save time, you can program a fax Press the { { { { User Tools} } } } key. number that you use often into a Quick Dial key. Then, whenever you are sending a message to that loca- tion, just press that Quick Dial key to dial. - Page 48 Registering F F F F H H H H Press the { { { { OK} } } } key. Display the number of the Quick Dial key you want to register. The fax number is programmed. Press a Quick Dial key, or search using 0 or 1.
-
Page 49: Editing
Quick Dial L L L L D D D D Press the { { { { OK} } } } key. Press the { { { { OK} } } } key. If you want to store another Quick Confirm that " 1. Prog. Quick Dial " Dial, go to step E. -
Page 50: Deleting
Registering Note Deleting ❒ Under rare circumstances, gar- bled characters may appear The following procedure describes during name registration if you how to delete fax numbers registered use the { { { { Pause/Redial} } } } key to in Quick Dial keys. display the fax number of par- ties located in other countries. -
Page 51: Quick Dial Key Label (Dial Label)
Quick Dial E E E E Press 0 0 0 0 or 1 1 1 1 until " 2. Del. Quick Quick Dial Key Label (Dial Dial " is displayed. label) You can print a template that can be used to make labels for Quick Dial F F F F keys. -
Page 52: Label Paper
Registering Label paper GFREPO1E... -
Page 53: Speed Dial
Speed Dial Speed Dial A A A A Press the { { { { User Tools} } } } key. Registering If you register numbers in Speed Di- als, you can specify the fax number simply by pressing the { { { { Speed Dial} } } } key, and entering a two-digit Speed Dial number. - Page 54 Registering G G G G Note Display the number of the Speed ❒ If a destination name is already Dial you want to register (00 to 99). registered in the Speed Dial, the name is shown on the display. If Enter the Speed Dial number with you wish to change the destina- the number keys, or search using...
-
Page 55: Editing
Speed Dial G G G G Display the number of the Speed Editing Dial you want to edit (00 to 99). Enter the Speed Dial number with The following procedure describes the number keys, or search using how to edit registered Speed Dial 0 or 1. -
Page 56: Deleting
Registering B B B B Press 0 0 0 0 or 1 1 1 1 until "2. Fax Fea- Note ❒ Label insertion allows the desti- tures " is displayed. n a t i o n n a m e t h a t i s p r o - gram m ed in Quick Dial or Speed Dial to be printed on the fax when it is received at the... - Page 57 Speed Dial I I I I Press the { { { { User Tools} } } } key to re- turn to standby display.
-
Page 58: Groups
Registering Groups If you regularly broadcast documents Registering to the same set of destinations, you can combine these numbers into a You can register the following items group. Then just select the group and in a Group: each number will be dialed in se- quence automatically. - Page 59 Groups ❒ It is recommended that you print A A A A Press the { { { { User Tools} } } } key. the Group Dial list and keep it when you register or change desti- nations. See p.54 “Printing Re- ports/Lists”, Advanced Features.
- Page 60 Registering G G G G J J J J Press the 0 0 0 0 or 1 1 1 1 to select " Add " Display the number of the Group you want to register (1 to 5). or " Exit ". Enter the group number with the number keys, or search using 0 or K K K K...
-
Page 61: Editing
Groups R R R R C C C C Press the { { { { User Tools} } } } key to re- Press the { { { { OK} } } } key. turn to standby display. Editing Confirm that " 1. Program / Delete You can edit the group name or add "... -
Page 62: Adding A Fax Number To A Group
Registering Note Adding a Fax Number to a Group ❒ If you want to delete a character A A A A o f t h e n a m e , p r e s s t h e Press the { { { { User Tools} } } } key. { { { { Clear/Stop} } } } key. - Page 63 Groups G G G G M M M M Display the number of the group Specify the destination using one t o w h ic h y o u w a n t to a d d a of the following three methods: number (1 to 5).
-
Page 64: Deleting
Registering R R R R Press the { { { { OK} } } } key. To delete a destination from a group A A A A Press the { { { { User Tools} } } } key. S S S S Press 0 0 0 0 or 1 1 1 1 to select "Yes"... - Page 65 Groups G G G G N N N N Press the { { { { OK} } } } key. Display the group number for the destination you want to delete (1 to 5). Enter the group number with the number keys, or search using 0 or To delete another destination, re- peat steps L to N.
-
Page 66: To Delete An Entire Group
Registering T T T T E E E E Press the { { { { OK} } } } key. Press 0 0 0 0 or 1 1 1 1 until " 6. Del. Group Dial " is displayed. If you want to delete another desti- F F F F nation from the group, go to step Press the { { { { OK} } } } key. - Page 67 Groups Enter the group number (1 to 5). Press the { { { { OK} } } } key. Press 0 or 1 to select "No", and then press the { { { { OK} } } } key. Press the { { { { OK} } } } key. If you want to change the Quick Dial key, press "Yes", and if you want to delete the Quick Dial key,...
-
Page 68: Entering Characters
Registering Entering Characters This section describes how to enter characters. Available Characters • Letters: ABCDEFGHIJKLMNOPQRSTUVWXYZabcdefghijklmnopqrstuvwxyz • Symbols: – _ (space) . , ( ) / @ & $ ! ' # p % + : ; < = > ? ^ [ ] ` { | } ∼ •... -
Page 69: How To Enter Characters
Entering Characters { { { { Clear/Stop} } } } key Deletes the character at the cursor posi- - Wild Cards tion. If the cursor is placed to the right of the last character at the right end of a line, When you register other parties' Own that character will be deleted. - Page 70 Registering...
-
Page 71: Troubleshooting
4. Troubleshooting Loading Paper in the Main Paper Tray If there is no paper in the main paper Important tray, the B indicator on the control ❒ Do not stack paper over the lim- panel lights. it mark. Use the following procedure to load the paper. -
Page 72: Adjusting Volume
Troubleshooting Adjusting Volume B B B B You can change the volume of the fol- Press 0 0 0 0 or 1 1 1 1 until " 2. Fax Fea- lowing sounds the machine makes. tures " is displayed. ❖ ❖ ❖ ❖ On Hook Sounds when you press the { { { { On Hook Dial} } } } key. - Page 73 Adjusting Volume I I I I Press the { { { { OK} } } } key. The volume is adjusted. If you want to adjust another item, repeat steps G to I. J J J J Press the { { { { User Tools} } } } key to re- turn to standby display.
-
Page 74: Clearing Original Jams
Troubleshooting Clearing Original Jams If an original is jammed, the hindica- D D D D Close the ADF unit and ADF cov- tor on the Control Panel blinks and “ er making sure it clicks firmly Clear Misfed Original (S) “ is dis- into place. -
Page 75: Clearing A Copy, Fax, Or Print Jam
Clearing a Copy, Fax, or Print Jam Clearing a Copy, Fax, or Print Jam B B B B If a copy, fax, or printed paper is Open the blue cover. jammed, the hindicator on the Con- trol Panel blinks and “ Clear Misfed Paper “... -
Page 76: Error Messages
Troubleshooting Error Messages The following messages may appear while you are operating or programming the machine. Message Problem/Solution No Files Exist No polling reception operations have been programmed. There are no documents in memory waiting for transmis- sion. Incorrect file number. Check the file number and try again. Cannot Combine : (currently se- Appears when you attempt to select a function that cannot lected function) - Page 77 Error Messages Message Problem/Solution Some Page(S) are Blank An almost entirely blank document was scanned. Check your document. Reset Toner Correctly The toner cassette is not set correctly. Toner is Almost Empty The toner cassette is nearly empty. Copy Mode Locked Copy mode is disabled.
-
Page 78: When The Receive File Indicator Is Lit
Troubleshooting When the Receive File Indicator is Lit If the Receive File indicator is lit, a message has been received but could not be printed for some reason. The message was stored in memory (Substitute Recep- tion). When you solve the problem, the message will be automatically printed out. -
Page 79: Solving Problems
Solving Problems Solving Problems This table lists some common problems and their solutions. Problem Required Action Printed or sent image contains spots. The Document Feeder (ADF) or scanner is dirty. Clean them. Make sure that ink or correction fluid is dry before set- ting the original. - Page 80 Troubleshooting Problem Required Action You cannot add any destinations to a 69 destinations have been programmed with the Group, even though the maximum number keys. Program more numbers with Quick Di- number of destinations has not been als or Speed Dials. reached.
-
Page 81: Index
INDEX Add Toner indicator , 13 Editing Fax Header , 41 ADF Cover , 11 Groups , 57 Adjusting Volume Alarm , 68 Own Fax Number , 41 Dialing , 68 Own Name , 41 Key Tone , 68 Quick Dial , 45 On Hook , 68 Speed Dial , 51 Reception , 68... - Page 82 LCD display , 13 Quick Dial , 43 Loading Paper , 67 Deleting , 46 Load Paper Indicator , 13 Dialing , 33 Lower Right Cover , 11 Dial label , 47 Low-power Mode , 5 Editing , 45 Registering , 43 Quick Dial keys , 14 Main Paper Tray , 67 Manual Receive , 37...
- Page 83 Tone , 33 Transmission Modes , 19 Trans. Option key , 13 Troubleshooting , 67 Error Messages , 72 TTI→Fax Header , 39 User Function keys , 13 User Tools key , 14 Ventilation hole , 12 Volume , 68 Wild Cards , 65...
- Page 84 MEMO...
- Page 85 MEMO...
- Page 86 MEMO H555-8401...
- Page 87 The CE Declaration of Conformity is available on the Internet at URL: http://www.ricoh.co.jp/fax/ce_doc/ In accordance with IEC 60417, this machine uses the following symbols for the main power switch: a means POWER ON. b means POWER OFF. Copyright © 2004 Ricoh Co., Ltd.
- Page 88 RICOH COMPANY, LTD. 15-5, Minami Aoyama 1-chome, Minato-ku, Tokyo 107-8544, Japan Phone: +81-3-3479-3111 Ricoh shall not be responsible for any dam- age or expense that might result from the use of parts other than genuine Ricoh parts with your Ricoh office products.