Table of Contents
Advertisement
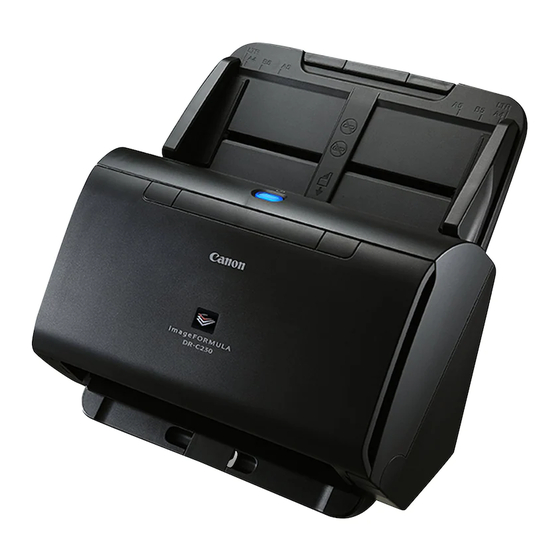
Scanner Canon DR-C230 600dpi
Estrutura compacta mas com grande performance, o Scanner
Canon imageFORMULA DR-C230 oferece confiabilidade e
produtividade suprema, a um preço acessível. Este robusto
scanner de mesa captura vários formatos e tamanhos de
documentos, tais como passaportes, com facilidade. Seu
alimentador suporta até 60 folhas e documentos de até 210/gm².
Pode digitalizar imagens de até 3m de comprimento, sendo capaz
de realizar até 3500 digitalizações por dia.
www.bztech.com.br
Advertisement
Table of Contents
Troubleshooting

Related Manuals for Canon imageFORMULA DR-C230


Summary of Contents for Canon imageFORMULA DR-C230
- Page 1 Scanner Canon DR-C230 600dpi Estrutura compacta mas com grande performance, o Scanner Canon imageFORMULA DR-C230 oferece confiabilidade e produtividade suprema, a um preço acessível. Este robusto scanner de mesa captura vários formatos e tamanhos de documentos, tais como passaportes, com facilidade. Seu alimentador suporta até...
- Page 2 User Manual • Please read this manual before operating this scanner. • After you finish reading this manual, store it in a safe place for future reference.
- Page 3 Canon U.S.A. Inc. new similar product or to an authorized collection site for recycling ONE CANON PARK, MELVILLE, NY 11747, U.S.A. waste electrical and electronic equipment (EEE). Improper handling of Tel. No. (800)652-2666...
- Page 4 This is not an exhaustive list. of their respective owners. However, the symbols are not Canon is not responsible for how this scanner is used by an individual. used in this document. Please note that certain intellectual property is protected by copyright...
- Page 5 CONSEQUENTIAL DAMAGES OF ANY NATURE, OR LOSSES OR EXPENSES RESULTING FROM THE USE OF THIS MATERIAL. CANON ELECTRONICS INC. IS NOT LIABLE FOR THE STORAGE AND HANDLING OF DOCUMENTS SCANNED WITH THIS PRODUCT, OR THE STORAGE AND HANDLING OF RESULTING SCANNED IMAGE DATA.
-
Page 6: Setup Guide
Setup Guide Please read first. STEP 1 Checking the Accessories If any of the items listed below are missing or damaged, contact your local authorized Canon dealer or service representative. AC Adapter/Power Cord Scanner Feed Tray USB Cable Type A/Type B... - Page 7 Setup Disc Contents The following software applications are also included on the supplied Setup Disc. For details on installing these applications, refer to the Install the following software necessary for using the scanner from the Readme.txt file. supplied Setup Disc. •...
- Page 8 However, normal operation is not guaranteed with all USB interfaces, even if present as standard equipment on the computer. Computer For details, consult your local authorized Canon dealer. CPU: Intel Core 2 Duo 1.66GHz or faster • Scanning speeds are lower if your computer’s standard USB interface is USB Full-Speed (equal to USB 1.1.)
- Page 9 Software Installation Click [Typical Installation]. IMPORTANT • Install the software before connecting the scanner to the computer. • Log on to Windows as an Administrator. • Close all other applications before installing the software. Insert the Setup Disc into the DVD drive of the computer. About Installation of the Third-Party Software The setup menu automatically starts up when you insert the disc When installing the bundled software, you can choose which of...
- Page 10 Follow the instructions on the screen to complete installation. IMPORTANT • Install the software before connecting the scanner to the computer. • Close all other applications before installing the software. Insert the Setup Disc into the DVD drive of the computer. Click [Exit] to finish installing the software.
- Page 11 Follow the instructions on the screen to complete installation. When the installation is complete, click [Log out].
- Page 12 STEP 3 Connecting to a Computer Connect the scanner to the computer and the power supply. IMPORTANT • Do not connect the scanner to the computer before installing the software. • Before connecting the scanner to the computer, verify that the power of the scanner is OFF. If the power is ON, turn it OFF.
-
Page 13: Turning Off The Power
STEP 4 Turning the Power ON The power of the scanner can be turned ON and OFF with the power When the scanner is properly connected to the computer, the button on the front of the scanner. (CaptureOnTouch) icon appears on the taskbar as follows. Make sure that the scanner and computer are connected properly. -
Page 14: Introduction
Introduction Thank you for purchasing the Canon imageFORMULA Document Scanner. • If you are using Windows, the User Manual (electronic manual) will Please read the following manuals carefully and familiarize yourself be registered to the following location when the software is installed. -
Page 15: Symbols Used In This Manual
Symbols Used in This Manual The following symbols are used in this manual to explain procedures, restrictions, handling precautions, and instructions that should be observed for safety. WARNING Indicates a warning concerning operations that may lead to death or injury to persons if not performed correctly. To use the scanner safely, always pay attention to these warnings. -
Page 16: Table Of Contents
Table of Contents Setup Guide ................. 5 About file formats ..............55 Environmental Settings ............57 Turning Off the Power ............12 Scanning with CapturePerfect ........61 Introduction ............... 13 Scanning with CapturePerfect..........61 Symbols Used in This Manual............ 14 Setting the Scanner Driver .......... -
Page 17: Before Using The Scanner
● If you have any questions regarding the power supply, contact your faucet, water heater, or humidifier. Avoid locations where ammonia local authorized Canon dealer or service representative for further gas is emitted. Avoid locations near volatile or flammable materials, information. -
Page 18: Moving The Scanner
Then, contact your local authorized Canon dealer or service representative to have the unit serviced. -
Page 19: Disposal
● Do not place objects on top of the scanner. Such objects may tip or fall over, resulting in personal injury. ● Connect only to a power outlet of the rated voltage and power supply frequency (120 V, 60 Hz or 220-240 V, 50/60 Hz depending on your region). -
Page 20: Features Of The Scanner
Features of the Scanner ● Auto Resolution Detection The main features of the scanner are described below. ● Compact Design When enabled in the CaptureOnTouch or scanner driver settings, The scanner has a compact size of 291 mm (11.46") (W) × 253 mm this function detects the content of documents and determines the (9.96") (D) ×... - Page 21 ● Prescan Function The scanner is equipped with a Prescan function that allows you to adjust the contrast and brightness of a prescanned image and then send the adjusted image to the application software, without needing to scan the document again. ●...
-
Page 22: Names And Functions Of Parts
Names and Functions of Parts Front View (With the Eject Tray Closed) A OPEN Lever C Document Eject Tray Pull this toward you to open the front unit. Open this for scanning. Scanned documents are output here. B Power button D Eject Tray Support Press this to turn on the scanner. - Page 23 Front View (With the Eject Tray Open) G Feed Extension Support Push it up to feed scan documents that are fastened together, such as invoices, without separating them (Bypass mode). (See p. 28) Open this when placing long paper in the scanner. K Front Unit H Feed Support Open this when cleaning the inside of the scanner or replacing...
- Page 24 C Start Button Back View This executes the job displayed in the Job No. Indicator. D Stop Button This stops active jobs. E DFR (Double Feed Release) Button This is lit when a document double feed is detected. Pressing this button cancels the double feed detection function, allowing you to continue scanning.
-
Page 25: Basic Operation
Basic Operation Documents The scanner can scan documents ranging in size from business cards to LTR/A4. The document sizes that this scanner can scan are shown below. Align the centers Plain Paper Size Width: 50.8 mm to 216 mm (2" to 8.5") Align the leading edges Length: 54 mm to 356 mm (2.1"... - Page 26 • Scanning the following types of documents can cause a paper jam Passport or malfunction. To scan such a document, make a photocopy of the Size: 88 mm x 125 mm (3.464" x 4.921") (ISO standard) document and then scan the photocopy. Insert the passport into an optional carrier sheet (passport type) in an opened state.
-
Page 27: How To Place Documents
How to Place Documents When placing long documents, pull out the document eject Scanning multiple documents extension support to match the length of those documents. Also, stand the eject stopper at the end of the eject support if necessary. Standard paper feeding should be used when scanning multiple documents of a standard size at one time. - Page 28 Set the feed selection lever to Normal mode. Place the document. After placing the document, align the document guides with both edges of the document. Adjust the document guides to fit the width of the IMPORTANT document to be scanned. •...
-
Page 29: When Scanning A Document One Page At A Time (Non Separation Mode)
When scanning a document one page Loading passports at a time (non separation mode) To scan a passport, insert the passport into the separately sold carrier sheet (for passports) and then place it onto the scanner. When scanning a thick document one page at a time or scanning a document that has multiple pages fastened together, set the feed Set the Feed Selection Lever to Bypass Mode. -
Page 30: Placing Cards
• Carrier sheet is a consumable item. Replace it with a new one Load the document with the page you want to scan facing when necessary, if there are clear damages or smudges. down. Placing Cards When scanning cards, set the feed selection lever to Bypass mode and then place one card at a time horizontally. -
Page 31: Placing Folded Documents
CAUTION Placing Folded Documents • Place the cards one at a time. Folio Scan enables you to scan documents that are larger than LTR/ • When scanning cards, place them to be fed horizontally. If you A4 and therefore do not fit in the feeder. To use the function, fold the place cards to be fed vertically, they may not be ejected properly, document in half lengthwise and place it into the feeder. - Page 32 Place the document with the folded edge facing right and the top edge facing downward. Opens the scanner driver's Detail Settings screen. (See p. 63) Set [Page Size] on the [Basic] tab to a size that is half that of the paper to be actually scanned, and set [Scanning Side] to [Folio].
-
Page 33: Setting The Long Document Mode
Setting the Long Document Mode The length of documents that can be scanned with the scanner is Opens the scanner driver's Detail Settings screen. (See normally 356 mm (14"), but you can scan documents up to 3,000 mm p. 65) (118.1") long by setting the scanner to the Long Document mode. - Page 34 Select [Long Document Mode (1000 mm)] or [Long Document In Windows 8.1, it is registered at the following location. Mode (3000 mm)] depending on the length of the document. Click [CANON DR-C240 USB] / [CANON DR-C230 USB] and click [Properties]. Scanner properties are displayed.
-
Page 35: Detecting A Document Double Feed
Detecting a document double feed This scanner includes a function to detect document double feeds. By Opens the scanner driver's Detail Settings screen. (See using this function, the scanner will automatically stop when it detects p. 65) that multiple documents have been fed at the same time. You can also specify whether to save the scanned image after scanning has Click to display the [Scanner Information] dialog box. - Page 36 To use the double feed detection ignore function, open the [Others] tab and select the [Rapid recovery system] Opens the scanner driver's Detail Settings screen. (See check box. p. 63) Click the [Feeding] tab. Select either the [Detect by Length] or the [Detect by Ultrasonic] check box (or both).
- Page 37 What to do when a double feed is detected Opens the scanner driver's Detail Settings screen. (See When not using the double feed detection ignore function p. 65) If a document double feed is detected during scanning, document feeding stops when the double fed documents are ejected. When this Select the [Double Feed Detection] check box, and then happens, the following error code is displayed in the Job No.
- Page 38 When using the double feed detection ignore function If a document double feed is detected during scanning, document feeding stops when the double fed documents are ejected. The following error code is displayed in the Job No. Indicator of the operating panel, and the DFR button lights.
-
Page 39: Scanning Methods
Scanning methods Scanning with CaptureOnTouch What is CaptureOnTouch? Save to folder Print Save to a specified Print to a specified printer. CaptureOnTouch is a scanning application that enables you to scan a Cloud Service folder. document with a simple operation merely by selecting the screen panel. (Network) Send to application Open a scanned image with specified application. Scanner Send by (Attach to) E-mail* start an e-mail application and send a ... -
Page 40: Starting And Exiting Captureontouch
Standard Scanning Click the Select document and Output panels, and then click the [Scan] button to scan the document. You can select the scan method according to the document type and purpose of use before scanning. “Standard Scanning” (See p. 41) Click (CaptureOnTouch icon) in the menu bar and then click [Launch CaptureOnTouch] from the menu which appears to start... -
Page 41: Selecting A Scanner
To close the CaptureOnTouch window, click at the top of the • Open [GO] - [Applications] folder from the Finder, and double-click window. This closes the window, but CaptureOnTouch will continue to [CaptureOnTouch]. reside in the system. click (CaptureOnTouch icon) in the menu bar, and select [Exit] Selecting a scanner from the menu. -
Page 42: Screen Descriptions
Hint Screen Descriptions If the scanner you are using does not appear, reinstall the scanner There are two areas in the CaptureOnTouch main screen, [Scanning driver.(see p. 8) Shortcut] and [Standard Scanning]. Use the [>] [<] at the top right of the main window to move between sections. - Page 43 Place the document in the scanner. Click the select document panel for the document to be scanned from [1 Select document]. The selected [Select document] panel will be displayed in orange. To edit scan images, see “Select document settings” on p. 51 Click the [SCAN] button.
- Page 44 When the scan is finished, the [Scanned image preview screen] To check the scanned image, click the [Finish] button. opens. Hint If using the same document selection and output combination the next time, click the [Save to Shortcut] button. The Select document and Select output that you selected are added to Scanning Shortcut.
-
Page 45: Scanning Shortcut
Hint If you click [Open storage folder], the folder in which the saved scanned images were saved opens. Depending on the output settings, the [Open storage folder] link may not be displayed. Scanning Shortcut Operations; Save [Scanning Shortcut] -> Scan the document -> Output the scanned images By adding scanning shortcuts that combine frequently-used document selections and outputs, you can scan just by clicking the Scanning Shortcut panel. - Page 46 Click the [Document] tab to set the Select document Click the [Output] tab to set the outputs. settings. “Setting the output” (See p. 54) “Select document settings” (See p. 51) Click the [Index] tab to set the index file. “Setting the Index” Click the [Batch separation] tab to set the batch (See p.
- Page 47 Click the [Option] tab to set the options. [Order of output] You can add or delete the output, and also change the order of output. Click the [General] tab to make other settings. [Edit after scanning] Check it on to enable modifying the scanned images in Scan Editing screen.
- Page 48 Selecting and scanning shortcuts Place the document in the scanner. “Basic Operation” (See p. 24) Click the scanning shortcut panel. The document is scanned. While scanning is in progress, the number of pages scanned is displayed in addition to the scanner settings. To check the scanned image, click the [Finish] button.
- Page 49 Hint If [Edit after scanning] is disabled in the scanning shortcut settings, the edit window will not be displayed. Start Button Click the [ ] button to edit the output settings. “Setting the output” (See p. 54) Click the [Cancel] button to discard the scanned image and return to the main window.
- Page 50 Scanned image preview screen (2) Thumbnail Display Area Thumbnails of the scanned documents will be displayed. You can implement the following operations. Click a thumbnail to display a preview of the scanned image in the preview window. Drag a thumbnail to change pages. (3) Preview Area The preview images of scanned documents are displayed.
- Page 51 Click [Color adjustment] to display the default. [Image alignment] Click the button to toggle between the typical settings and manual settings displays. Click a thumbnail in typical color adjustment to select the most suitable preview image that is displayed. 9 thumbnail patterns are displayed for the relevant image in color, and 6 patterns in grayscale.
-
Page 52: Select Document Settings
[Rotate] Select document settings By default, CaptureOnTouch enables the [Full auto] scan setting, so scanning is implemented using the scan conditions that match the document. To specify the document size, color mode, and other settings, set the desired scan condition by editing the scan mode panel. - Page 53 Scan settings [Rotate image to match orientation of text] Check [Enable] on to rotate the image in the same direction with the Makes the scan settings. characters. [Color mode] [Use advanced settings dialog box] Select the color mode for scanning from below. Document scan settings include basic items that are configured in Automatically determines the color mode [Scan settings], and the settings that are configured in the advanced...
-
Page 54: Setting The Batch Separation
Icon Separation method You can change the document scan icon displayed in the select Select the batch separation method and click the [Detail settings] document panel and scanning shortcut panel. button, to display the [Batch separation settings] and you can set the Enable [Change icon] to enable the [Settings] button and select the details of separation method. -
Page 55: Setting The Output
Save to folder Setting the output By default, CaptureOnTouch enables the settings to converts the scanned images to PDF file and save to a folder. To specify the output method and save location, edit the output panel and set the desired output. Create new [Output] panel Saves the scanned image to the specified folder. -
Page 56: Setting The Index
Setting the Index Scanning Shortcut setting You can set the index file. By default, CaptureOnTouch enables the [Full auto] scan setting, so scanning is implemented using the scan conditions that match the document. To specify combinations of document selection and outputs, you can edit the scanning shortcut panel to set the desired scanning shortcut. - Page 57 • BMP format • PPTX format (File format for Microsoft PowerPoint 2007 and later) The file formats that can be selected vary depending on the destination setting. When you output the scanned image using the plug-in, the image is output in the file format set in the application of the plug-in. Therefore this file format may be different from the one selected in the Select document panel.
-
Page 58: Environmental Settings
• Create one file for the pages of a document (Save all the pages of the document in one file). • Create one file per page (Save each page in two TIFF files). PPTX settings By selecting ON for [Compress image] and clicking the [Compression rate] button, you can specify the compression rate in the dialog box that appears. - Page 59 [Basic settings] Tab [Plugin] Tab On the [Plugin] tab, confirm the plugins that have been added to On the [Basic settings] tab, configure the following settings. CaptureOnTouch. Launch method setting [Setting] button By default, CaptureOnTouch becomes resident in the system when Displays the detailed information on the selected plugins.
- Page 60 If you click the [Execute] button, the [Save File] dialog is displayed. The operation slows down if you select [Full] for [Log file type]. [Initialize] A confirmation dialog box appears when you click the [Initialize] button. Back Up / Restore Use the [Back Up] and [Restore] buttons to back up the configuration file (settings, registered jobs, etc.) of CaptureOnTouch and restore the settings from the backup data.
- Page 61 [Restore] button Restore the settings from the backup file. When using multiple computers, you can back up the environmental settings of one computer and then perform a restore on the other computers so that all of the computers have the same settings. [Plugin] Tab On the [Plugin] tab, confirm the plugins that have been added to CaptureOnTouch.
-
Page 62: Scanning With Captureperfect
Scanning with CapturePerfect Scanning with CapturePerfect Select the scanner you are using and click [OK]. This section describes procedures from launching CapturePerfect to selecting a scanner, as well as procedures for scanning with the [Scan batch to file] function. See the “CapturePerfect Operating Guide” or help for details. From the Windows task bar, click [Start] and then select [All Programs]. - Page 63 Configure the scanning conditions. (See p. 63) If the placed document is removed, the scan will be interrupted and the [Continue Scanning] dialog box appears. To continue scanning, add a document and click [Continue Scanning] To stop scanning, click [Stop Scanning].
-
Page 64: Setting The Scanner Driver
Setting the Scanner Driver When you scan a document in an ISIS compatible (CapturePerfect, [Basic] tab etc.) or TWAIN compatible application, open the scanner driver and configure the scanning conditions and other settings. This section describes the configuration and functions of the scanner driver. - Page 65 [Image processing] tab Hint Depending on the ISIS compatible application, the application may have its own screen for setting scanning conditions. If the scanner driver is opened in such an application, setting items related to the functions provided by the scanner driver other than scanning conditions will be displayed on the [Basic] tab.
- Page 66 [Others] tab When the scanner driver is opened from CaptureOnTouch, the following settings screen of the scanner driver appears. Configure special scan method and image processing settings. Hint When the Advanced Settings screen is called from some applications, the Advanced Settings screen may have the Simple mode and Advanced mode.
-
Page 67: Setting Basic Scanning Conditions
Simple Mode Advanced Mode Setting Basic Scanning Conditions This section provides an overview of the basic setting items that are the minimum requirements when configuring the scanner settings. Confirming Basic Conditions for Scanning When you scan a document, make sure you confirm the [Color mode], [Page Size], [Dots per inch], and [Scanning Side] basic conditions in the Basic settings dialog box. - Page 68 Color mode Dots per inch Select the scanning mode. Select the scanning resolution. • [Advanced Text Enhancement] and [Advanced Text Enhancement II] remove or process the background color and background • Higher resolutions provide clearer images but result in larger file surrounding text to enhance the text for easy reading.
- Page 69 Color mode Select the scanning mode. Confirming Basic Conditions for Scanning When you scan a document, make sure you confirm the [Color mode], [Dots per inch], [Page Size], and [Scanning Side] basic conditions in • [Advanced Text Enhancement II] removes or processes the the settings screen of the scanner driver.
- Page 70 Page Size Scanning Documents of Unregistered Select the page size that matches the document to be scanned. Page Sizes You can register a non-standard page size that has not been registered as a page size by naming and registering it as a custom page size in the Custom Paper Size dialog box, which is opened from the [Save] button on the [Basic] tab.
- Page 71 Specifying the Scan Area Configuring Scanner Settings According to Purpose Configure the following settings when you want to specify the area of the document to be scanned. Set the scanning conditions according to the scanning purpose. Specifying an area When you want to delete the images of the blank pages in two-sided documents Specify the area of the document to be scanned in the Scan Area dialog box, which is opened from the [Area] button on the [Basic] tab.
- Page 72 When you do not want to scan colored lines and text Set the scanning side setting to [Skip blank page] to delete the images of the blank pages in the document. Specify the color (red, green, blue, all colors) to be ignored (dropped out) in the color drop-out settings on the [Image processing] tab, and that color will be removed from the scanned image.
- Page 73 When you want to enhance red When you want to enhance contours in images Specify [Red Enhance] in the color dropout settings on the [Image Adjust the edge emphasis setting on the [Image processing] tab. processing] tab, and red will be enhanced in the scanned image. Click [Image processing] and adjust the edge emphasis settings in the dialog box which appears.
- Page 74 When you want to make lines and text in scanned images When you want to enhance text that is difficult to read thicker or thinner because of factors such as the background of the scanned document Drag the [Character Emphasis] slider in the [Image processing] tab to make lines and text in the scanned images thicker or thinner.
- Page 75 Select [Advanced Text Enhancement II] in the [Color mode] setting. The background behind the text is removed or processed so that the text is emphasized for better readability. Select the [Double Feed Detection] check box. When you want to detect multiple pages fed at the same time Select the [Double Feed Detection] check box on the [Feeding] tab.
- Page 76 When you want to match the orientation of images to the text when scanning a mixture of pages with different text Select the [Text Orientation Recognition] check box. The text orientations orientation on each page is detected, and the scanned image is rotated in 90-degree increments to correct the orientation.
- Page 77 When you want to rotate the images of a document placed When you want to use batch separation for scanning horizontally to correct the orientation When you want to divide and scan a document, you can separate a Specify the rotation angle in [Document Orientation] on the [Others] batch at the timing with which each next document is placed and tab.
- Page 78 A When you want to specify different scanning conditions for the front When you want to use multistream settings for scanning and back pages of a document, select [Both] for [Scanning Side] on the [Basic] tab in advance. B Specify the number of scanning conditions to apply in [Stream count of Front].
- Page 79 To scan barcodes Click [Image processing] and select [ON] for [Erase Dot] or [Erase Notch] in the dialog box that appears. Installing a barcode module (optional) allows you to scan barcodes in the document. Click the [Barcode] button on the [Others] tab to configure barcode scanning conditions.
- Page 80 When you want to save a scanner driver setting Clicking the [Add] button registers the current setting to [Favorite Setting List]. Use the [Delete] button to delete a setting from the list. When you finish configuring a setting, click the [Save] button of [User Preference] to save the setting.
- Page 81 Function Restrictions Depending on Color Mode Setting Some of the setting items in each of the driver tabs are disabled as follows depending on the setting for [Color Mode] on the [Basic] tab. [Brightness] tab [Others] Tab Setting value Contrast Setting value Prescan Detect Automatically...
- Page 82 Not available for setting if either one of the following two conditions are met. • [Detection mode] in the [Auto Image Type Detection Settings] dialog box is set to [Color or Gray] • [Mode in case of binary] in the [Settings for in case of binary] tab is set to [Error Diffusion] Not available for setting if [Detection mode] is set to [Color or Gray] in the [Auto Image Type Detection Settings] dialog box.
- Page 83 Advanced mode (Image processing dialog) Prevent Bleed Edge Background Character Through / Color Erase Setting value Erase Dot emphasis smoothing Emphasis Remove drop-out Notch Background Detect automatically Black and White Error Diffusion Advanced Text Enhancement II 256-level Gray 24-bit Color O: Available for setting X: Not available for setting 1) Cannot be set if the [Detect automatically] setting matches the conditions below •...
-
Page 84: More Advanced Scanning Methods (Batch Separation)
More Advanced Scanning Methods (Batch Separation) Batch separation using patch code sheets Batch Separation (Insert blank page) This scanner supports batch separation (automatic file separation) Recognizes blank pages as batch separators and performs batch functions by using patchcodes. separation (automatic file separation) when documents containing By tucking patchcode sheets supplied with this scanner into a blank pages are scanned. - Page 85 Print patchcode with a printer. Pattern Description Patchcode Click [Start] – [All Programs] – [Canon DR-C240] / [Canon DR- Files are separated from C230] and then select [Patchcode] from the menu. the page after the page Patchcodes can be printed in A4 and letter (LTR) sizes. Open the printed with this patchcode.
- Page 86 Hint Place the documents in the scanner after inserting the In Windows 8.1, it is registered at the following location. patchcode sheet in front of the page that separates the files. Insert the patchcode sheets at the beginning of documents to change file separation.
- Page 87 In an application, specify a patchcode as a type of batch separation. When using CapturePerfect, select [Patchcode] in the [Batch Separator] settings. When using other ISIS-compatible applications, open the scanner driver settings screen and select [Patchcode] in [Batch Separation] on the [Others] tab.
-
Page 88: Maintenance
Maintenance Daily Maintenance Clean the scanner on a regular basis, as described below, to maintain Cleaning the Inside of the Scanner peak scanning quality. Dust or paper particles inside the scanner may cause lines or CAUTION smudges to appear on scanned images. Use compressed air to •... - Page 89 • Scratches on the sensor glass may cause marks on the images, as well as feeding errors. If there are scratches on the sensor glass, contact your local authorized Canon dealer or service representative. • Take care to ensure the anti-static brush in the front unit does not become deformed.
- Page 90 Clean the rollers. Wipe the removed rollers with a cloth that has been dampened with water and thoroughly wrung out. Clean the rollers while turning them. Wipe the rollers with a cloth that has been dampened with water and thoroughly wrung out, and then use a clean, dry and soft cloth to wipe away any moisture.
-
Page 91: Adjusting The Reduction Ratio
Hint Close the document eject tray. In Windows 8.1, it is registered at the following location. Click [Canon DR-C240 USB] / [Canon DR-C230 USB] and click [Properties]. Adjusting the Reduction Ratio Scanner properties are displayed. As the rollers installed in the scanner wear out, scanned images may become stretched in the vertical direction. - Page 92 Open the scanner driver's Detail Settings screen. (See p. 65) Click to display the [Scanner Information] dialog box. Click [OK] to close the scanner properties. Click [Maintenance] to display the [Maintenance] dialog box. Change the value of [Reduction ratio adjustment]. The adjustment value can be set within the range from -3.0% to 3.0%.
-
Page 93: Replacing Consumable Parts
Opening and Closing the Front Unit Replacing Consumable Parts The two rollers (feed roller and retard roller) installed in the scanner Open the document eject tray. are consumable parts. The feed roller and retard roller wear with scanning. If the feed roller and retard roller are worn, documents may not feed correctly and paper jams and double feeds may occur. - Page 94 Hint Close the document eject tray. The location of each of the consumable parts is shown below. Feed Roller Replacing the Feed Roller Retard roller (inside the front unit) Open the roller cover. When closing the front unit, make sure that it is completely closed by gently pressing the left and right until you hear a click.
- Page 95 Replacing the Retard Roller Install the new feed roller. Open the roller cover. Close the roller cover. Pull the left lever that secures the retard roller to the scanner, and remove the roller. ▼...
- Page 96 IMPORTANT Log on to Windows as an Administrator. Click the Start button, and then click [All Programs], [Canon DR-C240] / [Canon DR-C230], and [Canon imageFORMULA Utility]. imageFORMULA Utility starts. Push the left side of the retard roller to secure it to the scanner.
- Page 97 The counter for [Current Rollers] resets. Click [Canon DR-C240 USB] / [Canon DR-C230 USB] and click [Properties]. Click [OK] to close the scanner properties. Scanner properties are displayed. Opens the scanner driver's Detail Settings screen. (See p. 65) Click to display the [Scanner Information] dialog box.
-
Page 98: Auto Power Off Setting
To disable this setting, follow the procedure below. IMPORTANT Log on to Windows as an Administrator. Click [Canon DR-C240 USB] / [Canon DR-C230 USB] and click [Properties]. Click the Start button, and then click [All Programs], Scanner properties are displayed. -
Page 99: Removing The Document Feed Tray
Click [OK] to close the scanner properties. Removing the Document Feed Tray When you will store or otherwise not use the scanner for a long period of time, remove the document feed tray. -
Page 100: Troubleshooting
If a sticky substance such as glue or correction fluid is found, carefully wipe with just enough pressure to clean the area where the lines appear. If the problem cannot be solved by cleaning, the internal glass may be scratched. Contact your local authorized Canon dealer. - Page 101 Problem 6 Pages are missing. Problem 9 Multiple pages of scanned images cannot be saved to a single file. Solutions When the scanner driver’s [Scanning Side] setting is [Skip Blank Page], documents with very little black may Solutions • Depending on the file format, multiple scanned image be unintentionally skipped.
- Page 102 Problem 11 Memory becomes insufficient and scanning stops. Problem 13 Passport cannot be scanned as intended Solutions If you configure scanning conditions that use a large Solutions Depending on the condition of the carrier sheet or amount of the computer’s memory, scanning may stop passport, the image may not be scanned completely or because of insufficient memory.
-
Page 103: Software Troubleshooting
Software Troubleshooting This section describes troubleshooting problems and solutions for operating the supplied software (CaptureOnTouch and CapturePerfect). If scanning is too slow (1) Close other running programs, if any. (2) Scanning can be slowed down by memory shortage caused by memory-resident applications such as anti-virus programs. -
Page 104: Useful Tips
Useful tips Here are some useful tips for scanning documents. CapturePerfect Scanner setting configurations cannot be copied or backed up in Where are scanned images saved? Can the save destination be CapturePerfect. changed? Images are saved to the following locations, according to program What rules apply to scanned image file names? settings. - Page 105 How can I skip blank pages, and scan only non-blank pages? I want to save to other folders Specify [Skip Blank Page] on the scanner driver setting screen, then CaptureOnTouch scan. • In CaptureOnTouch, destinations other than [Save to folder] are provided as a plug-in.
-
Page 106: Clearing A Paper Jam
Clearing a Paper Jam When paper jams are detected during scanning, the following error Pull the OPEN lever and pull open the front unit toward codes are displayed in the scanner’s display panel and scanning is interrupted. you. Paper jam error code When a paper jam or double feed occurs during scanning, use the following procedures to clear them. - Page 107 IMPORTANT Make sure to pull the document out carefully, without applying too much force. If the jammed paper tears while you are pulling it out, make sure to remove any remaining pieces from inside the scanner. Close the front unit by gently pushing it up on both sides until it clicks into place.
-
Page 108: Uninstalling The Software
Uninstalling the Software If the ISIS/TWAIN driver, CaptureOnTouch or CapturePerfect is not operating normally, follow the procedure below to uninstall them. Then, re-install the software from the Setup disc. (See p. 8) IMPORTANT Log on to Windows as an Administrator. From the Windows task bar, click the [Start] button and then [Control Panel]. -
Page 109: Appendix
Appendix Specifications Main Unit Light source Scanning Side Simplex/duplex Type Desktop sheetfed scanner Scanning modes Black and White, Error Diffusion, 256-level Scanning Document Size Grayscale, Advanced Text Enhancement, Plain Paper Advanced Text Enhancement II, 24-bit Color Size: Width: 50.8mm to 216 mm (2" to 8.5") Scanning resolution (Primary Scan Lines x Secondary Scan Lines) Length: 54 mm to 356 mm (2.1"... -
Page 110: Replacement Parts
“Replacing Consumable Parts” About Use with CaptureOnTouch on p. • Contact your local authorized Canon dealer or service About Assigning Function to Start Button representative for detailed information about the replacement parts. When you connect Flatbed Scanner Unit, you can assign Scanning Shortcut of CaptureOnTouch to the start button of Flatbed Scanner Unit. -
Page 111: Dimensions
Limitation of Restarting with Start Button Dimensions When CaptureOnTouch is set not to be resident in memory, CaptureOnTouch cannot be restarted by pressing the start button on Flatbed Scanner Unit after you end CaptureOnTouch. About Setting up the Scanner Driver When functions of this scanner cannot be selected with the Flatbed Scanner Unit settings dialog box, click [Option] in the dialog box to open the scanner driver and make the required settings. -
Page 112: Index
Index Folio .................... 30 Front unit ..................92 Adjusting the Reduction Ratio ............ 90 Advanced Mode(Mac) ..............66 Auto Power Off ................97 Install .................... 8 Bundled software ..............8 Barcode module ............... 109 Batch separation ..............76 Job No. display ................23 Bypass mode ................ - Page 113 Start Button ................23 Stop Button ................23 Third-party Software ..............6 Uninstall ................... 107...
- Page 114 Safety-related markings on the machine Marquages de sécurité sur la machine Marcature di sicurezza sulla macchina Sicherheitshinweise auf der Maschine Marcas de la máquina relacionadas con la seguridad Veiligheidsmarkeringen op de machine Makine üzerindeki güvenlik i aretleri [English] Switch (On) Power on [Français] Commutateur (Marche)
- Page 115 [English] Switch (Push-On/Push-Off) Power on/off (no standby current) [Français] Commutateur (Appuyer pour Sous/hors tension (pas de courant de veille) mettre en marche/Appuyer pour arrêter) [Italiano] Interruttore a pulsante Alimentazione on/off (nessuna corrente di standby) bistabile (On/Off) [Deutsch] Schalter (Ein- und Ausschalten Ein- und Ausschalten (ohne Ruhestromaufnahme) durch Drücken) [Español]...
- Page 116 [English] DC symbol Indicates direct current [Français] Symbole CC Indique qu’il s’agit de courant continu [Italiano] Simbolo corrente continua (C.C.) Indica la corrente continua Kennzeichnet Gleichstrom [Deutsch] Gleichstrom-Symbol [Español] Símbolo CC Indica corriente continua Geeft gelijkstroom aan [Nederlands] DC-pictogram [Türkçe] DC sembolü...
- Page 117 CANON ELECTRONICS INC. 3-5-10 SHIBAKOEN, MINATO-KU, TOKYO 105-0011, JAPAN CANON U.S.A. INC. ONE CANON PARK, MELVILLE, NY 11747, U.S.A. CANON CANADA INC. 8000 Mississauga Road Brampton, Ontario L6Y 5Z7, CANADA CANON EUROPA N.V. BOVENKERKERWEG 59, 1185 XB AMSTELVEEN, THE NETHERLANDS CANON AUSTRALIA PTY.