Canon ImageFORMULA DR-C125 User Manual
Hide thumbs
Also See for ImageFORMULA DR-C125:
- Service manual (116 pages) ,
- Reference manual (68 pages) ,
- User manual (106 pages)

Related Manuals for Canon ImageFORMULA DR-C125


Summary of Contents for Canon ImageFORMULA DR-C125
- Page 1 0-00-DR-C125_RG_UK.book Page 1 Friday, May 27, 2011 6:54 PM Reference Guide • Please read this manual before operating this scanner. • After you finish reading this manual, store it in a safe place for future reference.
- Page 2 THIS AGREEMENT. distributor or dealer is not responsible for maintaining or helping you This legal document is a license agreement between you and CANON to use the SOFTWARE. No updates, fixes or support will be made ELECTRONICS INC. (“Canon”). BY OPENING THE SEALED DISK available for the SOFTWARE.
- Page 3 Should you have any questions concerning this Agreement, or if you terms of this Agreement. In addition to Canon enforcing its respective desire to contact Canon for any reason, please write to Canon’s local legal rights, you must then promptly destroy the SOFTWARE and any affiliate.
- Page 4 Canon U.S.A. Inc. waste electrical and electronic equipment (EEE). Improper handling of One Canon Plaza, Lake Success NY 11042, U.S.A. this type of waste could have a possible negative impact on the Tel. No. (516)328-5000 environment and human health due to potentially hazardous substances that are generally associated with EEE.
- Page 5 Trademarks CONSEQUENTIAL DAMAGES OF ANY NATURE, OR LOSSES OR • Canon and the Canon logo are registered trademarks, of Canon Inc. EXPENSES RESULTING FROM THE USE OF THIS MATERIAL. in the United States and may also be trademarks or registered trademarks in other countries.
-
Page 6: Setup Guide
0-00-DR-C125_RG_UK.book Page 6 Friday, May 27, 2011 6:54 PM Setup Guide Please read first. STEP 1 Checking the Accessories If any of the items listed below are missing or damaged, contact your local authorized Canon dealer or service representative. Scanner USB Cable AC Adapter/Power Cord Setup Disc Type A/Type B (Length: 1.8 m) - Page 7 – In order to receive support of this product, you need to upgrade to a Professional version. For details on upgrading, visit the following URL. http://www.nuance.com/partneroffer/canon • eCopy PDF Pro Office (Windows only) Nuance Communications PDF creation/editing software.
-
Page 8: Step 2 Installing The Software
To use the scanner, your computer must satisfy the following system interfaces, even if present as standard equipment on the computer. requirements. For details, consult your local authorized Canon dealer. • Scanning speeds are lower if your computer’s standard USB Computer interface is USB Full-Speed (equal to USB 1.1.) - Page 9 0-00-DR-C125_RG_UK.book Page 9 Friday, May 27, 2011 6:54 PM Installing in Windows Click [Typical Installation]. IMPORTANT • Install the software before connecting the scanner to the computer. • Log on to Windows as an Administrator. • Close all other applications before installing the software. Insert the Setup Disc into the DVD drive of the computer.
- Page 10 0-00-DR-C125_RG_UK.book Page 10 Friday, May 27, 2011 6:54 PM Click [Next]. Click [Install]. Read the license agreement, and click [I accept the terms When the driver installation is complete, click [Finish]. in the license agreement] and then [Next] if you agree to Click [Next].
- Page 11 0-00-DR-C125_RG_UK.book Page 11 Friday, May 27, 2011 6:54 PM Read the license agreement, and click [Yes] if you agree Specify whether to install plug-in for Evernote and to it. SharePoint, and click [Next]. Click [Next]. When CaptureOnTouch installation is complete, click [Finish].
- Page 12 0-00-DR-C125_RG_UK.book Page 12 Friday, May 27, 2011 6:54 PM Click [Next]. Click [Exit] to finish installing the software. Installing in Mac OS X IMPORTANT • Install the software before connecting the scanner to the computer. • Close all other applications before installing the software. Insert the Setup Disc into the DVD drive of the computer.
- Page 13 0-00-DR-C125_RG_UK.book Page 13 Friday, May 27, 2011 6:54 PM Click [DR-C125 Installer]. Click [Continue]. Read the license agreement and click [Continue] to About Installation of Third-Party Software accept it. If you open the folder containing the software instead of selecting [DR-C125 Installer], you can choose third-party software applications for installation.
- Page 14 0-00-DR-C125_RG_UK.book Page 14 Friday, May 27, 2011 6:54 PM Click [Install]. Enter the user name and the password with administrator privileges, and click [OK]. When the installation is complete, click [Close].
- Page 15 0-00-DR-C125_RG_UK.book Page 15 Friday, May 27, 2011 6:54 PM STEP 3 Connecting to a Computer Connect the scanner to the computer and the power supply. Hint IMPORTANT You can secure the cables to the back of the scanner. Make sure •...
- Page 16 0-00-DR-C125_RG_UK.book Page 16 Friday, May 27, 2011 6:54 PM STEP 4 Turning the Power ON The power of the scanner can be turned ON and OFF with the power When the scanner is properly connected to the computer, the button on the front of the scanner. (CaptureOnTouch) icon appears on the taskbar (or menu bar) as follows.
-
Page 17: Introduction
0-00-DR-C125_RG_UK.book Page 17 Friday, May 27, 2011 6:54 PM Introduction Thank you for purchasing the Canon imageFORMULA DR-C125 Symbols Used in This Manual Document Scanner. Please read the following manuals carefully and familiarize yourself The following symbols are used in this manual to explain procedures,... -
Page 18: Table Of Contents
0-00-DR-C125_RG_UK.book Page 18 Friday, May 27, 2011 6:54 PM Table of Contents Setup Guide ................. 6 Daily Maintenance ............54 Introduction ............... 17 Replacing Consumable Parts............. 54 Auto Power Off Setting............... 58 Symbols Used in This Manual............ 17 Common Problems and Solutions ........60 Important Safety Instructions.......... -
Page 19: Important Safety Instructions
● If you have any questions regarding the power supply, contact your ● Avoid locations where a considerable amount of dust accumulates. local authorized Canon dealer or service representative for further ● Avoid warm or humid locations, such as in the vicinity of a water information. -
Page 20: Moving The Scanner
Then, contact your local authorized Canon dealer or service representative to have the unit serviced. -
Page 21: Disposal
0-00-DR-C125_RG_UK.book Page 21 Friday, May 27, 2011 6:54 PM ● Do not allow water or flammable substances (alcohol, paint thinner, benzene, etc.) to spill into the scanner, as this may result in a fire or electric shock. ● Push the power button to turn the scanner OFF for safety when not using the scanner for a long period of time, such as overnight. -
Page 22: Features Of The Scanner
0-00-DR-C125_RG_UK.book Page 22 Friday, May 27, 2011 6:54 PM Features of the Scanner ● Full Auto Mode The main features of the document scanner DR-C125 are described below. A Full Auto Mode is provided in CaptureOnTouch and the scanner ● Compact Design driver to allow scanning under automatically determined conditions. - Page 23 0-00-DR-C125_RG_UK.book Page 23 Friday, May 27, 2011 6:54 PM ● Prescan Function The scanner is equipped with a Prescan function that allows you to adjust the contrast and brightness of a prescanned image and then send the adjusted image to the application software, without needing to scan the document again.
-
Page 24: Names And Functions Of Parts
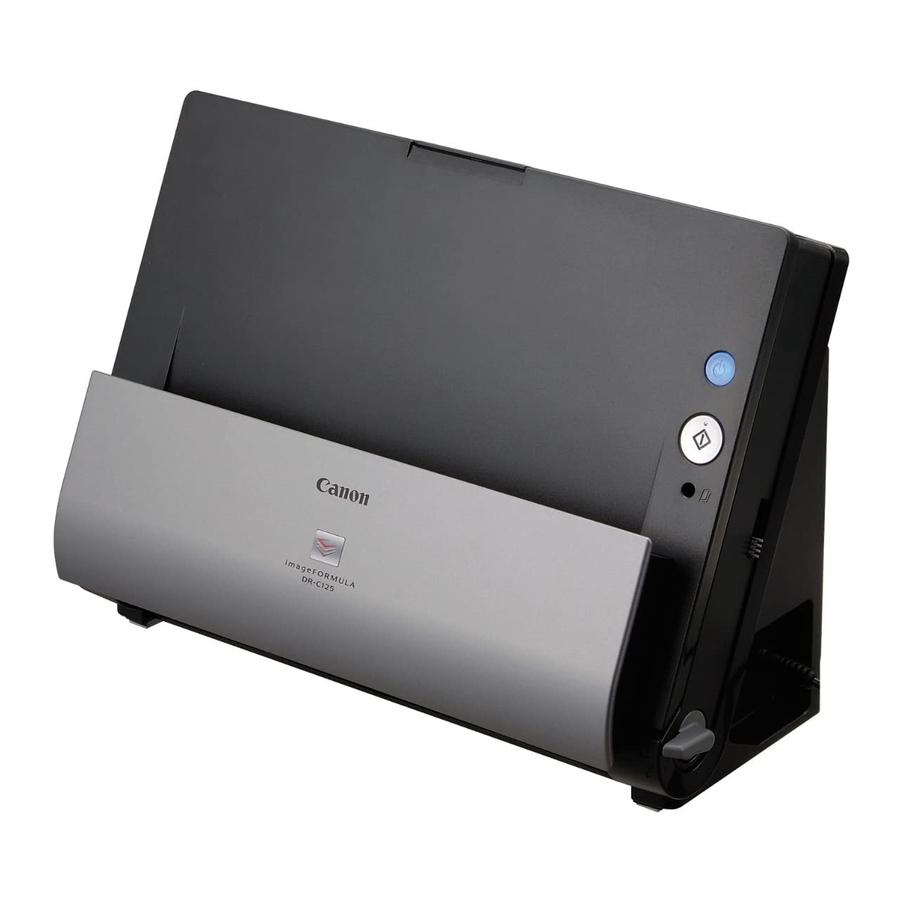
0-00-DR-C125_RG_UK.book Page 24 Friday, May 27, 2011 6:54 PM Names and Functions of Parts E Feed Support Front View Pull out this to support loaded documents. F Document Feed Tray Open this when loading documents for scanning. G Power Button This turns the scanner ON and OFF. - Page 25 0-00-DR-C125_RG_UK.book Page 25 Friday, May 27, 2011 6:54 PM Connectors Back View A Power Connector Connect the supplied AC adapter to this connector. B USB Connector Connect the supplied USB cable to this connector. A OPEN Button Press this button to open the front unit. B Kensington Slot Connect an anti-theft key chain or the like.
-
Page 26: Documents
0-00-DR-C125_RG_UK.book Page 26 Friday, May 27, 2011 6:54 PM Documents The scanner can scan documents ranging in size from business cards • Scanning documents before the ink is dry can cause problems with to Legal/A4. The document sizes that this scanner can scan are the scanner. - Page 27 0-00-DR-C125_RG_UK.book Page 27 Friday, May 27, 2011 6:54 PM Card (plastic or laminated) Size: 53.9 mm x 85.5 mm (2.12" x 3.37") (ISO standard) Card thickness: 0.76 mm (0.03") or less Orientation: Horizontal feeding only Feed path: Straight path only Embossed cards can be scanned.
-
Page 28: How To Place Documents
0-00-DR-C125_RG_UK.book Page 28 Friday, May 27, 2011 6:54 PM How to Place Documents Switching the Feed and Eject Placing Documents for Standard Methods Feeding Use the two levers on the scanner to switch the feed and eject Ordinarily, standard feeding should be used when scanning multiple methods based on the type of document you are scanning. - Page 29 0-00-DR-C125_RG_UK.book Page 29 Friday, May 27, 2011 6:54 PM When scanning long documents, pull out the feed Set the feed selection lever and the eject selection lever. extension plates and eject support. Set the feed selection lever to the standard feeding position (lower position).
- Page 30 0-00-DR-C125_RG_UK.book Page 30 Friday, May 27, 2011 6:54 PM IMPORTANT Place the document. • When placing documents into the feed tray, take care not to cut Insert the document in the feed tray so that the front is facing your hands on the edges of the paper. forward and the top is facing upward.
-
Page 31: Placing Documents For Bypass Feeding
0-00-DR-C125_RG_UK.book Page 31 Friday, May 27, 2011 6:54 PM Placing Documents for Bypass Adjust the document guides to fit the width of the document. Feeding When scanning a thick document one page at a time or scanning a document that has multiple pages fastened together, set document feeding to bypass. -
Page 32: Placing Cards
0-00-DR-C125_RG_UK.book Page 32 Friday, May 27, 2011 6:54 PM Placing Cards Place the document in the document feed tray. IMPORTANT Set the feed selection lever and the eject selection lever. • With the straight path, documents are ejected at the front of the Set the feed selection lever to the bypass position (upper scanner. - Page 33 0-00-DR-C125_RG_UK.book Page 33 Friday, May 27, 2011 6:54 PM IMPORTANT Place the card horizontally with the top edge facing With the straight path, documents are ejected at the front of the upward. scanner. Do not place anything that will block output near the document eject area.
-
Page 34: Scanning With Captureontouch (Windows)
Hint be selected according to the purpose and application. • You can also start CaptureOnTouch from the Start menu. Click [Start] – [All Programs] – [Canon DR-C125] – [DR-C125 Scan First CaptureOnTouch]. Scan a document and then select the output method. This method •... -
Page 35: Scan First
CaptureOnTouch will start and become resident in the system again. • Click [Start] – [All Programs] – [Canon DR-C125] – [DR-C125 CaptureOnTouch]. • Press the Start button on the scanner (in this case, the main screen of CaptureOnTouch will open and scanning will start using the scan method assigned to the Start button). - Page 36 0-00-DR-C125_RG_UK.book Page 36 Friday, May 27, 2011 6:54 PM IMPORTANT Set the scan method in the top screen. If you configure scanning conditions that consume a large amount of the computer’s memory, scanning may stop because of insufficient memory. If an error message appears due to insufficient memory while scanning is in progress, exit the application, change the scanning conditions, and then try scanning again.
-
Page 37: Select Scan Job
0-00-DR-C125_RG_UK.book Page 37 Friday, May 27, 2011 6:54 PM Select Scan Job Configure the settings related to output and then output the scanned images. Operation Flow Register the job ▼ Select the job ▼ Scan the document ▼ Output the scanned images Registering and Editing Jobs In CaptureOnTouch, up to 10 jobs can be registered for use with Select Scan Job. - Page 38 0-00-DR-C125_RG_UK.book Page 38 Friday, May 27, 2011 6:54 PM Enter the job name, and press the Enter key. Click [Output settings], and configure the output settings. The output setting items differ depending on the specified output method. For details on the setting items, see the Help of CaptureOnTouch.
- Page 39 0-00-DR-C125_RG_UK.book Page 39 Friday, May 27, 2011 6:54 PM Hint IMPORTANT • If you set [Check output after scanning] to [ON], you can check If you configure scanning conditions that consume a large amount of the output settings after scanning. the computer’s memory, scanning may stop because of insufficient •...
-
Page 40: Scanning With Start Button
0-00-DR-C125_RG_UK.book Page 40 Friday, May 27, 2011 6:54 PM When [Check output after scanning] is set to [ON] Hint The Output Confirmation screen appears before the scanned images You can also assign any job to the Start button. If a job is assigned, are output. - Page 41 0-00-DR-C125_RG_UK.book Page 41 Friday, May 27, 2011 6:54 PM When Select Scan Job: Dots per inch Specify the scanning resolution. When [Detect automatically] is specified, the resolution is detected automatically from the content of the scanned document. Scanning Side Specify whether to scan only one side or both sides of a document. When [Skip blank page] is specified, any blank paged detected within the document is skipped during scanning.
- Page 42 0-00-DR-C125_RG_UK.book Page 42 Friday, May 27, 2011 6:54 PM B Preview Area Setting of [Use Displays the preview images of the scanned document. Other than basic advanced settings Basic items C Preview Controls items dialog box] Control the preview images and cancel or continue scanning with the following buttons.
-
Page 43: Setting The Output Method
0-00-DR-C125_RG_UK.book Page 43 Friday, May 27, 2011 6:54 PM To use this feature, an e-mail application such as Windows Mail or Setting the Output Method Outlook Express (both of these applications come standard with the operating system) that supports MAPI (Microsoft Messaging CaptureOnTouch is provided with various output methods for Application Programming Interface) needs to be specified as the processing scanned images. -
Page 44: Scanning With Captureontouch (Mac Os X)
0-00-DR-C125_RG_UK.book Page 44 Friday, May 27, 2011 6:54 PM Scanning with CaptureOnTouch (Mac OS X) Scan with Start Button What is CaptureOnTouch? Scan First is pre-assigned to the Start button of the scanner, so you CaptureOnTouch is a scanning application that allows you to scan a can load a document and then start scanning by just pressing the Start document with a simple operation by following the instructions on the button. -
Page 45: Scan First
CaptureOnTouch will launch and become resident in the system again. • Open [Applications] - [Canon DR-C125] folder from the Finder, and double-click [CaptureOnTouch DR-C125]. • Press the Start button on the scanner (in this case, the main screen of CaptureOnTouch will open and scanning will start using the scan method assigned to the Start button). - Page 46 0-00-DR-C125_RG_UK.book Page 46 Friday, May 27, 2011 6:54 PM IMPORTANT Set the scan method in the top screen. If you configure scanning conditions that consume a large amount of the computer’s memory, scanning may stop because of insufficient memory. If an error message appears due to insufficient memory while scanning is in progress, exit the application, change the scanning conditions, and then try scanning again.
-
Page 47: Select Scan Job
0-00-DR-C125_RG_UK.book Page 47 Friday, May 27, 2011 6:54 PM Select Scan Job Configure the settings related to output and then output the scanned images. Operation Flow Register the job ▼ Select the job ▼ Scan the document ▼ Output the scanned images Registering and Editing Jobs In CaptureOnTouch, up to 10 jobs can be registered for use with A Configure the settings related to output. - Page 48 0-00-DR-C125_RG_UK.book Page 48 Friday, May 27, 2011 6:54 PM Enter the job name, and press the Enter key. Click [Output settings], and configure the output settings. The output setting items differ depending on the specified output method. For details on the setting items, see the Help of CaptureOnTouch.
- Page 49 0-00-DR-C125_RG_UK.book Page 49 Friday, May 27, 2011 6:54 PM Hint Hint • If you set [Confirm file saving] to [ON], you can check the output • Clicking [Return to top] returns to the top screen of Select Scan Job. settings after scanning. •...
-
Page 50: Scanning With Start Button
0-00-DR-C125_RG_UK.book Page 50 Friday, May 27, 2011 6:54 PM When [Check output after scanning] is set to [ON] Hint The Output Confirmation screen appears before the scanned images You can also assign any job to the Start button. If a job is assigned, are output. - Page 51 0-00-DR-C125_RG_UK.book Page 51 Friday, May 27, 2011 6:54 PM When Select Scan Job: Dots per inch Specify the scanning resolution. When [Detect automatically] is specified, the resolution is detected automatically from the content of the scanned document. Scanning Side Specify whether to scan only one side or both sides of a document. When [Skip blank page] is specified, any blank paged detected within the document is skipped during scanning.
- Page 52 0-00-DR-C125_RG_UK.book Page 52 Friday, May 27, 2011 6:54 PM B Preview Area Setting of [Use Displays the preview images of the scanned document. Other than basic advanced settings Basic items C Preview Controls items dialog box] Control the preview images and cancel or continue scanning with the following buttons.
-
Page 53: Setting The Output Method
0-00-DR-C125_RG_UK.book Page 53 Friday, May 27, 2011 6:54 PM Print Setting the Output Method CaptureOnTouch is provided with various output methods for processing scanned images. The output method specification is common to Scan First and Select Scan Job. Prints the scanned images with a specified printer. When you specify this output method, specify the printer for printing. -
Page 54: Daily Maintenance
0-00-DR-C125_RG_UK.book Page 54 Friday, May 27, 2011 6:54 PM Daily Maintenance Opening and Closing the Front Unit Replacing Consumable Parts The two rollers (feed roller and retard roller) installed in the scanner Open the document feed tray. Press the OPEN button and are consumable parts. - Page 55 0-00-DR-C125_RG_UK.book Page 55 Friday, May 27, 2011 6:54 PM Replacing the Feed Roller When closing the front unit, make sure that it is completely closed by gently pressing the left and right Open the roller cover. until you hear a click. Slide the feed roller to the left, and then remove it.
- Page 56 0-00-DR-C125_RG_UK.book Page 56 Friday, May 27, 2011 6:54 PM Replacing the Retard Roller Slide the roller to the light to secure it. Open the roller cover. Close the roller cover. Make sure that it is completely closed by pressing until you hear a click. Remove the retard roller and then install the new retard roller.
- Page 57 Click the Start button, and then click [All Programs], [Canon DR-C125], and [Canon imageFORMULA Utility]. imageFORMULA Utility starts. The counter for [Current Rollers] resets. Click [CANON DR-C125 USB] and click [Properties]. The scanner’s properties appear. Click [OK] to close the scanner properties. Under Mac OS X Start CaptureOnTouch.
-
Page 58: Auto Power Off Setting
Click the Start button, and then click [All Programs], [Canon DR-C125], and [Canon imageFORMULA Utility]. Click [Maintenance] to display the [Maintenance] dialog imageFORMULA Utility starts. box. Click [CANON DR-C125 USB] and click [Properties]. Scanner properties are displayed. Click [Reset]. Click to close the [Maintenance] dialog box. - Page 59 0-00-DR-C125_RG_UK.book Page 59 Friday, May 27, 2011 6:54 PM Click the [Maintenance] tab and then clear the [Turn off automatically after 4 hours] check box. Click [OK] to close the scanner properties.
-
Page 60: Common Problems And Solutions
(3) The computer’s USB interface may not support the be solved by cleaning, the internal glass may be scanner. The scanner cannot be guaranteed to scratched. Contact your local authorized Canon dealer. work with all USB interfaces. (4) Confirm that the supplied USB cable is used to Problem 6 Pages are missing. - Page 61 0-00-DR-C125_RG_UK.book Page 61 Friday, May 27, 2011 6:54 PM Problem 8 Each scanned image of a multi-page document is Problem 12 Scanned images are upside down. saved as a separate document. Solutions Confirm the scanner driver settings. Solutions With CaptureOnTouch, you can scan multiple pages In Windows, confirm that the [Upside-down feeding] into one image file when TIFF or PDF file format is check box in the [Feeding] tab is cleared.
-
Page 62: Clearing A Paper Jam
0-00-DR-C125_RG_UK.book Page 62 Friday, May 27, 2011 6:54 PM Clearing a Paper Jam When paper jams occur during scanning, use the following procedure When the jammed document is on the document ejecting to clear them. side, open the document eject tray. WARNING Be careful when removing jammed paper. - Page 63 0-00-DR-C125_RG_UK.book Page 63 Friday, May 27, 2011 6:54 PM Return the document eject tray to its original position. Remove the jammed document. Make sure that it is completely closed by pushing until you hear a click. IMPORTANT Make sure to pull the document out carefully, without applying too Press the OPEN button and pull open the front unit much force.
- Page 64 0-00-DR-C125_RG_UK.book Page 64 Friday, May 27, 2011 6:54 PM Close the front unit by gently pushing it up on both sides until it clicks into place. Make sure that the front unit is completely closed by pushing until you hear a click. After removing the jammed paper, check to see if the last page was scanned correctly, and then continue scanning.
-
Page 65: Specifications
0-00-DR-C125_RG_UK.book Page 65 Friday, May 27, 2011 6:54 PM Specifications Main Unit Scanning Speed (Conditions: Core 2 Duo 3.0GHz CPU, 2 GB memory, A4 document size) Type Desktop sheetfed scanner Black and white Simplex 200dpi 25 pages/min. Scanning Document Size 300dpi 25 pages/min. -
Page 66: Replacement Parts
Kit to replace the rollers (feed roller, retard roller) and document holding guide. • For the replacement procedure, see “Replacing Consumable Parts” on p. 54. • Contact your local authorized Canon dealer or service representative for detailed information about the replacement parts. - Page 67 0-00-DR-C125_RG_UK.book Page 67 Friday, May 27, 2011 6:54 PM...
- Page 68 0-08-Cover4.fm Page 68 Tuesday, May 31, 2011 5:18 PM CANON ELECTRONICS INC. 1248, SHIMOKAGEMORI, CHICHIBU-SHI, SAITAMA 369-1892, JAPAN CANON U.S.A. INC. ONE CANON PLAZA, LAKE SUCCESS, N.Y. 11042, U.S.A. CANON CANADA INC. 6390 DIXIE ROAD, MISSISSAUGA, ONTARIO L5T 1P7, CANADA CANON EUROPA N.V.