Table of Contents
Advertisement
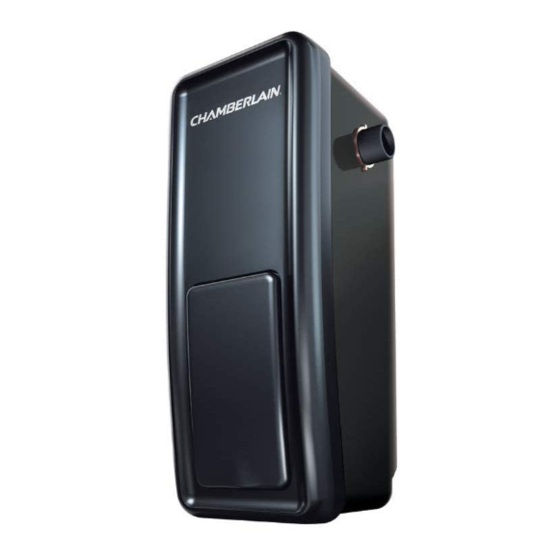
Wall Mount Garage Door Opener
Install On Sectional Doors With Torsion Assemblies Only
This product is NOT intended for use on low headroom tracks with outside pickup
drum or garage doors utilizing extension springs. For advanced or customized
adjustments, door springs, and/ or track confi gurations, contact a trained door
systems technician.
• Please read this manual and the enclosed safety materials carefully!
• Fasten the manual near the garage door after installation.
• The door WILL NOT CLOSE unless the Protector System
monitor are connected and properly aligned.
• Periodic checks of the garage door opener are required to ensure safe operation.
• This garage door opener is ONLY compatible with myQ
• The model number label is located behind the hinged door of your opener.
The Chamberlain Group, Inc.
300 Windsor Drive
Oak Brook, IL 60523
Model RJO20
For Residential Use
and cable tension
®
accessories.
®
Advertisement
Table of Contents
Troubleshooting

Related Manuals for Chamberlain RJO20


Summary of Contents for Chamberlain RJO20
- Page 1 • Periodic checks of the garage door opener are required to ensure safe operation. • This garage door opener is ONLY compatible with myQ accessories. ® • The model number label is located behind the hinged door of your opener. The Chamberlain Group, Inc. 300 Windsor Drive Oak Brook, IL 60523...
-
Page 2: Table Of Contents
Install the Door Control (myQ ® Control Panel) ....15 Chamberlain Internet Gateway ..31 Preparation Safety Symbol and Signal Word Review This garage door opener has been designed and tested to offer safe service provided it is installed, operated, maintained, and tested in strict accordance with the instructions and warnings contained in this manual. -
Page 3: Glossary
Preparation (continued) Glossary Here are some basic terms you may encounter as you prepare and install your garage door opener. Term Defi nition Bearing Plate Acts as a support for the torsion bar. The bearing and mounting plate are typically located above the garage door. -
Page 4: Is Your Garage Door Ready
Preparation (continued) Is Your Garage Ready? Use this check list to see if your garage is compatible with the garage door opener requirements. Note that you can install the garage door opener on either the left or the right side of the garage door. IMPORTANT: Your garage MUST meet the following requirements to install this opener to ensure safe and proper operation. -
Page 5: Prepare Your Garage Door
Preparation (continued) To prevent possible SERIOUS INJURY or DEATH: • ALWAYS call a trained door systems technician if garage door binds, sticks, or is out of balance. An unbalanced garage door may NOT reverse when required. • NEVER try to loosen, move or adjust garage door, door springs, cables, pulleys, brackets or their hardware, ALL of which are under EXTREME tension. -
Page 6: Carton Inventory
Power Door Lock with Lock Wire and Connector Garage Door Opener Template Safety Sensor Bracket (2) NOT SHOWN: Safety labels and literature Chamberlain Internet Gateway ACCESSORIES White & White/Red Wire Door Control 3-Button Premium Remote (myQ ® Control Control Model 953ESTD (1) -
Page 7: Overview Of Installation
Preparation (continued) Overview of Installation Remote light Cable tension monitor and wire Door control wire Door lock wire Safety reversing sensor wire Door control Safety reversing sensor wire Safety reversing sensor and bracket Safety reversing sensor and bracket ADDITIONAL ITEMS YOU MAY NEED FOR THE INSTALLATION: Survey your garage area to see if you will need any of the following items: •... -
Page 8: Installation
Installation IMPORTANT INSTALLATION INSTRUCTIONS To reduce the risk of SEVERE INJURY or DEATH: 1. READ AND FOLLOW ALL INSTALLATION 8. NEVER wear watches, rings or loose clothing while WARNINGS AND INSTRUCTIONS. installing or servicing the garage door opener. They could be caught in door or operator mechanisms. 2. -
Page 9: Attach The Collar To The Garage Door Opener
Installation (continued) Attach the Collar to the Garage Door Opener The garage door opener can be installed on either side of the door; see "Is Your Garage Ready?" on page 4. The illustrations shown are for installation on To prevent possible SERIOUS the left side. -
Page 10: Position And Mount The Garage Door Opener
Installation (continued) Position and Mount the Garage Door Opener 1. Close the garage door completely. To prevent possible SERIOUS 2. Slide the garage door opener onto the end of the torsion bar. Ensure the INJURY or DEATH: collar does NOT touch the bearing plate. •... - Page 11 Installation (continued) 5. Remove the garage door opener from torsion bar. 6. Drill 3/16 inch pilot holes at the marked locations. Drill through metal door rail plates if necessary. 7. Slide the garage door opener back onto the torsion bar until pilot holes align with bracket. 8.
-
Page 12: Attach The Emergency Release Rope And Handle
Installation (continued) Attach the Emergency Release Rope and Handle 1. Thread one end of the rope through the hole in the top of the red handle so To prevent possible SERIOUS “NOTICE” reads right side up. Secure with an overhand knot at least 1 inch INJURY or DEATH from a falling (2.5 cm) from the end of the rope to prevent slipping. -
Page 13: Position The Cable Tension Monitor (Required)
Installation (continued) Install Power Door Lock YOU WILL NEED 1. Pull down on the manual release to disengage the door and open the door manually. 2. Clean track surface, and attach Screw lock template to the track. 1/4"-20x1/2" (2) 3. Drill holes as marked on the template. -
Page 14: Attach The Cable Tension Monitor (Required)
Installation (continued) YOU WILL NEED Attach the Cable Tension Monitor Screw 1. Mark and drill 3/16 inch pilot holes for screws. If the cable tension monitor 14-10x2" (2) cannot be mounted into wood, it can be mounted into 1/2 inch (1 cm) or greater drywall using the drywall anchors (2) and the #8 screws (2) Drywall Anchor provided in the hardware bag. -
Page 15: Install The Door Control (Myq ® Control Panel)
Installation (continued) ® Install the Door Control (myQ Control Panel) Install door control within sight of garage door, out of reach of small To prevent possible SERIOUS children at a minimum height of 5 feet (1.5 m) above fl oors, landings, INJURY or DEATH from electrocution: steps or any other adjacent walking surface, and away from ALL moving •... -
Page 16: Install Remote Light
Installation (continued) IMPORTANT INSTALLATION INSTRUCTIONS To reduce the risk of SEVERE INJURY or DEATH: 1. This portable luminaire has a polarized plug (one 4. If it still does not fi t, contact a qualifi ed blade is wider than the other) as a feature to electrician. -
Page 17: Install The Protector System
Installation (continued) Install the Protector System ® IMPORTANT: The safety reversing sensors MUST be connected and aligned correctly before the garage door opener will move in the down Be sure power is NOT connected direction. to the garage door opener The Protector System ®... - Page 18 Installation (continued) INSTALLING THE BRACKETS The brackets house the safety reversing sensors in a fi xed, secure position so the safety reversing sensors will face each other across the garage door, with the beam no higher than 6" (15 cm) above the fl oor. Be sure power to the opener is disconnected.
- Page 19 Installation (continued) MOUNTING THE SAFETY REVERSING SENSORS 1. Slide a hex screw into the slot on each sensor. 2. Use wing nuts to fasten safety reversing sensors to brackets, with lenses pointing toward each other across the door. Be sure the lens is not obstructed by a bracket extension.
-
Page 20: Connect Power
Installation (continued) Connect Power To avoid installation diffi culties, do not run the garage door opener at To prevent possible SERIOUS INJURY or DEATH from electrocution or fi re: this time. • Be sure power is NOT connected to the opener, and disconnect power to circuit BEFORE removing cover to establish permanent wiring connection. -
Page 21: Align The Safety Reversing Sensors
Installation (continued) Align the safety reversing sensors IMPORTANT: The safety reversing sensors MUST be connected and aligned correctly before the garage door opener will move in the down direction. When the garaged door opener has power, check the safety reversing sensors. If the sensors are aligned and wired correctly, both LEDs will glow steadily. -
Page 22: Adjustment
Adjustment Program the Travel Limits Travel limits regulate the points at which the door will stop when moving Without a properly installed up or down. safety reversal system, persons Adjust the position of the door by using the black and yellow buttons. Black (particularly small children) could moves the door UP (open) and yellow moves the door DOWN (close). -
Page 23: Enter Force Adjustment Mode
Adjustment (continued) Enter Force Adjustment Mode The force setting measures the amount of force required to open and Without a properly installed close the door. safety reversal system, persons (particularly small children) could 1. Push the yellow button be SERIOUSLY INJURED or twice to enter into the KILLED by a closing garage door. -
Page 24: Test The Safety Reversal System
Adjustment (continued) Test the Safety Reversal System TEST Without a properly installed 1. With the door fully open, place a 1-1/2" (3.8 cm) board (or a 2x4 laid fl at) safety reversal system, persons on the fl oor, centered under the garage door. (particularly small children) could be SERIOUSLY INJURED or 2. -
Page 25: Test The Power Door Lock
NOTE: The power door lock can be manually released by sliding the manual release handle to the open position. However, if the power door lock does not function, contact Chamberlain for a replacement. Power Door Lock Power Door Lock Manual Release... -
Page 26: Operation
With the garage new codes. When programmed to the while closing, the door will reverse, door opener lights off, press and hold Chamberlain ® Internet Gateway you opener beeps and lights fl ash 5 times. the light button for 10 seconds, until... -
Page 27: Using The Door Control (Myq ® Control Panel)
Operation (continued) Using the Door Control (myQ ® Control Panel) NOTE: Due to power consumption, this door control (Model 041A7928-3) cannot be used in conjunction with another wired door control connected to your garage door opener. If an additional door control is needed, the wireless door control model 041A7773-1 can be programmed to the door control (Model 041A7928-3). -
Page 28: Using The Remote Control
Operation (continued) Using the Door Control (continued) FEATURE LIGHTS: TO CHANGE THE AMOUNT OF TIME THE REMOTE LIGHTS WILL STAY ON: Press the LIGHT button to turn the garage door opener lights on or off. When the lights are turned on they will Press and hold the LOCK button until the garage door stay on until the LIGHT button is pressed again, or until opener lights fl... -
Page 29: Programming
Model PILCEV - Remote Light Control ® * myQ accessories may be programmed to the Light module can be synchronized with the garage Chamberlain ® Internet Gateway (Model 828LG) or ® door opener light bulbs. the myQ... -
Page 30: Reprogramming Remote Light Or Additional Light
Programming (continued) Reprogramming Remote Light or Additional Light Your garage door opener remote light has already been programmed at the factory to operate with your opener. Any additional or replacement remote lights will need to be programmed. 1. Press the LEARN button on the light until the LED comes ON. 2. -
Page 31: Chamberlain Internet Gateway
NOTE: If you are unable to add the myQ ® Control Panel to your Chamberlain Internet Gateway, erase all codes from the door control and try again. Note that you will need to reprogram any accessories you wish to use. -
Page 32: Maintenance
Maintenance Care of Your Garage Door Opener MAINTENANCE SCHEDULE Once a Month • Manually operate door. If it is unbalanced or binding, call a trained door systems technician. • Check to be sure door opens and closes fully. Adjust limits and/or force if necessary (see Adjustment Steps 1 and 2). -
Page 33: Troubleshooting
Troubleshooting Diagnostic Chart Garage Door Opener Your garage door opener is programmed with self- diagnostic capabilities. The diagnostic LED will fl ash a number of times, then pause, signifying it has found a potential issue. Consult Diagnostic Chart below. Diagnostic Installed Safety Reversing Sensor Installed Safety Reversing... -
Page 34: Troubleshooting
Troubleshooting (continued) Troubleshooting The garage door opener doesn't operate from either the Door Control or the remote control: • Does the garage door opener have electric power? Plug a lamp into the outlet. If it doesn't light, check the fuse box or the circuit breaker. (Some outlets are controlled by a wall switch.) •... - Page 35 • Check to make sure the torsion bar is not visibly moving up and down as it rotates. • Check that the opener is mounted at a right angle to the jackshaft. If not, move the position of the mounting bracket. Power lock makes noise when operating. • Call Chamberlain ® for replacement power lock.
-
Page 36: Safety & Maintenance Guide
Automatic Garage Door Opener Safety & Maintenance Guide Garage Door Opener Safety – An Automatic Decision A garage door is the largest moving object in the home. An improperly adjusted garage door and opener can exert deadly force when the door closes – which could lead to entrapment of children or adults and subsequent injury or death. - Page 37 Routine Maintenance Can Prevent Tragedies Make monthly inspection and testing of your garage door and opener system a part of your regular routine. Review your owner’s manual for both the door and door opener. If you don’t have the owner’s manuals, contact the manufacturer(s) and request a copy for your specifi...
-
Page 38: Accessories
Security+ from 1993-present. a 4-digit PIN. Works ® remote control or ® compatible. with ALL Chamberlain a myQ ® Internet Gateway. Simply Includes visor clip. openers from replaces your current wired wall ®... -
Page 39: Warranty
Failure to comply strictly with those instructions will void this limited warranty in its entirety. If, during the limited warranty period, this product appears to contain a defect covered by this limited warranty, visit chamberlain.com, before dismantling this product. You will be advised of disassembly and shipping instructions when you call. Then send the product or component, pre-paid and insured, as directed to our service center for warranty repair. -
Page 40: Garage Door Opener Assembly Parts
KEY PART DESCRIPTION DESCRIPTION 041DJ002 Logic board complete with plate 041A6095 Motor with bracket 041B8861 Travel Module 041B0122 Power cord 041C0168 Transformer 041A6348-3 Cover Contact Information Visit us online at: support.chamberlaingroup.com © 2019, The Chamberlain Group, Inc. 114A5146D All Rights Reserved...