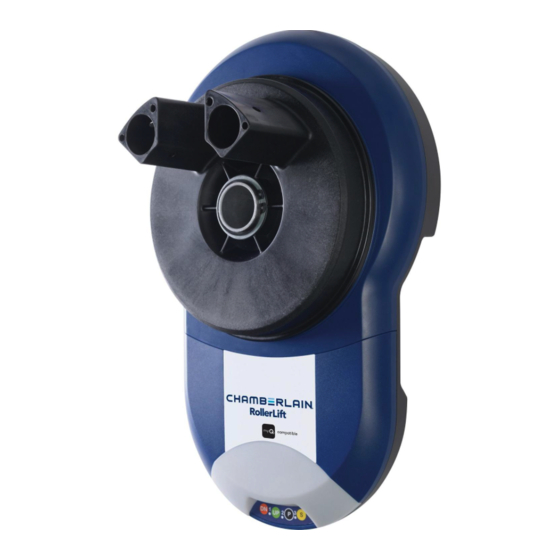
Chamberlain RollerLift CR655MYQ Installation And Operating Instructions Manual
Garage roller door opener
Hide thumbs
Also See for RollerLift CR655MYQ:
Table of Contents
Advertisement
Quick Links
chamberlaindiy.com.au
chamberlaindiy.co.nz
Garage Roller Door Opener
Installation and Operating Instructions
Owners Copy: Please keep these instructions for future reference
DO NOT PROCEED WITH THE INSTALLATION UNTIL READING THE
CR655MYQ
This manual contains IMPORTANT SAFETY information
INSTRUCTIONS THOROUGHLY
Advertisement
Table of Contents

Related Manuals for Chamberlain RollerLift CR655MYQ


Summary of Contents for Chamberlain RollerLift CR655MYQ
- Page 1 chamberlaindiy.com.au chamberlaindiy.co.nz CR655MYQ Garage Roller Door Opener Installation and Operating Instructions Owners Copy: Please keep these instructions for future reference This manual contains IMPORTANT SAFETY information DO NOT PROCEED WITH THE INSTALLATION UNTIL READING THE INSTRUCTIONS THOROUGHLY...
- Page 2 Warranty Registration Register your warranty at: chamberlaindiy.com.au/warranty chamberlaindiy.co.nz/warranty...
-
Page 3: Table Of Contents
START BY READING THESE IMPORTANT SAFETY INSTRUCTIONS WARNING • Failure to comply with the following instructions may result in serious injury or property damage. • Read and follow all instructions carefully. • The garage door opener is designed and tested to offer safe service provided it is installed and operated in strict accordance with the instructions in this manual. -
Page 4: Carton Inventory
TOOLS REQUIRED CARTON INVENTORY 1. Instruction manual (this document) 1. Ladder 2. Stop collar 2. Adjustable wrench for U-bolts already installed 3. Clamp bracket, plates, washers (2) and nuts (2) on the door 4. E940C car visor transmitter (1) 3. 8 mm socket, 10 mm socket and 13 mm extended 5. -
Page 5: Control Panel
CONTROL PANEL 1. Terminal Block: used for external accessories (see chart below). NOTE: The terminal block is behind a plastic cover in the back housing. Use a small screwdriver to lever open the plastic cover if access to the terminal block is required. All wires should be secured appropriately. Colour Polarity Comment Ref Function Push button... -
Page 6: Prepare & Test The Door
TESTING THE DOOR Complete the following test to ensure your door is well balanced, and not sticking or binding: • Disable all locks and remove any ropes connected to the garage door. • Lift the door to about halfway and then release it. The door should remain spring balanced. -
Page 7: Pinning The Door
PINNING THE DOOR Note: A ballooning door may delay the safety reversal response and can compromise garage door security. Free curtain Ballooning Add fasteners here • To remedy any ballooning, insert the supplied self tapping metal screws (inset 3) into where the curtain leaves the roll. Secure these through the curtain into the drum wheel at each end of the roll. - Page 8 LEFT / RIGHT HAND INSTALLATION RIGHT LEFT (factory (handing must default be changed setting) during limit setting - refer to section 13) Inside garage looking out...
-
Page 9: Installation Procedure
INSTALLATION PROCEDURE Do not allow people to walk under or around the door during the installation process as serious injury can occur. NOTE: The opener can be installed on either side of the door. The following instructions are for Rope RIGHT HAND INSTALLATIONS (as illustrated i.e. -
Page 10: Adjustment & Testing
SETTING THE LIMITS FOR RIGHT OR LEFT HAND OPERATION AND FORCE Travel limits set how far your door goes up and down. Your opener must also be configured for right or left hand installation. If not the door will rotate in the reverse direction. Program Buttons: The Control Panel diagram in section 4 identifies the Control Buttons and LED layout Audible Beep: An audible “BEEP”... - Page 11 TESTING THE SAFETY REVERSE SYSTEM The safety reverse system test is important. The garage door must reverse on contact with a 40 mm obstacle laid flat on the floor. Failure to properly adjust the opener may result in serious personal injury from a closing garage door.
-
Page 12: Timer To Close
The door may operate unexpectedly, therefore do not allow anything to obstruct the path of the door. SAFETY FIRST! Whilst Chamberlain have engineered safety features into your garage door opener, we urge you to consider fitting The Protector System (IR Beams) to your new garage door opener. In many countries these devices are compulsory to assist in preventing serious injury or property damage. -
Page 13: Audible Beep
AUDIBLE BEEP (OPTIONAL) The RollerLift (CR655MYQ) has been factory set for an audible “BEEP”. The Audible beep can be turned OFF by using the following method. Flash • Start with the door fully CLOSED. AUDIBLE • Press and Hold both “S” and “DN” buttons BEEP for 3 seconds. -
Page 14: Wireless Programming
WIRELESS PROGRAMMING (REMOTE ACCESSORIES) NOTE: The transmitters supplied with your opener are preprogrammed by the factory. Activate the opener only when door is in full view, free of obstruction and properly adjusted. No one should enter or leave the garage while the door is in motion. Do not allow children to operate push buttons or remotes. -
Page 15: Operating Your Opener
3 minutes when the opener is activated. SPECIAL NOTE: Chamberlain strongly recommends that The Protector System (IR Beams) be installed on all garage door openers. -
Page 16: Wiring
TYPICAL WIRING DIAGRAM ROLLERLIFT (CR655MYQ) Information for Service Personnel green grey white External Receiver 24 vdc white black Wired Wall Button Obstruction Detection Beams Battery of the transmitters: REPLACE BATTERIES IN TRANSMITTERS The batteries in the transmitter have a long life. If the transmission range decreases, the batteries should be replaced. -
Page 17: Troubleshooting
TROUBLESHOOTING 1. The opener will not operate from either the 8. The door opens but will not close (or reverses UP/DOWN activation button or the transmitters: while closing): • Does the opener have electric power? Plug a lamp into • Is something obstructing the door? Pull the manual the outlet. -
Page 18: Accessories
ACCESSORIES 1. Model E940C Car visor remote 4. Model 1702AML Outside quick release 2. Model E950C Keyring remote 5. Model 774AML Obstruction beams 3. Model E840C/E840M Wireless keypad 6. Model 827AU myQ Remote LED Light DIAGNOSTIC CHART Your garage door opener is programmed with self-diagnostic capabilities. The indicator LEDʼs 1 & 3 on the control panel will flash a number of times to indicate a fault code exists. -
Page 19: Warranty
Additional purchase of the myQ Connectivity Kit is required to enable myQ functionality. Visit www.chamberlaindiy.com.au or www.chamberlaindiy.co.nz for more details. Trademark of The Chamberlain Group, Inc. ® Registered Trademark of The Chamberlain Group, Inc. © 2019 The Chamberlain Group, Inc... - Page 20 Unit to you. purchaser, with this Chamberlain Limited Warranty. This Chamberlain Limited Warranty does not cover any failure of, or defect in, the Unit due to: The benefits given to you under this Chamberlain Limited Warranty are...