
Related Manuals for Bunn CWA-APS


Summary of Contents for Bunn CWA-APS
- Page 1 BUNN ® CWA-APS,TS CWTA-APS,TS OPERATING & SERVICE MANUAL BUNN-O-MATIC CORPORATION POST OFFICE BOX 3227 SPRINGFIELD, ILLINOIS 62708-3227 PHONE: (217) 529-6601 FAX: (217) 529-6644 10690.0001C 6/00 ©1998 Bunn-O-Matic Corporation...
- Page 2 SPECIFIED HEREIN, TO REPAIR OR, AT BUNN’S SOLE OPTION, REPLACEMENT OR REFUND. In no event shall Bunn be liable for any other damage or loss, including, but not limited to, lost profits, lost sales, loss of use of equipment, claims of Buyer’s customers, cost of capital, cost of down time, cost of substitute equipment, facilities or services, or any other special, incidental or consequential damages.
- Page 3 Carefully read and follow all notices in this manual and on the equipment. All labels on the equipment should be kept in good condition. Replace any unreadable or damaged labels. # 00831.0000 # 00656.0000 # 00658.0000 USER NOTICES Page 3 10690.1 071598...
-
Page 4: Electrical Requirements
" water supply line. A tight coil of copper tubing in the water line will facilitate moving the brewer to clean the countertop. Bunn-O-Matic does not recommend the use of a saddle valve to install the brewer. The size and shape of the hole made in the supply line by this type of device may restrict water flow. - Page 5 4. Fill the tank with water as directed: 4A. Models CWA-APS & CWA-TS: Pour three pitchers of tap water into the screened area on top of the brewer. Allow approximately two minutes between pitchers for water to flow into the tank. While the third pitcher of water is entering the tank, the tank will fill to capacity and the excess will flow from the sprayhead, out of the funnel, and into the dispenser.
-
Page 6: Adjusting Brew Volumes
INITIAL SET-UP (cont.) 7. Place the "ON/OFF" switch in the “OFF” (lower) position after water has stopped flowing from the funnel, and let the water in the tank reheat to the proper temperature. 8. Empty the dispenser and proceed as directed: 8A. -
Page 7: Cleaning
4. Place an empty dispenser beneath the funnel. 5. Operate the brewer as directed: 5A. Models CWA-APS & CWA-TS: Pour one pitcher of tap water into the screened area on top of the brewer. 5B. Models CWTA-APS, CWTFA-APS, CWTA-TS & CWTFA-TS: Place the "ON/OFF"... - Page 8 A troubleshooting guide is provided to suggest probable causes and remedies for the most likely problems encountered. If the problem remains after exhausting the troubleshooting steps, contact the Bunn-O-Matic Technical Service Department. • Inspection, testing, and repair of electrical equipment should be performed only by qualified service personnel.
- Page 9 TROUBLESHOOTING (cont.) PROBLEM Brew cycle will not start (cont.) Water is not hot Inconsistent beverage level in dis- penser PROBABLE CAUSE 7. Water strainer/flow control (.222 GPM)(CWTA-APS, CWTFA- APS, CWTA-TS, CWTFA-TS) 1. Tank Heater Switch 2. Limit Thermostat CAUTION - Do not eliminate or bypass limit thermostat.
- Page 10 TROUBLESHOOTING (cont.) PROBLEM Inconsistent beverage level in the dispenser (cont.) Consistently low beverage level in the dispenser Spitting or excessive steaming Dripping from sprayhead PROBABLE CAUSE 4. Water Pressure (CWTA-APS, CWTFA-APS,CWTA-TS & CWTFA- 1. Timer (CWTA-APS, CWTFA- APS, CWTA-TS & CWTFA-TS) 2.
- Page 11 A fine or drip grind must be used for proper extraction. A six-hole stainless steel spray- head must be used for proper extraction. The BUNN® paper filter must be centered in the funnel and the bed of grounds leveled by gentle shak- ing. 10690.1 063000...
- Page 12 195°F (91°C). Adjust the control thermostat to increase the water temperature. Replace if necessary. The BUNN® paper filter must be centered in the funnel and the bed of grounds leveled by gently shak- ing. The nut on the solenoid must be tight or it will vibrate during op- eration.
-
Page 13: Table Of Contents
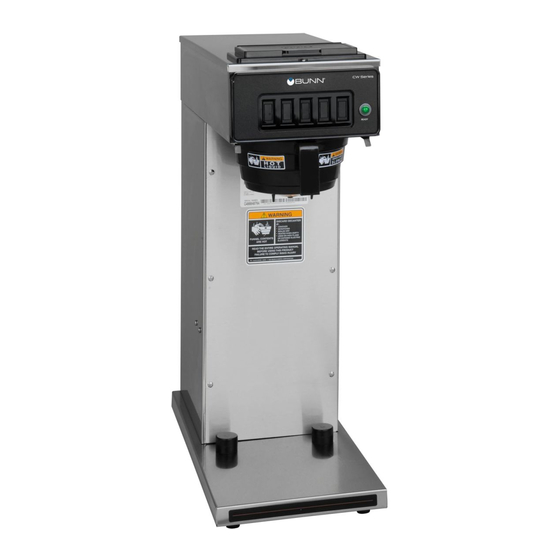
Start Switch (Brew) ... 18 Tank Heater ... 19 Tank Heater Switch ... 20 Timer (Early Model) ... 21 Digital Timer (Late Models) ... 22 Wiring Diagrams ... 25 FIG. 1 COMPONENT ACCESS Page 13 CWA-APS CWTA-TS P1467 10690.1 063000... -
Page 14: Control Thermostat
SERVICE (cont.) CONTROL THERMOSTAT FIG. 2 CONTROL THERMOSTAT Location: The control thermostat is located inside the trunk on the upper left side of the component bracket. Test Procedures: 1. Disconnect the brewer from the power source. 2. Locate the blue wire on the control thermostat. 3. -
Page 15: Limit Thermostat
SERVICE (cont.) LIMIT THERMOSTAT (CWTA & CWTFA) FIG. 4 LIMIT THERMOSTAT Location: The limit thermostat is located inside the rear of the hood on the tank lid. Test Procedures: 1. Disconnect the brewer from the power source. 2. Disconnect the blue and black wires from the limit thermostat. -
Page 16: On/Off Switch
SERVICE (cont.) ON/OFF SWITCH FIG. 6 ON/OFF SWITCH Location: The ON/OFF switch is located left of center on the front of the hood. Test Procedure: 1. Disconnect the brewer from the power source. 2. Viewing the switch from the back remove the red wire from the upper terminal and the black wire from the center terminal. -
Page 17: Solenoid (Inlet)
SERVICE (cont.) SOLENOID VALVE FIG. 8 SOLENOID VALVE Location: The solenoid valve is located inside the trunk on the lower center part of the component bracket. Test Procedures: 1. Disconnect the brewer from the power source. 2. Disconnect the white/green wire and black wire from the solenoid valve. -
Page 18: Start Switch (Brew)
SERVICE (cont.) START SWITCH FIG. 10 START SWITCH Location: The start switch is located in the front of the hood just to the right of center. Test Procedure: 1. Disconnect the brewer from the power supply. 2. Disconnect the white/orange wire from the top switch terminal and the white/yellow wire from the bottom switch terminal. -
Page 19: Tank Heater
SERVICE (cont.) TANK HEATER FIG. 12 TANK HEATER Location: The tank heater is located inside the tank and secured to the tank lid. Test Procedures: 1. Disconnect the brewer from the power supply. 2. With a voltmeter, check the voltage across the black and red wires. -
Page 20: Tank Heater Switch
SERVICE (cont.) TANK HEATER SWITCH FIG. 14 TANK HEATER SWITCH Location: The tank heater switch is located on the rear of the brewer on the upper left side of the trunk. Test Procedure: 1. Disconnect the brewer from the power source. 2. - Page 21 SERVICE (cont.) TANK HEATER SWITCH (cont.) 13. Insert new tank heater switch through the hole in the upper left rear of the trunk and secure with switch indicator/guard bracket, hex facenut and plastic facenut. 14. Refer to Fig. 15 and reconnect the wires to the tank heater switch terminals.
-
Page 22: Timer (Early Model)
SERVICE (cont.) TIMER (Early Models) FIG. 16 TIMER Location: The timer is located inside the front of the trunk on the component bracket. It consists of the dial plate and circuit board. Test Procedure: 1. Disconnect the brewer from the power source. 2. - Page 23 SERVICE (cont.) DIGITAL BREW TIMER (Late Models) FIG. 18 DIGITAL BREW TIMER Location: The timer is located inside the front of the trunk on the top of the component bracket. Test Procedure. NOTE: Do not remove or install wires while timer board is installed.
- Page 24 SERVICE (cont.) DIGITAL BREW TIMER (Late Models)(cont.) Timer Setting: NOTE: Prior to setting or modifying volumes, check that the brewer is connected to water supply, the tank is properly filled, and a funnel and server are in place. NOTE: All volume settings must be done with the sprayhead installed.
-
Page 25: Wiring Diagrams
10690.1 071598 Page 25...