Table of Contents
Advertisement
Quick Links
Quick Start Guide
PTX10001-36MR
IN THIS GUIDE
PTX10001-36MR Fixed Packet Transport Router Overview | 1
PTX10001-36MR Fixed Packet Transport Router Overview
IN THIS SECTION
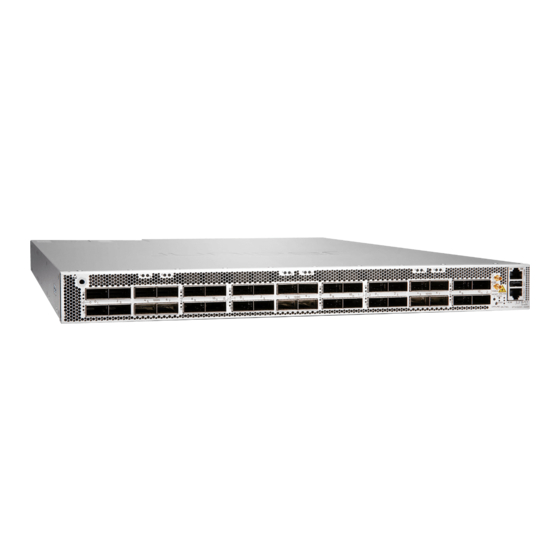
Juniper Networks PTX10001-36MR is a fixed-configuration router that features 36 network ports that provide high
density and cost efficient 100-Gigabit and 400-Gigabit Ethernet (GbE) ports in a low-profile 1-U form factor. With 9.6
Tbps of throughput, the PTX10001-36MR is optimally designed for peering, core routing, and infrastructure edge routing
roles in cloud provider, service provider and content provider networks. The high-speed ports support a wide variety of
port configurations that include speeds of 400 Gbps, 100 Gbps, 40 Gbps, 25 GPS and 10 Gbps.
For more information about the PTX10001-36MR hardware, see the PTX10001-36MR Packet Transport Router Hardware
Guide.
Advertisement
Table of Contents

Related Manuals for Juniper PTX10001-36MR


Summary of Contents for Juniper PTX10001-36MR
-
Page 1: Table Of Contents
100-Gigabit and 400-Gigabit Ethernet (GbE) ports in a low-profile 1-U form factor. With 9.6 Tbps of throughput, the PTX10001-36MR is optimally designed for peering, core routing, and infrastructure edge routing roles in cloud provider, service provider and content provider networks. The high-speed ports support a wide variety of port configurations that include speeds of 400 Gbps, 100 Gbps, 40 Gbps, 25 GPS and 10 Gbps. -
Page 2: Register Products-Mandatory For Validating Slas
Update your installation base at https://www.juniper.net/customers/csc/management/updateinstallbase.jsp. PTX10001-36MR Clearance Requirements for Airflow and Hardware Maintenance When planning the site for a PTX10001-36MR installation, you must allow sufficient clearance around the installed chassis (see Figure Figure 1: Clearance Requirements for Airflow and Hardware Maintenance for a PTX10001-36MR 24 in. -
Page 3: Prepare For The Installation
You must leave at least 24 in. (61 cm) both in front of and behind the PTX10001-36MR for service personnel to remove and install hardware components. You must leave adequate space at the front and back of the PTX10001-36MR. NEBS GR-63 recommends that you allow at least 30 in. -
Page 4: Mount The Ptx10001-36Mr In A Rack
4-post rack mount kit—2 side mounting blades and 2 side mounting rails NOTE: If you are installing the PTX10001-36MR on a two-post rack, you must order the 2-post rack mount kit separately. Sixteen flathead screws for the mounting brackets (Phillips, M4 x 6 mm) For AC/HVDC installations, two power cords with plugs that are appropriate for your geographical location. - Page 5 2. Decide whether to place the front (port) end or the back (FRU) end of the PTX10001-36MR at the front of the rack. Position the PTX10001-36MR in such a manner that the AIR OUT labels on components are next to the hot aisle.
- Page 6 2. Decide whether to place the front (port) end or the back (FRU) end of the PTX10001-36MR at the front of the rack. Position the PTX10001-36MR in such a manner that the AIR OUT labels on components are next to the hot aisle.
- Page 7 Figure 5: Attach the Two Post Mounting Brackets to the PTX10001-36MR 4. Attach the mounting bracket to the device using the mounting screws. Tighten the screws. 5. Repeat Step and Step on the opposite side of the device. 6. Have one person grasp both sides of the device, lift it, and position it in the rack so that the bracket is aligned with the rack holes.
-
Page 8: Connect The Ptx10001-36Mr To Ground
Screwdriver appropriate for the M6 x 10 mm screws. To connect a grounding cable to the PTX10001-36MR: 1. Attach a grounding cable to earth ground (such as the rack in which the PTX10001-36MR is mounted) and then attach it to the chassis grounding point. -
Page 9: Connect Ac/Hvdc Power To The Ptx10001-36Mr
Connect AC/HVDC Power to the PTX10001-36MR This procedure is for AC/HVDC installations only. For DC installations, see Connect DC Power to the PTX10001-36MR. CAUTION: Do not mix AC/HVDC and DC power supplies in the same chassis. - Page 10 2. Ensure that the power supplies are fully inserted in the chassis and the latches are secure. 3. Locate the power cord or cords shipped with the PTX10001-36MR; the cords have plugs appropriate for your geographical location. See PTX10001-36MR Power Cord Specifications.
-
Page 11: Perform The Initial Software Configuration
Perform the Initial Software Configuration You’ll need to perform the initial configuration of the PTX10001-36MR through the console port using the CLI or through zero-touch provisioning (ZTP). To provision the PTX10001-36MR using ZTP, you’ll need access to a Dynamic Host Control Protocol (DHCP) server and a File Transfer Protocol (anonymous FTP), Hypertext Transfer Protocol (HTTP), or Trivial File Transfer Protocol (TFTP) server on which the software image and configuration files are stored. -
Page 12: Safety Warnings Summary
[edit] root@# set system root-authentication plain-text-password New password: password Retype new password: password 6. (Optional) Configure the name of the PTX10001-36MR. If the name includes spaces, enclose the name in quotation marks (“ ”). [edit] root@# set system host-name host-name 7. - Page 13 The following guidelines help ensure your safety and protect the device from damage. The list of guidelines might not address all potentially hazardous situations in your working environment, so be alert and exercise good judgment at all times. Perform only the procedures explicitly described in the hardware documentation for this device. Make sure that only authorized service personnel perform other system services.
-
Page 14: Contact Juniper Networks
For technical support, see: https://www.juniper.net/support/requesting-support.html. Juniper Networks, the Juniper Networks logo, Juniper, and Junos are registered trademarks of Juniper Networks, Inc. in the United States and other countries. All other trademarks, service marks, registered marks, or registered service marks are the property of their respective owners.