
Related Manuals for Siemens HN878G4.6


Summary of Contents for Siemens HN878G4.6
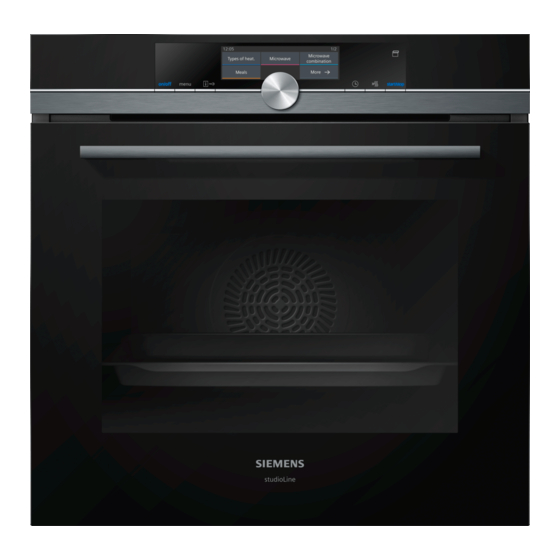
- Page 1 Oven HN878G4.6 User manual and installation instructions Register your product on My Siemens and discover exclusive ser- vices and offers. siemens-home.bsh-group.com/welcome The future moving in. Siemens Home Appliances...
-
Page 2: Table Of Contents
en Safety Table of contents 1 Safety Observe the following safety instructions. 1.1 General information USER MANUAL ¡ Read this instruction manual carefully. Safety .............. 2 ¡ Keep the instruction manual and the Preventing material damage ....... 6 product information safe for future refer- ence or for the next owner. -
Page 3: Safety
Safety en Hot steam may escape when you open the 1.4 Safe use appliance door. Steam may not be visible, de- Always place accessories in the cooking com- pending on the temperature. partment the right way round. ▶ Open the appliance door carefully. → "Accessories", Page 13 ▶... - Page 4 en Safety ▶ Never operate an appliance with a cracked ▶ Do not leave food unattended while it is or fractured surface. heating in containers made of plastic, pa- ▶ Never pull on the power cord to unplug the per or other combustible materials. appliance.
- Page 5 Safety en The accessible parts of the appliance become Cookware and containers made from metal or hot during operation. cookware with metal edging may lead to ▶ Never touch these hot parts. sparks being formed during simple mi- ▶ Keep children at a safe distance. crowave operation.
- Page 6 en Preventing material damage ▶ Keep children at a safe distance. Hot liquid may spill over the sides of the ac- If the door seal is damaged, a large amount cessory when it is removed from the cooking of heat is generated around the door. compartment.
-
Page 7: Preventing Material Damage
Preventing material damage en Never place cookware containing water on the Using accessories directly on top of one another ▶ cooking compartment floor. causes sparks. The prolonged presence of moisture in the cooking Do not combine the wire rack with the universal ▶... -
Page 8: Environmental Protection And Saving En- Ergy
en Environmental protection and saving energy 3 Environmental protection and saving energy 3.1 Disposing of packaging The packaging materials are environmentally compat- ible and can be recycled. Sort the individual components by type and dispose ▶ of them separately. 3.2 Saving energy If you follow these instructions, your appliance will use less power. -
Page 9: Familiarising Yourself With Your Appliance
Familiarising yourself with your appliance en 4 Familiarising yourself with your appliance 4.1 Control panel Buttons The buttons on the left- and right-hand side of You can use the control panel to configure all functions the control panel have a pressure point. Press of your appliance and to obtain information about the a button to execute its function. - Page 10 en Familiarising yourself with your appliance Countdown Lighting You can view the countdown time or the cooking time One or more oven lights illuminate the cooking com- for the previous operation in the top right in the status partment. bar. When you open the appliance door, the light in the If you have set a cooking time and the cooking time is cooking compartment switches on.
-
Page 11: Operating Modes
Operating modes en 5 Operating modes This is where you can find an overview of your appli- Operating ance's operating modes and main functions. mode Press to open the menu. Self-clean- The self-cleaning function cleans your oven automatically. Operating → "Self-cleaning", Page 31 mode Basic set- Adjust the basic settings. - Page 12 en Operating modes Symbol Types of heating Temperature What it's used for and how it works range Possible additional options Grill, small area Grill settings: Grill small quantities, such as steak, sausages or toast. Gratinate 1 = low small quantities of food. 2 = medium The central area below the grill element becomes hot.
-
Page 13: Accessories
Accessories en 6 Accessories Use original accessories. These have been made espe- cially for your appliance. Note: Accessories may become deformed if they get hot. Deformation has no effect on function. As the ac- cessory cools down, it will regain its original shape. The accessories supplied may differ depending on the appliance model. -
Page 14: 7.1 Before Using For The First Time
You will find a comprehensive range of products for your appliance in our brochures and online: www.siemens-home.bsh-group.com Accessories vary from one appliance to another. When purchasing accessories, always quote the exact Note: The pull-out rails lock in place when they are product number (E no.) of your appliance. -
Page 15: Basic Operation
If you cancel the operation completely, the settings are ‒ reset. a The Siemens logo appears in the display. A type of heating and a temperature are then displayed. To pause the operation briefly: Briefly press ... - Page 16 en Rapid heating Turn the rotary selector to select the required type a The appliance starts heating. of heating. a The set type of heating, temperature and cooking a The corresponding recommended temperature ap- time/appliance run time are shown in the display. pears on the display.
- Page 17 Time-setting options en Cancelling the cooking time a The timer starts automatically after a few seconds. a The symbol and the time counting down are dis- You can cancel the cooking operation time at any time. played on the left in the status bar. Press ...
- Page 18 en Steam 11 Steam Food can be cooked particularly gently using steam. Fill the water tank with water up to the "max" You can use the special types of steam heating, or use mark. steam assistance with certain types of heating. WARNING ‒ Risk of scalding! Hot steam may escape when you open the appliance door.
-
Page 19: Steam
Steam en Press the cooking time. In the operating modes menu, set the "Types of Use the rotary selector to set the cooking time. heating". Press to start the operation. Use the rotary selector to set the type of heating. Press the temperature. Note: If the water tank runs dry during operation, a Use the rotary selector to set the temperature. -
Page 20: Microwave
en Microwave Clean the water tank with a soft cloth and standard ▶ Drying the cooking compartment washing-up liquid. Dry the cooking compartment after each steam opera- tion. Note: Once the appliance has been switched off, the button remains lit for a little longer to remind you to Dry the cooking compartment by hand or use the ▶... - Page 21 Microwave en ATTENTION! Cookware and ac- Information cessories Operating the appliance without food in the cooking compartment may lead to overloading. Serving dishes You do not need to transfer Do not switch on the microwave unless there is food ▶ your food. inside.
- Page 22 en Microwave ¡ → "Preventing material damage", Page 6 a The microwave starts and the cooking time counts down. ¡ ¡ → "Cookware and accessories with microwave", a Once the cooking time has elapsed, an audible sig- Page 20 nal sounds. The time shown in the display is zero. Once the cooking time has elapsed: Press ...
- Page 23 Meat probe en 13 Meat probe Cook with precision by inserting the meat probe into Thick Insert the meat probe diagonally into the the food and setting a core temperature on the appli- pieces meat from above, pushing it in as far as ance.
- Page 24 en Meat probe Changing the type of heating 13.3 Setting the meat thermometer When you change the type of heating, the other set- The roasting sensor measures the temperature inside tings are also reset. the food between 30 °C and 99 °C. Press to pause operation. Requirements Press the type of heating.
-
Page 25: Meat Probe
Dishes en Other Core temperature Other Core temperature in °C in °C Meat loaf, all kinds of meat 80 - 90 Heating food, reheating 65 - 75 14 Dishes The "Dishes" operating mode helps you to use your ap- Meat probe pliance to prepare different meals by selecting the op- You can use the meat probe for several dishes. - Page 26 en Dishes 14.5 Adjusting the dish Category Foods Poultry Chicken Note: Once it has started, you can no longer change or Duck, goose interrupt the dish or the settings. Turkey Requirement: To start the operation, the cooking com- Meat Pork partment must be cooled down. Beef Press ...
-
Page 27: Childproof Lock
Childproof lock en 15 Childproof lock You can secure your appliance to prevent children a A confirmation notification appears on the display. from accidentally switching it on or changing the set- a The appears in the status bar when the appliance tings. -
Page 28: Basic Settings
en Basic settings 18 Basic settings You can configure the appliance to meet your needs. Basic setting Selection Warning: Baking tray in Display 18.1 Overview of the basic settings Do not display Night-time dimming Switched off Here you can find an overview of the basic settings Switched on and factory settings. -
Page 29: Cleaning And Servicing
Cleaning and servicing en 19 Cleaning and servicing Do not use cleaning products with a high alcohol To keep your appliance working efficiently for a long ▶ content. time, it is important to clean and maintain it carefully. Do not use hard scouring pads or cleaning ▶... - Page 30 en Cleaning and servicing Cooking compartment Area Suitable cleaning agents Information Enamel surfaces ¡ Hot soapy water Soak any heavily soiled areas and use a brush or steel wool. ¡ Vinegar water Leave the appliance door open to dry the cooking compartment after cleaning it.
-
Page 31: Self-Cleaning
Self-cleaning en 20 Self-cleaning cess releases vapours, which can irritate mucous mem- With the self-cleaning cleaning function, the cooking branes. compartment is cleaned virtually automatically. Keep the kitchen well ventilated while the cleaning Use the "Self-cleaning" to clean the cooking compart- ▶... -
Page 32: Cleaning Assistance
en Cleaning assistance While the cleaning function is running, the rails may Note: While the cleaning function is running, the frame become discoloured. This discolouration does not on the inside of the appliance door becomes discol- compromise the functionality of the appliance. oured. -
Page 33: Drying
Drying en If descaling solution comes into contact with the control Press to start. panel or other delicate surfaces, it will damage them. a The descaling programme starts and the duration Remove descaling solution immediately with water. counts down. ▶ a Once the first part of the descaling programme has Mix the descaling solution: finished, an audible signal sounds. - Page 34 en Appliance door Remove the door cover and carefully close the ap- Press the intermediate pane against the appliance pliance door. with one hand while pushing the left- and right-hand retainers upwards. Do not detach the retainers . Remove the intermediate pane. 24.2 Removing the door panes WARNING ‒ Risk of serious harm to health! If the screws are undone, the safety of the appliance...
-
Page 35: Rails
Rails en Push the left- and right-hand retainer downwards Push the front pane in at the bottom until you until the intermediate pane is clamped . hear it click into place. Open the appliance door slightly and remove the tea towel. Screw both screws back in on the left and right of the appliance door. -
Page 36: Troubleshooting
en Troubleshooting Hook the front retainers in at the bottom and 25.3 Attaching the rails straighten them . Notes ¡ The rails only fit on the right or left. ¡ For both pull-out rails, ensure that you can pull them forwards and out. Hook the rear shelf support into the retainers at the top and bottom and pull it forwards... - Page 37 Troubleshooting en Fault Cause and troubleshooting The operation does Different causes are possible. not start or is inter- Check any notifications that appear in the display. ▶ rupted. → "Displaying information", Page 16 Appliance does not Device is in demo mode. heat up and "Demo Briefly disconnect the appliance from the power supply by switching the circuit breaker in mode is switched on"...
-
Page 38: Disposal
Next time, set lower or higher values. ▶ Tip: A lot of information about the food preparation and corresponding setting values can be found on our website www.siemens-home.bsh-group.com . 27 Disposal Find out here how to dispose of old appliances cor- Dispose of the appliance in an environmentally rectly. -
Page 39: Customer Service
Customer Service en This appliance is labelled in accord- ance with European Directive 2012/19/EU concerning used elec- trical and electronic appliances (waste electrical and electronic equip- ment - WEEE). The guideline determines the frame- work for the return and recycling of used appliances as applicable throughout the EU. - Page 40 en How it works Roasting in uncovered cookware Baking on two or more levels Shelf position ¡ Use a deep roasting dish. 3 levels ¡ If you do not have any suitable cookware, you can ¡ Baking tray use the universal pan. ¡...
- Page 41 How it works en ¡ Do not wash or dry food. Add 1-3 tablespoons of 29.5 Cooking frozen products water or lemon juice to the food. ¡ Do not use heavily frosted frozen products. ¡ Spread the food out so that as much of it as pos- ¡...
- Page 42 en How it works Food Accessory/ Shelf pos- Heating Temperat- Microwave Steam in- Cooking time cookware ition function ure in °C power set- tensity in mins → Page 11 ting in W Small yeast cakes Baking tray 160–180 Medium 25–35 Biscuits Baking tray ...
- Page 43 How it works en Food Accessory/ Shelf pos- Heating Temperat- Microwave Steam in- Cooking time cookware ition function ure in °C power set- tensity in mins → Page 11 ting in W Potato gratin, raw in- Ovenproof dish 160 - 190 - 50 - 70 gredients, 4 cm deep Potato gratin, raw in- Ovenproof dish...
- Page 44 en How it works Food Accessory/ Shelf pos- Heating Temperat- Microwave Steam in- Cooking time cookware ition function ure in °C power set- tensity in mins → Page 11 ting in W Sirloin, medium, Uncovered 190 - 200 - 65 - 80 1.5 kg cookware Sirloin, medium,...
- Page 45 How it works en Place the containers on the cooking compartment After making the yoghurt, leave it to cool in the refri- floor. gerator for at least 12 hours. Use the recommended settings when configuring the appliance settings. Recommended settings for desserts and compote Food Accessory/ Shelf pos-...
- Page 46 en How it works Proving dough Use the recommended settings when configuring ‒ the appliance settings. Always allow dough to prove in two steps: Once in their Do not open the appliance door while the dough ‒ entirety (1. – dough fermentation) and a second time in is proving, otherwise moisture will escape.
- Page 47 How it works en Food Accessory/ Shelf pos- Heating Temperat- Microwave Steam in- Cooking cookware ition function ure in °C power set- tensity time in → Page 11 ting in W mins Berries, 300 g Uncovered 5 - 10 cookware Butter, defrosting, Uncovered 7 - 9 125 g cookware Turn the dish halfway through the cooking time.
- Page 48 en How it works ¡ Be aware that some types of food will actually con- The different added steam levels are suitable for tinue cooking when you are keeping them warm in keeping the following foods warm: the oven. ¡ Level 1: Joints and briefly roasted food ¡...
- Page 49 How it works en Food Accessories/ Shelf posi- Heating Temperat- Steam intens- Cooking time cookware tion function ure in °C in mins → Page 11 Hot water sponge cake Springform cake 1. 150– 1. 10 tin, diameter 26 2. 20-25 2. 150– Hot water sponge cake, Springform cake ...
-
Page 50: Installation Instructions
en Installation instructions Food Accessory/cook- Shelf posi- Heating Temperat- Microwave Cooking time ware tion function ure in °C power setting in mins → Page 11 in W Cakes Uncovered cook- 180–200 18–23 ware Chicken Wire rack 200–220 25–35 Turn the dish 2/3 of the way through the cooking time. 30 ... - Page 51 Installation instructions en 30.3 Installation below a worktop ATTENTION! Carrying the appliance by the door handle Observe the installation dimensions and the installation could break it. The door handle cannot sup- instructions when installing below a worktop. port the weight of the appliance. ▶...
- Page 52 en Installation instructions ¡ To ensure that the appliance door can be opened, 30.5 Installation in a tall unit you must take the minimum dimensions into consid- Observe the installation dimensions and the installation eration when installing in a corner. The dimension instructions when installing in a tall unit.
- Page 53 Installation instructions en 30.8 Installing the appliance Slide the appliance all the way in and centre it. Screw the appliance into place. Note: The gap between the worktop and the appliance must not be closed by additional battens. Thermal insulation strips must not be fitted to the side panels of the surround unit.
- Page 56 Valid within Great Britain: Imported to Great Britain by BSH Home Appliances Ltd. Grand Union House Old Wolverton Road Wolverton, Milton Keynes MK12 5PT United Kingdom Manufactured by BSH Hausgeräte GmbH under the trademark licence of Siemens AG *9001620191* 9001620191 (010623)