Table of Contents
Advertisement
Quick Links
Advertisement
Table of Contents

Related Manuals for Siemens HN678G4.1B


Summary of Contents for Siemens HN678G4.1B
- Page 1 Built-in oven HN678G4.1B en Instruction manual...
-
Page 3: Table Of Contents
Table of contents e n I n s t r u c t i o n m a n u a l Intended use ......4 Basic settings. -
Page 4: Intended Use
8 years old and by persons with replacement parts and services can be found at reduced physical, sensory or mental www.siemens-home.bsh-group.com and in the online shop www.siemens-home.bsh-group.com/eshops capabilities or by persons with a lack of experience or knowledge if they are... -
Page 5: Important Safety Information
Important safety information Water in a hot cooking compartment may Risk of scalding! (Important safety ■ create hot steam. Never pour water into the information hot cooking compartment. Warning – Risk of injury! G eneral information Scratched glass in the appliance door may I m p o r t a n t s a f e t y i n f o r m a t i o n ■... -
Page 6: Microwave
Important safety information Airtight packaging may burst when food is Microwave Risk of burns! ■ heated. Always observe the instructions on Warning – Risk of fire! the packaging. Always use oven gloves to Using the appliance for anything other than remove dishes from the cooking ■... -
Page 7: Steam
Important safety information If using the appliance in microwave mode fill the water tank with water or with the ■ only, placing cookware and containers descaling solution that is recommended by us. made of metal or featuring metal detailing inside the appliance may cause sparks Meat thermometer when the appliance is operating. -
Page 8: Causes Of Damage
Causes of damage Warning – Risk of burns! ]Causes of damage The cooking compartment becomes ■ extremely hot during the cleaning function. G eneral information Never open the appliance door. Allow the C a u s e s o f d a m a g e appliance to cool down. -
Page 9: Microwave
Causes of damage Inserting accessories: depending on the appliance Steam ■ model, accessories can scratch the door panel Caution! when closing the appliance door. Always insert the Baking tins: Ovenware must be heat and steam accessories into the cooking compartment as far as ■... -
Page 10: Environmental Protection
Environmental protection Open the appliance door as infrequently as possible 7Environmental protection ■ when the appliance is in use. Y our new appliance is particularly energy-efficient. E n v i r o n m e n t a l p r o t e c t i o n Here you can find tips on how to save even more energy when using the appliance, and how to dispose of your appliance properly. -
Page 11: Getting To Know Your Appliance
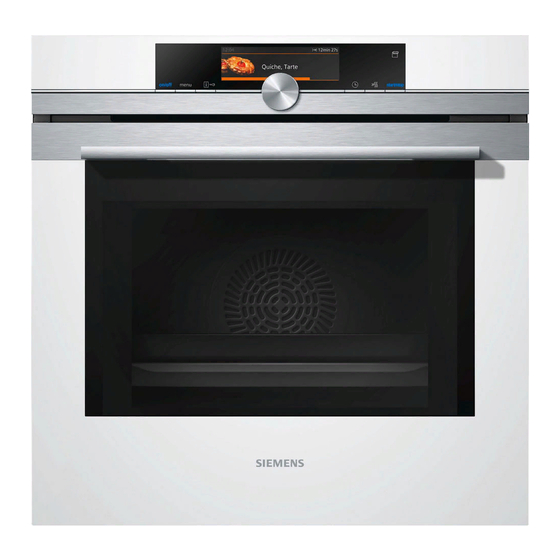
Getting to know your appliance Depending on the appliance model, individual Note: *Getting to know your details and colours may differ. appliance Control panel I n this chapter, we will explain the indicators and In the control panel, you can use the various buttons G e t t i n g t o k n o w y o u r a p p l i a n c e controls. -
Page 12: Operating Modes Menu
Getting to know your appliance Operating modes menu Countdown If you have started your appliance without a cooking The menu is divided into different operating modes. In time, you can see how long the operation has already this way, you can quickly access the required function. been running for at the top right in the status bar. -
Page 13: Further Information
Getting to know your appliance Grill, large area Grill settings: For grilling flat items such as steaks, sausages or bread, and for browning food. 1 = low The whole area of the grill heating element becomes hot. 2 = medium 3 = high Grill, small area Grill settings:... -
Page 14: Accessories
Accessories You can change how long the cooling fan Inserting accessories Note: continues to run for in the basic settings. ~ "Basic The cooking compartment has five shelf positions. The settings" on page 20 shelf positions are counted from the bottom up. In some appliances, the highest shelf position is marked on the cooking compartment with the grill symbol. -
Page 15: Optional Accessories
Before using for the first time When inserting the wire rack, ensure that the catch Universal pan, non-stick tappet is at the rear and is facing downwards. The ‚ For moist cakes, pastries, frozen meals and large roasts. lettering "microwave" must be at the front and the outer Pastries and roasts can be removed more easily from the universal rail must face downwards ¾... -
Page 16: Initial Use
Before using for the first time Malfunctions may occur when using filtered or Touch the arrow. Æ ■ demineralised water. A message appears on the display confirming that The appliance may request that you top up the water the initial use has been completed. tank even though it may be full, or operation with steam is cancelled after approx. -
Page 17: Operating The Appliance
Example in the picture: Top/bottom heating at 180 °C. blue. Use the rotary selector to change the type of The Siemens logo appears in the display, and then a heating. type of heating and a temperature. You can specify which operating modes should... -
Page 18: Rapid Heat Up
Time-setting options Rapid heat up OTime-setting options You can use the button to heat up the cooking compartment particularly quickly. Y our appliance has different time-setting options. The rapid heat up function is not possible for all types of T i m e - s e t t i n g o p t i o n s heating. -
Page 19: Cooking Time
Time-setting options Cooking time Touch the "End " field. The end time is displayed. If you set the cooking time for your meal, the operation stops automatically once this time has elapsed. The oven stops heating. The maximum setting you can apply is 23 hours and 59 minutes. -
Page 20: Childproof Lock
Childproof lock AChildproof lock Audible signal duration Short (30 s) Medium (1 m) Y our appliance is equipped with a childproof lock so Long (5 m) C h i l d p r o o f l o c k that children cannot switch it on accidentally or change Volume Can be adjusted to one of five different... -
Page 21: Changing The Time
Microwave other changes take effect after the settings have been Cookware test saved. Never switch on the microwave unless there is food inside. The short cookware test is the only exception to -------- this rule. Changing the time Perform the following test if you are unsure whether your cookware is suitable for use in the microwave. -
Page 22: Setting The Microwave Combined With A Type Of
Microwave Setting the microwave combined with a type You can change the microwave output setting.Pause the oven by pressing the Start/Stop button.Touch the of heating appropriate microwave field. Press the Start/Stop You can set output settings from 90 W to 360 W. button to restart. -
Page 23: Steam
Steam Open the appliance door for 1 to 2 minutes so that the Steam intensity moisture can escape. Different intensity levels are available when adding steam: Caution! Enamel damage: Do not start any operations when ■ Medium there is water on the cooking compartment floor. Before ■... -
Page 24: Prove Dough
Steam Touch the "Duration" field and set the duration using liquids may catch fire in the cooking compartment the rotary selector. (explosion). The appliance door may spring open. Hot Press the Start/Stop button to start. steam and jets of flame may escape. The appliance heats up. -
Page 25: After Every Steam Operation
Steam Fill the water tank with cold water up to the "max." operation, wipe away the water from the cooking mark (Fig. compartment floor. The remaining water is pumped back into the water tank after every operation with steam. Then empty and dry the water tank. -
Page 26: Meat Thermometer
Meat thermometer Starting the Drying function Intensive heat & To dry the cooking compartment, it is heated up so that Reheating the moisture in the cooking compartment evaporates. You will then need to open the appliance door to allow Notes the steam to escape from the cooking compartment. -
Page 27: Setting The Core Temperature
Sabbath mode food, check that the meat probe is correctly positioned Food Core temperature in in the food. °C If you remove the meat probe while the food is cooking, Poultry all settings will be reset and you will have to apply them Pork again. -
Page 28: Cleaning Agent
Cleaning agent DCleaning agent Door panels Hot soapy water: Clean with a dish cloth and then dry with a soft cloth. W ith good care and cleaning, your appliance will retain Do not use a glass scraper or a stainless steel C l e a n i n g a g e n t its appearance and remain fully functioning for a long scouring pad. -
Page 29: Keeping The Appliance Clean
Cleaning function .Cleaning function Accessories Hot soapy water: Soak and clean with a dish cloth or brush. If there are heavy deposits of dirt, use a stainless Y our appliance is equipped with the "Self-cleaning" and steel scouring pad. C l e a n i n g f u n c t i o n "Descaling"... -
Page 30: Descaling
Cleaning function Before starting the cleaning function, remove the worst Cancelling the cleaning operation of the food remnants manually. Use the "On/off" button to switch off the oven. The Remove accessories and cookware from the cooking cooking compartment door cannot be opened until the compartment. - Page 31 Cleaning function of remaining operations is displayed after the appliance Final cleaning is switched on. You can therefore prepare for the Open the control panel. descaling in good time. Empty and dry the water tank. Switch off the appliance. Starting Descaling is complete and the appliance is ready for Caution! use again.
-
Page 32: Rails
Rails Use the hook to attach the rear holder into the upper pRails hole and push it into the lower hole (fig. ‚ ƒ W ith good care and cleaning, your appliance will retain R a i l s its appearance and remain fully functional for a long time to come. -
Page 33: Appliance Door
Appliance door Removing and fitting the door panels qAppliance door To facilitate cleaning, you can remove the glass panels from the appliance door. W ith good care and cleaning, your appliance will retain A p p l i a n c e d o o r its appearance and remain fully functional for a long Removing the door panels from the appliance time to come. - Page 34 Appliance door Press the front panel down until it clicks audibly into Warning – Risk of serious damage to health! place (fig. If the screws are loosened, the safety of the appliance Open the appliance door again slightly and remove can no longer be guaranteed.
-
Page 35: Trouble Shooting
Trouble shooting 3Trouble shooting Warning – Risk of electric shock! Incorrect repairs are dangerous. Repairs may only be carried out and damaged power cables replaced by I f a fault occurs, there is often a simple explanation. one of our trained after-sales technicians. If the T r o u b l e s h o o t i n g Before calling the after-sales service, please refer to the appliance is defective, unplug the appliance from the... -
Page 36: Maximum Operating Time Exceeded
Customer service Power cut Check whether other kitchen appliances are working Panel does not open The circuit breaker is faulty Check in the fuse box to make sure that the fuse for the appliance is in working order Faulty sensor Call the after-sales service If required, empty the water tank: Open the appliance door, take hold of the lower part of the panel on the... -
Page 37: Dishes
Dishes for the microwave. The "Microwave" section provides To book an engineer visit and product advice 0344 892 8999 information on the type of cookware that is suitable. Calls charged at local or mobile rate. ~ "Microwave" on page 21 01450 2655 0.03 €... -
Page 38: Baking Sensor
Dishes The baking sensor is active while "Do not open door" is Categories Food shown on the display. Do not open the appliance door; Pork otherwise, the settings will be cancelled. The appliance Beef asks you whether you wish to continue cooking. The Meat appliance will continue to heat and you can adjust the Lamb... -
Page 39: Tested For You In Our Cooking Studio
Tested for you in our cooking studio In combined operation, you can use conventional JTested for you in our baking tins made from metal. If sparks form between cooking studio the baking tin and the wire rack, check whether the baking tin is clean on the outside. - Page 40 Tested for you in our cooking studio be cooked on the outside, and would not be fully baked Universal pan or baking tray Slide the universal pan or the baking tray in carefully as in the middle. far as the limit stop with the bevelled edge facing the The setting values apply to food that is placed into a appliance door.
- Page 41 Tested for you in our cooking studio Dish Accessories/cookware Shelf po- Type of Tempera- MW power Steam in- Cooking sition heating ture in °C in watts tensity time in mins. Quiche quiche tin (dark coated) 190-210 30-40 (White) Bread loaf tin (1x 900 g or 2x 450 g) 180-200* 20-30 (White) Bread...
-
Page 42: Roasting And Braising
Tested for you in our cooking studio The cake has risen in the middle but Only grease the base of the springform cake tin. After baking, loosen the cake carefully with a knife. is lower around the edge. The fruit juice overflows. Next time, use the universal pan. - Page 43 Tested for you in our cooking studio Add in a little liquid for roasting if the meat is lean. A Steam- assisted roasting and braising covering of approx. cm depth should be applied to Certain dishes become crispier if cooked using steam, the base of any glass cookware.
- Page 44 Tested for you in our cooking studio Types of heating used: The levels of steam intensity are indicated as numbers in the table: 4D hot air ■ Circulated air grilling ■ 1 = Low ■ 2 = Medium ■ 3 = High ■...
- Page 45 Tested for you in our cooking studio Dish Accessories/cookware Shelf po- Type of MW pow- Temperature Steam in- Time in min. sition heating er in watts in °C tensity Turkey, crown**** wire rack 150-160 20+15 Turkey, crown, 3 kg wire rack 140-150 100-140 Turkey, thighs...
-
Page 46: Grilling
Tested for you in our cooking studio The meat gets burned during brais- The roasting dish and lid must fit together well and close properly. ing. Reduce the temperature and add more liquid when braising if necessary. The roast is not well-done enough. Carve the roast. - Page 47 Tested for you in our cooking studio Roasting in combination with a microwave Notes The grill element switches itself continuously on and Certain foodstuffs can be prepared in combination with ■ off; this is normal. The grill setting determines how a microwave.
- Page 48 Tested for you in our cooking studio Types of heating used: The levels of steam intensity are indicated as numbers in the table: Circulated air grilling ■ Grill, large area ■ 1 = Low ■ 2 = Medium ■ 3 = High ■...
- Page 49 Tested for you in our cooking studio Dish Accessories/cookware Shelf po- Type of Temperature in C / MW power Steam in- Time in min. sition heating Grill setting in watts tensity Poultry Chicken drumstick, 150 g wire rack 210-230 20-30 each Chicken drumstick, 150 g wire rack...
-
Page 50: Convenience Products
Tested for you in our cooking studio Convenience products oven on trays or in baking tins/dishes at the same time will not necessarily be ready at the same time. Here, you can find the ideal settings for preparing Universal pan: Level 3 ■... - Page 51 Tested for you in our cooking studio Types of heating used: The levels of steam intensity are indicated as numbers in the table: 4D hot air ■ Top/bottom heating ■ 1 = Low ■ Pizza setting ■ 2 = Medium ■...
-
Page 52: Microwave
Tested for you in our cooking studio Microwave information on the packaging. Use the settings indicated in the table. Preparing food in a microwave is ideal if time is of the As soon as the milk starts to rise, stir thoroughly. essence. -
Page 53: Yogurt
Tested for you in our cooking studio Dish Cookware Shelf po- Type of MW power Cooking sition heating in watts time in mins. Vegetables, fresh Vegetable, fresh, 250 g* cookware, covered 6-10 Ý Vegetable, fresh, 500 g* cookware, covered 10-15 Ý... -
Page 54: Eco Heating Functions
Tested for you in our cooking studio Eco heating functions Universal pan or baking tray Slide the universal pan or the baking tray in carefully as Hot air eco and Top/bottom heating eco are intelligent far as the limit stop with the bevelled edge facing the heating functions that allow you to gently cook meat, appliance door. -
Page 55: Acrylamide In Foodstuffs
Tested for you in our cooking studio Dish Accessories/cookware Shelf po- Type of Tempera- Cooking sition heating ture in °C time in mins. Meat Beef, slow roast joint wire rack 140-150 35+40 ‘ Casserole Diced meat (beef, pork, lamb), 500 g meat cookware, covered 100-120 ‘... -
Page 56: Drying
Tested for you in our cooking studio Type of heating used: Slow cooking ■ Dish Cookware Shelf posi- Heating Searing time Tempera- Cooking tion function in mins ture in °C time in mins Poultry Duck breast, medium rare, 300 g Cookware, uncovered 45-60 each... -
Page 57: Preserving
Tested for you in our cooking studio Turn very juicy fruit and vegetables several times. After the food to be dried, the better it will be preserved. The drying, remove the dried products from the paper thinner the slices are, the quicker the drying process immediately. -
Page 58: Proving Dough
Tested for you in our cooking studio jars are bubbling. Remove the jars from the cooking them from draughts. Only remove the clamps once the compartment after the indicated cooling time. jars are cold. Vegetables Recommended setting values After a short while, small bubbles will form at short The indicated times in the settings table are average intervals. -
Page 59: Defrosting
Tested for you in our cooking studio Dish Accessories/cookware Shelf posi- Type of Tempera- Cooking tion heating ture in °C time in mins. Rich dough, e.g. panettone Bowl 40-45 40-90 Tin on wire rack 40-45 30-60 Yeast dough, savoury E.g. pizza Bowl 35-40 20-30... - Page 60 Tested for you in our cooking studio Dish Accessories/cookware Shelf posi- Type of Temperature MW power in Cooking tion heating in °C watts time in mins. Bread rolls Wire rack 140-160 Cake Cake, moist, 500 g Cookware, uncovered Ý 10-15 Cake, dry, 750 g Cookware, uncovered 10-15...
-
Page 61: Heating And Reheating Food
Tested for you in our cooking studio Heating and reheating food Reheating Using heating type "Reheating", food is reheated gently Your appliance offers you various options for heating or using steam. It tastes and looks as though it has been reheating food. - Page 62 Tested for you in our cooking studio Types of heating used: Microwave Ý ■ Reheating ■ Dish Accessories/cookware Shelf posi- Type of Tempera- MW power in Cooking tion heating ture in °C watts time in mins. Heating drinks 200 ml (stir well) Cookware, uncovered Ý...
-
Page 63: Keeping Warm
Tested for you in our cooking studio Dish Accessories/cookware Shelf posi- Type of Tempera- MW power in Cooking tion heating ture in °C watts time in mins. Side dishes, 500 g, e.g. pasta, dump- Cookware, covered 7-15 lings, potatoes, rice Ý... -
Page 64: Test Dishes
Tested for you in our cooking studio Test dishes Cakes in tinplate springform cake tins: bake on one level with top/bottom heating. Place the springform These tables have been produced for test institutes to cake tin onto the universal pan instead of onto the wire facilitate the inspection of the appliance. - Page 65 Tested for you in our cooking studio Type of heating used: Grilling Grill, large area Also slide in the universal pan. The liquid will be caught ■ and the cooking compartment stays cleaner. Dish Accessories Shelf posi- Type of Grill Cooking tion heating...
- Page 68 *9001032622* 9001032622 980504...