D-Link DSL-200 User Manual
Adsl usb modem
Hide thumbs
Also See for DSL-200:
- User manual (50 pages) ,
- Quick installation manual (32 pages) ,
- Manual (8 pages)
Table of Contents
Advertisement
Quick Links
Download this manual
See also:
User Manual
Advertisement
Table of Contents

Related Manuals for D-Link DSL-200


Summary of Contents for D-Link DSL-200
- Page 1 DSL-200 ADSL USB Modem User’s Guide Second Edition (April 2001) 6DSL200H..02 Printed In Taiwan RECYCLABLE...
-
Page 2: Table Of Contents
ABOUT THIS USER’S GUIDE...3 ’ ...3 VERVIEW OF THE UIDE BEFORE YOU START ...4 ...4 PERATING YSTEMS USB Port ...4 ADSL S ...4 ERVICE Network Protocol and the Software Driver...4 ...5 ICROFILTERS AND PLITTERS Microfilters...5 Line Splitter...6 Encapsulation Method ...7 Modulation Method...7 ...7 NPACKING... -
Page 3: About This User's Guide
BOUT This user’s guide tells you how to install your DSL-200 ADSL USB Modem and use it to connect to the Internet. ADSL services are provided by, and sold by a variety of businesses. Your ADSL service provider may be your telephone company, an Internet service provider (ISP), a business that specializes in providing network services or a combination of any of these. -
Page 4: Before You Start
Modem. Operating Systems The D-Link DSL-200 can be used with PCs running Microsoft® Windows 98, Windows 98 Second Edition, Windows Millennium Edition , Windows 2000. USB Port In addition to the Windows OS, you will need a USB (Universal Serial Bus) type A port on your computer. -
Page 5: Microfilters And Splitters
The drivers are fundamentally different in the way they function with the PC. The PC/Modem relationship can be summarized as follows: WAN driver – The WAN driver will cause the Modem to appear to the PC as an ordinary dial-up modem. The Modem employs the Dial-Up Networking software used by conventional analog modems even though there is no actual dialing or any activity in the voice band frequencies on the telephone line. -
Page 6: Line Splitter
Note: Do not install the microfilter between the Modem and the telephone jack. Microfilters are only intended for use with regular telephones, Fax machines and other telephone devices. Line Splitter If you are instructed to use a “line splitter”, you must install the device between the Modem and the phone jack. -
Page 7: Encapsulation Method
Open the shipping carton and carefully remove all items. In addition to this User's Guide, make sure that you have: DSL-200 1. Modem 1. D-Link DSL-200 USB Modem 2. USB cable 3. ADSL cable or connector 4. Installation CD-ROM 2. USB Cable 3. - Page 8 Use the tables provided here to record the information you need to install the Modem. VPI: Software Driver: The driver used depends on the connection protocol used for your network services. Encapsulation Method: (choose one) Modulation Method: (choose one) ACCOUNT INFORMATION (WAN driver users only) User Name: Password: IP CONFIGURATION (LAN driver only)
-
Page 9: Introduction
ADSL modem technology is a relatively new technology and may be unfamiliar to the reader. In this section, we will introduce you to ADSL technology and give a brief description of its key attributes. We also give a general description of the D-Link DSL-200 ADSL USB Modem and its main features. -
Page 10: Modem Description And Operation
Modem Description and Operation The DSL-200 ADSL USB Modem is easy to install and use. Please note that you must first install the software driver for the device by following the instructions in Chapter 3. Once the driver has been installed, you can connect the Modem to your computer. The Modem connects directly to any functional USB port on a PC with a standard USB cable. -
Page 11: Rear Panel
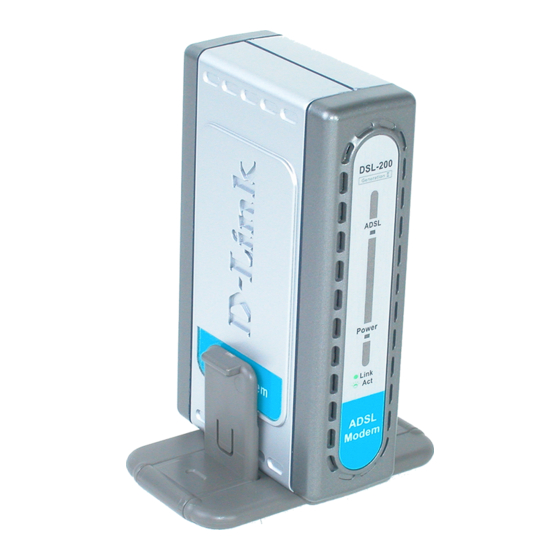
Rear Panel Connect both the ADSL cable and the USB cable at the rear of the Modem. Front Panel LED Indicators There are two LED indicators on the Modem: Power - This indicates that the Modem is powered on. ADSL Link – This indicates a valid ADSL link has been established. -
Page 12: Modem Installation
Before you connect the USB cable, you must install the driver. See the next chapter for driver installation instructions. The only cable you should connect initially is the ADSL cable. Place the Modem in a location so that you are able to view the LEDs. It should be placed in an area that is clean, dry and ventilated. -
Page 13: Software Installation
The DSL-200 can be used with the following operating systems: Microsoft Windows 98 Microsoft Windows 98 Second Edition Microsoft Windows Millennium Edition Microsoft Windows 2000 The procedures for each system are slightly different so follow the instructions provided for your PC’s operating system. -
Page 14: Install The Software Driver
Found New Hardware process. To install the software driver for the Modem, follow these steps: 1. Insert the DSL-200 Installation CD into the CD-ROM drive. Double-click on the My Computer icon located on your desktop. Double-click on the CD-ROM icon. - Page 15 4. In the Select ISP window, select ‘Other Service Provider’, and then click Next. 5. In the Select Driver Type window, choose the driver that best suits your ADSL connection, and then click Next. By default the WAN driver will be selected.
- Page 16 6. In the Communication Settings window you must provide the PVC settings, Encapsulation method and Modulation method for configuring the Modem. Type in the VPI and VCI values in their respective fields. 7. In the same window, select the proper Encapsulation method using the pull-down menu.
- Page 17 Note: For Windows 2000 applications, the “Digital Signature Not Found” window may appear warning that the installation software is not a digitally signed version. A digital signature is not necessary; D-Link has tested the software with Windows 2000. Click Yes to allow the installation to continue.
- Page 18 10. In the Setup Complete window, click Finish. 11. The DSL Installer window asks you to plug in the Modem. Plug the rectangular end (Type A) of the USB cable into the USB port of your PC, and then plug the square end (Type B) of the USB cable into the USB port of the ADSL Modem.
-
Page 19: Verify The Adsl Connection
Verify the ADSL Connection Before you continue to the final step, you should make sure that the ADSL connection has been established. This can be done easily using the Modem’s ADSL connection monitoring feature described below. Desktop Monitoring A new icon will appear in the System Tray of your desktop. These colored arrows will help you monitor the status of your ADSL connection. -
Page 20: Connect To The Internet
ONNECT TO THE NTERNET Now that the driver has been installed you are ready to connect to the Internet by way of the DSL service provider’s network backbone. Follow the instructions that are appropriate for the driver you have installed and the operating system of your PC. If you have installed the WAN driver: You will use a Dial-Up process that should be familiar to anyone who has installed a conventional analog modem. - Page 21 2. In the My Computer folder, double-click the Dial-Up Networking folder. 3. In the Dial-Up Networking folder double-click the D-Link Dial-Up PPP Connection icon.
- Page 22 4. In the Connect To window type in the correct User name and Password given to you by your ADSL or network service provider. Check the Save password box if do not want to retype the password when you need to reconnect. The Phone number field will display the VPI/VCI values you entered earlier.
- Page 23 Dial-Up Connection for Windows 2000 (WAN Driver Only) 1. From the Start Menu on your desktop, bring the cursor to the Settings icon and then to the Control Panel folder. Double-click on the Network and Dial-up Connection folder. 2. Double-click on the D-Link Dial-Up PPP Connection icon.
- Page 24 3. In the Connect D-Link Dial-Up PPP Connection window type in the correct User name and Password given to you by your ADSL network service provider. Check the Save Password box if do not want to retype the password when you need to reconnect.
- Page 25 Dial-Up Connection for Windows Me (WAN Driver Only) 1. From the Start Menu on your desktop, move the cursor to the Settings icon and then to the Control Panel folder. Double-click on the Network and Dial-up Connection folder. 2. Double-click on the D-Link Dial-Up PPP Connection icon.
- Page 26 3. In the Connect To window, select “D-Link Dial-Up PPP Connection” from the pull-down menu and type in the correct User name and Password given to you by your ADSL or network service provider. Check the “Save password” box if do not want to retype the password for reconnection.
-
Page 27: Connect To Internet - Lan Driver Users
9. Enter the DNS settings in the DNS Server Search Order field and click Add. If you have more than one DNS IP address, repeat this step. You can have up to 3 DNS servers listed here. 10. After all the TCP/IP information has been entered, click OK. D-Link DSL-200... -
Page 28: Windows 2000 (Lan Driver)
Network and Dial-up Connections icon. 2. The Network and Dial-up Connections window will appear. Right click on the Local Area Connection for the D-Link DSL-200 USB ADSL Modem. 3. The Local Area Connection window appears. Click on Internet Protocol (TCP/IP), and then click on Properties. -
Page 29: Monitoring The Modem
ODEM Once you have installed the Modem you can monitor the status of the ADSL connection by clicking on the connection icon in your System Tray or click on the DSL-200 icon in the Control Panel folder. Clicking on either icon will bring up the following window: The bright green circle under “Link Status”... - Page 30 Click on the System Info tab of the DSL-200 Modem monitor window to see the Current Driver and Firmware Release version as well as the Control Panel Version currently used by the device. Clicking on the Configuration tab will provide you with the configuration values currently used by the Modem, including, the Modulation, the connection protocol, the Encapsulation method and the VPI/VCI settings.
-
Page 31: Changing Modem Configuration
Once the Modem and software have been installed the communication settings may be easily updated by performing the following steps: 1. From your PC desktop click Start – Programs – D-Link DSL-200 ADSL Modem – Configure. A notification message will appear indicating that the setup process has begun. - Page 32 2. Click Settings from the “DSL Modem Installer” window. 3. The Communication Settings window will be displayed. Make the necessary changes to the VPI, VCI, Encapsulation type and/or Modulation type and click Apply. 4. The new settings will be applied after restarting the computer. If you want to restart now click Finish.
-
Page 33: Contacting Technical Support
949-788-0805 (option #4) If you are a customer residing outside of the United States, please refer to the list of D-Link locations that is included in this manual. Thank you for purchasing this product. We like to receive feedback from our customers concerning our products. -
Page 34: Offices
Le Florilege #2, Allee de la Fresnerie, 78330 Fontenay le Fleury, France TEL: 33-1-3023-8688 FAX: 33-1-3023-8689 URL: www.dlink-france.fr E-MAIL: info@dlink-france.fr GERMANY D-Link Central Europe/D-Link Deutschland GmbH Schwalbacher Strasse 74, 65760 Eschborn, Germany TEL: 49-(0) 6196-7799-0 FAX: 49-(0) 6196-7799-300 URL: www.dlink.de BBS: 49-(0) 6192-971199 (analog) - Page 35 URL: www.dlink.it E-MAIL: info@dlink.it JAPAN D-Link Japan 10F, 8-8-15 Nishi-Gotanda, Shinagawa-ku, Tokyo 141, Japan TEL: 81-3-5434-9678 FAX: 81-3-5434-9868 URL: www.d-link.co.jp E-MAIL: kida@d-link.co.jp RUSSIA D-Link Russia Michurinski Prospekt 49, 117607 Moscow, Russia TEL: 7-095-737-3389 & 7-095-737-3492 FAX: 7-095-737-3390 URL: www.dlink.ru E-MAIL: vl@dlink.ru...
-
Page 36: Technical Specifications
ECHNICAL General ANSI T1.413 issue 2 ITU G.992.1 (G.dmt) Standards: ITU G.992.2 (G.lite) ITU G.994.1 (G.hs) USB 1.1 specifications RFC 2364 PPP over ATM Adaptation Layer 5 Protocol: RFC 1483 Multiprotocol Encapsulation over ATM Adaptation Layer 5 G.dmt full rate downstream: up to 8Mbps G.dmt full rate upstream: up to 640Kbps Data Transfer Rate: G.lite ADSL downstream: up to 1.5Mbps... -
Page 37: Uninstalling The Modem
NINSTALLING THE If you need to uninstall the Modem, use the Uninstall program available in the DSL-200 Modem folder. Failure to use the Uninstall program can leave files in the system that can cause problems with future installations, including problems with reinstallation of the Modem. - Page 38 2. From the DSL Modem Installer window select Remove. 3. You are asked to confirm your intention to remove the device. Click Yes to uninstall the Modem. 4. A new window appears and asks that you not unplug the USB cable until after the device driver has been completely removed.
- Page 39 5. The final window informs you that the uninstall process is now complete. You can restart now if you wish, however do not disconnect the USB cable until the computer has shut down. Click Finish. IMPORTANT: Do not disconnect the USB cable from the Modem before the computer has been shut down or restarted.
-
Page 40: Wichtige Sicherheitshinweise
Wichtige Sicherheitshinweise 1. Bitte lesen Sie sich diese Hinweise sorgfältig durch. 2. Heben Sie diese Anleitung für den spätern Gebrauch auf. 3. Vor jedem Reinigen ist das Gerät vom Stromnetz zu trennen. Vervenden Sie keine Flüssig- oder Aerosolreiniger. Am besten dient ein angefeuchtetes Tuch zur Reinigung. 4. -
Page 41: Limited Warranty
Warranty service for software products may be obtained by contacting a D-Link office within the applicable warranty period. A list of D-Link offices is provided at the back of this manual, together with a copy of the Registration Card. If a Registration Card for the product in question has not been returned to a D-Link office, then a proof of purchase (such as a copy of the dated purchase invoice) must be provided when requesting warranty service. - Page 42 D-Link makes no warranty that its software products will work in combination with any hardware, or any application or system/platform software product provided by any third party, excepting only such products as are expressly represented, in D-Link's applicable product documentation as being compatible.
- Page 43 No part of this publication may be reproduced in any form or by any means or used to make any derivative such as translation, transformation, or adaptation without permission from D-Link Corporation/D-Link Systems Inc., as stipulated by the United States Copyright Act of 1976 FCC Warning This device complies with part 15 of the FCC Rules.
- Page 45 8. What category best describes your company? Aerospace Engineering Education Manufacturing Retail/Chainstore/Wholesale System house/company Other____________________________________________________________ 9. Would you recommend your D-Link product to a friend? Don't know yet 10.Your comments on this product? _________________________________________________ _________________________________________________________________________________ _________________________________________________________________________________ _________________________________________________________________________________ _____________________________________________________________________________ Registration Card * Product installed in type of computer (e.g., Compaq 486)