Table of Contents
Advertisement
Available languages
Available languages
Quick Links
Download this manual
See also:
Operating Manual
DVR 1600 ENG+ES
6.0(05.03.05)
G
G
(0503C)
6.0(05.03.05)
F
F
(0503C)
File
Internal External
Rev.
Model:
DVR 1600
Part:
Manual (ENG+ES)
Date:
2005.04.09
Approved
Revlewed
MANUAL
3
2005.03.09
Change
macrovision
2005.03.09
Change
Date
HAN HUA OPTICS LIMITED COMPANY
Part No:
Scale:
Remark:
P.C.C.
Design
Penny
Description
40-015-405400
1:1
FOR USA
Supervisor
G.M.
Penny
Penny
By
Edition:
6.1
Pages:
1/61
P.M.
Ver. A (2005.04.09)
Advertisement
Chapters
Table of Contents

Related Manuals for CyberHome CH-DVR 1600MU

Summary of Contents for CyberHome CH-DVR 1600MU
- Page 1 DVR 1600 ENG+ES 2005.03.09 6.0(05.03.05) (0503C) 2005.03.09 6.0(05.03.05) (0503C) File Internal External Date Rev. HAN HUA OPTICS LIMITED COMPANY Model: DVR 1600 Part: Manual (ENG+ES) Date: 2005.04.09 P.C.C. Approved Revlewed MANUAL Change macrovision Change Description Part No: 40-015-405400 Scale: Remark: FOR USA Design G.M.
- Page 2 DVR 1600 DVD Recorder & Player Progressive Scan Video Playback 000:00:00 VIDEO DVD R W DVR 1600 DVD RECORDER WITH PROGRESSIVE SCAN PLAYBACK Operation Guide Operation Guide RECORD DV IN AUDIO STAND BY VIDEO IN 2...
- Page 4 If service is being performed by a CyberHome technician, the cost of parts is covered for up to one (1) year from the date of purchase. CyberHome will not repair or replace defective parts unless the work is performed by a CyberHome technician.
-
Page 6: Safety
Important Safety Instructions Explanation of Warning Symbols The exclamation point within an equilateral triangle is intended to alert the user to the presence of important operating and servicing instructions in the literature accompanying the appliance. The lightning flash with arrowhead symbol, within an equilateral triangle, is intended to alert the user to the presence of not isolated dangerous voltage within the inside of the... -
Page 7: Copyrights
Front and Rear A/V Inputs. DV Input and Camcorder control. Delete/Rename Titles. Auto-Insert Chapter Markers. Your recordings are playable on most DVD Players. Checking the Package Contents In addition to the DVD Recorder, your package should contain the following accessories. Check the contents of the package carefully, as some items may be located under the packing foam. -
Page 8: Table Of Contents
Table of Contents Safety Important Safety Instructions ....2 Copyrights Notes on Copyright ......3 Introduction Recording &... -
Page 9: Disc Compatibility And Care
So, any disc space already used by a recording cannot be regained. DVD+R discs are required to be "Finalized" before they will be compatible with standard DVD Players. Once a disc is finalized, no further recordings can be made. DVD+RW: DVD+RW discs can be written to and erased multiple times. -
Page 10: Remote Control
Remote Control POWER DISPLAY SETUP OPEN/CLOSE MENU GOTO BOOKMARK TITLE ANGLE SUBTITLE ZOOM AUDIO PLAY/PAUSE STOP ENTER SLOW MUTE 1/ALL REPEAT RETURN CM SKIP SCHEDULE SOURCE EDIT POWER - Turns the unit on and sends the unit to Standby mode. DISPLAY - Brings up the on- screen display showing... -
Page 11: Remote Control Preparation & Use
Remote Control Preparation & Use Remote Control Use The battery is already installed into the remote control. Turn over the remote to the back cover. Pull the plastic tab to enable the battery in the remote. Your remote is now ready for use. Remote Control Plastic Tab Replace the battery, check for the correct polarity of... -
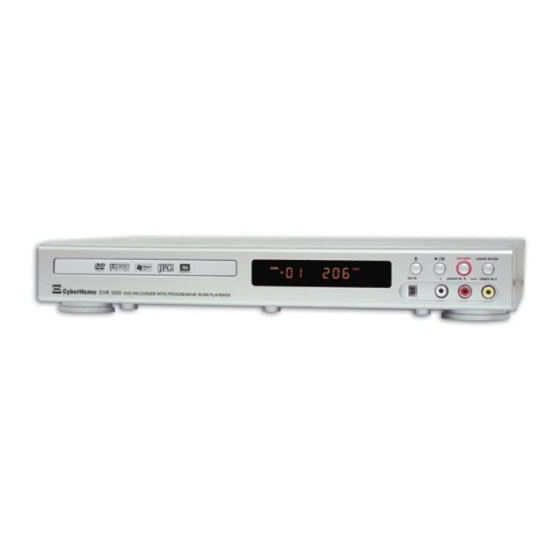
Page 12: Front Panel
Front Panel DVR 1600 DVD RECORDER WITH PROGRESSIVE SCAN PLAYBACK DISC TRAY - Loads DVD+R/RW, DVD, CD-R/RW, VCD/SVCD, MP3, JPG and other optical discs. FRONT DISPLAY - The front Vacuum Flourescent Display shows information about the unit's operation, such as current chapter and elapsed time during playback. -
Page 13: Connections
Typical Connection to TV Your new recorder comes with composite video (A/V) cable for connection to TVs with a standard video input as shown below. On most TVs, this connector is colored yellow, and is normally accompanied by stereo audio inputs, colored red and white for stereo channels right and left, respectively. -
Page 14: S-Video & Component Video
S-Video & Component Video Connections S-VIDEO is a higher quality connection than standard composite video, and requires a special S-Video cable (not included). The S-Video connector is distinguishable by its 4 pins, as shown below. If your TV has an S-Video input, it's recommended that you use this type of connection for better picture quality. -
Page 15: Audio Output Connections
Audio Output This unit features a variety of audio line outputs for connection to a receiver or other audio equipment. Use the included A/V cable to connect the stereo audio outputs for connection to a TV or stereo receiver. COAXIAL digital audio output is able to send an encoded digital bitstream, suitable for receivers with Dolby or DTS decoding capability. -
Page 16: Quick Start Guide
Powering Up Plugging In and Power On Plug the DVD player's electrical plug into a wall socket or power strip. Press the STANDBY / ON button on the front panel, or the POWER button on the remote control to turn the DVD recorder on. -
Page 17: Disc Playback
Disc Playback Inserting a Disc Press the OPEN/CLOSE button on the remote or front panel to open the disc tray. Insert the disc, being careful not to touch the playing surface. Hold the disc by the sides and with your fore finger through the hold in the middle and insert gently into the tray. -
Page 18: Zoom Playback
Advanced Playback Functions ZOOM Playback Use the ZOOM function to magnify or shrink the image on screen during playback or when paused. Press the ZOOM key repeatedly to choose a magnification level. When the ZOOM function is first activated, directional arrows will appear on screen. During this time, you can use the remote control to move around the image in order to view the area that is currently off screen. -
Page 19: Jumping To A Chapter Or Time Point
Jumping, Repeat Playback and Bookmark Jumping to a Chapter or Time Point The GOTO function provides a convenient way to navigate DVD, Audio CD and other discs by allowing you to select the Title, Chapter/Track or Time to jump to. During playback, press the GOTO the GOTO MENU. -
Page 20: Viewing Jpg / Play M 3 P
Viewing JPG / Play Mp3 This unit can play an audio CD, JPG and Mp3 file on a disc. A handy on-screen player will appear automatically. MP3 / WMA disc SONG_ONE.MP3 SONG_ONE.MP3 Total: SONG_TWO.MP3 Play mode: SONG_THREE.MP3 SONG_FOUR.MP3 SONG_FIVE.MP3 Type Mode Play Action Menu Icons... -
Page 21: Recording
Recording Recording to DVD Discs With DVD+R/RW recording, you can create your own DVDs from your home movies, favorite TV shows or from other video sources. DVD+RW Think of DVD+RW (DVD+ReWritable) discs as the digital equivalent of your old VHS tapes. Like video tape, DVD+RW discs can be recorded to, erased and re-used. -
Page 22: Controlling A Dv Camcorder
Recording- Front Input Connections RECORD DV IN AUDIO IN DV OUT AUDIO Controlling a DV Camcorder You can use this unit's remote to control most camcorders that support the DV interface. Connect the camcorder to the DV INPUT using a Digital Video (also called 1394 or Firewire) Cable. -
Page 23: Playing And Editing Your Recordings
Playing and Editing Your Recordings The Title Screen When you insert a DVD+RW or DVD+R disc, the Title Screen will appear. The Title Screen displays thumbnail and information for each Title (recording) on the disc. In the Title Screen, you can perform the following functions with your Recordings: Play Titles or Chapters. -
Page 24: Using The On-Screen Keyboard
On-Screen Keyboard & Scheduled Recordings About the On-Screen Keyboard The On-Screen Keyboard makes it easy to enter Text, Numbers and Various Symbols with your remote control. Return Letters Exit Numbers << >> a b c < > Signs Display g h i j k l Done p q r s... -
Page 25: Scheduled Timer Recordings
Scheduled Timer Recordings Setting Beginning and Ending Times By default, the START and END times are set to the current time and one hour later, respectively. The START and END dates are set to the current date. To change a time or date field, use the keys to navigate the screen. -
Page 26: Changing Setup Options
Changing Setup Options About the SETUP MENU The DVD Recorder's SETUP MENU is where various settings are configured, including setting the Clock, Recording Options, Playback Options, Languages, Parental Control Settings and more. Using the SETUP MENU It's easy to change the recorder's settings with the SETUP MENU. - Page 27 General - Rating Parental Rating Password : Level : Change Password : Press RETURN to exit Parental Options Default setting: 8. ADULT Your DVD Player features a Parental Control option. By default, this option is set to the ADULT allow play of all discs. Available options include: Rating Description Suitable for all audiences.
- Page 28 Time and Date Settings Use the keys to select a time or date field to change. To edit a field, press ENTER Use the keys to increase or decrease the value of the field. To exit a field, press ENTER Press SETUP to exit the CLOCK SETTINGS...
- Page 29 TV Shape (Aspect Ratio) Default setting: 4:3 Pan Scan By default, this option is set for normal TVs with 4:3 aspect ratio. Unless you're sure you have a WIDESCREEN TV, do not change this setting. The 4:3 Letter Box setting is meant to enable the “Letterbox” view on DVDs that contain both Letterbox and Pan/Scan versions.If you are using a wide screen TV, set this option to...
- Page 30 TV Channel Setup AUTO SCAN automatically scans for available channels. The unit saves those channels received at sufficient signal strength. This subject was discussed earlier. Further topics include skipping/showing channels. Set Channels Here is where you can customize your channel list by SKIPPING or SHOWING any channel you choose.
-
Page 31: Troubleshooting
Turn the player on with the Remote Control and then eject the disc. signal when used with VCRs. Connect the player directly to the TV. Some VCR/TV combos may be incompatible with DVD players. Troubleshooting VIDEO menu. Try changing... -
Page 32: Disc Types Supported
Specifications are subject to change without notice. While due caution has been exercised in the production of this document, inadvertent technical inaccuracies or typographical errors are possible and unintentional. While all efforts have been made to ensure accuracy, CyberHome Entertainment will not be held liable for any inaccuracies or errors in the information contained herein. - Page 34 MANO DE OBRA: Si se determina que el producto es defectuoso dentro de tres (3) meses de la fecha de compra, CyberHome lo reparará o reemplazará sin cargo. Una vez pasado el período de tree (3) meses, Ud. será responsable por cualquier costo de mano de obra.
-
Page 36: Instrucciones De Seguridad Importantes
Instrucciones de Seguridad Importantes Explicación de los Símbolos de Advertencia El signo de admiración dentro de un triángulo equilátero tiene como propósito alertar al usuario sobre la presencia de instrucciones importantes de operación y mantenimiento en la literatura que acompaña al artefacto. El símbolo del rayo con punta de flecha dentro de un triángulo equilátero tiene como propósito alertar al usuario sobre la presencia de voltaje... -
Page 37: Dvr 1600 Specifications
Características El Grabador de DVD DVR 1600 con Salida de Video con Barrido Progresivo Características de Grabación Funciones de Grabación en Vivo y con Timer. Modos Múltiples de Grabación, HQ, SP, LP, EP, EP+, SLP. Más de 8 Horas de Grabación en un Disco DVD+R/RW. El Navegador de Títulos de Discos en Pantalla le Otorga un Rápido y Fácil Acceso a sus Grabaciones. - Page 38 Tabla de Contenidos Seguridad Instrucciones de Seguridad Importantes ... 2 Copyrights Notas sobre el Copyright ..... . . 3 Introducción Características de Grabación y Reproducción .
-
Page 39: Compatibilidad Y Cuidado De Los Discos
Compatibilidad y Cuidado de los Discos Discos Aptos para Reproducción DVD Video: Esta unidad reproduce DVDs grabados para una región particular. La marca de la región en la parte trasera del reproductor debe corresponder a la que se encuentre en cualquier disco de DVD que quiera reproducir. -
Page 40: Control Remoto
Control Remoto POWER DISPLAY SETUP OPEN/CLOSE MENU GOTO BOOKMARK TITLE ANGLE SUBTITLE ZOOM AUDIO PLAY/PAUSE STOP ENTER SLOW MUTE 1/ALL REPEAT RETURN CM SKIP SCHEDULE SOURCE EDIT ENCENDIDO Enciende la unidad y la pone en modo de espera. DISPLAY Visualiza el display en pantalla que muestra información de la sesión de reproducción TITULO... -
Page 41: Preparación Y Uso Del Control Remoto
Preparación y Uso del Control Remoto Uso del Control Remoto La pila ya está instalada en el control remoto. Dé vuelta el control remoto de manera que se vea la cubierta trasera. Jale la lengüeta plástica para activar la pila en el control. Su Control está ahora listo para ser usado. -
Page 42: Panel Frontal
Panel Frontal DVR 1600 DVD RECORDER WITH PROGRESSIVE SCAN PLAYBACK BANDEJA DE DISCO Carga discos de DVD+R/RW, DVD, CD-R/RW, VCD/SVCD, MP3, JPG y otros discos ópticos. PANTALLA FRONTAL La Pantalla Fluorescente al Vacío frontal muestra sobre el funcionamiento de la unidad, como el capítulo en reproducción, el tiempo transcurrido durante la reproducción y el estado de la bandeja de disco. -
Page 43: Conexiones
Conexión Típica al Televisor Su nueva grabadora viene con un cable de video compuesto (A/V) para conexión con televisores con una entrada de video estándar, como se muestra debajo. En la mayoría de los televisores, este conector es de color amarillo y va normalmente acompañado por entradas de audio estéreo, de colores rojo y blanco para los canales estéreo derecho e izquierdo, respectivamente. - Page 44 Conexiones S-Video y Componente de Video El S-VIDEO es una conexión de calidad superior al video compuesto estándar, y requiere un cable S-Video especial (no incluido). El conector S-Video se distingue por sus 4 pines, como se muestra debajo. Si su televisor tiene una entrada S-Video, se recomienda que use este tipo de conexión para una mejor calidad de imagen.
-
Page 45: Entrada Digital
Salida de Audio Esta unidad dispone de una variedad de salidas de línea de audio para conectar a un receptor u otro equipo de audio. Utilice el cable de A/V incluido para conectar las salidas de audio estéreo para conectar a un televisor o un receptor estéreo. -
Page 46: Guía De Inicio Rápido
Encendiendo Enchufe y Encendido Enchufe el conector de toma eléctrica del reproductor de DVD a un tomacorriente de pared o a un prolongador. Presione el botón MODO DE ESPERA/ENCENDIDO en el panel frontal, o el botón ENCENDIDO en el control remoto para encender el DVD. -
Page 47: Reproducción De Discos
Comenzar a Reproducir Discos Insertar un Disco Presione el botón ABRIR/CERRAR remote o en el panel frontal para abrir la bandeja de disco. Inserte el disco, siendo cuidadoso de no tocar la superficie de reproducción. Sostenga el disco por los lados y con su dedo índice a través del orificio en el medio, e insértelo suavemente en la bandeja. -
Page 48: Reproducción En Zoom
Funciones Avanzadas de Reproducción Reproducción en ZOOM Utilice la función de ZOOM para agrandar o encoger la imagen en la pantalla durante la reproducción o durante una pausa. Presione la tecla de ZOOM repetidamente para elegir un nivel de acercamiento. Cuando la función de ZOOM se activa por primera... -
Page 49: Saltar A Un Capítulo O Punto De Tiempo
Saltos, Repetición de la Reproducción y Señaladores Saltar a un Capítulo o Punto de Tiempo La función IR A provee un modo conveniente de navegar DVDs, CDs de Audio y otros discos permitiéndole seleccionar el Título, Capítulo/Pista o Tiempo al cual saltar la reproducción. Durante la reproducción, presione la tecla mostrar el MENÚ... -
Page 50: Insertar Un Disco De Jpg
Reproducción de Imágenes y Música Esta unidad puede reproducir un CD de Audio y archivos JPG y MP3 que se encuentren en un disco. Un práctico reproductor aparecerá automáticamente en la pantalla. MP3 / WMA disc SONG_ONE.MP3 SONG_ONE.MP3 Total: SONG_TWO.MP3 Play mode: SONG_THREE.MP3 SONG_FOUR.MP3... -
Page 51: Grabación
Grabación Grabación en Discos de DVD Con la grabación de DVD+R/RW, puede crear sus propios DVDs de sus películas hogareñas, programas de televisión favoritos o de otras fuentes de video. DVD+RW Piense en los discos DVD+RW (DVD+Regrabable) como el equivalente digital a sus viejas cintas VHS. Como las cintas de video, los discos DVD+RW pueden ser grabados, borrados y re usados. -
Page 52: Controlar Una Cámara Dv
Grabación - Conexiones Frontales de Entrada RECORD DV IN AUDIO IN DV OUT AUDIO Controlar una Cámara DV Puede usar el control remoto de esta unidad para controlar la mayoría de las cámaras con soporte para la interfaz DV. Conecte la cámara a la ENTRADA DV utilizando un Cable de Video Digital (también llamado 1394 o Firewire). - Page 53 Reproducir y Editar sus Grabaciones La Pantalla de Títulos Cuando inserta un disco DVD+RW o DVD+R, la Pantalla de Títulos aparecerá. La Pantalla de Títulos muestra vistas previas e información para cada Título (grabación) en el disco. En la Pantalla de Títulos, puede realizar las siguientes funciones con sus Grabaciones: Reproducir Títulos o Capítulos.
- Page 54 Teclado en Pantalla y Grabaciones Programadas Sobre el teclado en pantalla El Teclado En Pantalla facilita la introducción de Texto, Números y Símbolos Varios con su control remoto. Letras Volver Exit Números << >> a b c < > Símbolos Pantalla g h i j k l...
- Page 55 Grabaciones programadas Configurando la Hora de Inicio y Finalización Por omisión, los horarios de INICIO FINALIZACIÓN están configurados para ser la hora actual y una hora después, respectivamente. Las fechas de INICIO están configuradas para ser la fecha actual. Para cambiar un campo de fecha u hora, utilice las teclas para navegar la pantalla.
-
Page 56: Cambiar Opciones De Configuración
Cambiar Opciones de Configuración Acerca del MENÚ DE CONFIGURACIÓN El Menú de Configuración de la Grabadora de DVD es donde se configuran varias opciones, incluyendo la configuración del Reloj, Opciones de Grabación, Opciones de Reproducción, Idiomas, Opciones de Supervisión Parental y más. Utilizar el MENÚ... - Page 57 General - Rating Categoria para padres Clave : Nivel : Cambiar Clave : Para salir presione RETURN Restricciones Parentales Configuración de fábrica: 8. ADULTO Su Reproductor de DVD posee una opción de Supervisión Parental. Esta opción está configurada en nivel por omisión, lo cual permitirá...
- Page 58 Configuración de Fecha y Hora Use las teclas para seleccionar un campo de fecha u hora a cambiar. Para editar un campo, presione 5 6 / Use las teclas para incrementar o disminuir el valor del campo. Para salir de un campo, presione Presione CONFIG para salir del MENÚ...
- Page 59 Formato TV (Proporciones) Configuración de Fábrica: 4:3 Barrido Panorámico Esta opción está configurada por omisión para televisores normales con una proporción de pantalla de 4:3. A menos que esté seguro que tiene una TV de PANTALLA ANCHA (Widescreen), no cambie esta configuración.
- Page 60 Configuración de Canales de Televisión La BÚSQUEDA AUTOMÁTICA busca automáticamente canales disponibles. La unidad guarda aquellos canales recibidos con la suficiente fuerza de señal. Este tema fue tratado previamente. Otros puntos incluyen saltearse/mostrar canales. Configurar Canales Aquí es donde puede personalizar su lista de canales OMITIENDO o MOSTRANDO cualquier canal que elija.
-
Page 61: Solución De Problemas
Problemas Comunes y Soluciones La Grabadora de DVD No Se Enciende Un Disco Específico No Se Reproduce El Control Remoto No Funciona No Hay Imagen En La Pantalla del Televisor La Imagen Aparece Achatada o Estirada La Grabación en Vivo No Comienza El Disco No Puede Borrarse... - Page 62 En tanto se han realizado todos los esfuerzos para asegurar la precisión, CyberHome Entertainment no será responsable por cualquier imprecisión o error en la información aquí contenida. Part# DVR 1600 G - SPANISH...