Philips NORELCO AT790 User Manual
Rechargeable cordless tripleheader razor
Hide thumbs
Also See for NORELCO AT790:
- User manual (230 pages) ,
- Manual (187 pages) ,
- User manual (65 pages)
Table of Contents
Advertisement
Available languages
Available languages
Quick Links
Advertisement
Chapters
Table of Contents

Related Manuals for Philips NORELCO AT790


Summary of Contents for Philips NORELCO AT790
- Page 1 AT790 Rechargeable Cordless Tripleheader Shaver Always here to help you Question? Question? Contact Contact Register your product and get support at Philips Philips www.norelco.com/register Norelco Norelco...
- Page 3 ENGLISH 4 ESPAÑOL 28 Congratulations on your purchase and welcome to Philips Norelco! To fully benefit from the support that Philips Norelco offers, register your product at www.norelco.com/register ¡Bienvenido a Philips Norelco y felicitaciones por su compra! Para utilizar los servicios de asistencia técnica de Philips Norelco, registre su producto en www.norelco.com/register...
- Page 4 2. Use this shaver for its intended household use as described in this manual. Do not use attachments not recommended by Philips Electronics North America Corporation. 3. Never operate this shaver if it has a damaged cord or charging plug, if it is not working properly, if it has been dropped or damaged, or dropped into water while plugged in.
- Page 5 ENGLISH 4. Keep the shaver, cord and charging plug away from heated surfaces. 5. Never drop or insert any object into any opening. 6. Do not use the adapter in or near a power outlet that contains an electric air freshener to prevent damage to the adapter. 7.
- Page 6 Men’s Shaver, the shaver should be used exclusively for 3 weeks. This allows your hair and skin enough time to adapt to the Philips Norelco Shaving System. If, after that period of time, you are not fully satisfied with your Philips Norelco Men’s Shaver, send the product back along with dated sales receipt and we’ll refund...
-
Page 7: Table Of Contents
ENGLISH Table of Contents Features ............8-9 LED Multi-Purpose Display .......10 Before First Use ...........11 Charging ...........11-12 Recharging .............12 Put It To The Test & Shaving Tips ....13 How to Shave With An Electric Shaver .......14-16 Trimming ............16 Cleaning ............17-21 Replacing the Shaving Heads ....22-23 Storage ............24 Assistance ............24... -
Page 8: Features
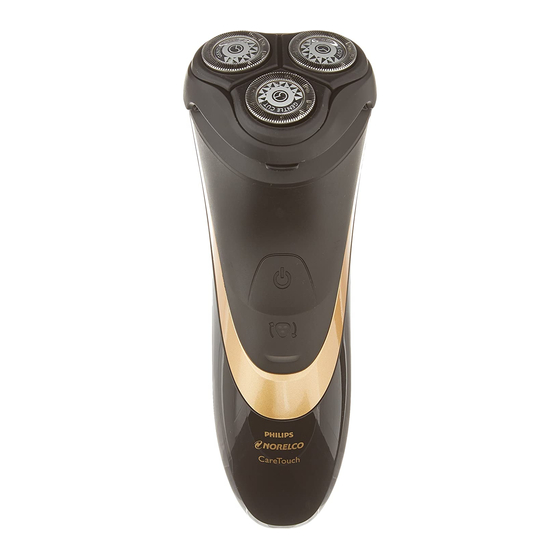
ENGLISH Features Rotary Comfort System Shaver Head Assembly Protective Cap Individually Floating Heads Shaver Head Release Button • Hair Chamber captures shaven hair Electronic On/Off Button Shaver Head Replacement Indicator LED Charge Indicators • Battery Charge, Full & Low Indicators... - Page 9 ENGLISH Pop-up Trimmer Automatic Worldwide Voltage 100V to 240V AC Rechargeable - 8-hour Full Charge for up to 45 minutes cordless use Cordless - To shave without a cord Full 2-Year Warranty 45-Day Money-Back Guarantee...
-
Page 10: Led Multi-Purpose Display
ENGLISH LED Multi-Purpose Display The display provides the following information: ◗ Charging Indicator -When the shaver is charging, the charging light blinks green. ◗ Full Charge Indicator -When the battery is fully charged, the charging light lights up green continuously. After approximately 30 minutes the charging light goes off to save energy. -
Page 11: Before First Use
ENGLISH Before First Use w Charge the shaver before you start using it (see ‘Charging’). Make sure the shaver is switched off before you start charging it. Important w Only use the power cord provided to charge the shaver. w The power plug transforms 100-240V AC to less than 24V DC. -
Page 12: Recharging
ENGLISH Connect cord directly to shaver and connect the charging plug into any 100V to 240V AC outlet. Use only the power cord provided. w An adaptor plug may be necessary for charging plug usage in some foreign countries. Use an attachment plug adaptor of the proper configuration for the power outlet. -
Page 13: Put It To The Test & Shaving Tips
Use your new shaver exclusively for 3 weeks to fully enjoy the closeness of a Philips Norelco shave. w At first you may not get as close a shave as you expect, or your face may even become slightly irritated. -
Page 14: How To Shave With An Electric Shaver
ENGLISH How To Shave With An Electric Shaver w This symbol on the shaver indicates that the shaver can be used in both the bath and shower. w The shaver will not operate while power cord is connected to an electrical outlet. w For hygienic reasons, the shaver should only be used by one person. - Page 15 ENGLISH Put the Protective Cap on the shaver to protect shaver heads. Wet Shaving You can also use the shaver on a wet face with shaving foam or gel. Apply some water to your skin. Apply shaving foam or gel to your skin. Rinse the shaving unit under the tap to ensure that the shaving unit glides smoothly over your skin.
-
Page 16: Trimming
ENGLISH When shaver is thoroughly dry, put the Protective Cap on the shaver to protect heads. Trimming To groom sideburns and moustache: Turn shaver ON. Push down spring-release trimmer switch. The trimmer can be activated while the shaver is running. Hold trimmer as shown and move in downward strokes with gentle pressure. -
Page 17: Cleaning
ENGLISH Cleaning w Always clean your shaver after each use. w Always switch shaver OFF, unplug and remove power cord before cleaning. w Never clean, remove or replace head assembly while motor is on. w Do not apply pressure to combs. Do not touch shaving heads with hard objects as this may dent or damage precision-made slotted combs. - Page 18 ENGLISH Press the Shaver Head Release Button to open the Shaver Head Assembly. Clean inside shaving heads and hair chamber by running under hot water. Clean outside of Shaver Head Assembly by running under hot water. Close the Shaver Head Assembly and shake off excess water.
- Page 19 ENGLISH Extra-thorough Cleaning Method Do not mix up the cutters and combs as the shaving performance may be adversely affected for several weeks before optimal shaving performance is restored. Turn shaver OFF, remove the charging plug from the outlet and power cord from the shaver.
- Page 20 ENGLISH Separate the cutter from the comb. Clean the inside and outside of the cutter by rinsing under hot water. Do not clean more than one cutter and comb at a time, since they are all matching sets. If you accidentally interchange the cutters and combs, it could take several weeks before optimal shaving performance is restored.
- Page 21 ENGLISH Insert the notch of the shaving unit into the slot in the top of the shaver and leave open to allow the cutters and combs to air dry thoroughly. Close the Shaver Head Assembly and put the Protective Cap on shaver to protect heads.
-
Page 22: Replacing The Shaving Heads
Replace damaged or worn shaving heads with model HQ7 Philips Norelco shaving heads only. w HQ7 Philips Norelco shaving heads are available on www.philips.com/store Shaver Head Replacement Indicator w The shaver head replacement indicator symbol will light up orange continuously to remind you to replace your shaving heads. - Page 23 ENGLISH Turn the lock counterclockwise to unlock (A) and remove the retaining frame (B). Remove the shaving heads and place the new shaving heads in the shaving unit. Make sure that the two pointy edges of the head fit exactly into the recesses. Replace the frame and turn the lock clockwise until it locks into place.
-
Page 24: Storage
Put the Protective Cap on shaver to protect heads. Assistance w For assistance, visit our website: www.philips.com/support or call toll free 1-800-243-3050 w Online information is available 24 hours a day, 7 days a week. -
Page 25: Disposal
ENGLISH Disposal w This Philips Norelco shaver contains a rechargeable lithium-ion battery which must be disposed of properly. w Contact your local town or city officials for battery disposal information or call 1-800-822-8837 or www.rbrc.com for battery drop-off locations. w For assistance, visit our website, www.philips.com/support or call toll free:... -
Page 26: Accessories
ENGLISH Accessories w Replacement Heads Model HQ7 - For maximum shaver performance, replace your Philips Norelco shaving heads once a year. w Philips Norelco Shaver Accessories may be purchased at a store near you, or on our website www.philips.com/store... -
Page 27: Warranty
Damage occurring during shipment is not covered by this warranty. NOTE: No other warranty, written or oral, is authorized by Philips Electronics North America Corporation. This warranty gives you specific legal rights, and you may also have other rights which vary from state to state. -
Page 28: Spanish
ESPAÑOL INSTRUCCIONES IMPORTANTES DE SEGURIDAD Cuando utilice un artefacto eléctrico, tome las precauciones básicas. Lea las instrucciones antes de utilizar este producto. PELIGRO Para reducir el riesgo de descarga eléctrica: 1. No intente sujetar una afeitadora enchufada que se haya caído al agua. - Page 29 2. Utilice esta afeitadora para el uso doméstico al cual está destinada según se describe en este manual. No use accesorios no recomendados por Philips Electronics North America Corporation. 3. Nunca use esta afeitadora si el cable o el conector de carga están dañados, si no funciona correctamente, si se cayó...
- Page 30 Esto permite que su pelo y su piel se acostumbren al sistema de afeitado Philips Norelco. Si después de este período de prueba no está satisfecho con los resul- tados de su afeitadora Philips Norelco, puede devolver el producto con el recibo de compra que contenga la fecha de adquisición y le reembolsaremos el precio de...
- Page 31 ESPAÑOL Tabla de contenido Características ........32-33 Pantalla LED multiuso .........34 Antes del primer uso ........35 Carga ............35-36 Recarga ............37 Prueba y consejos de afeitado ....37 Cómo usar una afeitadora eléctrica ............38-40 Recorte .............40-41 Limpieza ............41-46 Reemplazo de los cabezales de afeitado ..........46-48 Almacenamiento ..........49 Asistencia ............49 Eliminación .............50...
-
Page 32: Características
ESPAÑOL Características Sistema Rotativo de confort Montaje del cabezal de afeitado Tapa protectora Cabezales flotantes individuales Botón de liberación del cabezal de afeitado • La cámara recoge el pelo afeitado Botón electrónico de encendido y apagado Indicador de sustitución del cabezel Indicadores de carga LED •... - Page 33 ESPAÑOL Recortador desplegable Voltaje universal automático entre 100 y 240 V CA Recargable: carga completa en ocho hora para hasta 45 minutos de uso sin cable Sistema inalámbrico: para afeitarse sin necesidad de cables Garantía total por 2 años Garantía de devolución del importe de 45 días...
-
Page 34: Pantalla Led Multiuso
ESPAÑOL Pantalla LED multiuso La pantalla ofrece la siguiente información: w Indicador de carga Cuando la batería se está cargando, la luz verde del símbolo de batería parpadea. w Indicador de carga completa Cuando la batería está completamente cargada, la luz de carga permanece encendida de forma continua. -
Page 35: Antes Del Primer Uso
ESPAÑOL Antes del primer uso w Cargue la afeitadora antes de comenzar a usarla (consulte "Carga"). Asegúrese de que la afeitadora esté apagada antes de comenzar a cargarla. Importante w Utilice sólo el cable de alimentación suministrado para cargar la afeitadora. w El adaptador del conector transforma 100 - 240 V de CA a menos de 24 V de CC. - Page 36 ESPAÑOL Conecte el cable directamente a la afeitadora y enchufe el conector de carga a cualquier tomacorriente de entre 100 V a 240 V de CA. Utilice únicamente el conector de carga suministrado. w En algunos países puede ser necesario el uso de un adaptador para el conector de carga.
-
Page 37: Recarga
Es un hecho que la piel y la barba necesitan tiempo para acostumbrarse a un nuevo sistema de afeitado. w Utilice su nueva afeitadora Philips Norelco como método exclusivo de afeitado por 3 semanas para disfrutar de una piel suave. -
Page 38: Cómo Usar Una Afeitadora Eléctrica
ESPAÑOL Cómo usar una afeitadora eléctrica w Este símbolo indica que la afeitadora puede utilizarse en el baño o en la ducha. w La afeitadora no funcionará meintras que la cuerda está conectada un enchufe électrico. w Por razones de higiene, la afeitadora sólo debe ser utilizado por una sola persona. - Page 39 ESPAÑOL Limpie la afeitadora después de cada uso (consulte el capítulo "Limpieza"). Coloque la tapa protectora para proteger los cabezales de afeitado. Afeitado húmedo También puede utilizar la afeitadora con crema o gel de afeitar. Humedezca la piel. Colóquese crema o gel de afeitar en el rostro.
-
Page 40: Recorte
ESPAÑOL Apague la afeitadora. Séquese la cara y limpie cuidadosamente la afeitadora después de cada uso (consulte el capítulo "Limpieza"). NOTA: elimine todos los restos de crema de afeitar de la afeitadora cuando la enjuague. Cuando la afeitadora es a fondo seca, ponga la tapa protectora para proteger los cabezales de afeitado. -
Page 41: Limpieza
ESPAÑOL Para retraer el recortador, presiónelo hacia abajo. Apague la afeitadora (posición OFF). Limpieza w Limpie la afeitadora después de cada uso. w Antes de limpiar la afeitadora, apáguela (posición OFF), desenchúfela y desconecte el cable de alimentación. w Nunca limpie, retire ni cambie la unidad del cabezal de afeitado con el motor en funcionamiento. - Page 42 ESPAÑOL TEMPERATURA DEL AGUA PARA EVITAR QUEMADURAS EN LAS MANOS. w Una limpieza frecuente garantiza los mejores resultados de afeitado. w No sumerja la afeitadora en el agua. w Al enjuagar los cabezales de afeitado, es posible que salga agua por la base de la afeitadora.
- Page 43 ESPAÑOL Vuelva a abrir la unidad del cabezal de afeitado y déjela abierto para que se seque al aire. NOTA: no seque los cabezales de afeitado con una toalla o paño. De lo contrario, pueden dañarse los cabezales de afeitado. w Si usted utilizado crema o gel para afeitar, siga los pasos 3 y 4 arriba para prevenir acumulación del residue de las cabezas que...
- Page 44 ESPAÑOL Extraiga la unidad de afeitado de la afeitadora. Gire la traba en el sentido contrario al de las agujas del reloj (A) y retire el marco de sujeción (B). Retire y limpie los conjuntos de cuchillas y peines de a uno por vez. Separe el cortador del peine.
- Page 45 ESPAÑOL con una gota de aceite mineral (en el centro del cabezal). Esto ayuda a prevenir el desgaste de los cabezales. Vuelva a colocarlos en la unidad del cabezal de la afeitadora. Verifique que los dos bordes en punta del cabezal encastren exactamente en las ranuras.
-
Page 46: Reemplazo De Los Cabezales
Reemplace los cabezales de la afeitadora una vez por año para obtener resultados de afeitado óptimos. w Reemplace los cabezales dañados o desgastados únicamente por cabezales Philips Norelco modelo HQ7. w HQ7 cortantes de Philips Norelco están disponibles en www.philips.com/store. -
Page 47: De Afeitado
ESPAÑOL Indicador de sustitución del cabezel w El símbolo indicador de sustitución del cabezel se encenderá en naranja continuamente como un recordatorio para reemplazar los cabezels. Apague la afeitadora (posición OFF), desenchufe el conector de carga del tomacorriente y el cable de la afeitadora. Pulse el botón de liberación del cabezal de afeitado para abrir la unidad del cabezal de afeitado. - Page 48 ESPAÑOL Vuelva a colocar el marco y gire la traba en el sentido de las agujas del reloj hasta que encastre. Inserte la muesca de la unidad de afeitado en la ranura que se encuentra en la parte superior de la afeitadora (1) y cierre la unidad de afeitado (2).
-
Page 49: Almacenamiento
Coloque la tapa protectora para proteger los cabezales de afeitado. Asistencia w Para obtener asistencia, ingrese en nuestro sitio web: www.philips.com/support o llame al número gratuito:1-800-243-3050. w Información disponible por internet las 24 horas del día, los 7 días de la semana. -
Page 50: Eliminación
ESPAÑOL Eliminación w Esta afeitadora Philips Norelco contiene una batería recargable de iones de litio que debe desecharse de forma adecuada. w Para obtener información sobre la forma de desechar las baterías, comuníquese con las autoridades locales, llame al número 1-800-822-8837 o visite el sitio web www.rbrc.com... -
Page 51: Accesorios
Cabezales reemplazables Model HQ7 - para disfrutar del máximo rendimiento de la afeitadora, sustituya los cabezales Philips Norelco una vez por año. w Puede adquirir los accesorios para la afeitadora Philips Norelco en el local más cercano a su domicilio o a través de nuestro... - Page 52 La garantía no cubre los daños producidos durante el envío. NOTA: Philips Electronics North America Corporation no autoriza ninguna otra garantía escrita o verbal. Esta garantía otorga al usuario derechos específicos, sin perjuicio de otros derechos de los que disponga en virtud de la legislación del estado.