Table of Contents
Advertisement
Quick Links
Advertisement
Table of Contents
Troubleshooting

Related Manuals for Crestron QM-TX


Summary of Contents for Crestron QM-TX
- Page 1 Crestron QM-TX QuickMedia™ Transmitter Operations Guide...
- Page 2 This document was prepared and written by the Technical Documentation department at: Crestron Electronics, Inc. 15 Volvo Drive Rockleigh, NJ 07647 1-888-CRESTRON All brand names, product names and trademarks are the property of their respective owners. ©2005 Crestron Electronics, Inc.
-
Page 3: Table Of Contents
Installer’s Toolbox ...10 Identity Code...11 Hardware Hookup ...14 Ground Wire Connections...15 Earliest Version Software Requirements for the PC ...15 Programming with Crestron SystemBuilder ...16 Configuring with SIMPL Windows ...21 Example Program...24 Communication Settings ...25 Troubleshooting Communications ...27 Uploading a SIMPL Windows Program ...28 Firmware Upgrade via Installer’s Toolbox ...30... -
Page 5: Quickmedia™ Transmitter: Qm-Tx
RGB, video, and audio signal routing and control as part of a complete MediaManager A/V presentation system. Using Crestron's exclusive QuickMedia transport, the QM-TX transmits RGB, video and audio signals over a single inexpensive CAT5E or CAT6 cable to any QuickMedia receiver. -
Page 6: Quickmedia Transport System
QuickMedia™ Transmitter Block Diagram of the QM-TX NOTE: The QM-TX is compatible with 2-Series control systems only. QuickMedia Transport System Using a new, proprietary signal routing solution, signals such as composite video, S-video, RGBHV, audios, and microphone, are all transported using a single cable solution called QuickMedia (QM). -
Page 7: Part Number Compatibility
VGA signals may experience a loss of quality over very long lengths of cable. This phenomenon is due to the added resistance and capacitance of longer cable lengths, and is not particular to either Crestron and/or QuickMedia systems. To ensure sufficient bandwidth to support signal resolutions up to 1600 x 1200, the maximum aggregate cable length should not exceed 328 feet. -
Page 8: Specifications
The latest software versions can be obtained from the Downloads | Software Updates section of the Crestron website. Refer to the NOTE following these footnotes. Crestron 2-Series control systems include the AV2 and PRO2. Consult the latest Crestron Product Catalog for a complete list of 2-Series control systems. -
Page 9: Physical Description
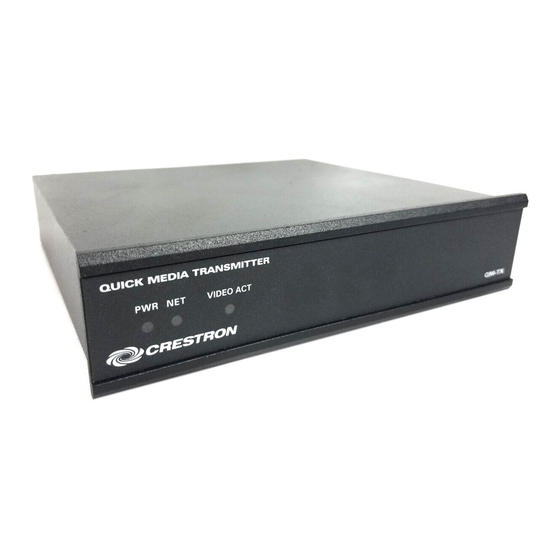
Crestron QM-TX Physical Description The QM-TX is housed in a black enclosure with labels on the front and rear panels. On the front of the unit there are three LEDs for indicating the unit’s current status. All connections are made on the back of the unit. There are four rubber feet on the base of the unit for stability and to prevent slippage. - Page 10 QuickMedia™ Transmitter QM-TX Physical Dimensions Indicators The QM-TX indicators are located on the front panel and are described as follows. PWR (Power) This green LED illuminates when the unit is connected to Cresnet and receives 24 VDC. This yellow LED illuminates when the QM-TX communicates with any device on the network.
- Page 11 Crestron QM-TX Ports The QM-TX ports are located on the rear panel and are illustrated and described as follows. Video and RGB Inputs Five BNC type connectors are provided for video and RGB input. Composite video is a type of video signal in which all information – the red, green, and blue (horizontal and vertical sync) signals are mixed together.
-
Page 12: Industry Compliance
Cresnet system or when the device is added or replaced. Industry Compliance As of the date of manufacture, the QM-TX has been tested and found to comply with specifications for CE marking and standards per EMC and Radiocommunications Compliance Labelling. -
Page 13: Setup
Cresnet power usage of the entire chain. If the unit is a home-run from a Crestron system power supply network port, the Cresnet power usage of that unit is the Cresnet power usage of the entire run. The length of the run in feet and the Cresnet power usage of the run should be used in the resistance equation below to calculate the value on the right side of the equation. -
Page 14: Qm Network Wiring
Repeat the procedure for the other three conductors. NOTE: For additional information on video connections over CAT5, refer to the latest version of the Crestron CAT5 Wiring Reference Guide (Doc. 6137) which is available from Crestron website (http://www.crestron.com/manuals). -
Page 15: Identity Code
Windows program. Refer to “Setting the Net ID in Device Settings” on page 22 for details of the SIMPL Windows procedure. The Net ID of the QM-TX has been factory set to 1B. The Net IDs of multiple QM-TXs in the same system must be unique. Net IDs are changed from a personal computer (PC) via the Crestron Installer’s Toolbox. - Page 16 QuickMedia™ Transmitter Network Device Tree – Pull Down Connection List Network Device Tree – “Address Book” Window 12 • QuickMedia™ Transmitter: QM-TX 2. Open Installer’s Toolbox and select the Network Device Tree icon, or select Tools | Network Device Tree.
- Page 17 Installer’s Toolbox – “Network Device Tree” 6. Right-click on the device, and when the sub-menu appears, select Change Network ID. “Network Device Tree” – Sub-Menu 7. Select a new Net ID and press Enter. Enter New Net ID QuickMedia™ Transmitter: QM-TX • 13...
-
Page 18: Hardware Hookup
The ratings on the connecting unit's supply input should be considered to prevent overloading the wiring. QM-TX Hookup Connections Video Input Connections 14 • QuickMedia™ Transmitter: QM-TX Crestron QM-TX Operations Guide - DOC. 6334... -
Page 19: Ground Wire Connections
Have a question or comment about Crestron software? Answers to frequently asked questions (FAQs) can be viewed in the Online Help section of the Crestron website. To post a question or view questions you have submitted to Crestron’s True Blue Support, log in at http://support.crestron.com. -
Page 20: Programming With Crestron Systembuilder
QuickMedia™ Transmitter NOTE: Crestron software and any files on the website are for Authorized Crestron dealers and Crestron Authorized Independent Programmers (CAIP) only. New users are required to register to obtain access to certain areas of the site (including the FTP site). - Page 21 After entering the appropriate information in each step, SystemBuilder creates the control system logic and touchpanel pages, ready to upload to the controller. NOTE: Crestron SystemBuilder version 2.0 or higher is required. Creating a QuickMedia System in SystemBuilder The following information is a general procedure for setting up a QuickMedia system using SystemBuilder.
- Page 22 4. Specify the audio configuration. 5. Add RoomView™ if desired. 6. Click the Assign QuickMedia Devices and Routing button drag the QM-TX from the library on the right side, to the QM system on the left side. Crestron QM-TX Operations Guide - DOC. 6334...
- Page 23 8. Build the program. 9. Upload the program to the control processor. 1. Ensure that all network devices are connected to the control system. 2. After completing your SystemBuilder program, click the Build and Upload button QuickMedia™ Transmitter: QM-TX • 19...
- Page 24 QuickMedia™ Transmitter SystemBuilder – “Set Network IDs” Window 20 • QuickMedia™ Transmitter: QM-TX SystemBuilder – “Finish” Window 3. On the Finish window, click the Set Network IDs… button to assign the network IDs. SystemBuilder provides three methods for assigning Net IDs and reconciling IDs of connected devices to the program.
-
Page 25: Configuring With Simpl Windows
Program Manager, for designing the logic and functionality of the control system. In addition, you can use the powerful Crestron Viewport utility to accomplish multiple system tasks, such as uploading the program to the control system and performing diagnostic functions. - Page 26 Net ID of 1B as shown in the following illustration. NOTE: The first QM-TX in a system is preset with a Net ID of 1B when its symbol is dragged into the upper pane of System Views. Additional units are assigned different Net ID numbers as they are added.
- Page 27 Crestron QM-TX “Device Settings” Window NOTE: This procedure sets the Net ID for the QM-TX in the program only. It does not automatically set the Net ID for the QM-TX itself. SIMPL Windows automatically changes Net ID values of a device added to a program if a duplicate device or a device with the same Net ID already exists in the program.
-
Page 28: Example Program
QuickMedia™ Transmitter QM-TX Symbol Signals Example Program An example program for the QM-TX is available from the “Example Program” section of the Crestron website (http://www.crestron.com/exampleprograms). Uploading and Upgrading NOTE: Crestron recommends that you use the latest software and that each device contains the latest firmware to take advantage of the most recently released features. -
Page 29: Communication Settings
Crestron QM-TX The following sections define how one would upload a SIMPL Windows program to the control system and upgrade the firmware of the QM-TX. However, before attempting to upgrade or upload, it is necessary to establish communications. Communication Settings NOTE: For laptops and other PCs without a built-in RS-232 port, Crestron recommends the use of PCMCIA cards, rather than USB-to-serial adapters. - Page 30 QuickMedia™ Transmitter TCPIP Connection 26 • QuickMedia™ Transmitter: QM-TX 2. Open Installer’s Toolbox and click Tools | Manage Address Book to display the communications settings. Enter the new address name, and then click RS-232 as the connection type. 3. The PC communication settings specified here should match the protocol that the control processor expects.
-
Page 31: Troubleshooting Communications
4. Click Tools | Network Device Tree to display the devices in the system. 1. Verify that you are using the correct cables. As described previously, an RS-232 connection to a QuickMedia control processor requires a QuickMedia™ Transmitter: QM-TX • 27 SIGNAL SIGNAL... -
Page 32: Uploading A Simpl Windows Program
(e.g., for a modem). Consult the manufacturer’s documentation for further information about the COM ports on your 3. Remove and reapply power to the control system. 4. If communication still cannot be established, contact Crestron customer service. 1. Start SIMPL Windows. - Page 33 “SIMPL Program” Window 7. Click the browse button to locate the new compiled (.spz) program. “Open” Window Select a file and click Open. When the SIMPL Program window re- opens click Send. QuickMedia™ Transmitter: QM-TX • 29...
-
Page 34: Firmware Upgrade Via Installer's Toolbox
QuickMedia™ Transmitter Firmware Upgrade via Installer’s Toolbox To take advantage of all the QM-TX features, it is important that the unit contains the latest firmware available. Please check the Crestron website for the latest version of firmware. Not every product has a firmware upgrade, but as Crestron improves functions, adds new features, and extends the capabilities of its products, firmware upgrades are posted. - Page 35 7. Click Open and the file transfers to the unit. “File Transfer” Window 8. The “Firmware” window indicates the new firmware version. 9. The QM-TX automatically reboots. Click Close after the QM-TX automatically reboots. “Firmware” Window – New Firmware Number Displayed...
-
Page 36: Problem Solving
[1-888-273-7876]. For assistance in your local time zone, refer to the Crestron website (www.crestron.com) for a listing of Crestron worldwide offices. You can also log onto the online help section of the Crestron website to ask questions about Crestron products. First-time users will need to establish a user account to fully benefit from all available features. -
Page 37: Appendix - Qm Auto Compensation
NOTE: Because video auto compensation travels on the audio line, it does not function when audio is split up from video as in the QM-MD4X2 or any QM switcher with audio breakaway. Operations Guide – DOC. 6334 QuickMedia™ Transmitter QuickMedia™ Transmitter: QM-TX • 33... -
Page 38: Return And Warranty Policies
CRESTRON shall not be liable to honor the terms of this warranty if the product has been used in any application other than that for which it was intended, or if it has been subjected to misuse, accidental damage, modification, or improper installation procedures. - Page 39 Crestron QM-TX QuickMedia™ Transmitter This page intentionally left blank. QuickMedia™ Transmitter: QM-TX • 35 Operations Guide – DOC. 6334...
- Page 40 Crestron Electronics, Inc. Operations Guide – DOC. 6334 15 Volvo Drive Rockleigh, NJ 07647 (2011914) Tel: 888.CRESTRON 03.05 Fax: 201.767.7576 Specifications subject to www.crestron.com change without notice.